Aubri’s Pink + Gold Foil Business Cards

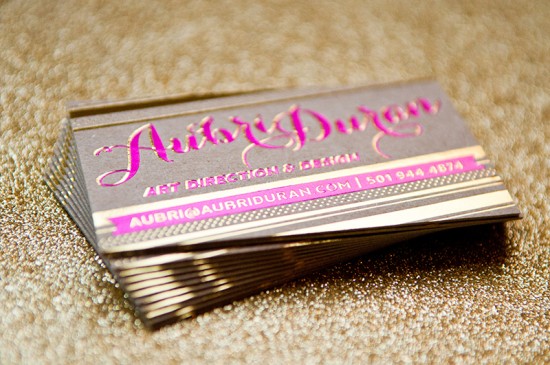
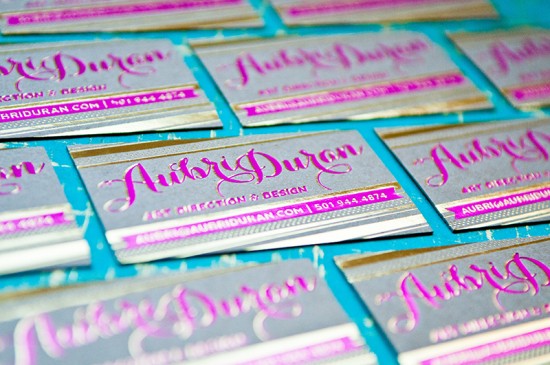
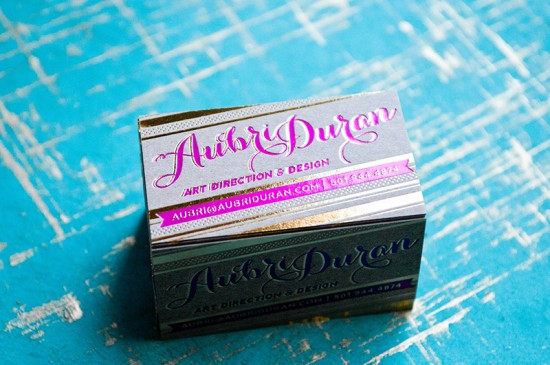
Designer Aubri Duran sent over her new business cards, and the combination of chipboard, hot pink foil, and shiny gold foil accents is so exuberant! Just the photos of her lovely cards make me smile, so I can only imagine how pretty they must be in person!

Gold Foil Business Cards by Aubri Duran via Oh So Beautiful Paper (1)

From Aubri: These are my dream business cards! I rebranded myself at the end of last year and this year was all about redoing my website and getting the perfect business card to go with my new look.

Gold Foil Business Cards by Aubri Duran via Oh So Beautiful Paper (3)

I love the luxe of cotton paper but I decided to go with the natural chip board because I wanted an organic element but also wanted to mix it with the pretty foils. A shiny gold foil was a must for me but for my second color it was either going to be pink or turquoise. After looking at lots of swatches I went with the pink and LOVED it!

Gold Foil Business Cards by Aubri Duran via Oh So Beautiful Paper (2)

Thanks Aubri!

Design: Aubri Duran

Printing: Genuine Letterpress Inc.

Photo Credits: Ben Peacock Photography

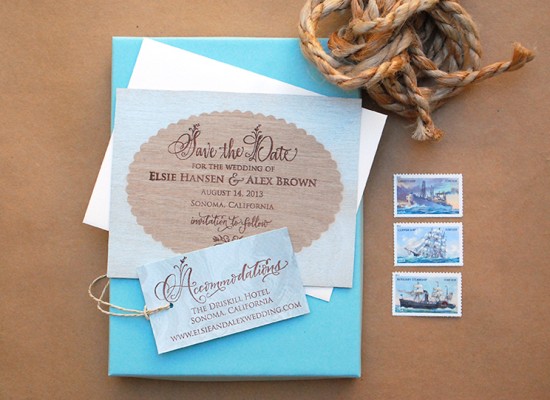
DIY Tutorial: Scalloped Wood Frame Save the Date

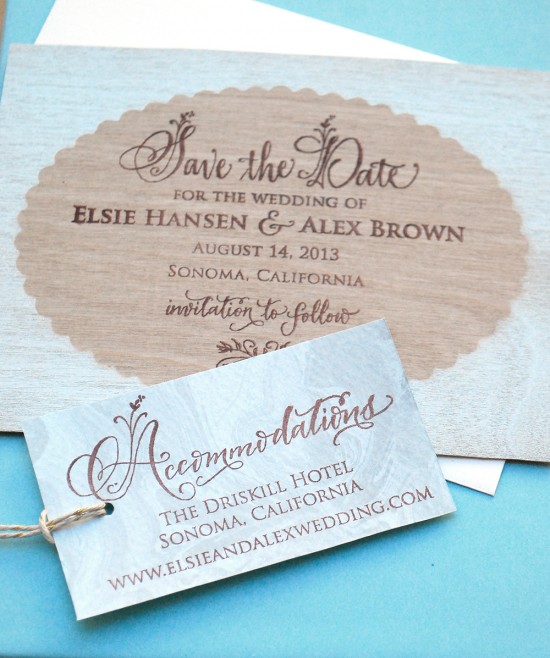
This save the date project has been brewing in our brains for a while now. After we found out how wonderful it was to stamp on wood in this tutorial, we’ve been biting at the bit to use it again. For this save the date, we used spray paint to create the “frame” effect on the wood piece before stamping the text. We couldn’t be happier with the finished project! –Bailey and Emma of Antiquaria

DIY Tutorial: Rubber Stamps on Wood Save the Date by Antiquaria via Oh So Beautiful Paper

DIY Tutorial: Rubber Stamps on Wood Save the Date by Antiquaria via Oh So Beautiful Paper

The subtle wood grain adds such a nice texture to the design.

DIY Tutorial: Rubber Stamps on Wood Save the Date by Antiquaria via Oh So Beautiful Paper

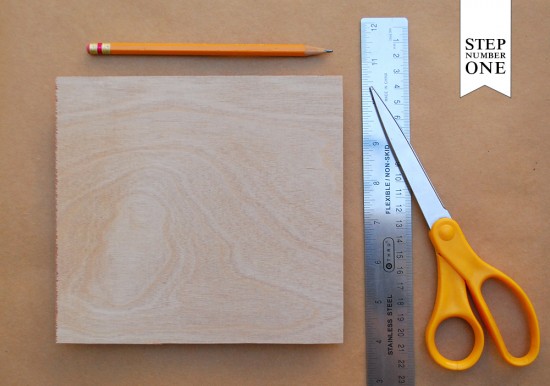
Step One: Since the wood veneer that we used in the project comes in large square sheets, we first had to cut out our A2 (5.5″ x 4.25″) cards from the sheet.

DIY Tutorial: Rubber Stamps on Wood Save the Date by Antiquaria via Oh So Beautiful Paper

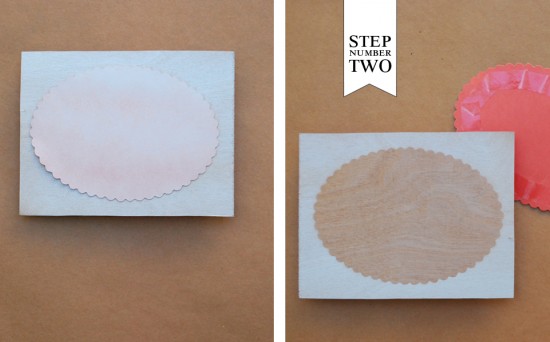
Step Two: Once you have all of your cards cut to size, you’ll now need to prep them for painting. To mask the center and make the frame shape in the wood, we double stick taped an oval scallop flat card to the center of each wood card. We then used acrylic spray paint over the entire card to complete the frame image. **You really only need one pack of oval scallop cards to complete the project. You can reuse them after the paint is completely dry.** Once everything is dry, peel off the oval scallop card and set aside. Repeat the process until all of your cards are complete.

DIY Tutorial: Rubber Stamps on Wood Save the Date by Antiquaria via Oh So Beautiful Paper

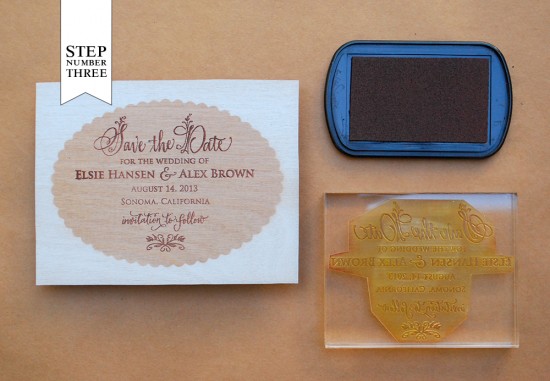
Step Three: You’ll now want to print your save the date. Place one of the cards on a hard surface. Ink your stamp (we used our Floral Calligraphy Save the Date stamp) and center it over the oval portion of the card. Once centered, press down firmly, using both hand to make the print. Please watch this video for more information on inking and stamping an oversized stamp.

DIY Tutorial: Rubber Stamps on Wood Save the Date by Antiquaria via Oh So Beautiful Paper

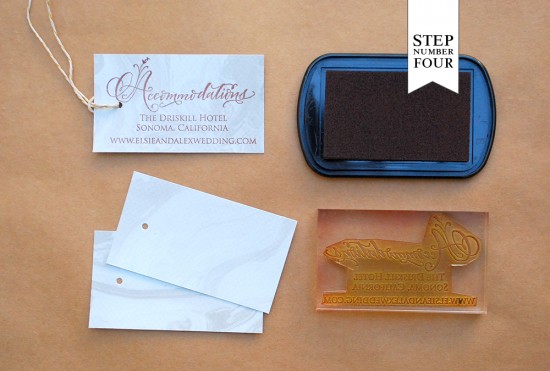
Step Four: Since many out of town guests need to make travel and accommodation arrangements prior to receiving your wedding invitation, it is wise to include an accommodations card or website card with your save the date. This way, they have all of the information they’ll need to make it to your wedding! Print this standard business sized card (2″ x 3.5″) using the stamp printing technique described in step three. To coordinate with our save the date, we used our (Floral Calligraphy Accommodations stamp).

DIY Tutorial: Rubber Stamps on Wood Save the Date by Antiquaria via Oh So Beautiful Paper

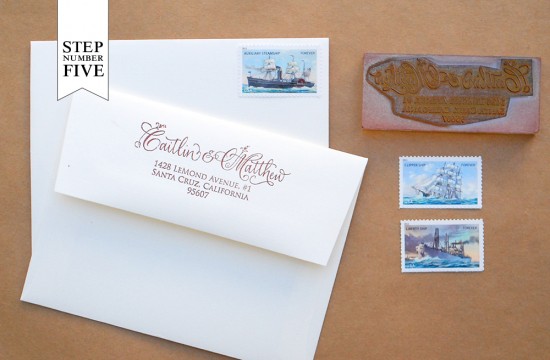
Step Five: Now all that’s left is to stamp your return address (we used our Floral Calligraphy Return Address stamp), address them, add postage and send them to all of your guests!

Materials

Floral Calligraphy Save the Date Stamp

Floral Calligraphy Accommodations Stamp-custom sized to fit tag

Floral Calligraphy Return Address Stamp

Stamp Pad in Chestnut

Wood Veneer cut down to A2 (5.5″ x 4.25″) cards, we bought ours locally at an art store

Oval Scallop Cards

A2 Envelopes

Double sided tape

Spray Paint in Liberty

Suminagashi Tags


Photo Credits: Antiquaria

DIY Tutorial: Fig & Gold Calligraphy Save the Date

A few years ago, we participated in a gorgeous vintage plum & gold inspiration shoot. Besides contributing our Gold Leaf Collection place settings to the shoot, we were also asked to provide a calligraphy menu and all of the place cards for the table. To this day, we still inquiries for save the dates or invitations that reference the menu from that shoot because the combination of the fig paper with gold calligraphy is so incredibly striking. – Bailey and Emma of Antiquaria
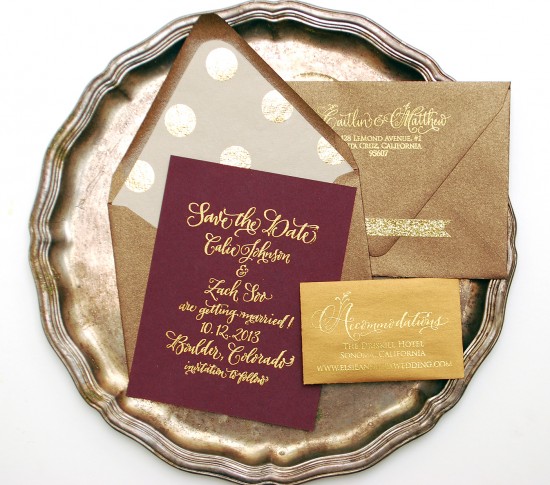
DIY Tutorial: Fig + Gold Calligraphy Save the Dates by Antiquaria via Oh So Beautiful Paper

By embossing these stamps with gold powder it really creates a high end, custom looking save the date!
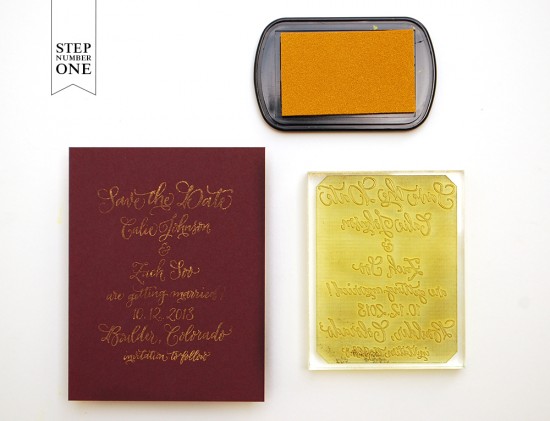
DIY Tutorial: Fig + Gold Calligraphy Save the Dates by Antiquaria via Oh So Beautiful Paper

Step One: Place your A2 card on a stable and firm surface. Ink your save the date stamp (we used our Calligraphy Save the Date, No.2 stamp) and center the stamp over your card. When ready, press the stamp down with moderate pressure to make the print. Lift the stamp off and quickly move on to step number two. For more information about inking your stamp or making prints, please watch this video that shows the process in more detail.
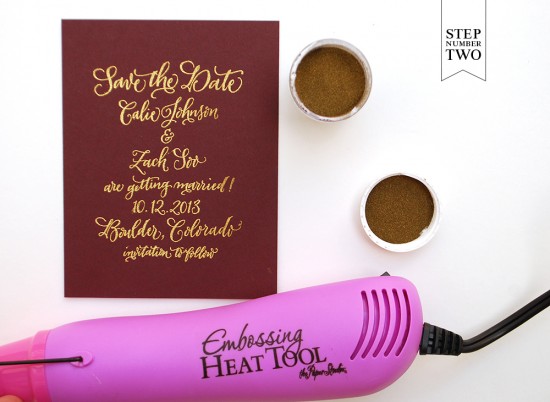
DIY Tutorial: Fig + Gold Calligraphy Save the Dates by Antiquaria via Oh So Beautiful Paper

Step Two: Once you’ve made your print, immediately cover it with embossing powder by sprinkling it across the paper. Shift the powder around until you have covered the entire image. Now, you will pour the excess powder off of the card onto a scrap piece of paper so that you can reuse it for future prints. Heat set the print, using an Embossing Heat Tool. You will be able to see the powder melt into a smooth and shiny gold when it’s done.

Note: One key thing about embossing is that it is wise to try to closely match your ink color with your powder color. By doing this, you will get much more crisp and opaque results. Since we are wanting a lovely and shiny gold print, we used both a gold stamp pad and gold embossing powder.
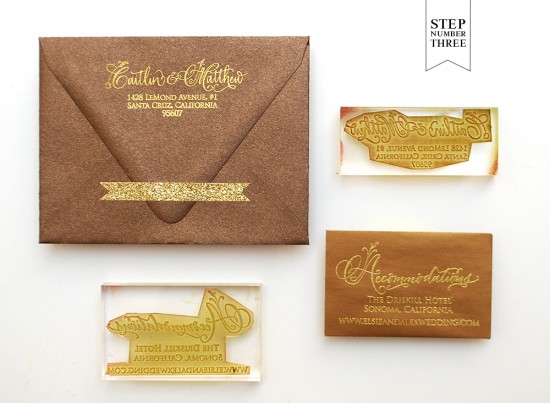
DIY Tutorial: Fig + Gold Calligraphy Save the Dates by Antiquaria via Oh So Beautiful Paper

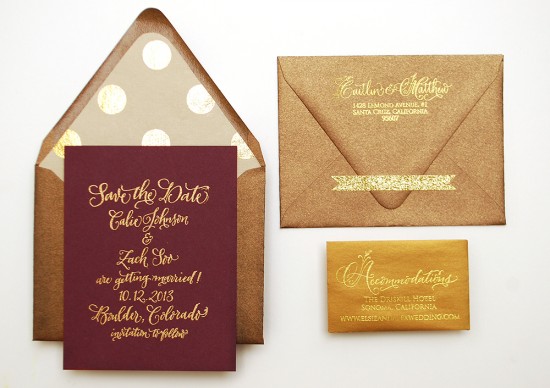
Step Three: You will now just repeat this inking and embossing process for your remaining pieces (we used our Floral Calligraphy Return Address stamp and our Floral Calligraphy Accommodations stamp) that will coordinate with your save the date. For the accommodations card, you will use a standard business sized card.
DIY Tutorial: Fig + Gold Calligraphy Save the Dates by Antiquaria via Oh So Beautiful Paper

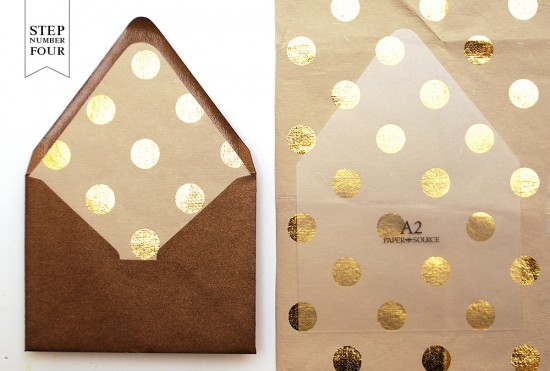
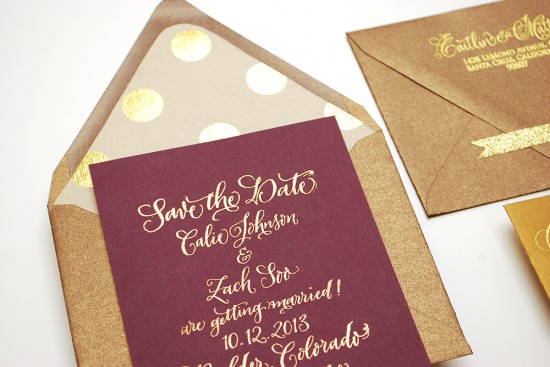
Step Four: To add a little extra personality to the suite, we added an envelope liner made from some awesome kraft and gold polka dot gift wrapping paper. It really helps tie the whole thing together! Trace the template onto your paper and cut it out with scissors. To install, simply use stick glue or double sided tape to adhere them into your envelope.
DIY Tutorial: Fig + Gold Calligraphy Save the Dates by Antiquaria via Oh So Beautiful Paper

DIY Tutorial: Fig + Gold Calligraphy Save the Dates by Antiquaria via Oh So Beautiful Paper

Finally, address the invitations, add postage, and send them off to delight your guests! You can also accent the suite with sparkly gold washi tape if you like!

Materials:

Calligraphy Save the Date Stamp, No.2

Floral Calligraphy Return Address Stamp

Floral Calligraphy Accommodations Card

Stamp Pad

Embossing Powder

Heat Gun

A2 Cards in Fig

A2 Envelopes in Antique Gold

Business Cards for the Accommodations piece, in Antique Gold

Gift Wrap to be used as an envelope liner, ours was purchased locally from Urbanic

Envelope liner templates

Pencil

Scissors

Glitter Washi Tape

Photo Credits: Antiquaria

Fisher’s Mountain Ski Theme Bar Mitzvah Invitations

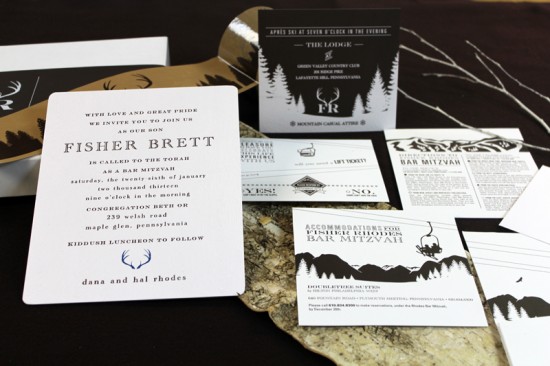
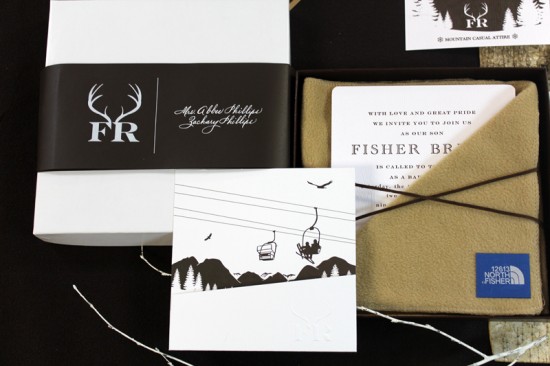
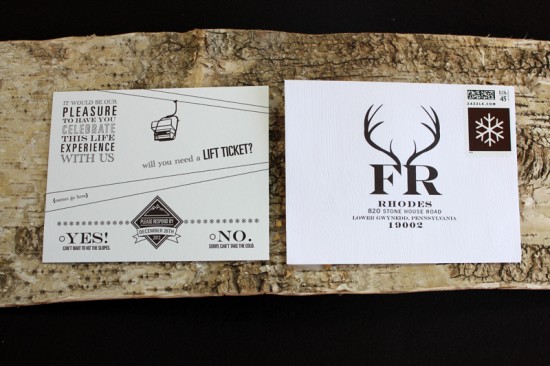
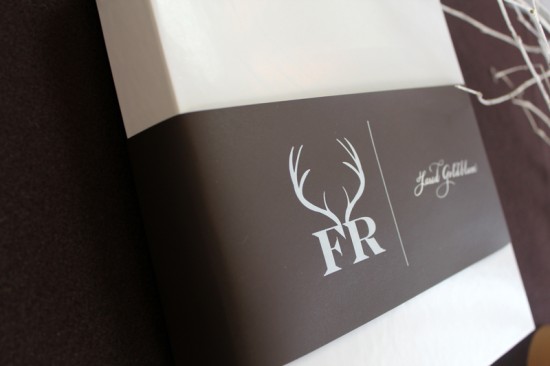
Bar and Bat Mitzvah invitations are serious business. I love seeing all the creative themes for the receptions after the ceremony! These particular invitations come to us from La Petite Fleur and were created with a snow lodge and ski theme in mind, and actually incorporate custom made scarves! There are lots of other wonderful details in this suite, but I think my favorite is perhaps the most simple – the beautiful antler monogram created using Fisher’s initials.

Ski Themed Bar Mitzvah Invitations by La Petite Fleur via Oh So Beautiful Paper (3)

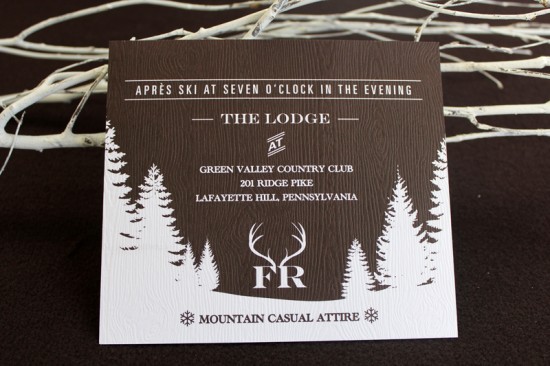
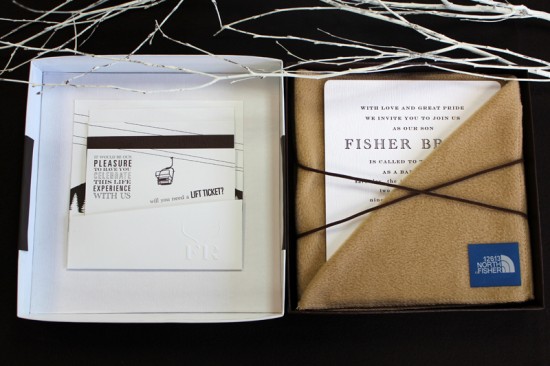
From Leigh: Our clients, leaders in the garment industry, came to us for a custom invitation suite for their son Fisher’s Bar Mitzvah. They asked for a unique suite that incorporated a piece of clothing and that was expertly handcrafted. Along with the event’s “snow lodge/après ski” theme in mind, we designed a monogram with Fisher’s initials – FR – and a “North Fisher” logo, both of which were used throughout the invitation suite.

Ski Themed Bar Mitzvah Invitations by La Petite Fleur via Oh So Beautiful Paper (2)

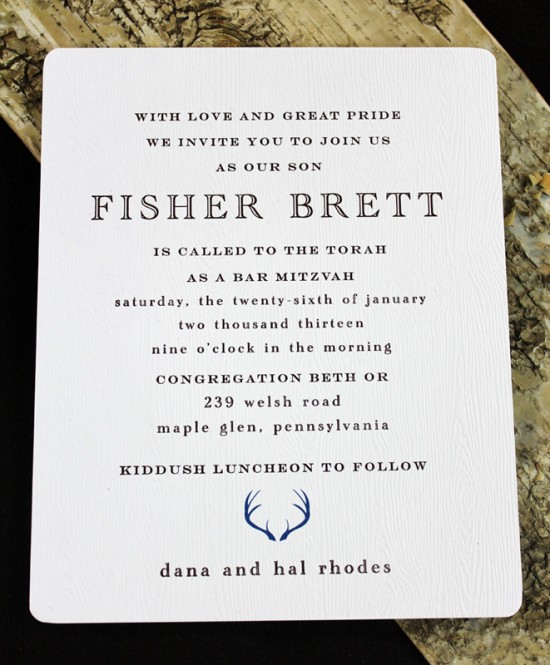
The North Fisher icon was applied to a custom made camel scarf, which would serve as a “pocket” for the suite’s letterpress printed, foil-stamped, die cut, two color invitation card, which was printed on embossed Barque paper.

Ski Themed Bar Mitzvah Invitations by La Petite Fleur via Oh So Beautiful Paper (6)

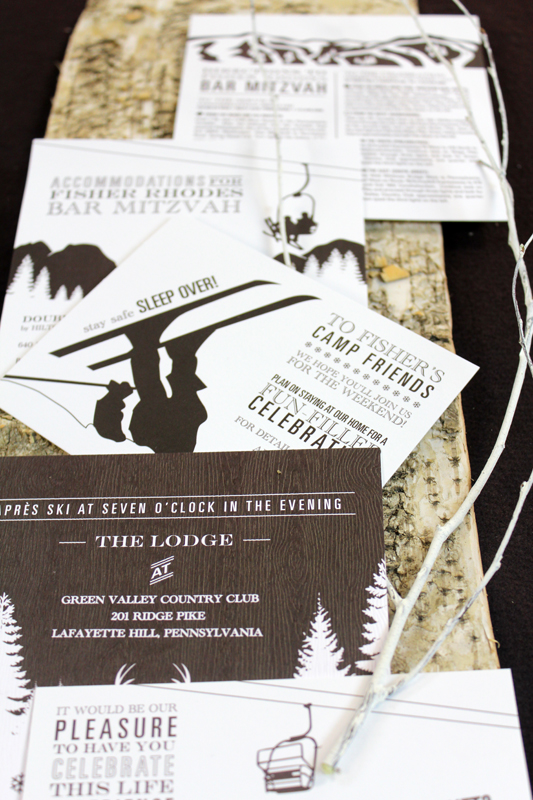
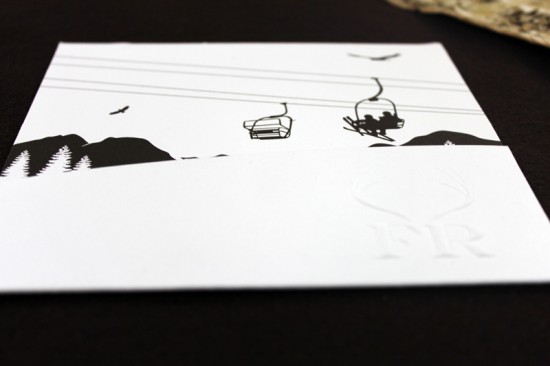
To house the various custom-designed inserts within this Mitzvah suite, we created a die cut pocket that featured an angled front with a blind embossed logo. On the inside back of the pocket was an illustrated ski scene, which was revealed once all the inserts were stacked inside, like pieces of a puzzle. Each of the insert cards was custom illustrated to feature a portion of the overall ski and snow graphics scene.

Ski Themed Bar Mitzvah Invitations by La Petite Fleur via Oh So Beautiful Paper (9)

Ski Themed Bar Mitzvah Invitations by La Petite Fleur via Oh So Beautiful Paper (7)

Ski Themed Bar Mitzvah Invitations by La Petite Fleur via Oh So Beautiful Paper (8)

Ski Themed Bar Mitzvah Invitations by La Petite Fleur via Oh So Beautiful Paper (1)

Ski Themed Bar Mitzvah Invitations by La Petite Fleur via Oh So Beautiful Paper (10)

Ski Themed Bar Mitzvah Invitations by La Petite Fleur via Oh So Beautiful Paper (5)

The scarf, with its tucked-in invitation, was nestled in the bottom of the custom box. The accompanying graduated inserts and pocket were adhered to the inside lid. The custom box was then wrapped and tied with a brown suede belly band that featured the FR monogram in a white foil stamp, and secured with brown suede ribbon. Guest names and addresses were written in white calligraphy.

Ski Themed Bar Mitzvah Invitations by La Petite Fleur via Oh So Beautiful Paper (4)

Thanks Leigh!

Photo Credits: La Petite Fleur

{happy weekend!}

Happy Friday everyone – and yay for a long weekend! I hope you all had a nice Valentine’s Day. Sadly, my husband was on a late night shift this week, so there wasn’t much celebrating over here. Hopefully we’ll find some time to do something nice this weekend instead. We’ve had a few glimpses of spring here in DC this past week, which has me so so so excited for the real thing to arrive soon! Last year I was so overwhelmed with first trimester sickness that I was barely able to enjoy my favorite season, but this year I’m so excited to introduce Sophie to our favorite spring activities (like visiting Dumbarton Oaks and the National Arboretum). But in the meantime…

Maple and Belmont

Photo Credit: Maple & Belmont

…a few links for your weekend!

This week on Oh So Beautiful Paper:

Also, there a LOT of new Designer Rolodex members to welcome!

That’s it for me this week! I hope you enjoy your long President’s Day weekend and I’ll see you back here on Tuesday! xoxo