Robin + Sergei’s Floral and Gold Foil Wedding Invitations

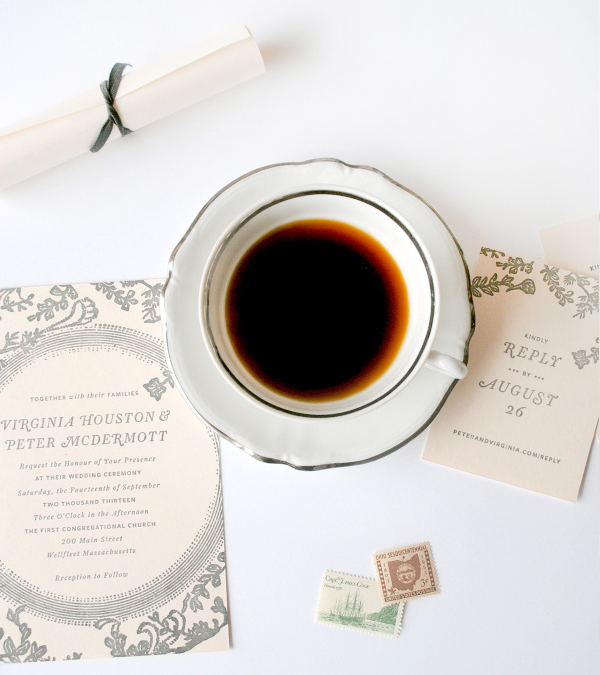
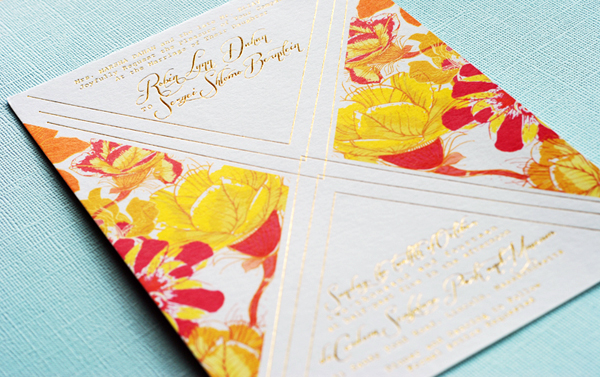
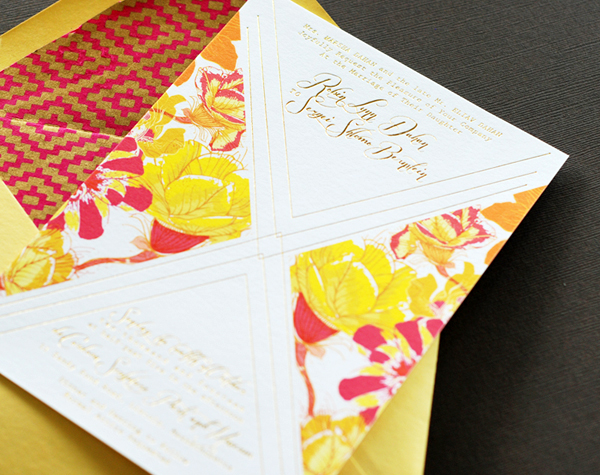
Maybe it’s the influence of summer, but I can’t get enough bright and bold color these days! Luckily, Nicole from Umama sent over these colorful wedding invitations. The invitations pair a deep vivid pink, marigold yellow, and graphic floral elements – along with some shiny metallic gold foil! So pretty!

Colorful-Floral-Gold-Foil-Wedding-Invitations-Umama-OSBP

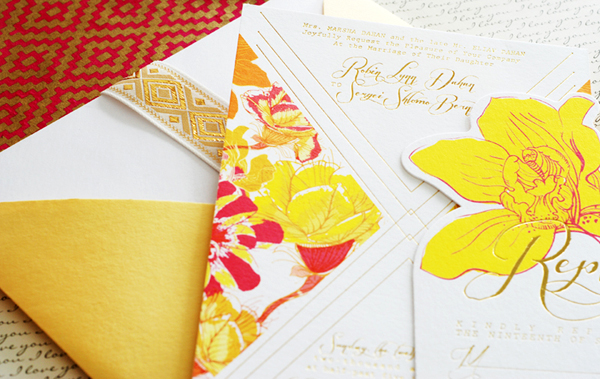
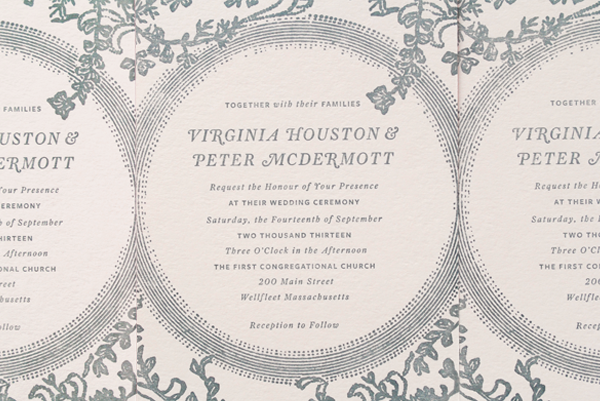
From Nicole: Robin was super excited and passionate about all the little design details in the invitation. The invitation combines a deep, vivid pink and a bright marigold yellow, along with gold foil to bring out the flowers.

Colorful-Floral-Gold-Foil-Wedding-Invitations-Umama-OSBP8

Colorful-Floral-Gold-Foil-Wedding-Invitations-Umama-OSBP4

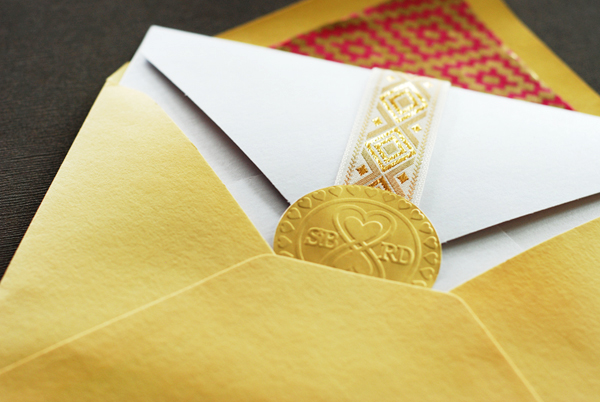
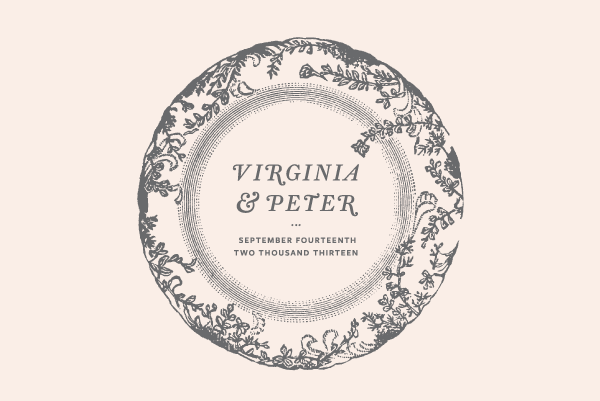
Robin took the time to learn the basics of Illustrator to create her own custom monogram. She also learned how to revise fonts in order to achieve just the right flourish. We explored paper options for the envelope liners until we truly captured the vivid vibe with a touch of gold to bring in that extra element. It was truly a melding of two minds that resulted in something we were both excited about.

Colorful-Floral-Gold-Foil-Wedding-Invitations-Umama-OSBP3

Colorful-Floral-Gold-Foil-Wedding-Invitations-Umama-OSBP9

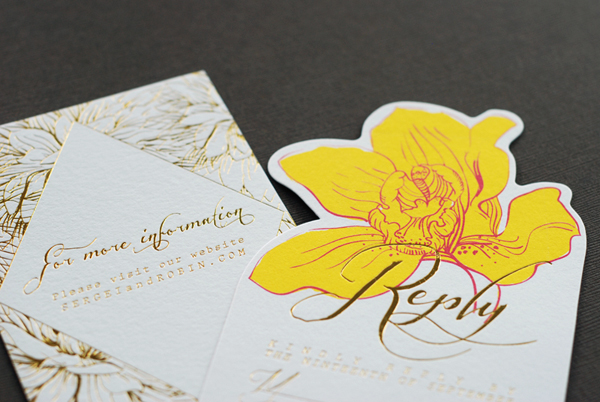
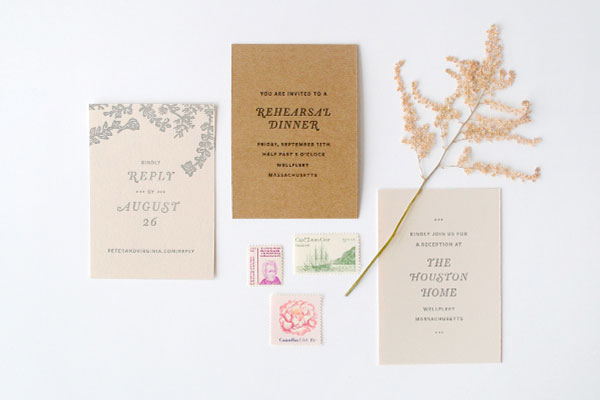
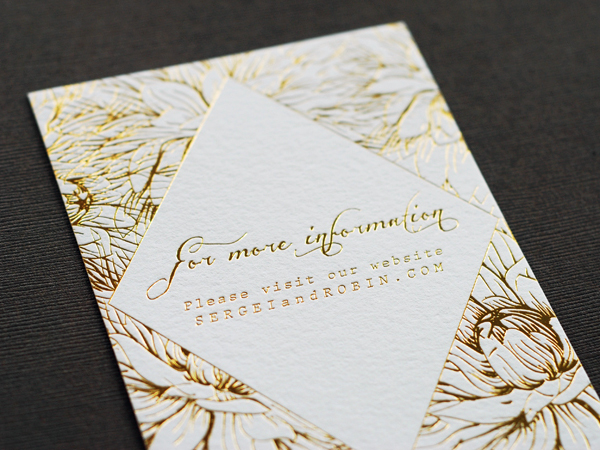
The end product is digitally printed on Crane cotton Lettra paper with a second printing of gold foil by Boxcar Press. The reply card was printed similarly, with a custom die cut around the floral design. The insert card was printed entirely in gold foil. The three pieces were wrapped in a gold patterned ribbon and sealed with the embossed monogram designed by Robin.

Colorful-Floral-Gold-Foil-Wedding-Invitations-Umama-OSBP7

Thanks Nicole!

Design: Umama

Digital + Gold Foil Printing: Boxcar Press

Check out the Designer Rolodex for more tal­ented wed­ding invi­ta­tion design­ers and the real invi­ta­tions gallery for more wedding invitation ideas!

Photo Credits: Umama

DIY Patterned Wedding and Party Favor Bags

We have a confession: we’re crazy about details… and we can’t get enough pattern in our lives. A few weeks ago, we were on the hunt for the perfect favor bags and just couldn’t find exactly what we were looking for. A light bulb went off and Emma dreamed up these custom DIY wedding and party favor bags that can be made from any patterned sheet of paper! And thus a new obsession was born. – Bailey and Emma of Antiquaria

DIY Wedding and Party Favor Bag Tutorial by Antiquaria for Oh So Beautiful Paper

These favor bags are best made in an assembly line fashion, completing each step for all of your bags at once. Doing it this way will save you tons of time!

Materials

Coco and Paloma Green Floral Patterned Paper in text weight

Scoreboard

T-square Ruler

Pencil

Scissors

Double Sided Tape (a tape gun is faster but optional)

DIY Wedding and Party Favor Bag Tutorial by Antiquaria for Oh So Beautiful Paper

Step 1: Using a scoreboard, score your sheet of paper on the back (we used 8.5 x 11″ patterned paper) half an inch above the bottom (the 11″ side) and half an inch from right hand side. Lastly, score down the new center, at the 5.25″ mark. You can adapt this technique to any size paper by using this formula, simply adjust the center score accordingly.

DIY Wedding and Party Favor Bag Tutorial by Antiquaria for Oh So Beautiful Paper

Step 2: With a t-square ruler, draw a light pencil line across the lefthand side and righthand half inch portion of the paper that you just scored, about an inch down from the top.

DIY Wedding and Party Favor Bag Tutorial by Antiquaria for Oh So Beautiful Paper

Step 3: Next, you will center a plate on the right-hand side, in between your straight pencil lines. This is how to create the top arch on your bag. Trace the top of the plate light with a pencil. You should now have a cutting guide that runs all the way across your paper.

DIY Wedding and Party Favor Bag Tutorial by Antiquaria for Oh So Beautiful Paper

Step 4: With scissors, carefully cut along the line that you just made. You will also need to cut half an inch at the center score line along the bottom to where the score marks meet.

DIY Wedding and Party Favor Bag Tutorial by Antiquaria for Oh So Beautiful Paper

Step 5: Next, fold down the righthand half inch score mark. Apply double sided tape along the length of the right side as well as across the bottom right side (from cut to edge). Carefully fold the left side to meet the right and adhere them together.

DIY Wedding and Party Favor Bag Tutorial by Antiquaria for Oh So Beautiful Paper

Step 6: Flip your bag over and finish it off by folding up the bottom half inch and tape it to the back using double sided tape.

DIY Wedding and Party Favor Bag Tutorial by Antiquaria for Oh So Beautiful Paper

Et voila! Favor bags sure to impress at any wedding or party. Now… what to put in them?

Photo Credits: Antiquaria for Oh So Beautiful Paper

Virginia + Peter’s Low Key Wedding Invitations

Designer Christine Wisnieski created this beautiful and low key wedding invitation suite with an unusual (but awesome) source of inspiration: the bride’s collection of vintage china! The invitation suite features a blush pink and kraft paper color palette with subtle vintage-inspired design details. So lovely!

Low-Key-Cape-Cod-Wedding-Invitations-Christine-Wisnieski-OSBP

From Christine: I created a simple and delicate wedding invitation suite in pale blush pink inspired by Virginia’s collection of vintage china and lace wedding gown. Family and friends from all over the country gathered on Cape Cod to enjoy a quaint celebration and beautifully prepared meal at the bride’s family home.

Low-Key-Cape-Cod-Wedding-Invitations-Christine-Wisnieski-OSBP3

Low-Key-Cape-Cod-Wedding-Invitations-Christine-Wisnieski-OSBP2

The blush pink and kraft paper includes a letterpress printed invitation, rsvp card, welcome dinner note, and envelope along with day-of stationery pieces like ceremony programs, menus, escort cards, table numbers and favor packaging. Ohio Cherry bitters were thoughtfully crafted by the bride and groom and packaged in amber bottles for guests to take home.

Low-Key-Cape-Cod-Wedding-Invitations-Christine-Wisnieski-OSBP5

Low-Key-Cape-Cod-Wedding-Invitations-Christine-Wisnieski-OSBP6

Low-Key-Cape-Cod-Wedding-Invitations-Christine-Wisnieski-OSBP7

Low-Key-Cape-Cod-Wedding-Invitations-Christine-Wisnieski-OSBP8

Low-Key-Cape-Cod-Wedding-Invitations-Christine-Wisnieski-OSBP9

Thanks Christine!

Design: Christine Wisnieski

Letterpress Printing: Type Twenty Seven

Check out the Designer Rolodex for more tal­ented wed­ding invi­ta­tion design­ers and the real invi­ta­tions gallery for more wedding invitation ideas!

Photo Credits: Christine Wisnieski

Frozen Cocktail Recipe: Blackberry St-Germain Granita

Our final frozen cocktail recipe happens to be one of our most recent favorites! Nole has been making delicious frozen granitas out of fresh fruit for years at home, so I don’t know why it took so long for us to add booze to one. But I’m glad we did. It’s the perfect way to use abundant in-season fruit – in this case, blackberries! – Andrew

Blackberry St-Germain Cocktail Granita Recipe by Oh So Beautiful Paper / Photo by Sweet Root Village

Blackberry St-Germain Cocktail Granita Recipe by Oh So Beautiful Paper / Photo by Sweet Root VillageBlackberry St-Germain Cocktail Granita Recipe by Oh So Beautiful Paper / Photo by Sweet Root Village / Calligraphy by A Fabulous Fete

Blackberry St-Germain Granita

4 Cups Blackberries
1 Cup St-Germain
1/3 Cup Sugar
1 Tablespoon Lemon Juice
A pinch of kosher salt

Purée the blackberries, St-Germain, sugar, lemon juice, and salt with a cup of water in a blender until smooth. Strain through a fine-mesh sieve into a 9 x 13″ metal baking pan, pressing on the solids to squeeze out as much liquid as possible. Freeze the mixture until the edges begin to set, then use a fork to scrape, breaking up the frozen sections into light flakes. Freeze, scraping and breaking up mixture every 20–30 minutes, until it resembles fluffy shaved ice, about 2–4 hours. Serve with a spoon.

Blackberry St-Germain Granita Cocktail Recipe Card by Dinara Mirtalipova for Oh So Beautiful Paper

Illustration by Dinara Mirtalipova for Oh So Beautiful Paper

We made this recipe both with and without St-Germain, and we both agree: with St-Germain is better. The succulent fruitiness of the blackberries is a perfect match for St-Germain’s robust floral notes, and the St-Germain adds just enough alcohol to give the granita some oomph without overwhelming it as a dessert. St-Germain, as a liqueur, also has a much lower proof than a liquor, which is perfect for a dessert like this – alcohol freezes at a much lower temperature than water, so too much alcohol in the recipe will keep the drink from freezing properly. Not this recipe: it came out just fine, fluffy and crunchy and delicious.

Blackberry St-Germain Cocktail Granita Recipe by Oh So Beautiful Paper / Photo by Sweet Root Village

Blackberry St-Germain Cocktail Granita Recipe by Oh So Beautiful Paper / Photo by Sweet Root Village

Calligraphy by Lauren Saylor of A Fabulous Fete

Styling by Nole Garey for Oh So Beautiful Paper

Photos by Sweet Root Village for Oh So Beautiful Paper

Frozen Cocktail Recipe: Frozen St-Germain Daiquiri

In hoity-toity cocktail circles, the blender has become something of a joke. It’s too closely associated with the dark years of the 1980s and 1990s, when frozen drinks were sickly sweet and garishly colored from artificial mixers. But blended drinks go back – way back, to the mid-1800s, when drinks like the Absinthe Frappe were all the rage. Let’s reclaim another one: the Frozen Daiquiri.  – Andrew

Frozen St-Germain Daiquiri Cocktail Recipe by Oh So Beautiful Paper / Photo by Sweet Root Village

Frozen St-Germain Daiquiri Cocktail Recipe by Oh So Beautiful Paper / Photo by Sweet Root VillageFrozen St-Germain Daiquiri Cocktail Recipe by Oh So Beautiful Paper / Photo by Sweet Root Village

Frozen St-Germain Daiquiri

2 oz Bacardi Rum
1 oz Lime Juice
1/2 oz St-Germain
1/2 oz Rich Simple Syrup

Combine all the ingredients in a blender with an equal amount of crushed ice. Start to blend at the lowest setting and slowly add more crushed ice, a bit at a time, until the drink starts to fold over on itself. Pour into a chilled glass and enjoy!

Frozen St-Germain Daiquiri Recipe Card by Dinara Mirtalipova for Oh So Beautiful Paper

Illustration by Dinara Mirtalipova for Oh So Beautiful Paper

This is an easy enough technique once you’ve mastered it, but plenty easy to screw up. I recommend practicing ahead of time so you’ve nailed it down once it’s time to serve your guests. I definitely screwed up a few batches before I got the right consistency down, watering down the drink with too much ice or not blending enough and leaving the drink full of big ice chunks. The ideal frozen daiquiri is smooth enough to sip easily through a straw, but still with enough body to chew on. (As a texture eater, I love chomping on those micro-ice crystals.) It should taste just like a St-Germain daiquiri that you’d shake with ice – sweet and tart and floral – but feel like a smoothie. You might consider adding a bit more sugar, since the cold will dull your sense of taste a bit (the same reason we put so much sugar in ice cream). Delicious. Just watch out for brain freeze.

Frozen St-Germain Daiquiri Cocktail Recipe by Oh So Beautiful Paper / Photo by Sweet Root Village

Frozen St-Germain Daiquiri Cocktail Recipe by Oh So Beautiful Paper / Photo by Sweet Root Village

Calligraphy by Lauren Saylor of A Fabulous Fete

Styling by Nole Garey for Oh So Beautiful Paper

Photos by Sweet Root Village for Oh So Beautiful Paper