Hello Brick & Mortar: How to Get a Shop Owner’s Attention

Ed Note: You guys, I could not be more excited to introduce this new column! Each month, Emily Blistein – owner of the amazing gift, baby, vintage, home decor, and stationery shop Clementine in Middlebury, Vermont – will be stopping by to share wisdom from the retail perspective. We have lots planned for this column, from gift pairings to retail trends and everything in between. But the best part? Emily is willing to answer questions! So read through her first post below, then leave your questions for Emily in the comment section! –Nole

As a grown-up, mail is not always fun. You, Dear Stationery Artists and Lovers of Letterpress, make mail-time like Valentine’s Day in elementary school. I adore you for it. When I opened Clementine three years ago I had two stationery lines, now I have nearly two dozen. Customers fawn over the card selection so much that stationery has become the heart of my shop. I love watching it grow and dream of days spent drinking coffee and making orders. In reality, my to-do list is often longer by the end of the day.  Things get lost in the shuffle. Here is my best advice for growing your wholesale line by grabbing the eye of busy shop-owners. – Emily of Clementine

Brick and Mortar: Retail Advice for Stationers via Oh So Beautiful Paper

1. Do you like-like me?

You may have a well-organized list of potential shops to contact or you just blog-hopped your way to a new shop.  This whole thing is a bit like dating. It can be really exciting and slightly awkward. At the core we’re both asking: are we good for each other (even if it’s just seasonal)?

This is a good stage to do a bit of friendly social media stalking. You might find a window to connect that traditional introductions don’t allow. Just refrain from making your first hello a post on Instagram that says: “love your shop, would love to show you my line!”

If you like a shop, you can learn a lot about what we like in a quick website, blog and social media search. If you like what you see, then by all means, say hello!

Brick and Mortar: Retail Advice for Stationers via Oh So Beautiful Paper

2. Would you maybe want to get some coffee sometime?

You want to introduce your line but do you email, call, send a packet, or stop in?  No matter the method, make your first hello quick and memorable.

If you’re stuck, follow this: Use my first name, say how you found me and what you like about my shop. Tell me a few sentences about you. Make a date to follow up. Say a gracious good-bye. Decorate a nice envelope. Remember to actually follow up when you say you will. (I prefer email).

  • Introduce yourself by post mail if: You really like my shop, think your cards would be a perfect fit and you can afford it.
  • Introduce yourself by email if: You’re more comfortable over email and it’s easier to get out the door.
  • Call if: You want to make me flustered and awkward. Your currency is visual; I want to see it first.
  • Visit if: You’re in the area. I love in person visits. I do not love unannounced visits to talk about your line, which you happen to have in your car.

OSBPHappyBirthdayCards2 OSBPbaby2

3. Be memorable and follow up:

I don’t have to tell you how to make it personal. This is where you excel, but here are a few things that often make a difference to me:

Brick and Mortar: Retail Advice for Stationers via Oh So Beautiful PaperBrick and Mortar: Retail Advice for Stationers via Oh So Beautiful Paper

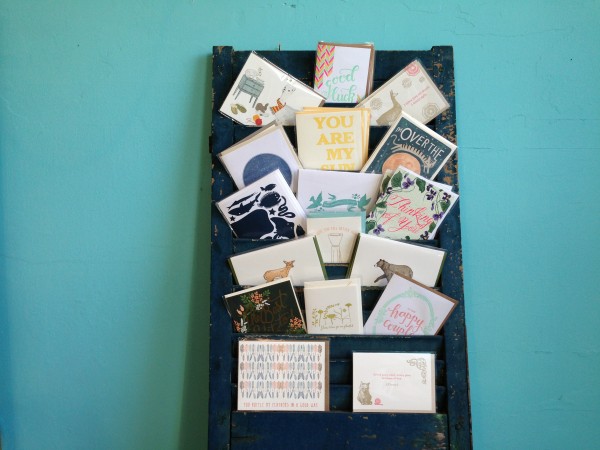
Showstoppers: A day of mail just before the 2013 National Stationery Show / The recent introduction package from E. Frances

  • Your envelope is the first thing I see. You are in a sea of incredible envelope addressers. Stand out in a vibrant way that fits your aesthetic.
  • Let your work do the talking. Include 2-4 images (by email) or 4-5 cards (by post) of your best work. You don’t have to tell me why your cards would be perfect in my shop; I’ll take care of that.
  • Use my first name and make it personal. Shop owners take pride in curating their lines, personalizing your introduction shows that you understand that. (Do beware of ‘cut and paste.’)
  • Offer to send samples. This will make me look at your line, and it gives you an obvious reason to follow-up. I don’t suggest that all vendors send samples, but cards can look very different in person.
  • Consider offering an incentive, like free shipping. This won’t make me order, but may sway me to increase my order and take chances.
  • Sometimes you catch me at the right moment and I reply immediately. Be prepared with immediate follow up and clear (hopefully flexible) instructions for how to place an order.
  • Use your connections. I adore and trust my current vendors and friends. If you know them and they tell me to look at you, I will. You are in the best, most supportive and collegiate industry around, use it!
  • Timing. Remember Thanksgiving through Christmas is crazy for retail shops. Consider following the National Stationery Show timeframe even if you’re not going. I keep a folder of NSS cards and April is when I’m most tuned in to new lines. January is also great, things slow down and I’m ready to think about Valentine’s Day. (I love to think about Valentine’s Day)

4. It’s not you, it’s my toddler. Silence does not mean I’m not interested. I know you put a lot of effort in to your submissions. I try to reply to all of the (thoughtful) submissions I get. But I wrangle a two-year-old, so my days are long, and my “I have to email that person back” list is longer. Don’t be afraid to send a follow up note. I have a huge stack of orders waiting to be written. Often a well-timed email about new items or a special makes an order happen.

5. Don’t be shy. If you like a shop, stay on our radar. I’ve brought on many lines months or years after the first introduction. Social media can be a great way to build a connection. If you mail an introduction packet, remember to include your social media handles. I get a lot of submissions that are fantastic, but aren’t quite right for the shop. I will happily tweet/instagram a quick photo of a great package. (And don’t be afraid to follow up!)

Brick and Mortar: Retail Advice for Stationers via Oh So Beautiful PaperBrick and Mortar: Retail Advice for Stationers via Oh So Beautiful Paper

Brick and Mortar: Retail Advice for Stationers via Oh So Beautiful PaperBrick and Mortar: Retail Advice for Stationers via Oh So Beautiful Paper

Perfectly personalized packages (clockwise from top left): Grey Moggie, MogleaInk Meets Paper, An Open Sketchbook

Brick and Mortar: Retail Advice for Stationers via Oh So Beautiful PaperOSBPscoutshonor

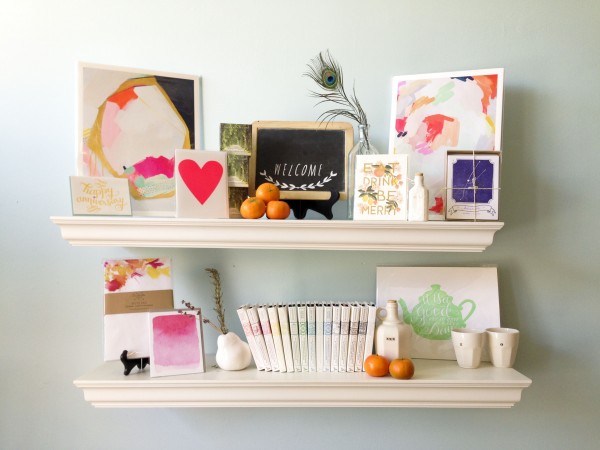
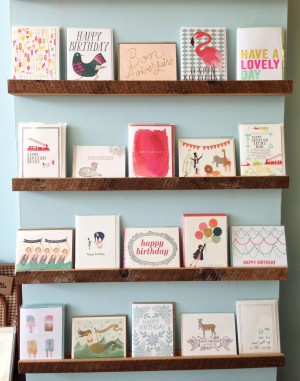
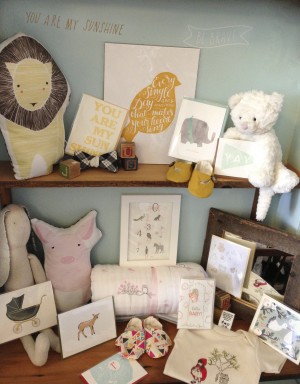
A family of favorites at Clementine and Scout’s Honor Co’s little nook. 

I love growing the family of print at Clementine. Your ideas and experiments make this possible and I’m constantly grateful (and pretty darned impressed).

Each little shop is unique, but I hope these are some helpful bits to expand your wholesale business. If you have specific questions, ask away! That’s where the fun happens, and maybe where future posts are born. I can’t wait to hear from you. xx Emily

Photo & Instagram credits: Emily Blistein, Clementine.

Friday Happy Hour: The Bufala Negra

Usually these posts take some time. I do some reading about classic cocktails and try out the recipes for myself, or I play around with my own recipes until I get it just right. There’s a lot of research and a lot of experimenting before I’m ready to write about a drink. But not this one. I came across this modern cocktail a few days ago, tried it out, and loved it so much that I didn’t take any convincing to post about it right away. So enjoy this amazing combination of bourbon, balsamic, and basil – the Bufala Negra. – Andrew

OSBP-Signature-Cocktail-Recipe-Bufala-Negra-18

OSBP-Signature-Cocktail-Recipe-Card-Bufala-Negra-Shauna-Panczysyzn

Illustration by Shauna Lynn for Oh So Beautiful Paper

The Bufala Negra

2 oz Bourbon
3/4 oz Balsamic Syrup

2-4 oz Ginger Beer
3-4 Fresh Basil Leaves

To make the balsamic syrup, combine equal parts balsamic vinegar with simple syrup over low heat, stirring frequently, until the vinegar and syrup are combined and slightly reduced.

To make the Bufala Negra, muddle the balsamic syrup and basil leaves together in a shaker.  Add the bourbon and lots of ice, then shake well.  Strain into a tumbler filled with fresh ice, then top with ginger beer and garnish with more basil.  Enjoy!

OSBP-Signature-Cocktail-Recipe-Bufala-Negra-28

The Bufala Negra is the creation Jerry Slater, owner and operator of the Atlanta, Georgia bar H. Harper Station. Needless to say, I am now scheming up an excuse to visit Atlanta. Jerry’s Bufala Negra is sweet and tart and herbal and spicy at the same time. The balsamic and basil lend the drink an air of Italian cuisine without being gimmicky. (I’m a huge fan of balsamic vinegar in cooking, but I’d only ever used it in cocktails to make shrubs, so I find its use here pretty ingenious.)

OSBP-Signature-Cocktail-Recipe-Bufala-Negra-20 OSBP-Signature-Cocktail-Recipe-Bufala-Negra-23

I did make a couple of changes to the recipe. First, I upped the bourbon a bit; there are lots of strong flavors in the Bufala Negra and I didn’t want the bourbon to get lost. Second, I replaced the original recipe’s inclusion of some brown sugar with more balsamic syrup. I’m not a big fan of brown sugar, which is basically white sugar colored brown with molasses. Using a raw or cane sugar, like turbinado, in your balsamic syrup will give your cocktails a much richer and more honest flavor.

OSBP-Signature-Cocktail-Recipe-Bufala-Negra-5

A word of warning: the Bufala Negra can go down easily.  They’re light without being insubstantial, sweet and rich without being cloying, perfect to have with dinner. In other words, you might find yourself having more than you meant to without realizing it. Yeah, it’s a good cocktail.

Photo Credits: Nole Garey for Oh So Beautiful Paper

Baby Essentials: The First Year

When we first created our baby registry last year, I really only focused on items that I thought we would need to get through the newborn phase. I didn’t even think about some of the things that Sophie would need after passing the three month mark! We were also living in a small apartment at the time, so we intentionally kept our registry to just what we thought was the most basic list of essentials. Now that Sophie is a year old, I thought it would be helpful to look back at the things that we did (and didn’t) need for that first year.

OSBP-Baby-Essentials-Sleep-Soothe

1. Rock n’ Play; 2. Motorola wireless infant video monitor; 3. Jenny Lind crib; 4. Sealy soy foam mattress; 5. 4moms MamaRoo swing; 6. Miracle Blanket + Summer Infant SwaddlePod; 7. Auggie crib sheets; 8. Graco sound machine

Bassinet + Crib: We started with a separate moses basket, but once we discovered the rock n’ play Sophie slept in that until we transitioned her to the crib. I love the sweet vintage style of our Jenny Lind crib, and like most cribs it can be converted to a toddler bed.

Monitor + Noise Machine: The video monitor and sound machine are two of our absolute essential baby items. We registered for the video monitor based on Joy’s registry list and love it. When Sophie was a newborn we used the extreme rain setting on this iphone app, which seemed to help calm her down faster and soothe her to sleep, but now that she’s a bit older the waves setting on the Graco sound machine is just perfect.

Swings: We received this Fisher Price hand-me-down swing from my sister-in-law and absolutely loved it, even though it takes up quite a bit of space. However, the swing has been through my sister-in-law’s 3 kids and now Sophie, so it’s pretty much on its last legs. I’ve heard good things about the MamaRoo from 4moms and may go that route for our next baby.

Swaddle: We swaddled Sophie at night until she was nearly six months old. Most fellow moms rave about the Aden + Anais swaddle wraps, but it was just too much fabric for our tiny baby and she would always break free. My favorite combination was a Miracle Blanket swaddle underneath a zip-up swaddle. Totally breakout-proof! I recommend registering for three of each: one to use, one to have in the closet, and another in the wash.

OSBP-Baby-Essentials-Eating-Bath

1. OXO high chair; 2. The First Years bottle brush; 3. Boon lawn drying rack; 4. VentAire bottles; 5. Munchkin mesh feeders; 6. Circo bath mitts; 7. 3 Sprouts towel; 8. Honest shampoo; 9. Dwell Studio bibs

High Chair: I never even thought to register for a high chair, but we ended up needing one when Sophie started solids around the six-month mark. Of course I wanted something well-designed, but also something that could be cleaned up with a simple wipe down (no fabric covers or anything that might require laundering). I’m a big fan of this OXO high chair.

Bottles + Cleaning: Everyone seems to have a different favorite bottle, and we ended up trying a few varieties before settling on these. We added the Boon drying rack after moving to our new house (where we have a bit more counter space). We could probably do without a separate drying rack, but it’s handy for keeping track of small bottle parts.

Bibs: We mostly used bibs when Sophie was a newborn, and then again a bit later when she was drooling up a storm while cutting her first tooth. We were gifted a set of these Dwell bibs, and I love how soft and absorbent they are!

What we don’t have or use: We don’t have a separate bottle warmer or sterilizer and have gotten by just fine without them. We did receive an infant tub, but Sophie didn’t particularly care for it and we found it kind of awkward to use, so we ended up just bringing her into the bath or shower with us. Now that she’s older she sits in the big tub (with a bath mat to keep her from slipping too much). Sophie’s favorite bath toys include a toothbrush, these foam bath stickers from Target, and empty shampoo bottles.

OSBP-Baby-Essentials-Diapering

1. Summer infant changing pad; 2. Honest diapers; 3. Earth Mama Angel Baby bottom balm; 4. Ubbi diaper pail; 5. vintage dresser; 6. Land of Nod changing pad cover

Changing Table + Diaper Pail: Because space is limited in Sophie’s nursery, we used a vintage dresser that my parents bought for me when I was a baby – similar to this one from Ruby Lane – in lieu of a separate changing table. The first drawer holds diaper supplies and smaller accessories like socks and tights, while the other three drawers hold clothing and pjs. I like the Ubbi diaper pail because it takes regular trash bags.

Diapers + Ointment: We use Honest diapers during the day and Pampers Baby Dry diapers for overnight. Sophie has never had a big issue with diaper rash, so we use this all-natural ointment and it works great for us!

What we don’t have or use: a wipes warmer or a separate tray to hold the changing pad. The changing pad simply sits on top of the dresser and attaches via a strap screwed into the back of the dresser.

OSBP-Baby-Essentials-Play-Go

1. Baggu backpack; 2. Green Sprouts travel changing pad; 3. Ergobaby carrier; 4. Snap n’ Go; 5. Lotus travel crib; 6. Fisher Price activity chair; 7. Boppy newborn lounger

Diaper Bag: I invested in a not-too-frilly Kate Spade diaper bag, which I love for its multiple pockets and included changing pad but is sadly no longer in production. But when I’m out and about with Sophie, particularly if I’m carrying her or wearing her in the Ergo, I often switch over to my Baggu backpack. I also really love this diaper bag from Ikabags; just make sure you have a separate travel changing pad to take along for outings.

Baby Carrier: We love, love, love our Ergo! We take Sophie everywhere in the Ergo, and when she was a newborn she would snuggle down into the infant insert and go to sleep almost instantly. We also have a sling and moby wrap, but we haven’t used the sling much since Sophie turned 3 months old and I never figured out how to properly tie the moby wrap. I can’t recommend the Ergo highly enough.

Stroller + Car Seat: I’m actually still searching for our perfect stroller, so I’ll update this section if or when I find one. We received an infant car seat from my sister-in-law, so we purchased an inexpensive Snap n’ Go frame that we use whenever we need a stroller. Now that Sophie is almost at the 20 lb mark, we’re preparing to transition from an infant car seat to a convertible car seat. We’ve settled on the Britax Roundabout after reading reviews and talking with friends and family.

Travel Crib: Another omission from the registry list! I like this Lotus travel crib because it folds up into a carry-on size backpack, which is great for airplane trips.

Activity Chairs + Loungers: We received this activity chair from my sister-in-law, and while it’s not something I probably would have chosen to buy on my own, Sophie LOVED it! It kept her entertained for extended periods of time from about 8 weeks old until she started backwards-crawling around 8 months. We also used a Bumbo seat pretty regularly until Sophie started sitting on her own at 9 months. Finally, we also received a hand-me-down Boppy (the regular kind), and while we ended up using it primarily as a newborn lounger it was a pretty important part of Sophie’s first few months.

OSBP-Baby-Essentials-Infant-Care

1. Crane humidifier; 2. Baby toothbrush; 3. Gripe water + gas drops; 4. Hyland’s teething gel; 5. Infant thermometer; 6. Infant pain relief; 7. Gerber pre-folds; 8. NoseFrida

Gas + Pain Relief: Sophie never had colic, but like all babies she experienced some gas and tummy issues when she was around 2-3 months. Once I found out about gripe water, we started adding it to her bottles and her symptoms definitely improved. I wish I’d known about it sooner! When we need to use a pain reliever, we alternate between infant Tylenol and Advil depending on the situation, since Advil is an NSAID that can irritate the stomach.

Snot: Sophie caught her first cold just before she turned 7 months old, and the NoseFrida was the only thing that got us through those 10 days. It sounds awful, but it absolutely works. The humidifier also helps Sophie from getting congested during our dry winter months.

Misc: Gerber pre-folds are super absorbent and can be used for just about anything, from receiving blankets to cleaning up spills to drying baby bottoms. We inherited a pile from my sister-in-law and still use them regularly. Sophie didn’t really take to any traditional teething toys, but she loves to chew on her baby toothbrush along with our keys, wallets, and other household objects. We’ve been using Hyland’s teething gel regularly since she was around 6 months.

What we don’t have or use: infant nail clippers. I tried some out, but they were just too clumsy and I couldn’t see what I was doing enough to feel confident using them. Some people bite their babies’ nails, some people use cuticle scissors, I just use regular adult nail clippers since I’m most familiar with the feel. We also didn’t bother with a separate infant care or first aid kit, since we already had most of the individual pieces (and most hospitals send you home with a few of those pieces).

*   *   *

That’s pretty much everything! I relied pretty heavily on the lists from Joy, Erin, and Christine when building my registry, so feel free to check those out for additional recommendations. I’ve also put together a Pinterest board with everything above along with a few alternative recommendations, which you can find right here.

Finally, while most of our registered items are easily available on Amazon or Diapers.com (yay for free shipping!), we chose Babyli.st as our registry so that we could include items from other online shops – it was perfect for us!

Paper to Petal

I was lucky enough to receive a review copy of the amazing new book Paper to Petal by Rebecca Thuss and Patrick Farrell – and I’m just going to be straight with y’all: It is completely impossible for me not to love this book. First, I’ve been in awe of Rebecca’s talent since I picked up my first issue of Martha Stewart Weddings back in college. Rebecca’s work was a huge influence on my own wedding five years ago, and in fact her styling work was the subject of one of my early posts on Oh So Beautiful Paper! Second, this book combines my two favorite things – paper and flowers – in more than 250 pages of truly stunning inspiration. What could be better?? I may have hugged my copy of Paper to Petal upon arrival.

Paper to Petal Book Preview via Oh So Beautiful Paper

Paper to Petal features an inspirational gallery of 75 paper flower ideas – including wreaths, décor, and centerpieces – followed by a resource section with a list of recommended materials and styling tips, along with thorough step-by-step instructions for all projects with accompanying templates. My favorite project? A beautiful mobile that I can’t wait to make for Sophie’s nursery.

Paper to Petal Book Preview via Oh So Beautiful Paper (6) Paper to Petal Book Preview via Oh So Beautiful Paper (5)

Paper to Petal Book Preview via Oh So Beautiful Paper (4) Paper to Petal Book Preview via Oh So Beautiful Paper (3)

Paper to Petal Book Preview via Oh So Beautiful Paper (2) Paper to Petal Book Preview via Oh So Beautiful Paper (1)

Paper to Petal is currently available for pre-order and ships out next week – grab your copy right here!

Photo Credits: Thuss + Farrell / Potter Craft

Potter Craft Random House sent me a copy of this book for review, but all words and opinions are my own.

DIY Tutorial: Rubber Stamp Butterfly Handkerchief Wedding Invitations

We absolutely love collecting and handkerchiefs are one of those things that are very hard to pass up when you find a beautiful one. Given the popularity of handkerchief wedding invitations and the growing number of them that are stashed around the studio, we decided it was time to design a gorgeous, butterfly inspired handkerchief suite. Adding in coordinating patterns, kraft paper and calligraphy really makes the design feel custom and personal. – Bailey and Emma of Antiquaria

DIY Tutorial: Rubber Stamp Butterfly Handkerchief Wedding Invitations by Antiquaria for Oh So Beautiful Paper

DIY Tutorial: Rubber Stamped Butterfly Handkerchief Invitation Suite by Antiquaria for Oh So Beautiful Paper

Just a few assorted handkerchiefs from the collection. Since there is so much pattern elsewhere in this suite, we decided to use only solid ones in white and ecru with pretty lace borders.

DIY Tutorial: Rubber Stamp Butterfly Handkerchief Wedding Invitations by Antiquaria for Oh So Beautiful Paper

DIY Tutorial: Rubber Stamp Butterfly Handkerchief Wedding Invitations by Antiquaria for Oh So Beautiful Paper

Step One: Iron all of your handkerchiefs smooth and lay a single handkerchief on a flat, sturdy surface. Ink your invitation stamp (we used our Sophisticate Invitation Stamp) throughly and center it over the middle of the handkerchief. Once it’s aligned, press it down firmly and apply even pressure across the entire stamp. Lift off and set aside to dry. You can also use crafters ink that can be heat set with an iron if you’d like the text to be waterproof! For a step-by-step video tutorial about the printing process go here.

DIY Tutorial: Rubber Stamped Butterfly Handkerchief Invitation Suite by Antiquaria for Oh So Beautiful Paper

Step Two: We gussied up the accommodations card for this suite by using an A7 butterfly printed card. In the center, we stamped our Butterfly Monogram Stamp to add a personal touch. For the back of the card, we kept it simple, stamping it with the accommodations information (we used our Calligraphy Accent Accommodations Card Stamp).

DIY Tutorial: Rubber Stamped Butterfly Handkerchief Invitation Suite by Antiquaria for Oh So Beautiful Paper

Step 3: Reply postcards are rapidly growing in popularity among couples these days for more casual affairs, so for this suite, we incorporated one in kraft! Place your postcard (4″x6″) on a flat, firm surface. Ink your stamp (we used our Calligraphy Accent Reply Postcard Stamp) and center it over the card. To make the print, press down with even, moderate pressure. Remove and set card aside to dry.

DIY Tutorial: Rubber Stamped Butterfly Handkerchief Invitation Suite by Antiquaria for Oh So Beautiful Paper

Step Four: To tie the suite together (and keep the handkerchief secure), we decided to make a monogram tag to coordinate with the design. First, you’ll need to cut your paper to rectangles sized 1.5″x3″ using a self healing mat, craft knife and ruler (we used our Chloe Yellow Floral Patterned Paper, in Cover Weight for the tag).

DIY Tutorial: Rubber Stamped Butterfly Handkerchief Invitation Suite by Antiquaria for Oh So Beautiful Paper

Step Five: To give the tag some extra detail, we notched the corners off of the top. Lay the rectangular tag on a self healing mat at the 45 degree angle, place the ruler and make the cut. Flip the tag over an repeat on the other side.

DIY Tutorial: Rubber Stamped Butterfly Handkerchief Invitation Suite by Antiquaria for Oh So Beautiful Paper

Step Six: To finish the tag we punched a hole in the top center and added an adorable kraft hole protector. Then we stamped our monogram (we used the Cross my Heart Monogram Stamp) on the lower right corner of the tag.

DIY Tutorial: Rubber Stamped Butterfly Handkerchief Invitation Suite by Antiquaria for Oh So Beautiful Paper

Step Seven: Next, you’ll need to stamp your return address (we used our Calligraphy Ampersand Return Address Stamp) and address them to all of your guests. Make sure to stamp the return address on all of your envelopes first! And how could we not add Butterfly themed postage!

DIY Tutorial: Rubber Stamped Butterfly Handkerchief Invitation Suite by Antiquaria for Oh So Beautiful Paper

Tying everything together looks trickier than it is! Simply iron down the top and bottom of the handkerchief and fold it over your accommodations and reply card, overlapping the fabric a bit in the back. You can secure it with washi tape if you want or you can just go for it and tie the twine and tag around the suite sans tape.

DIY Tutorial: Rubber Stamped Butterfly Handkerchief Invitation Suite by Antiquaria for Oh So Beautiful Paper

 Materials

Sophisticate Invitation Stamp

Calligraphy Accent Accommodations Stamp

Butterfly Monogram Stamp

Calligraphy Accent Postcard Stamp

Cross my Heart Monogram Stamp

Calligraphy Ampersand Return Address Stamp

Stamp Pad in Black or Crafters in Black (if you choose to heat set)

Handkerchiefs with smooth open centers

Butterfly A7 Cards

Postcards in Paper Bag

A7 Envelope in Paper Bag

Chloe Yellow Floral Patterned Paper-in Cover Weight

Kraft Hole Protector

Self Healing Mat

Craft Knife

Metal Ruler

Twine similar to shown

Anti­quaria is a mem­ber of the Designer Rolodex – you can see more of their beau­ti­ful work right here or visit the real wedding invitations gallery for more wedding invitation ideas!

Photo Credits: Antiquaria