DIY Hand Lettered Wall Art

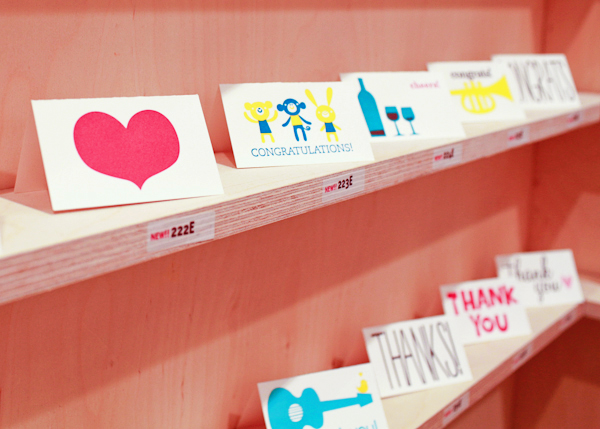
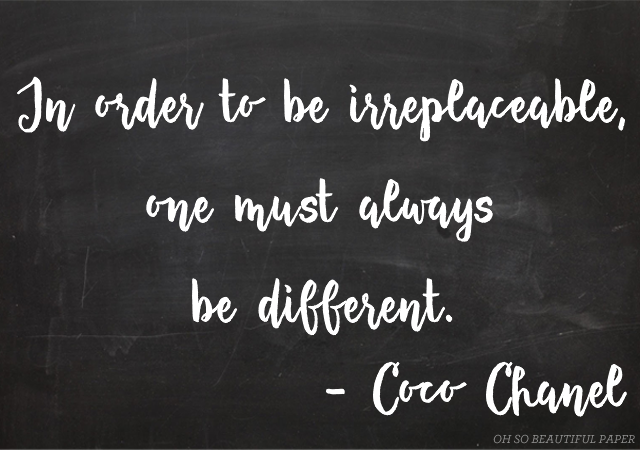
We’re in the middle of prepping for the National Stationery Show in May, which for us means finalizing our latest product designs and finishing the catalogs. In the process, we have been designing new art prints for our line and shop – so we definitely have wall art on the brain! Our tutorial today is a break down of how to make your very own, one-of-a-kind hand lettered wall art for your house or to give as a gift. Just find your favorite quote and get pencil to paper! –Bailey and Emma of Antiquaria

DIY Hand Lettered Wall Art by Antiquaria for Oh So Beautiful Paper

Materials

High quality archival paper, such as Arches Watercolor Paper Hot Press

Pencil

Kneaded Eraser

Brush Pen

Fine Felt Tipped Pen

Gouache (optional)

Copy Paper (to draft layout)

DIY Hand Lettered Wall Art by Antiquaria for Oh So Beautiful Paper

DIY Hand Lettered Wall Art by Antiquaria for Oh So Beautiful Paper

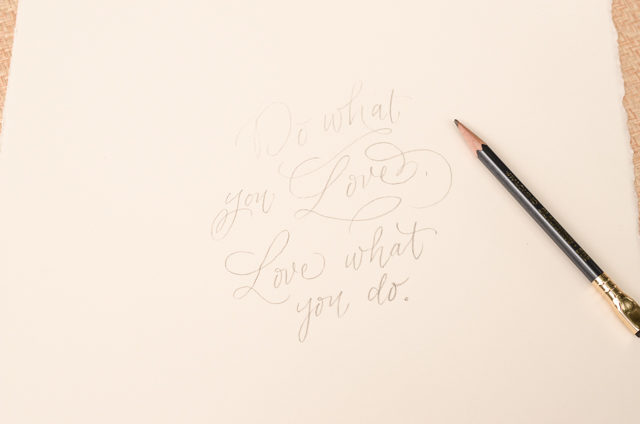
Step One: Using sheets of copy paper, sketch out your quote in a variety of different layouts/styles. Look at some of your favorite fonts for letter-shape inspiration if you feel stuck about how to make the letters go together. Once you’ve settled on a layout that you like, re-draw it on your nice archival paper. So that it pressure isn’t too high, make sure that you have a couple of sheets of the nice paper-in case you need to make a couple of drafts of the piece.

DIY Hand Lettered Wall Art by Antiquaria for Oh So Beautiful Paper

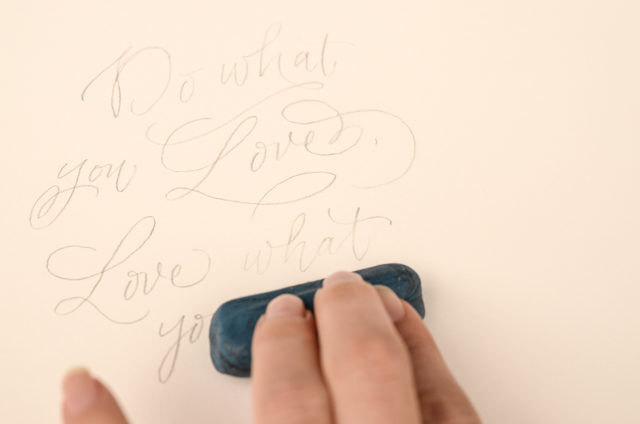
Step Two: Before putting any ink down onto your piece, you want to lift up the pencil lines so that they can act as a light guide for you but will not require heavy force once the ink is in place. A kneaded eraser does this job easily by rolling over the pencil and picking up the excess lead, as shown above.

DIY Hand Lettered Wall Art by Antiquaria for Oh So Beautiful Paper

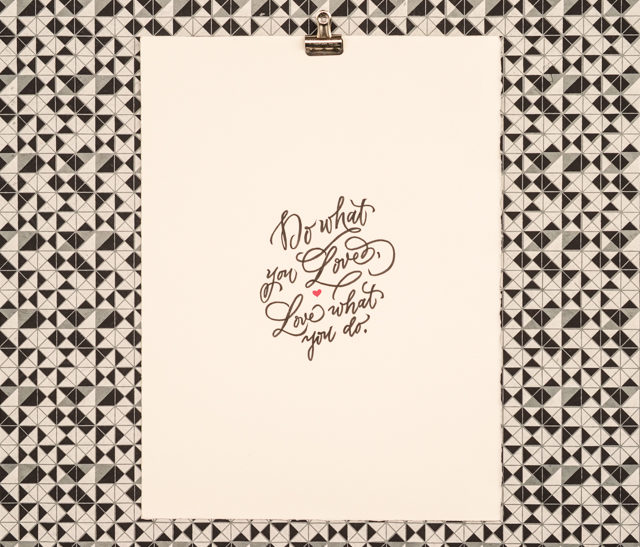
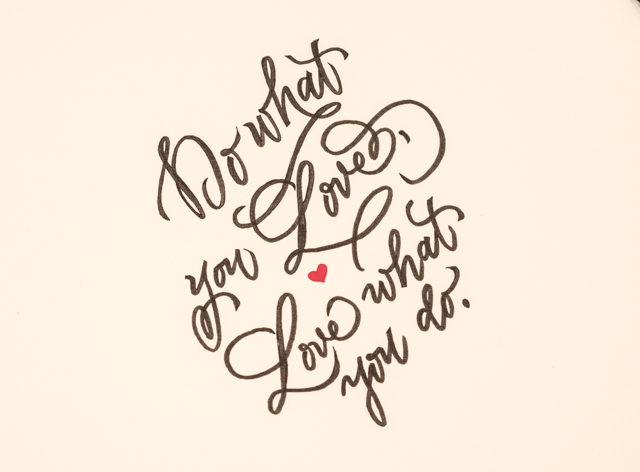
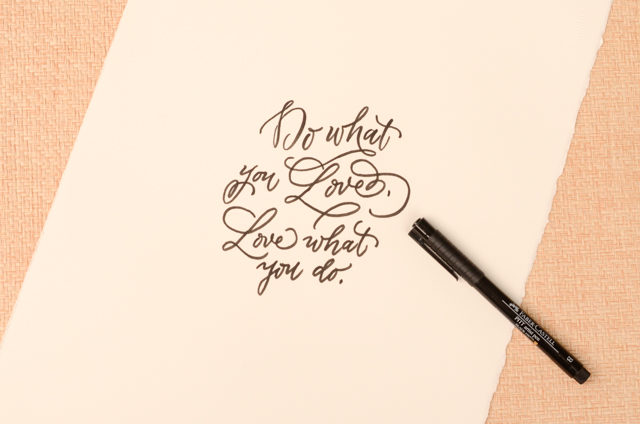
Step Three: Take a deep breath and do your lettering with ink using your very light pencil lines as a guide. You can use a brush pen as we did here, a brush and ink, a felt tipped pen or a calligraphy pen. Each of these will yield a different looking result so it’s worth figuring out what you like best (a great thing to do while your drafting your design on copy paper). We like the boldness that a brush pen gives, especially when it meant to be viewed from a distance, which it will be when hanging on the wall!

DIY Hand Lettered Wall Art by Antiquaria for Oh So Beautiful Paper

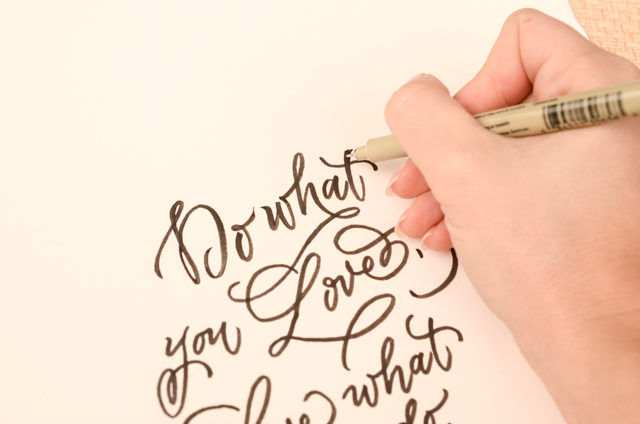
Step Four: To give some polish to the lettering, we like to go in with a fine tipped felt pen and do “touch-ups” to the outline. We typically smooth out any ending flourishes, tops of letters (like the “t”) and light areas that the brush didn’t get. The step is optional. You may achieve exactly the look you’re going for in step three! Once you’re happy with the lettering, gently erase the remaining light pencil lines.

DIY Hand Lettered Wall Art by Antiquaria for Oh So Beautiful Paper

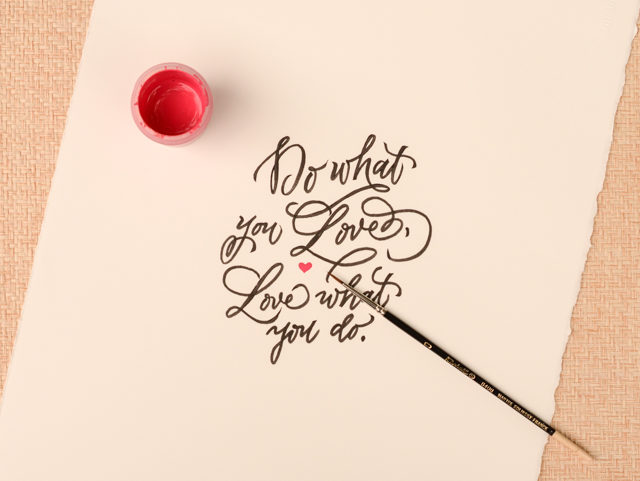
Step Five: We added a pop of color with a hot pink heart painted with gouache (opaque water color). This step is also optional and will depend on your design!

We hope that you have fun creating your own pieces and that you let your imagination run wild! If you’re new to lettering, it’s probably best to start with one word or a short phrase so that you can practice the process without the layout being too difficult. Have fun and Happy Lettering!

All artwork © 2015 Antiquaria, with DIY tutorials created exclusively for Oh So Beautiful Paper and intended for personal, non-commercial use only.

Photo Credits: Antiquaria for Oh So Beautiful Paper

Lola’s Bachelorette Weekend Getaway Invitations

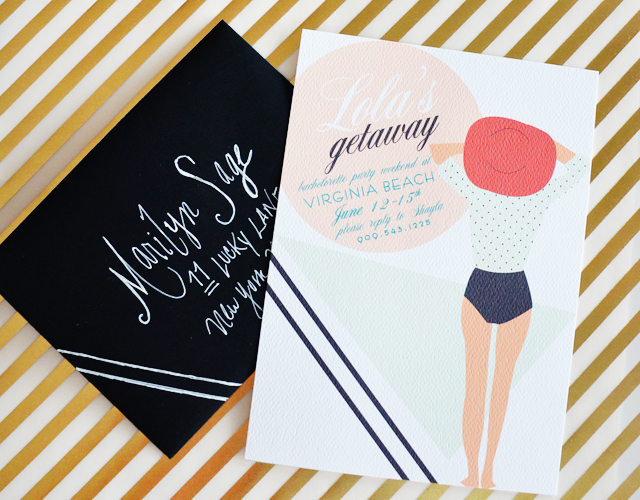
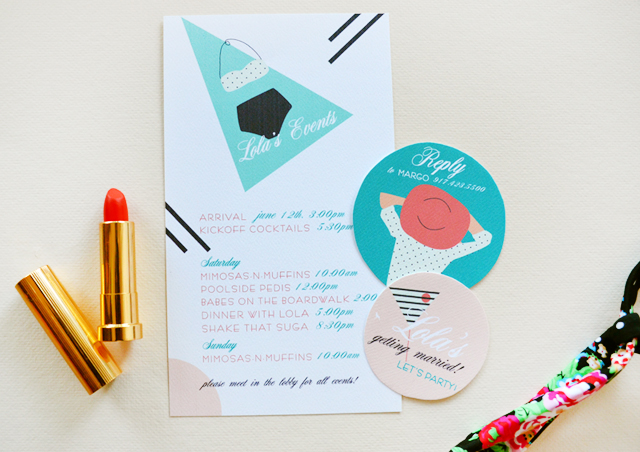
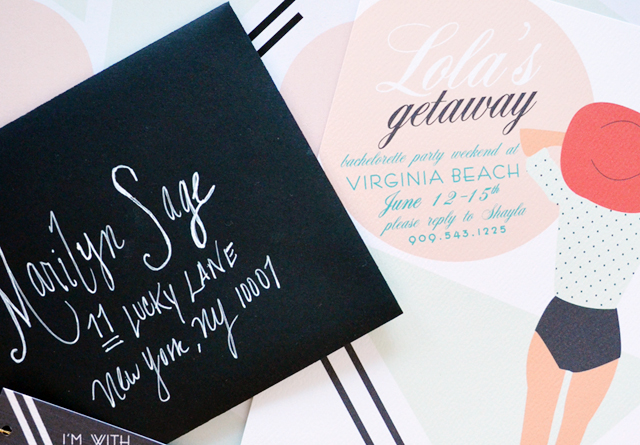
A weekend lounging by the pool with cocktails and pedicures sounds pretty awesome right about now. Nicole from Umama designed these fun invitations and itinerary for a bachelorette weekend escape – with plenty of playful imagery and bright pops of color. So fun!

Bachelorette-Weekend-Getaway-Invitations-Itinerary-Umama-OSBP

From Nicole: For Lola’s bachelorette weekend, the ladies spent a weekend in Virginia Beach. When I asked Lola how she envisioned her weekend, she wanted something classic, but fun! Something to capture beachside + bikinis + martinis. She planned for a weekend dolled up in bikinis by the sea.

Bachelorette-Weekend-Getaway-Invitations-Itinerary-Umama-OSBP8

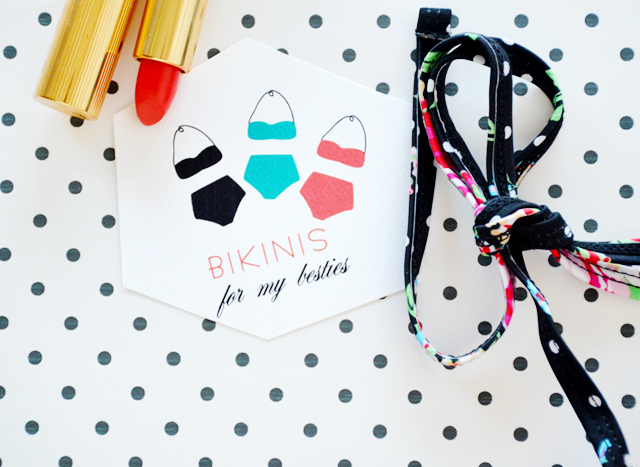
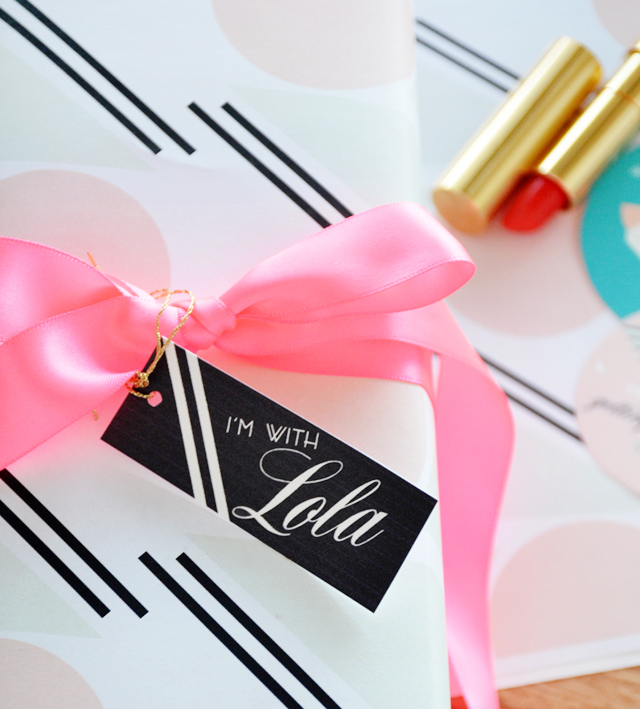
We opted for a color palette of black and white in stripes and dots, with a mix of blush, cherry red, and teal all digitally print on 80 lb Solar White Dutch Felt. We paired the invitation with some oversized informational confetti, as well as the weekend’s itinerary of events – including kickoff cocktails and poolside pedis. Not to mention coordinating bikinis and cherry red lipstick for each of the besties, a gift from the bride-to-be. This is sure to make a weekend of classic, clean fun – well, maybe!

Bachelorette-Weekend-Getaway-Invitations-Itinerary-Umama-OSBP4

Bachelorette-Weekend-Getaway-Invitations-Itinerary-Umama-OSBP5

Bachelorette-Weekend-Getaway-Invitations-Itinerary-Umama-OSBP7

Thanks Nicole!

Photo Credits: Umama

Elizabeth + Ricky’s Elegant Trellis Wedding Invitations

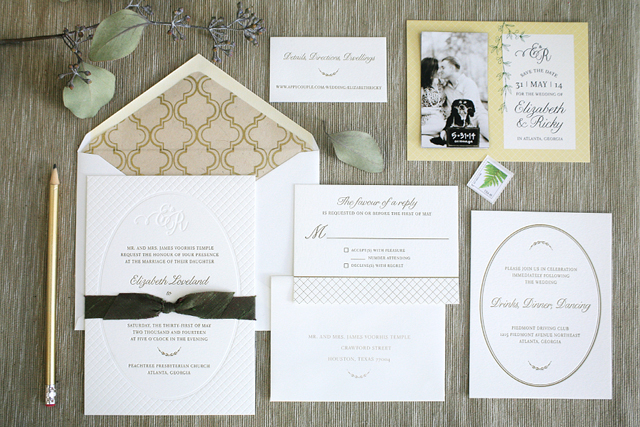
These wedding invitations from Sarah at Foglio Press combine classic elegance with Spring garden-inspired details and a bit of Southern Charm. Sounds like the perfect combination to me!

Elegant-Trellis-Wedding-Invitations-Foglio-Press-OSBP

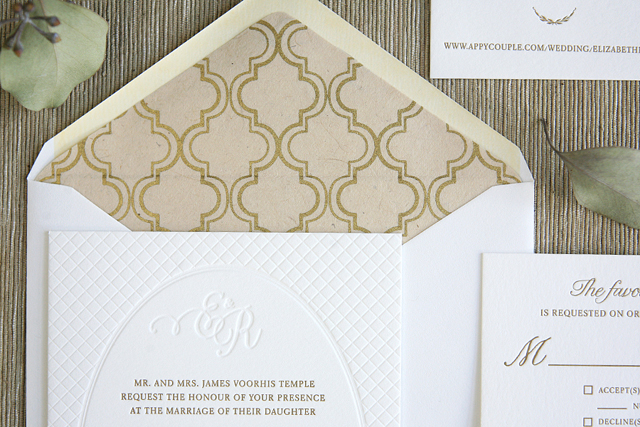
From Sarah: Elizabeth and Ricky’s garden-style wedding was a classic and elegant affair, with a hint of Southern charm. Their stationery suite design was inspired by the lush Spring florals used throughout their reception, and the trellis patterns found throughout the decor. With its understated style and gorgeously printed details, this suite quickly became one of my personal all-time favorites to date!

Elegant-Trellis-Wedding-Invitations-Foglio-Press-OSBP2

Elegant-Trellis-Wedding-Invitations-Foglio-Press-OSBP4

In order to reflect the couple’s classic yet natural style, we combined a traditional serif font with a handwriting inspired script, and created a simple monogram to carry from the save the dates through to their wedding day stationery pieces. The mix of pattern, texture and borders throughout each piece of the suite added interest and depth to an otherwise simple and minimal design style.

Elegant-Trellis-Wedding-Invitations-Foglio-Press-OSBP3

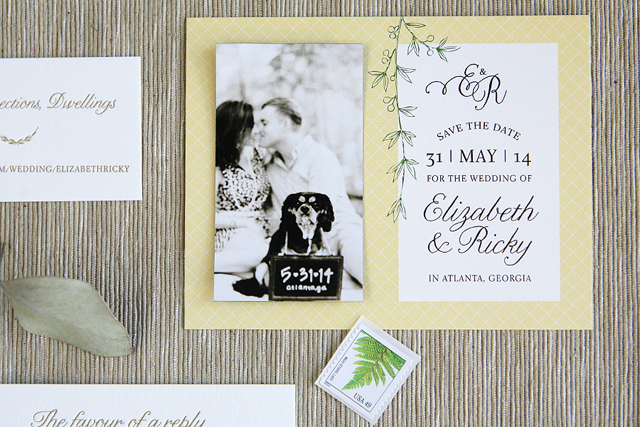
The groom was in favor of a photo magnet style save the date, but the bride wanted something more traditional. As a compromise, we printed the couple’s engagement portrait (including their favorite four-legged companion!) onto a wallet-sized magnet, and adhered the magnet to a more traditional printed save the date. The magnet could easily be removed from the thick paper backing as a memento, keeping the printed save the date in tact.

Elegant-Trellis-Wedding-Invitations-Foglio-Press-OSBP5

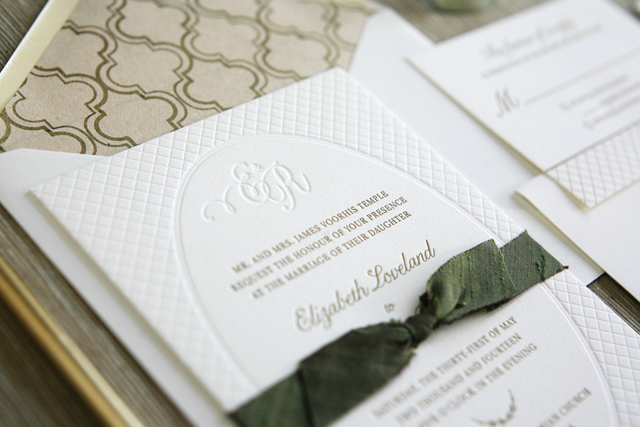
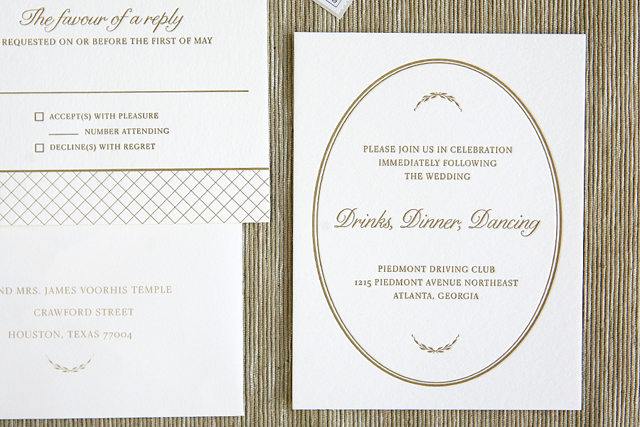
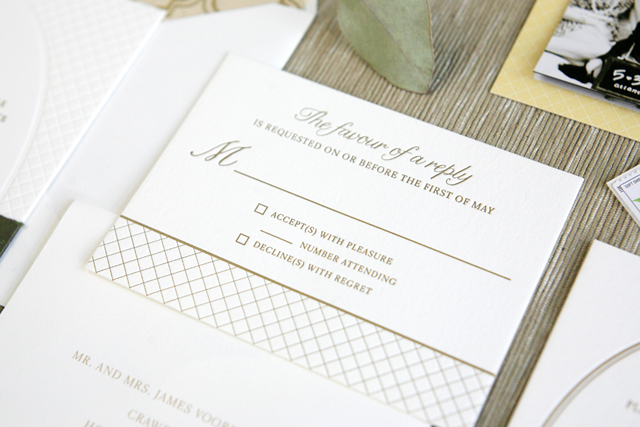
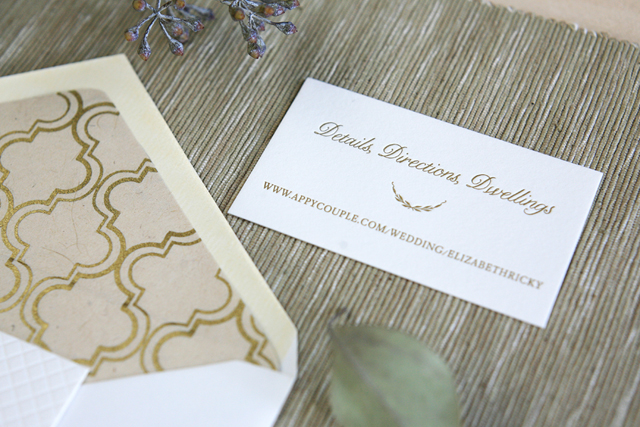
For the wedding invitation suite, it was all about elegance and high quality printing and materials. The invitation suite was letterpress printed for us by Mama’s Sauce on Crane’s Lettra – we used double thick, 220# stock for the main invitation to get the most out of the rich blind impression of the couple’s signature trellis pattern and monogram. The text and additional suite elements were printed in an antique gold ink, with simple garden-inspired printers ornaments scattered throughout. Finishing touches included an organic feeling, dupioni silk ribbon band in lush evergreen, and handmade paper envelope liner with a hint of gold shimmer.

Elegant-Trellis-Wedding-Invitations-Foglio-Press-OSBP7

Elegant-Trellis-Wedding-Invitations-Foglio-Press-OSBP8

Thanks Sarah!

Check out the Designer Rolodex for more tal­ented wed­ding invi­ta­tion design­ers and the real invi­ta­tions gallery for more wedding invitation ideas!

Photo Credits: Foglio Press

Brick + Mortar Q + A: Perfecting your Stationery Show Booth

OSBPEmilyMcdowellIllustration

Illustration by Emily McDowell for Oh So Beautiful Paper

Dear Emily, 

I was sketching out booth designs for the National Stationery Show and had a few questions (see below!)

xoxo, Sarah

Parrott Design Studio

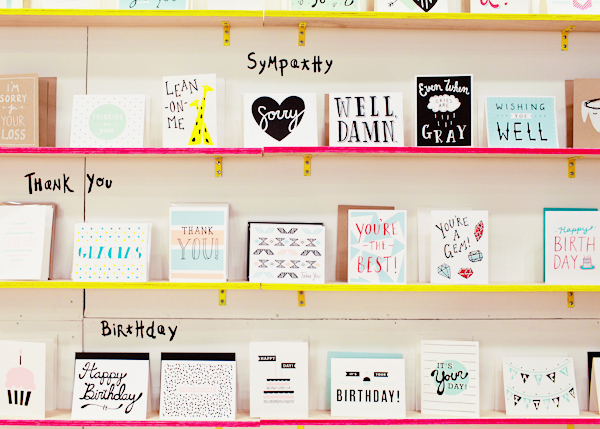
1. Do you find it helpful to label the card category (eg Birthday, Thank You) above/near the cards?
NSS 2014: The Paper Cub via Oh So Beautiful Paper

The Paper Cub uses their own signature lettering in a larger size, making it well branded and easy to read!

Labeling cards by category is a great idea, but make sure it integrates well into your booth. It should be well branded with the rest of your booth design, not a messy/half-done afterthought. These labels are your table of contents, and act as your megaphone (Hey! These are the cards/accessories I sell! Come in for a closer look) so use type that’s large enough to read if I’m standing in the aisle. Also, don’t feel constricted to the normal categories. Birthday, Thank You, Baby, Wedding, Sympathy are all important, but if you have an unusual category let us know what you call it, that can start a conversation. If you don’t create cards in traditional categories, think of this as a reminder to highlight or embolden your line in smaller sub-groups, so that buyers can view it in bite-size chunks.

2. I have never highlighted what is new and what is a best seller, but I found I was constantly pointing them out to buyers. Is it helpful for buyers to see this or is it a better idea to highlight these categories in their own section? 

NSS 2014: Fugu Fugu Press via Oh So Beautiful Paper

Fugu Fugu Press highlights new additions on their stickers with a different color, the perfect visual cue to buyers.

It’s a good idea to highlight new and best seller cards for obvious reasons, but I would be careful that these tags don’t become visual clutter. I like little flags/stickers that note new cards cards because this shows you’re coming up with fresh content. Noting “best sellers” may be smart, if you’ve done a significant volume of sales. But if you’ve never sold wholesale before, or only have a few stockists, it may be a subjective/possibly irrelevant distinction to the buyers you meet at the Stationery Show. By telling me what a best seller is, you’re giving a recommendation, so make sure you’re confident. I would always recommend a small sticker or flag next to the card, rather than creating a whole section to note new or best sellers. A mailer or email is a great way to send me a visual of all new cards, but at the Stationery Show, I want to see all of your birthday cards together, because I’m comparing them against each other to make my selections.

3.  A lot of exhibitors are taking orders digitally. I still love writing out an order and feel like too much can go wrong at the Javits (wonky wifi, computer error), etc. As a buyer, do you like leaving a booth with a physical piece of paper/receipt, or are you happy with an emailed order?  Or does it really matter as long as we take the order quickly and correctly?

It doesn’t really matter. Do the system you’re most comfortable with and do it well. I don’t care if you give me paper that I throw away, I do care if you lose my order. If you are doing digital orders, I would suggest sending an email confirmation asap. I’m making a lot of orders and I don’t remember what I ordered a day later, especially if there’s no physical record, this can lead to confusion a month later when my order arrives. If you are taking the order by hand, do your best to make it clear. Many of the paper orders I get are so messy, I can’t tell what I’ve ordered based on what vendors write down. Which ever way you do it, get it to the retailer clearly and as quickly as possible. (If you do go digital, it’s probably not a bad idea to have a backup system, just in case!)

4. Show Specials – I remember you asking me if I had one last year (I did not) and you were trying to maximize specials at the show and would order from me after if I didn’t have one (and you did!). I am thinking of offering one this year as I think it would help with not only new orders, but re-orders. We have been talking about this on the Tradeshow Bootcamp forum on Facebook and we all seem to agree they are a good thing!

I just think show specials are smart. They are a marketing tool. They serve as: 1) a nice way to say “hey, this is a special time, thanks for coming out!” 2) a good incentive for a buyer who is on the fence about placing an order at the show, or 3) A great way to make existing retailers take their credit card out again. If I know I’ll be buying from you later in the year, I’ll certainly do it now with financial incentive. I talked about show specials in this post, but essentially, I think there are two smart specials: 1) Free shipping 2) A percentage off or free product for buying a little more. How do you decide what this should be? Look at your average order – is it $200, then make the incentive 10% off for orders over $250; or order $250 and get $25 in free product; or order 12 dozen cards get 6 cards free. In other words, you’re giving me a benefit, while giving me the incentive to order a little more than I might normally. Different incentives will appeal to different retailers. If you have a handful you trust, why not ask them now what they’d respond to at the show? (I would love to know some of the ideas that you’ve discussed in Tradeshow Bootcamp!)

5. I would love to hear if you have further thoughts on how booths are laid out and what you, as a buyer, find helpful when you have a million booths to see and what makes shopping a breeze!

Well, since you asked, I do have a few:

  • I would really encourage sellers to display their cards without sleeves this year. I know you run the risk of getting them damaged, but it just looks so much better.
  • Please make your booth numbers easy to read. Consider a nice, bold font that can been seen from at least several booths away.
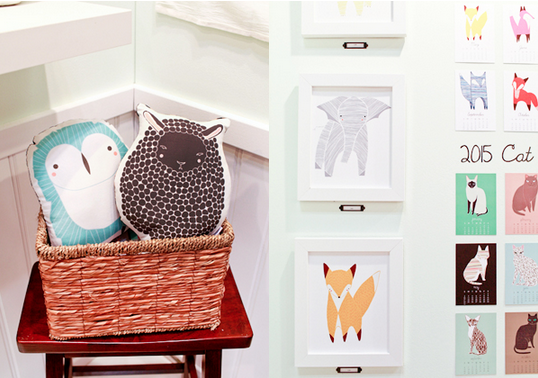
  • Showcase your work. To me, this means framing your prints and showing your accessories in use. Your booth is a mini-shop, merchandise it!
National Stationery Show 2014: Gingiber via Oh So Beautiful Paper

Gingiber’s pillows are stuffed and cozy and her prints are framed so you can picture them on your walls.
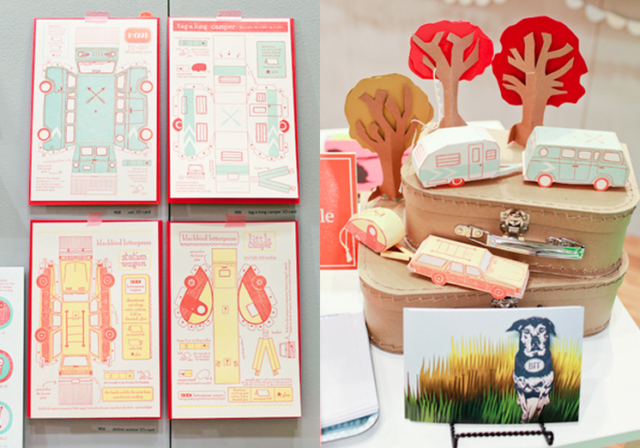
National Stationery Show 2014: Blackbird Letterpress via Oh So Beautiful Paper

I think we can all agree, it’s helpful to see the Blackbird Letterpress 3D cut + fold vehicles when they’re actually put together.

  • Find a place for calm within your booth: Maybe it’s one wall with just your name or a large counter with nothing on it. In a day, I see thousands of cards, prints and accessories. My eyes are exhausted. Smart blank spaces will stand out more than anything. Your deep blue wall from the Stationery Show last year is a great example of this:
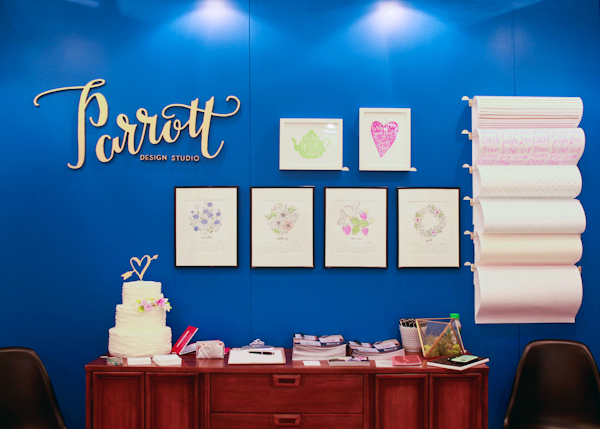
National Stationery Show 2014: Parrott Design Studio via Oh So Beautiful Paper

  • Finally, do that thing you’re excited about and a little afraid of doing. You know your line and your aesthetic better than anyone else. When in doubt, when you’re sleep deprived and questioning everything, ask yourself: what you I best? What do I love doing? Then trust it. Add it in to your booth, or pump up an element that seems to be working. You’ll love it, and you’ll be memorable because of it.

All images swiped from Nole’s prior National Stationery Show recaps. They’re great, I’d totally suggest perusing them now. See you in a few weeks!

xo Emily