DIY Rubber Stamp Pattern Envelope Liners

It’s the ladies of Anti­quaria, back with another cre­ative DIY project for you!  Today they’re sharing a fun tutorial on how to make DIY envelope liners using rubber stamps!

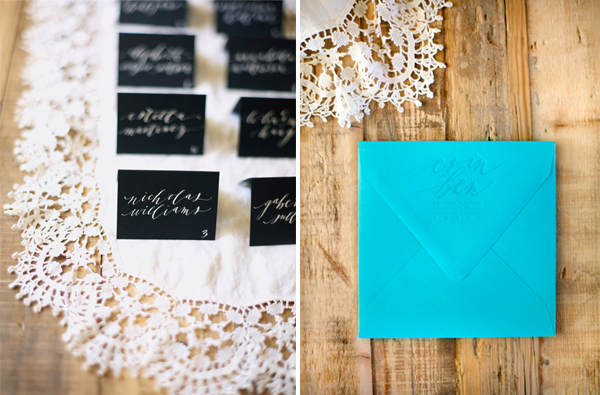
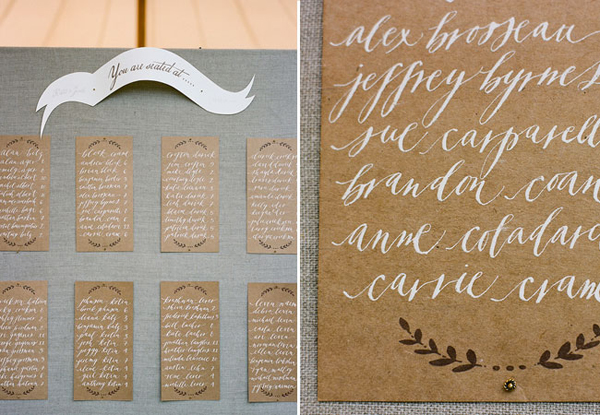
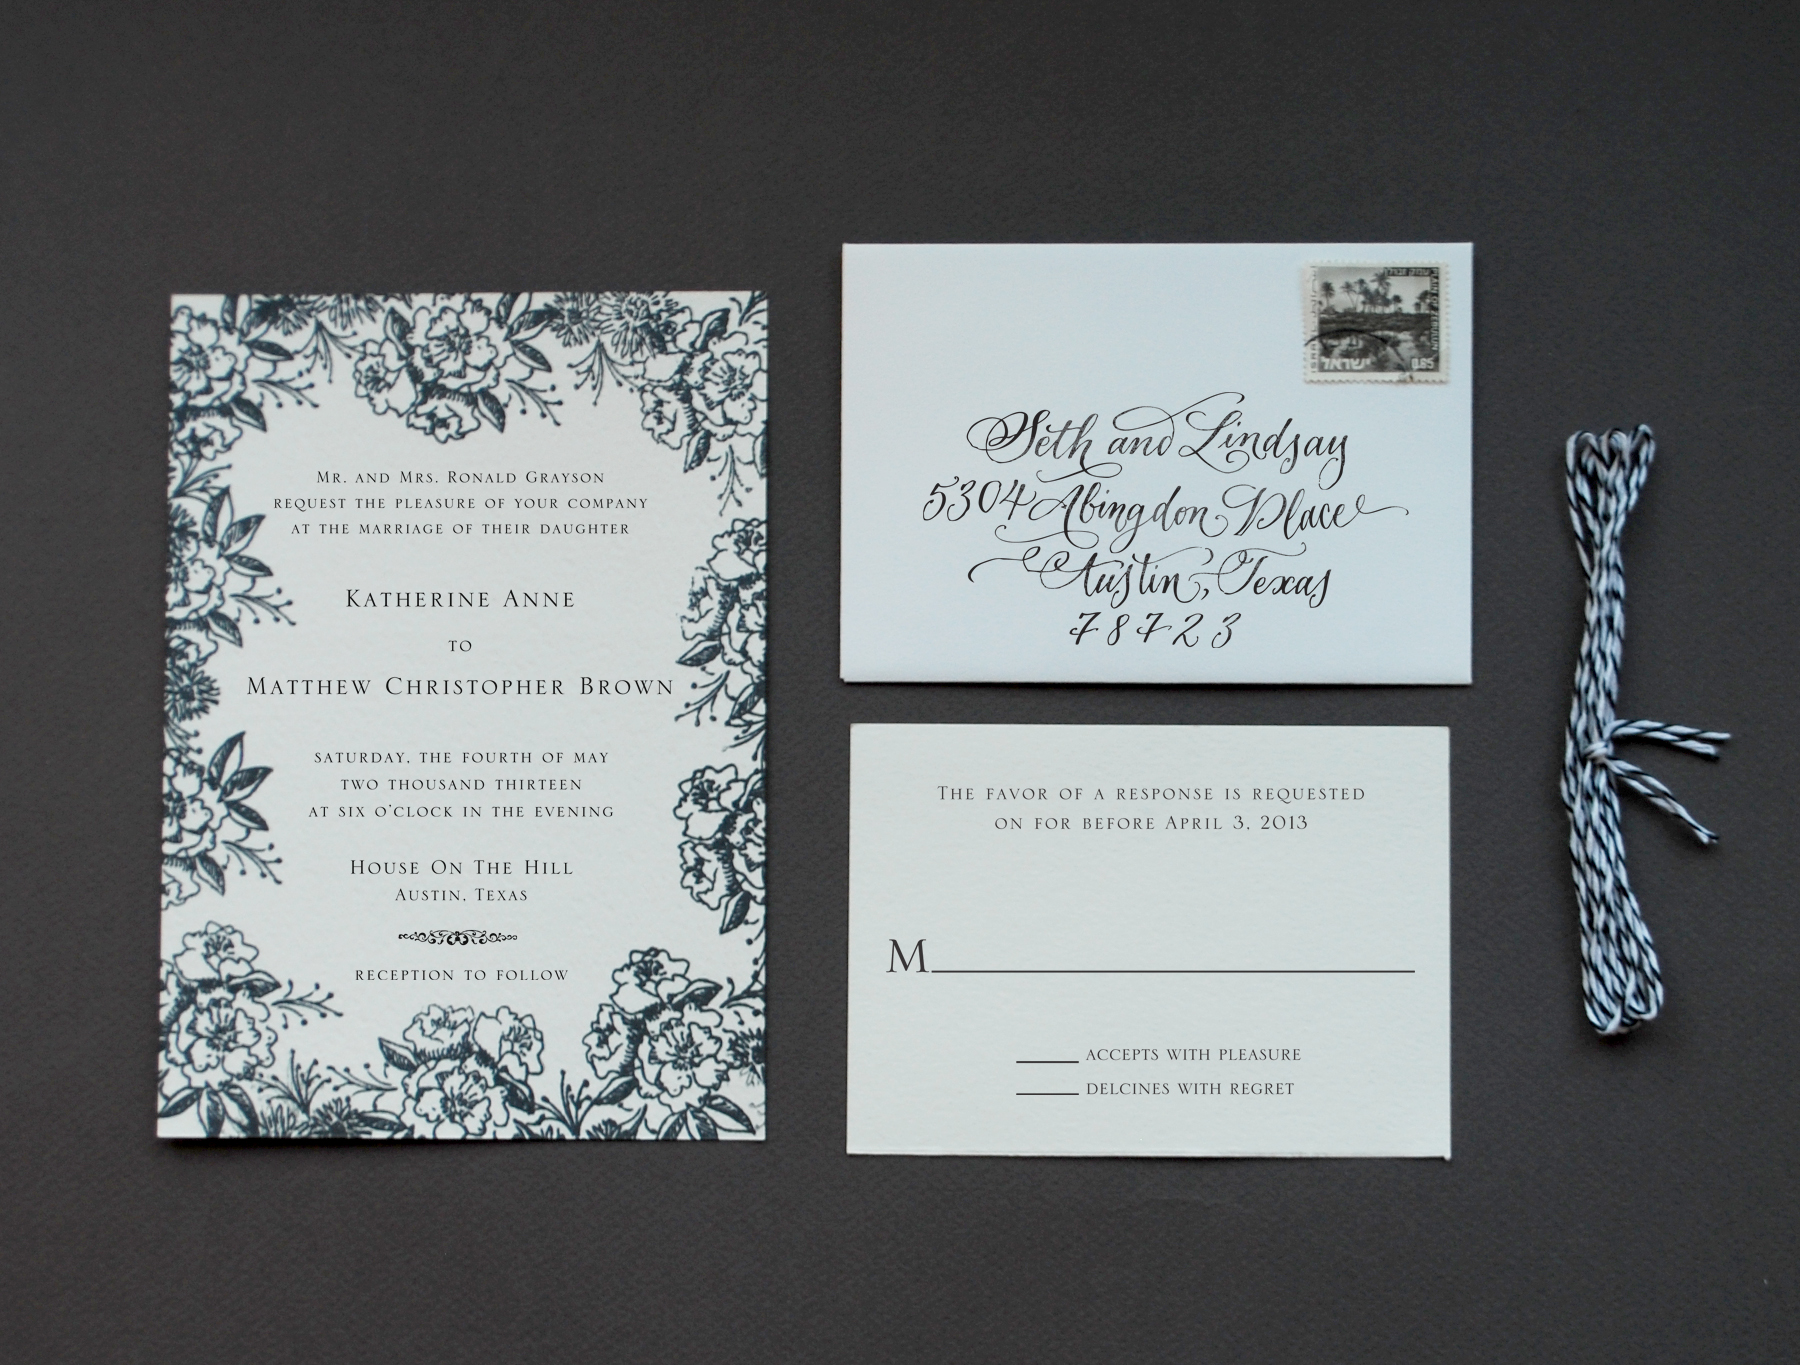
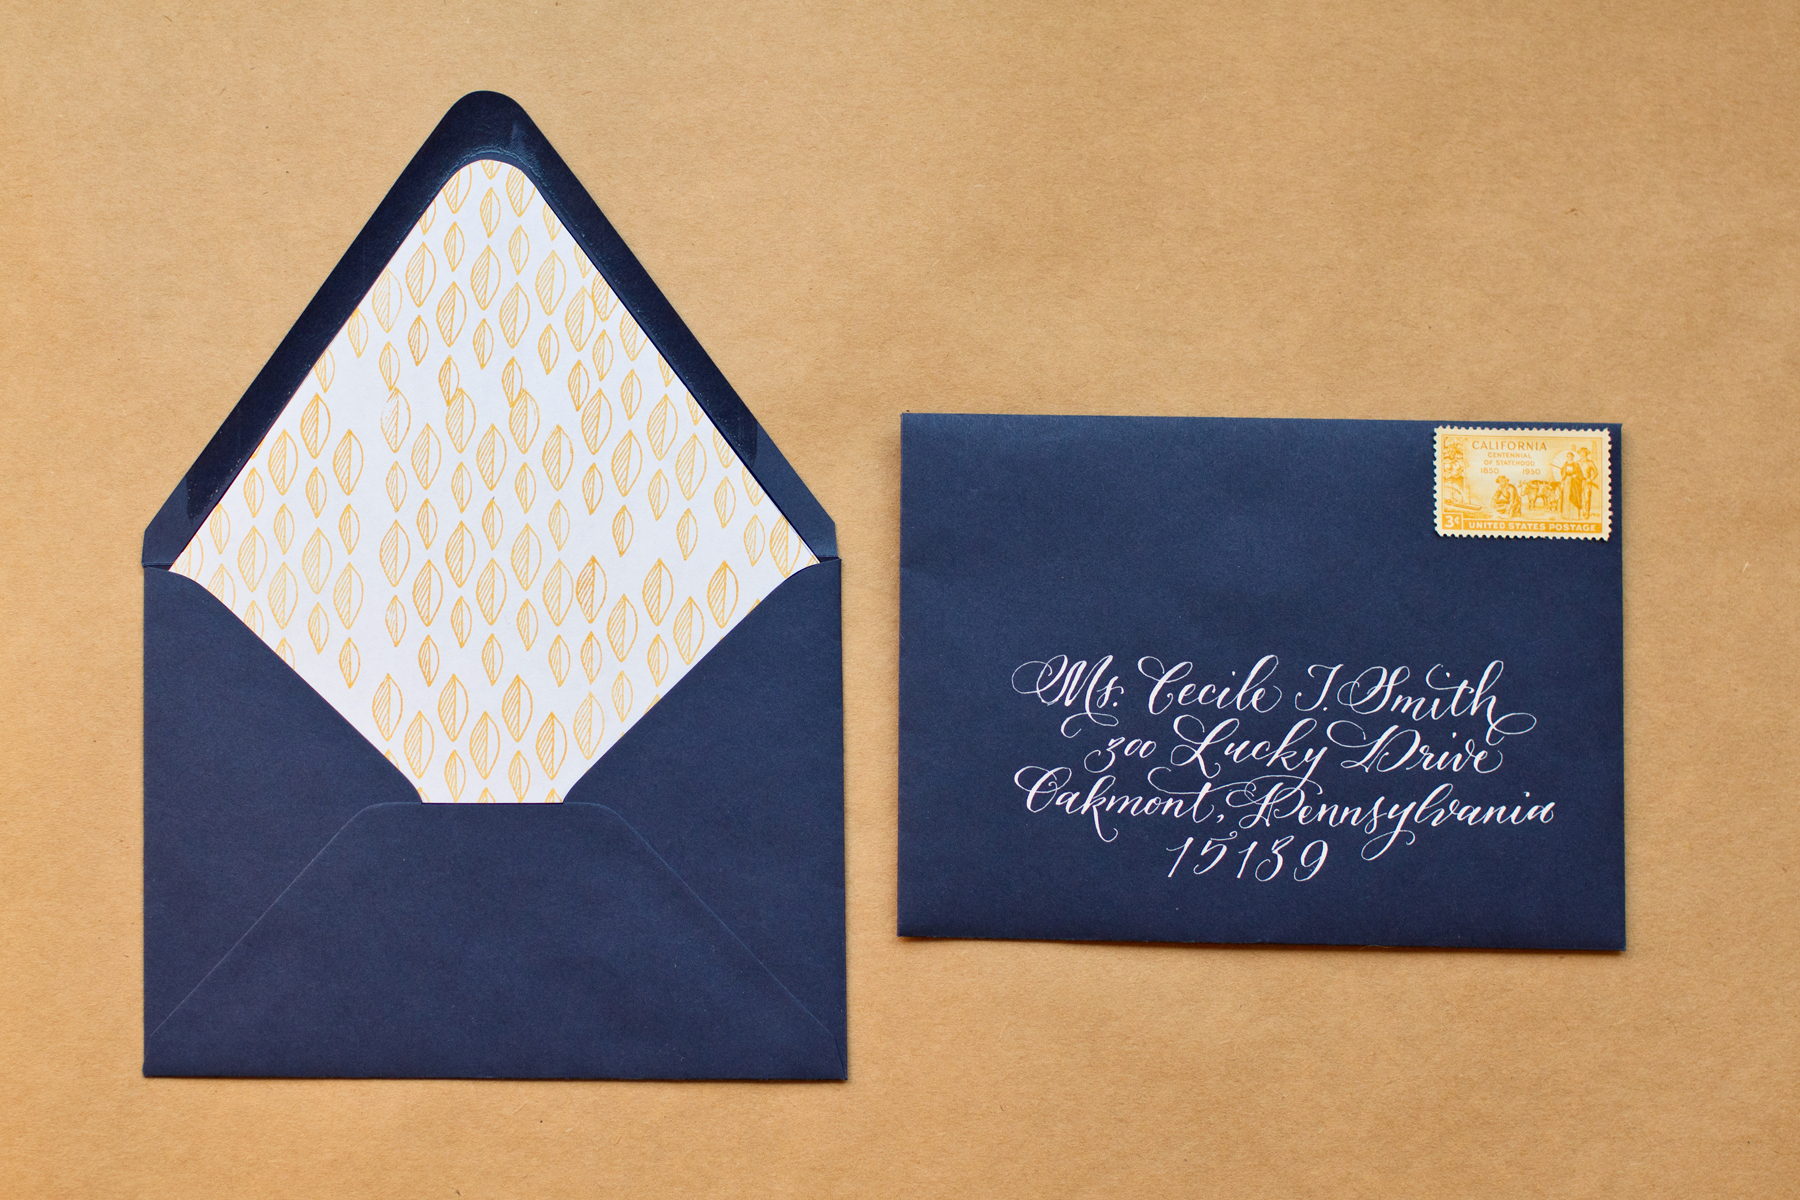
The finishing touches make your stationery special and unique.  It’s the little things – like vintage postage, twine, washi tape, calligraphy and envelope liners – that can turn a basic invitation, card or letter into a show stopper.  At Antiquaria, we love envelope liners… but they can be mighty expensive, so we figured out a way to get the look of decorative paper on a shoestring budget.  Plus it’s super easy!

DIY Tutorial: Rubber Stamp Envelope Liners

DIY Tutorial: Rubber Stamp Envelope Liners

DIY Tutorial: Rubber Stamp Envelope Liners

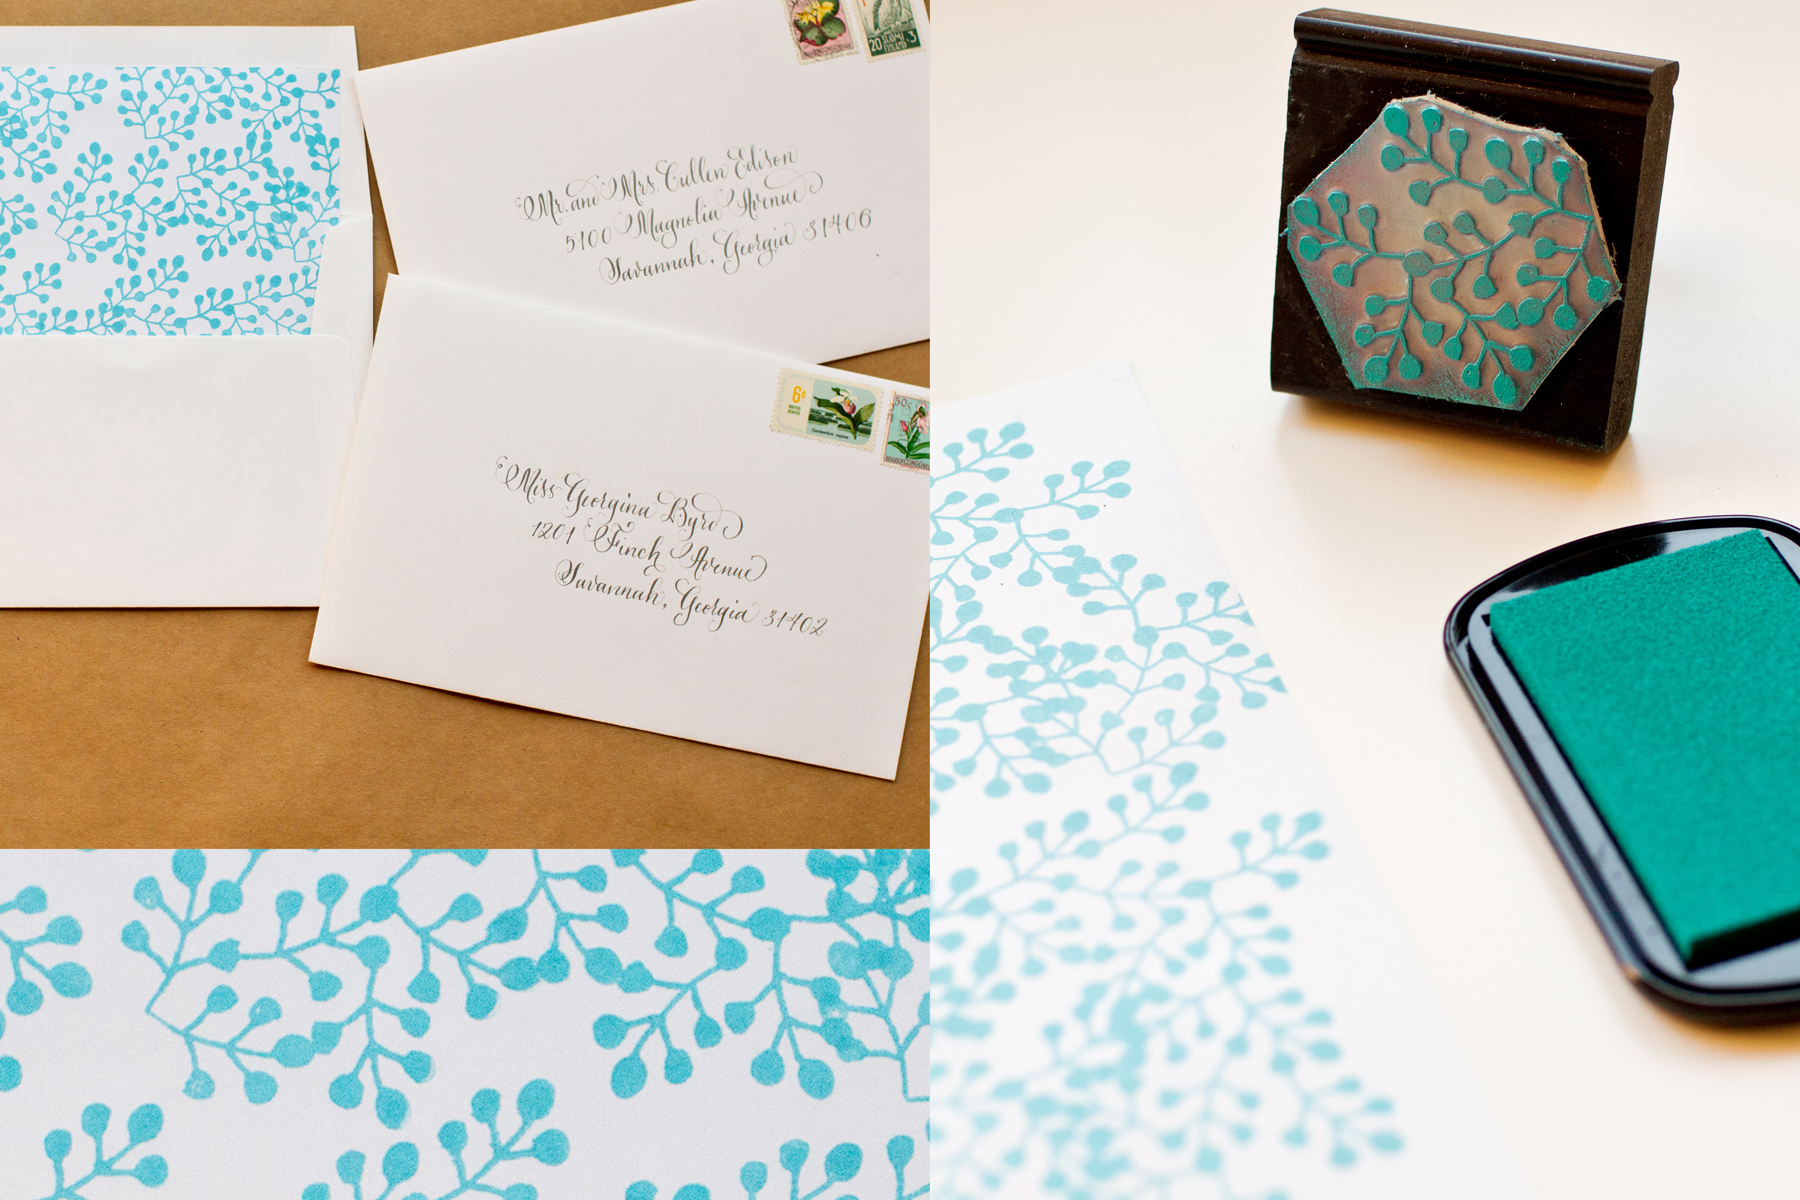
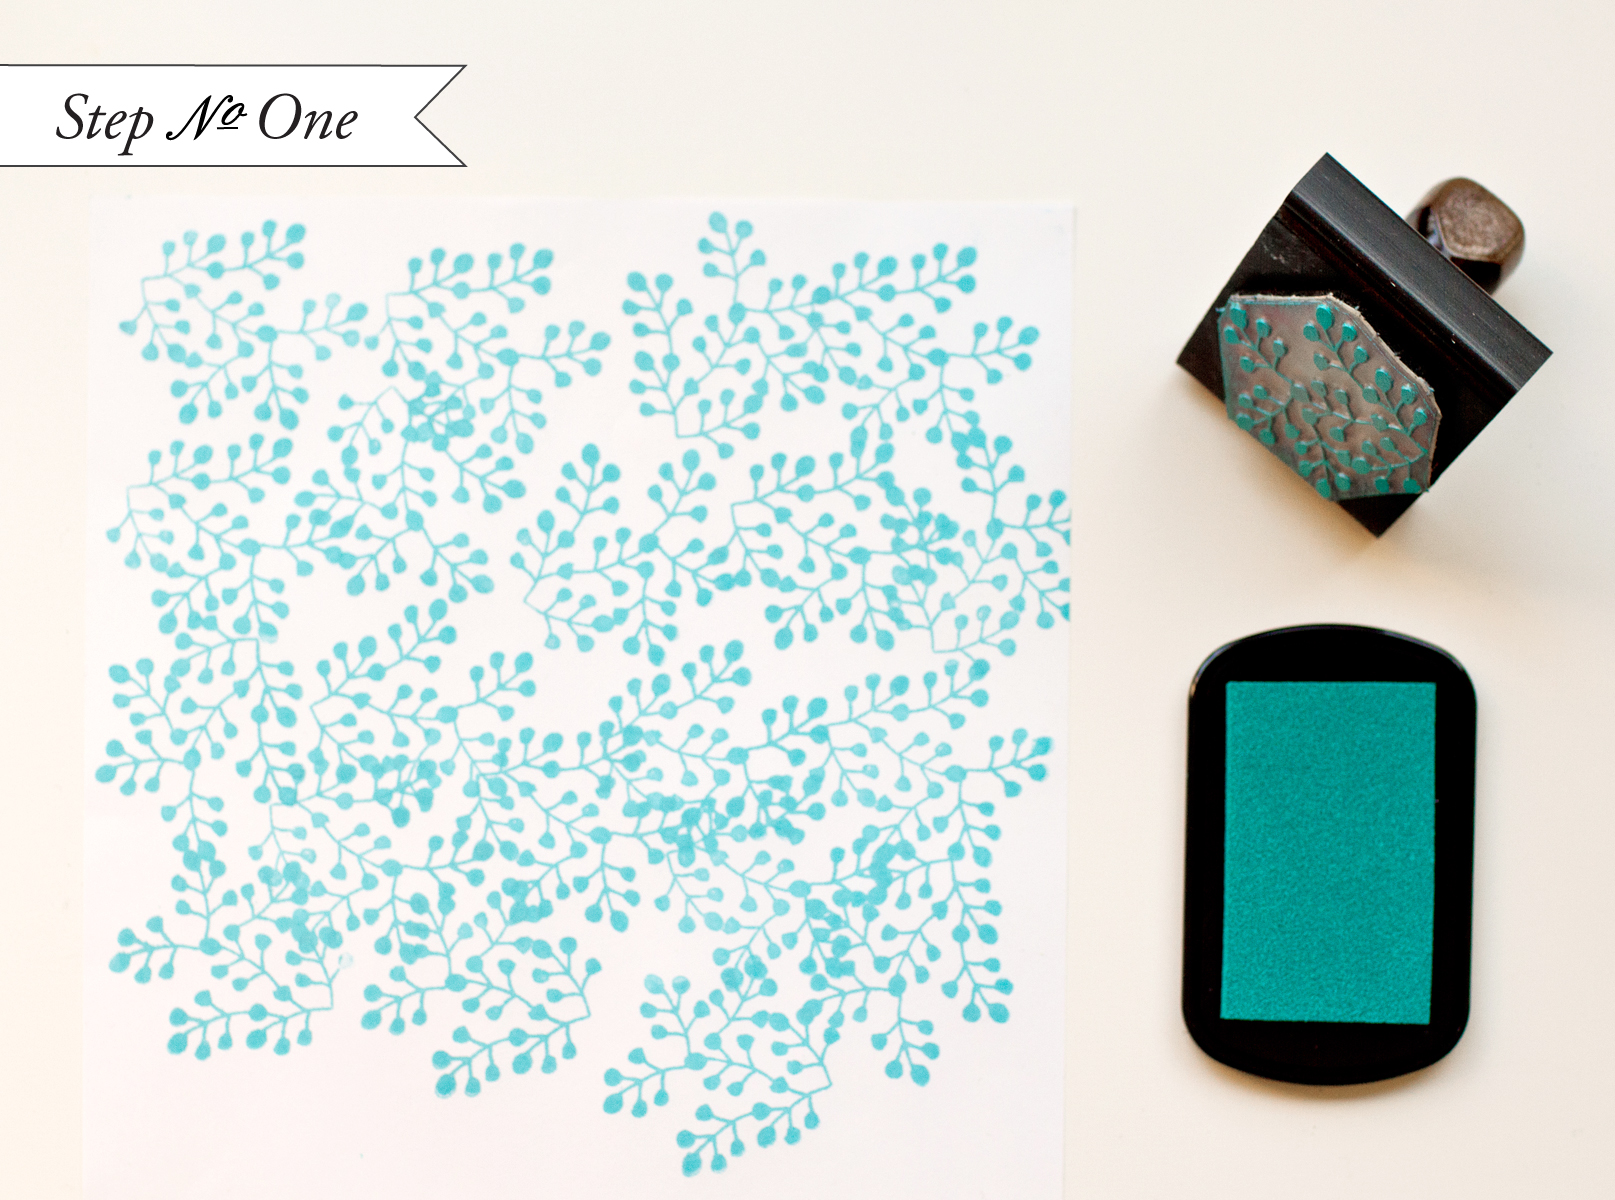
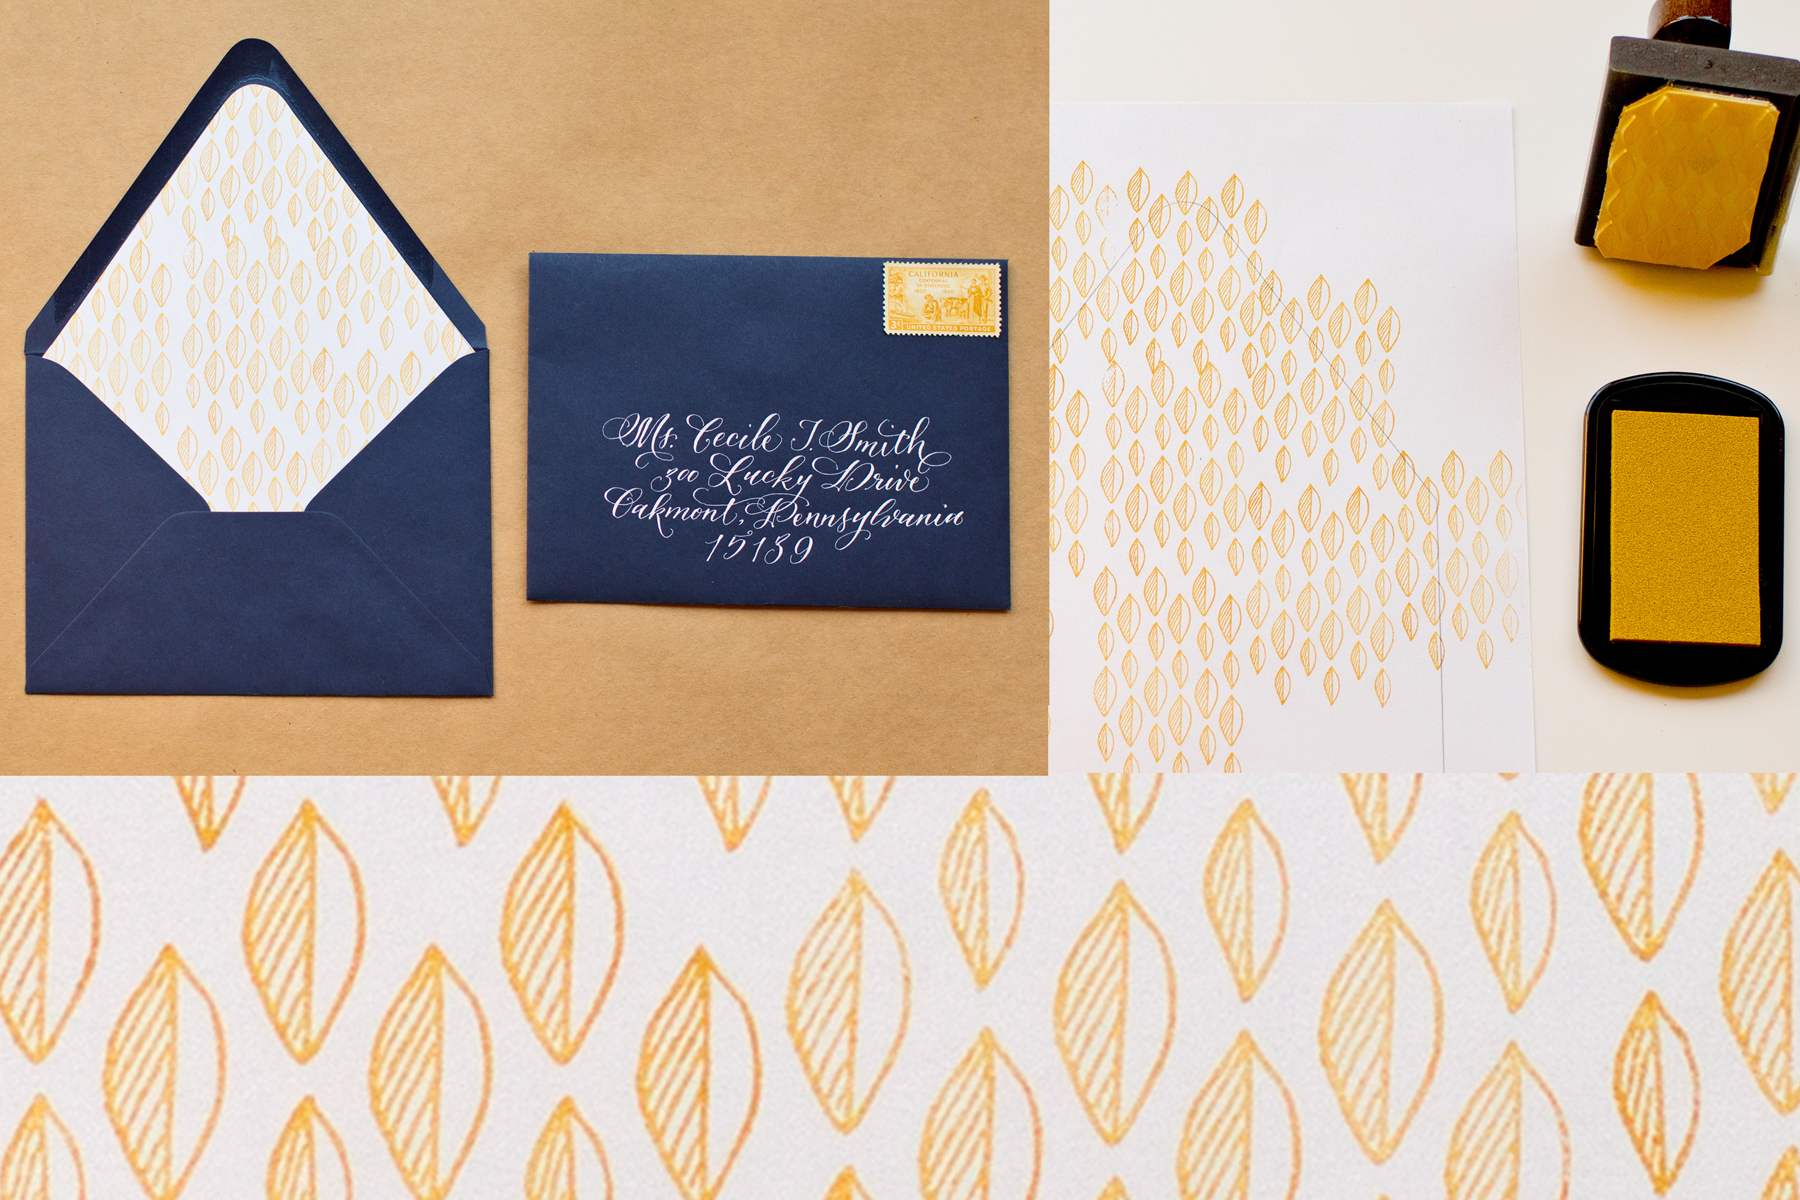
Step 1: Lay your sheet of text weight paper out on a hard surface.  Choose your stamp (we used our Mod Fern Pattern stamp), and ink it well.  Print your pattern stamp in an orderly fashion on the paper, making sure you stamp enough area so that the images will bleed off once the liner is cut.  In general, you will not want to overlap the stamped images (but don’t worry if they do).

DIY Tutorial: Rubber Stamp Envelope Liners

Step 2: Cutting your liner… the technique will all depend on what style of envelope you choose.  You can find envelope liner template kits at Paper Source to fit their envelopes.  To use these, trace the template and cut along the line.  If you’re using square envelopes, you can have your local print shop cut paper down to your envelope specifications or draw out the dimensions and cut your own!

DIY Tutorial: Rubber Stamp Envelope Liners

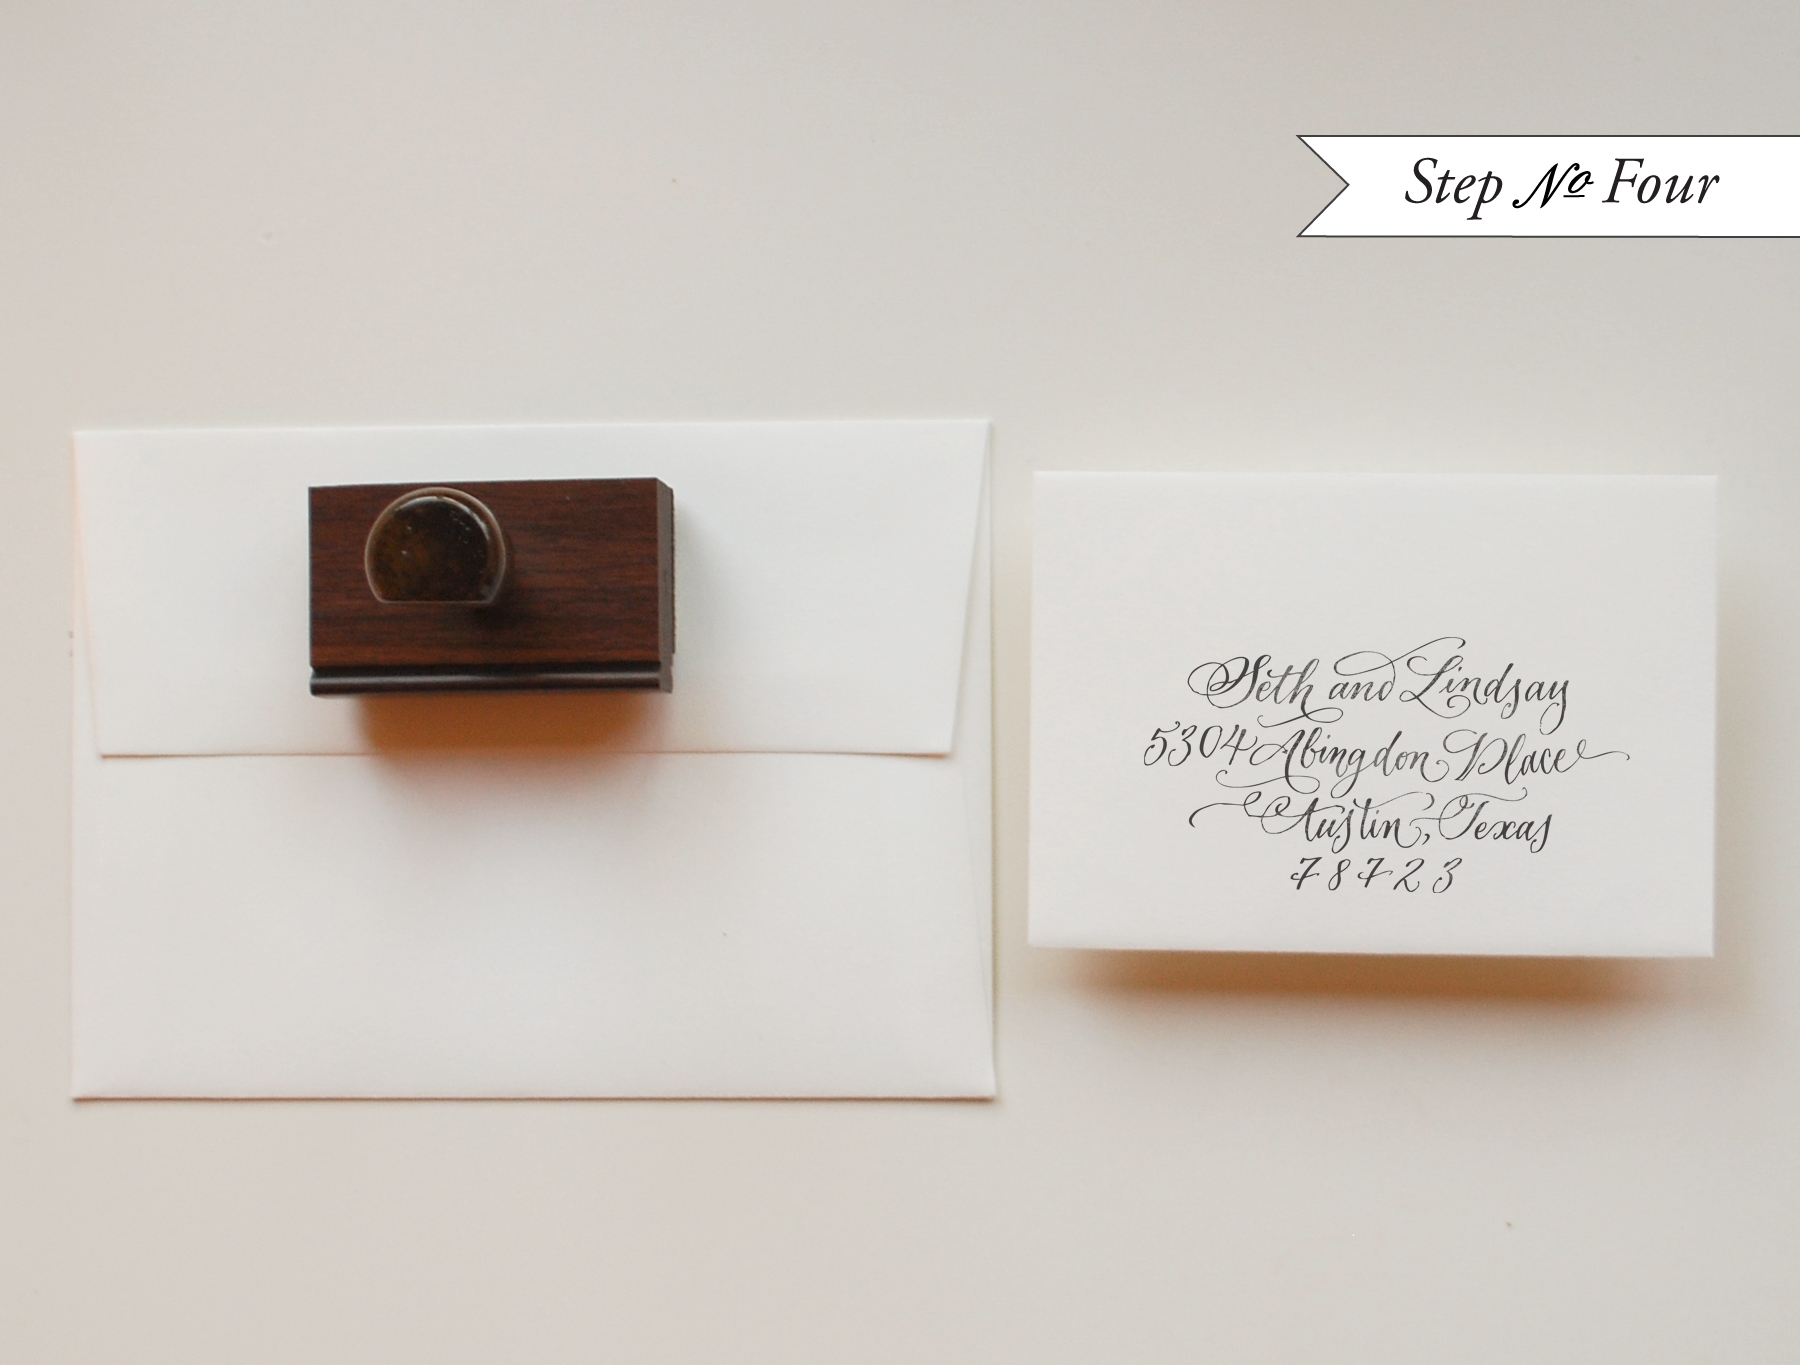
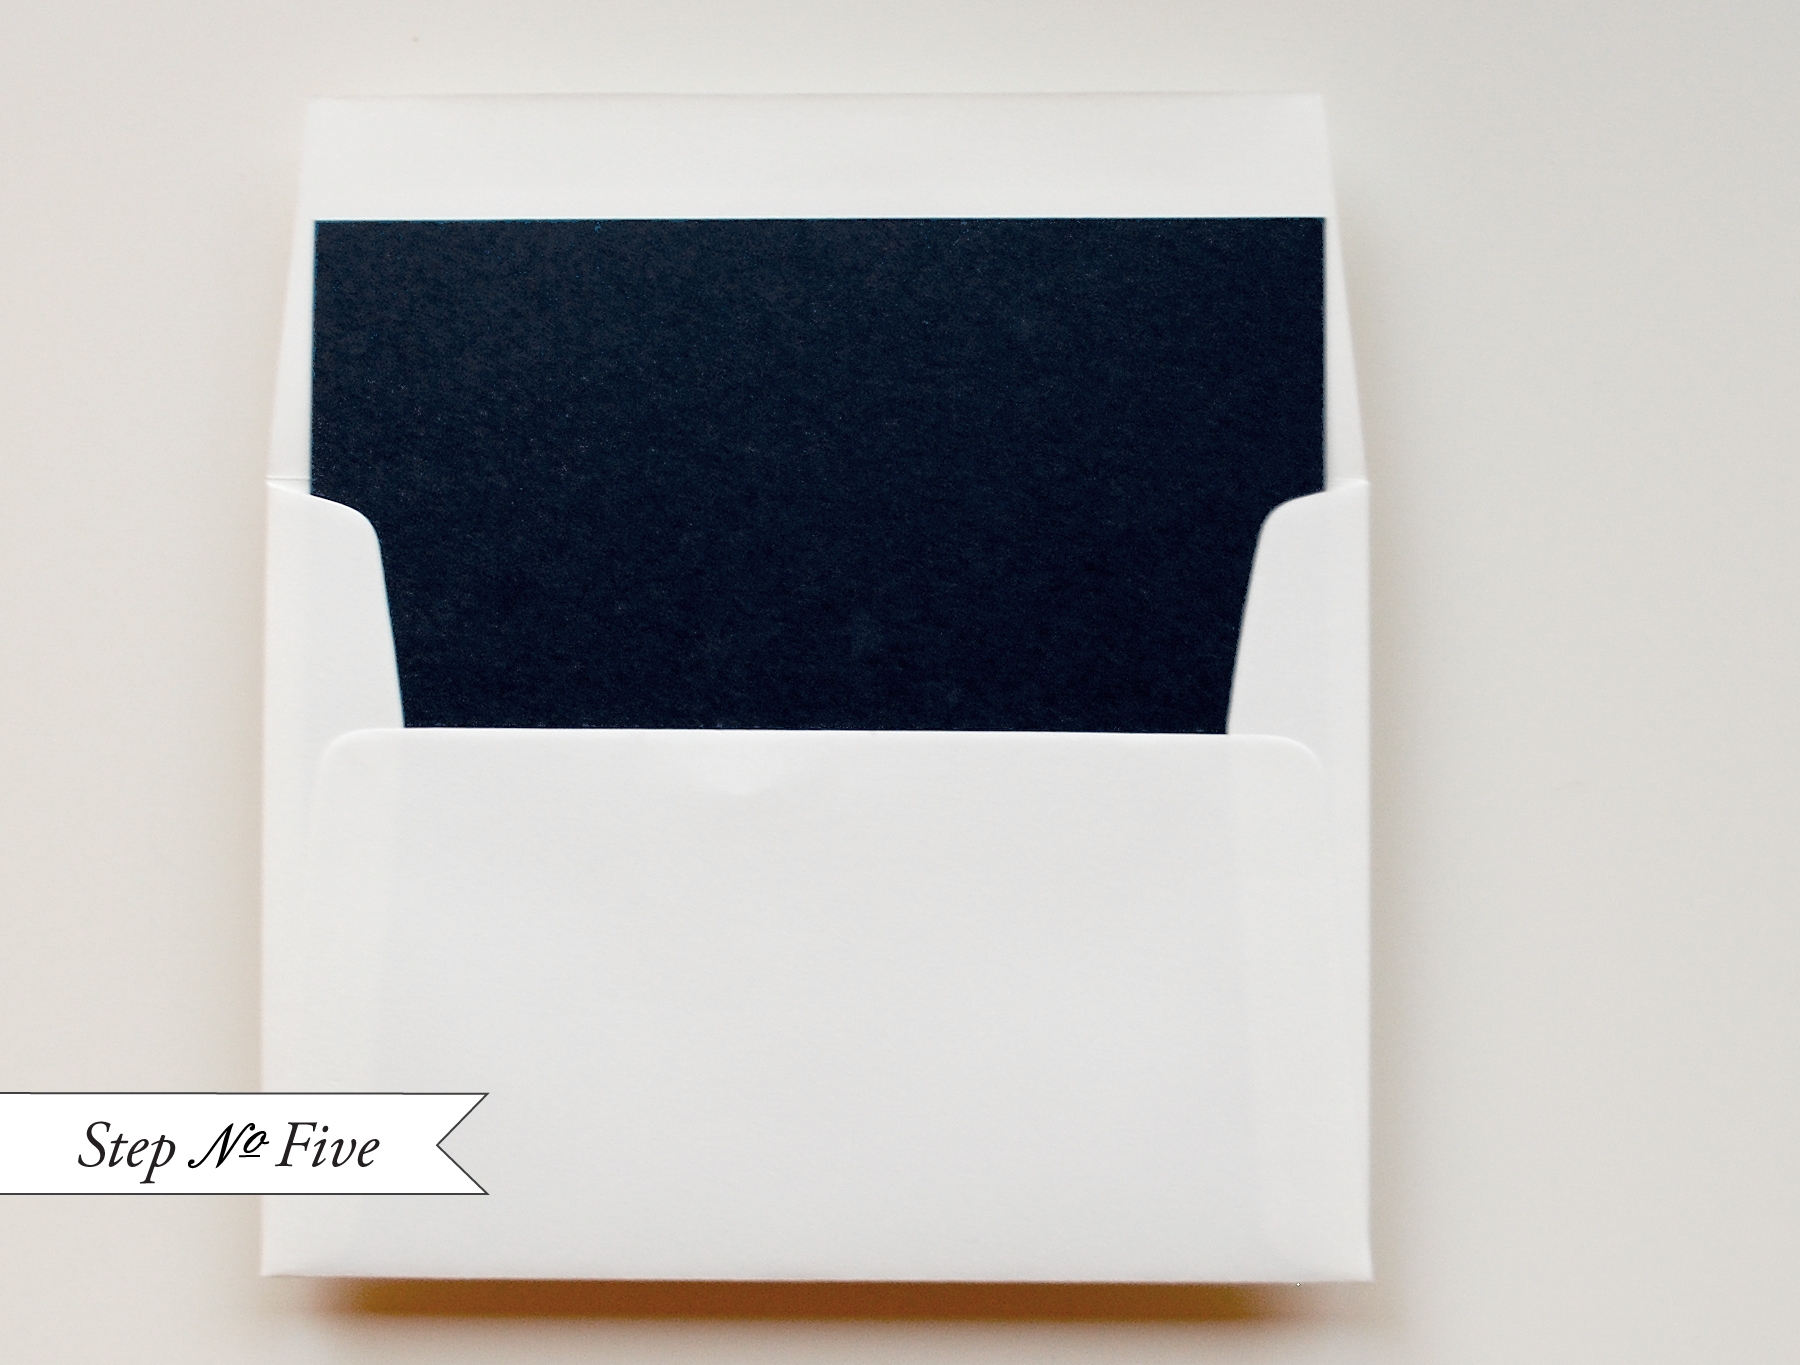
Step 3:  To insert your liner,  place a line of double stick tape or stick glue across the top (or around the top triangle), slide them into position and press to secure.  Fold at the crease with a bone folder to get a nice, crisp edge.

DIY Tutorial: Rubber Stamp Envelope Liners

Materials

Pattern Stamps – we used Mod Fern Pattern stamp (in turquoise), Repeat Leave Pattern Stamp (in ochre)

Stamp Pad

Envelopes

Double Stick Tape or Stick Glue

Bone Folder

Anti­quaria is a mem­ber of the Designer Rolodex – you can see more of their beau­ti­ful work right here!

Photo Credits: Intertwyned for Antiquaria

Calligraphy Inspiration: Neither Snow

I have been eagerly awaiting to share some new work of this month’s calligrapher with you.  As one of my top calligraphy crushes, I love to check out Mara Zepeda’s blog and swoon over her client work.  Mara started Neither Snow, a calligraphy studio, in 2009.  Over the last three years she’s had the pleasure of working on tattoos and commercial identities, along with collaborators, designers and countless couples.  In September 2012, Mara will be moving to Florence, Italy, where she’ll spend the year exploring how her calligraphy can be translated onto different surfaces for weddings, events, installations, displays and custom projects. Julie

Neither Snow invitation suite

Neither Snow Calligraphy

Clean and simple yet highly expressive, Mara’s calligraphy is often all that’s required to create beautiful details for your wedding and evoke a sense of whimsy.

Neither Snow seating chart

Neither Snow detail - decal on fabric

Neither Snow decal notebooks

A glimpse into Neither Snow’s future; decals, fabric, laser cut, glass etching, ceramic, screenprinting, embossing and foil are just some of the materials and processes Mara will be experimenting with during her time in Florence.

Neither Snow constellations

Mara creates some truly gorgeous pieces, like this custom seating “star” chart.  For this wedding, she worked with the couple, Mr. Boddington’s Studio and the wedding designer/stylist Jolene Sullivan for nearly a year.  Below is a wonderful detail of her work and a couple’s wedding vows.

Neither Snow detail - vows

I can’t wait to see what’s in store for Neither Snow with a year abroad and medium explorations. You’ll be pleased to know Mara will still be doing client work, and looks forward to hearing from those with wildly creative and grand visions of how to employ the written word on just about any surface they can dream up (in addition to paper, of course!).

Photo and Printer Credits: image no. 1 printer: Paisley Tree Press and no. 2 (right) printer: Evince Design, both shot by Jose Villa; image no. 3 shot by  A. Bryan Johnson Photo; image no. 4 & 6 shot by Neither Snow; image no. 5 by Rylee Hitchner Photography and  Joy Thigpen; image no. 7 shot by Tec Petaja

Molly Jacques Calligraphy Business Cards + Artwork

I love the classic beauty and elegance of these business cards from calligrapher and illustrator Molly Jacques.  Molly frequently works with the ladies of Sugar Paper (which is where I first became acquainted with Molly’s work) and her calligraphy and illustration portfolio is simply stunning.  The ladies of Sugar Paper letterpress printed Molly’s double-sided design in their signature pool ink.  Gorgeous!

Molly has a beautiful shop with calligraphy address stamps and some truly beautiful prints – I just couldn’t resist sharing these two prints in particular:

Thanks Molly!  You can see more of Molly’s illustration and calligraphy work right here!

Business Card Design: Molly Jacques

Letterpress Printing: Sugar Paper

p.s. Check out more business card ideas and inspiration right here!

Photo Credits: Molly Jacques

{happy weekend!}

Happy Friday everyone!  Despite some truly gorgeous spring weather over the last couple of days, I’m actually feeling like I might be coming down with a cold – so I’m going to head out a bit early to rest and recuperate.  I hope you all have fun plans for the weekend!  But in the meantime…

Constellation-Place-Cards-Neither-Snow-Calligraphy

Photo Credit: Tec Petaja, Calligraphy by Neither Snow, Paper Goods by Mr. Boddington’s Studio

…a few links for your weekend!

This week on Oh So Beautiful Paper:

As usual, we have a fun cocktail coming up for you this afternoon, so check back a bit later for the recipe!  I hope you all have a wonderful weekend, and I’ll see you back here on Monday!  xoxo

DIY Rubber Stamp Floral Wedding Invitations

It’s the ladies of Anti­quaria, back with another cre­ative DIY project for you!  Today they’re sharing a fun tutorial on how to make gorgeous rubber stamp wedding invitations with a floral motif!

We love the versatility and custom look that rubber stamps can give your invitation suite.  This week, we wanted to show how the same stamp designs can lead to two very different wedding invitation suites: one designed for a festive tropical bash, and the other for more traditional, sophisticated affair!  It’s as simple as changing the stamp pad and envelope colors!  Let us show you…

DIY Tutorial: Floral Rubber Stamp Wedding Invitations

Option 1: For the tropical fete… shades of coral, mango, and berry make the floral border.  Lovely pool colored envelopes complement the suite.

DIY Tutorial: Floral Rubber Stamp Wedding Invitations

Option 2: Traditional black and white convey elegance and sophistication.

DIY Tutorial: Floral Rubber Stamp Wedding Invitations

Step 1:  You’ll want to stamp your invitation wording first… it makes things much more simple.  Ink your stamp (we used our classic invitation stamp) thoroughly, and center it over your paper.  Press firmly but moderately, using the handle as your primary pressure point to avoid an uneven print.  Let dry.

DIY Tutorial: Floral Rubber Stamp Wedding Invitations

Step 2: Put a sheet of regular text weight paper underneath your already printed invitation. Using your border stamps, (we used our camellia pattern stamp, daisy pattern stamp and small leaves pattern stamp) begin stamping the motifs around the border, making sure not to cover any text.  Go in a clockwise pattern and stamp the images sparsely first… you can always come back in and add more in each circular pass.  It also helps to stamp off of the page, giving the invitation a full bleed effect.  It  would be wise to start with your largest motif and move to the smaller ones to fill in the border.  If you are using multiple colors, be certain to make the overall border balanced in color and design.

DIY Tutorial: Floral Rubber Stamp Wedding Invitations

Step 3: Print your reply card (we used our classic reply card stamp) in the same manner as you did the invitation text.  If you like, you can also add your floral motifs to this card, like in the tropical suite, or keep it simple, as shown above.

DIY Tutorial: Floral Rubber Stamp Wedding Invitations

Step 4: Stamp your return and reply addresses (we used our calligraphy return address stamp) on your envelopes.  You can re-use the stamp long  after your wedding is over… maybe on all those thank you notes!!!

DIY Tutorial: Floral Rubber Stamp Wedding Invitations

Step 5: We’ve chosen to add a black text weight paper liner to the outer envelope.  This is a great way to bring in some additional color to the suite and to create a nice balance.  It’s simple to do as well… you can find envelope liner template kits or pre-cut liners at Paper Source and local craft stores.  If you’re using square envelopes, you can also have your local print shop cut paper down to your envelope specifications.  Then just put a line  of double stick tape or stick glue across the top, slide them into position and press to secure.  Fold at the crease with a bone folder to get a nice, crisp edge.

DIY Tutorial: Floral Rubber Stamp Wedding Invitations

Now all that’s left is to tie the suite together, address them and hand them off to your post office to deliver to your lovely guests!!

Materials:

For the classic invitation suite

Classic Invitation Stamp

Classic Reply Card Stamp

Calligraphy Return Address Stamp

Camellia Pattern Stamp

Daisy Pattern Stamp

Small Leaves Pattern Stamp

Stamp Pad – in Black

Cover Weight Paper, cut to A7 (5″x7″) and 4bar (3″x5″)

A7 Envelope

4bar Envelope

Liner paper in black, cut to size

Double Stick tape

Twine – in black and white

For the tropical invitation suite

Classic Invitation Stamp

Classic Reply Card Stamp

Calligraphy Return Address Stamp

Classic Monogram Stamp

Camellia Pattern Stamp

Daisy Pattern Stamp

Small Leaves Pattern Stamp

Stamp Pad – in Coral, Mango Tango, Magenta and Antique Pewter

Cover Weight Paper, cut to A9 (5.5″x8.5″) and 4bar (3″x5″)

A9 Envelope – in Pool

4bar Envelope – in Pool