DIY Rubber Stamp Calling Cards

The ladies of Anti­quaria took a quick break to relocate to California (congrats ladies!), but today they’re back with another fab­u­lous and cre­ative DIY project!  This week they’re here with three options for DIY rubber stamp calling cards!

After a studio relocation and move…we are back with more DIY stamp tutorials!!  This week, we are exploring the world of calling cards, a fun and unique way to make a lasting impression on someone you’ve just met.  By using a calling card rubber stamp, you can customize and really make them reflect you!  Also, because you can make them in small batches, you can change their design on a whim and reflect your current mood & style.

To create these three calling cards, we adapted techniques from our previous DIY posts (and one sneak peek).

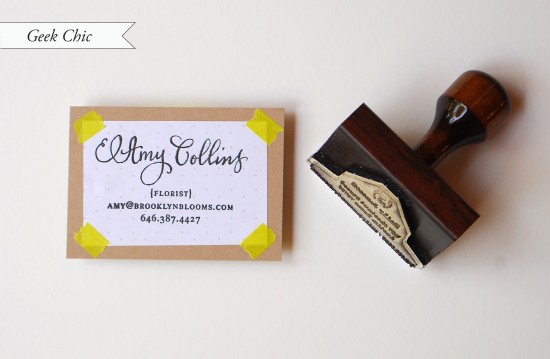
Our Geek Chic tutorial, is super easy and uses very inexpensive and resourceful materials!!

1. Find vintage, or download & print (we used Hex Dot for this calling card) graph paper. Cut into 2×3″ rectangles.

2. Cut kraft colored card stock into 3.5 x 2.5″ rectangles.

3. Ink stamp (we used our Calligraphy Accent Calling Card stamp) with desired color and make print using even pressure on a hard surface.

4. Using fun colored or patterned washi tape, affix the stamped graph paper to the kraft paper backing. (If more security is desired, use double stick tape to affix the two together and use the washi tape as decoration)

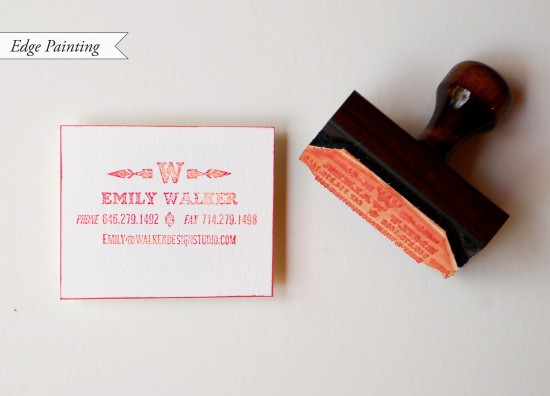
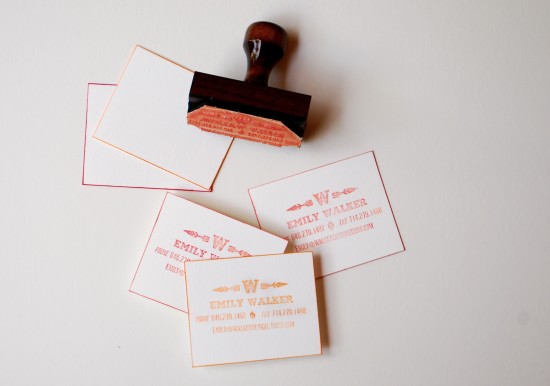
As a teaser for our next Save the Date tutorial, this calling card uses stamp pad edge painting to make the cards really pop.  This technique is so simple, you won’t believe it!

1. Using a heavy cotton paper, cut into 2.5×3″ rectangles.

2. To make the mixed ombre stamp image, use 2 different but similarly shaded colors (we used a mix of orange & red, one dark, one light).  Ink the stamp (we used our Navajo Calling Card stamp) lightly in the darker of the two, then ink over it in the lighter shade.  Stamp image with even pressure on a hard work surface.  Let the images dry overnight.

3. To paint the edges, grasp each card in the middle.  Drag the edges through your stamp pad, applying even pressure to ensure an even border…it’s that simple!!!

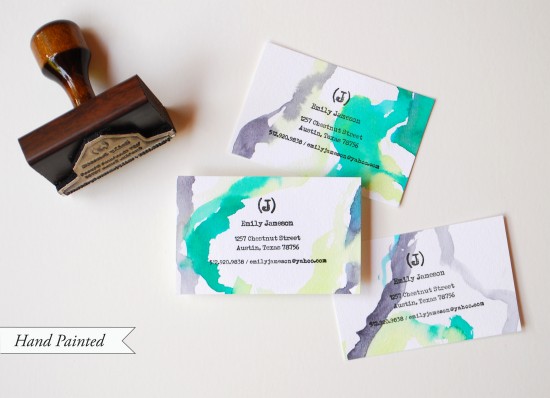
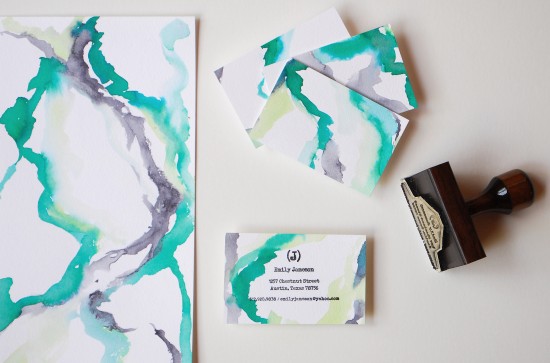
By far one of the most popular DIY posts we’ve done, this calling card uses the techniques from the Hand Watercolor Save the Dates & Thank You Card tutorial.  It astounds us how many different looks you can achieve with this technique!

1. Choose the colors you desire to paint with (a few similar shades and one contrasting always looks nice).

2. Paint random and uneven lines on sheets of watercolor paper. When dry, cut each sheet into 2 x 3.5″ rectangles. Admire how lovely and unique each one is!

3. Ink stamp (we used our Typewriter Calling Cardstamp) and print, pressing evenly on a hard work surface.

So, get stamping and be creative with the most important brand you represent….you!!

Photo Credits: Antiquaria for Oh So Beautiful Paper

Studio Tour – Czar Press

I love getting a sneak peek into printing studios.  I’m constantly in awe of the heavy duty cast iron machines that produce such beautiful and delicate stationery.  I was absolutely thrilled when Michael from Czar Press sent over this fun tour of his letterpress printing studio in Orange County, California.  Let’s take a look!

From Michael: We’re a full service wholesale and commercial print shop.  We make our own film and photopolymer plates and offer letterpress printing, flat printing, die cutting, scoring, duplexing, edge painting, and some other good stuff.  Our shop currently consists of four letterpresses: Chandler, a 12 x 18 Chandler & Price; Ivan, a 10×15 hand feed Kluge; and Boris and Lenin, both 10×15 auto feed Kluges.  We also have a little nursery for my little one, Piper.  We welcome vistors!

And here’s the cozy play area that Michael created for his adorable daughter Piper!

Thanks Michael!  For more from Czar Press, check out their website right here!

Photo Credits: Czar Press

*Czar Press is one of my fab­u­lous spon­sors; for more on my edi­to­r­ial poli­cies please click here.

Julianne + Philip’s Whimsical Letterpress Wedding Invitations

The folks down at Mama’s Sauce are really on a roll lately!  First they create some seriously cool business cards, and now these awesome wedding invitations.  Nick from Mama’s Sauce came up with the concept of basing the invitation design around an illustration of the couples’ shoes by Itchy Illustration, then incorporated the design into a horizontal tri-fold layout with a sunny yellow wax seal.  Love it!

From Nick: The couple wanted their printed materials to be a balance of playful & classic.  When it came time to design the wedding invitations months after our first consultation, Julianne’s love affair with her shoes was still stuck in my mind.  I quickly sketched a scene of the couple standing side by side with a bright popping yellow, highlighting Jewel’s shoes.  Not your typical wedding invitation, but typical isn’t what the couple wanted.

I am especially in love with the tri-fold wrap.  110# Pearl White Lettra Duplexed to French Paper Lemon Drop, we experimented with a type of die cut that allowed the wrap to fold and expose the yellow paper underneath creating a tri-colored edge.  A subtle detail that the most aesthetically sensitive recipients will surely appreciate.  Add a wax seal and the wrap is complete.

A collaboration with our friend & officemate, the talented Brian Boesch of Itchy Illustration, Julianne & Phil’s save the date and wedding suite are amongst our favorites that we’ve designed and printed this year.

Very cool – I love the layered effect with the yellow tri-fold die cut wrap, and of course that wax seal!  Thank you so much Nick!


Concept and Letterpress Printing: Mama’s Sauce
Illustration: Itchy Illustration


Photo Credits: Mama’s Sauce

Business Card Ideas and Inspiration #9

I’m in the mood for some pretty business cards today, so I thought I’d pull together a few of my favorite cards from the last couple of weeks for you!  Today I seem to be drawn to crisp black and white with some bright pops of color – and, really, how could you possibly go wrong with that combination?

Black-White-Heart-Business-Cards

September Industry

Milk-Blind-Impression-Business-Card

Milk Inc.

Black-White-Letterpress-Business-Cards

Mode Design with printing by The Mandate Press via FPO

Evan-Huwa-Black-White-letterpress-business-card

Evan Huwa

Meadowlark Creative

Black-White-Letterpress-Business-Card

Halftone Def via FPO

Dolce Press

Floral-Backing-Business-Cards

Interabang via Design Work Life

Vintage-Stamp-Letterpress-Business-Cards

Angela Liguori

T-Cake-Business-Cards

Build Design via Lovely Stationery

Black-Foil-Purple-Edge-Painting-Business-Card

Analogue via Lovely Stationery

Colorful-Business-Cards-Akimbo

Akimbo

For more business card inspiration, check out some of my previous posts right here.  And as always, if you’d like to sub­mit your own busi­ness cards, you can e-mail me right here!

{images via their respec­tive sources}