So You Want to Get into the Stationery Business: A Brief Overview

It’s been such a fun week guest blogging here at OSBP. Thanks for following along with me! (Don’t forget, OSBP readers get 25% off all items in the Happy Cactus shop through June 15. Use code OSBP25 at checkout.) I am often asked how I got my start in this industry and thought that as we wrap things up I could offer some thoughts and pieces of advice for those of you who may be thinking of launching your own stationery or greeting card line.

One of the greatest things I love about the community of stationery and greeting card designers is that it is truly is a welcoming community that supports newbies. I received so much advice and assistance when I launched Happy Cactus Designs’ first collection in 2011. I never imagined how nice and helpful fellow designers would be to me. I was also fortunate enough to take a continuing ed class on launching a greeting card business at New York’s School of Visual Arts with Joyce Wan and shortly thereafter took Tradeshow Bootcamp’s webinars. Both helped immensely and introduced me to many good friends I’ve made in this industry.

gardenblues

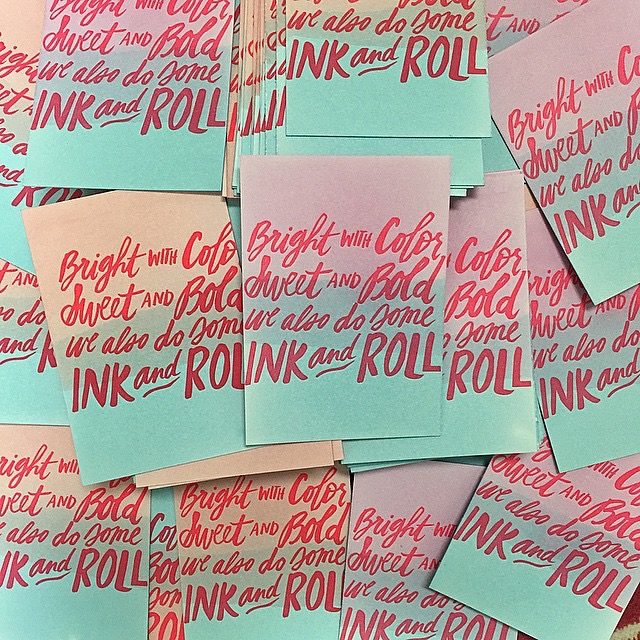
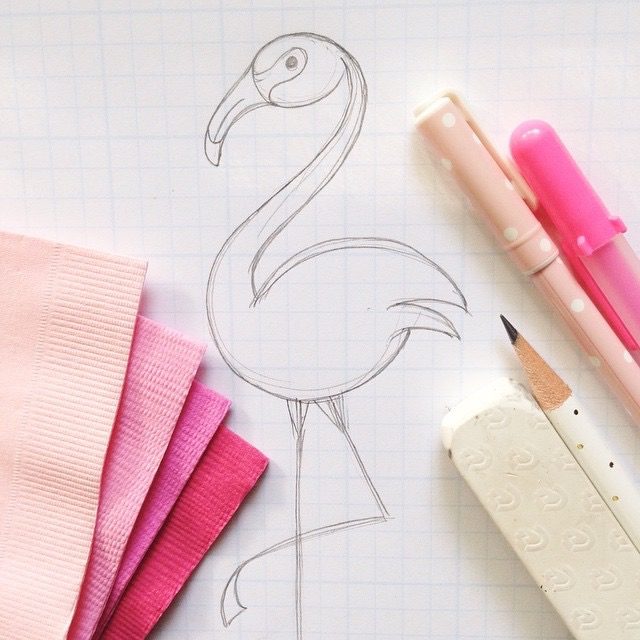
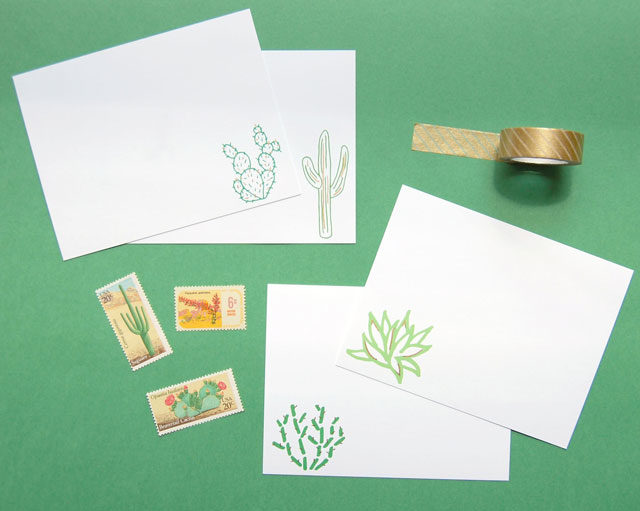
One of my very first card designs that is still a best seller years later!

So, Where to Begin?

Do you have dreams of crafting a collection of greeting cards? Have you just opened an online shop? Are you thinking about exhibiting at a tradeshow? Here’s some valuable tips I’ve learned along the way.

  • Create a cohesive collection that exemplifies your own personal style. Think about what distinguishes your work from everyone else’s out there. Is it your spectacular hand lettering? Your innovative printing method? Your funny puns and play on words? Play to your strengths and focus on what makes your work unique. It takes a lot of work to build an initial collection, but debuting with 20+ designs will help give people a greater sense of what your work is all about.
  • Do your own research on the industry and build relationships with vendors. I can’t tell you how much time I spent Googling questions as I designed my initial collection and laid the groundwork for what would become Happy Cactus Designs. (Full disclosure: I still spend a ton of time with my pal Google. The struggle never ends.)
  • Invest in getting samples of your work from various printers if you are outsourcing the job. Research local printers and online printing options. Don’t be afraid to ask questions either. Coming from a non-design school background, I had no idea what the difference between RGB and CMYK was or how to set up a file with bleeds. Just ask!
  • Trial and error: Trust me, it takes a LOT of trial and error to get things right. Every designer has a story about the cards that were printed incorrectly, or the catalogs with horrible ink bleeds, or the printing press that broke down just as a big print run was to begin. Just remember it’s all part of the learning process!
  • Observe what is happening in the stationery industry. OSBP is the best resource for doing this as Nole has her finger on the pulse of all things paper. Stationery Trends, a quarterly magazine targeted specifically to the trade, is another great place to scope out new trends and to read interviews with both designers and shop owners.
  • Be respectful of other designers. Each has been in your position and while some may freely share their sources/vendors, others may be reticent to share this information as they have spent a lot of time working to get things right (see the points above!).

foil

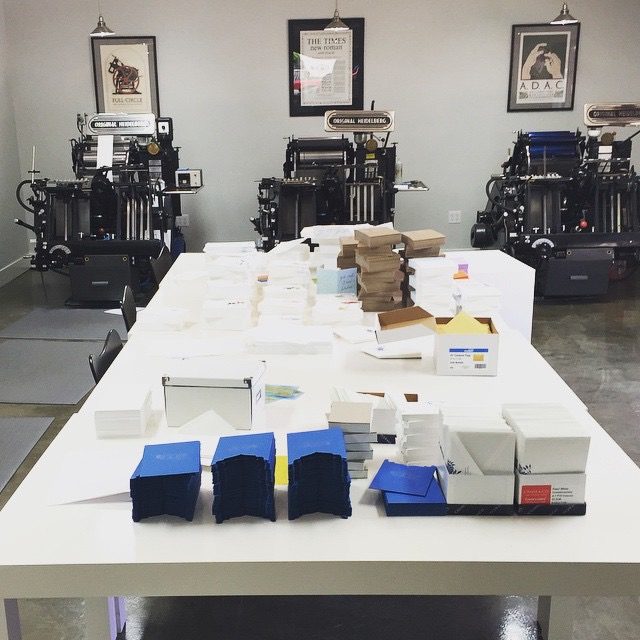
I introduced a line of foil stamped cards at the National Stationery Show in 2013. Adding a new method of printing to my collection took many, many hours of research, not to mention a large investment. That big gold balloon makes me so happy.

happycactusflats

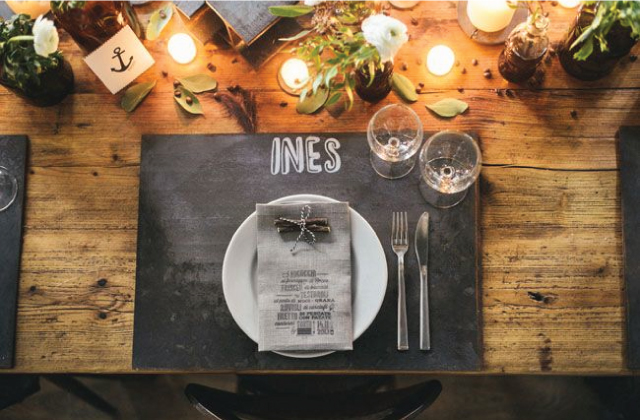
Over the years I’ve learned techniques to improve my product photography. It takes a lot of time and practice and many outsource this job.  You can imagine my surprise when the shot above was featured on the cover of Stationery Trends!

  • Think about how you want to sell your cards:
    • Research and sign up for local craft fairs. Listen closely to customers as they can provide a wealth of feedback on your products. Are they looking for particular types of cards? What designs are they responding to? Are your price points on target?
    • Consider an online storefront: Etsy or your own shop, or both. I could write an entire post on my thoughts about the two (I run my own e-commerce site via Shopify and have an Etsy storefront that plays second fiddle to my store). Each has its own set of pros and cons and building an online shop takes a tremendous amount of work upfront. From product photography and marketing to packaging and shipping, it’s no small feat to open an e-commerce site, but it’s one of the best ways to establish your brand.
    • If you are thinking about dipping your toes in the wholesale pool, seek out opportunities to learn how it all works. It is an entirely different beast. My personal favorite learning tools include Tradeshow Bootcamp, Eva Jorgensen of Sycamore Street Press’ class on Atly, local continuing ed classes, Emily’s brilliant Brick and Mortar column here on OSBP, and Meryl Hooker and Rob Fortier’s book on the industry. I’ve also found that talking to shop owners I’ve grown friendly with is a great way to get pointed advice about the world of wholesale.

first-booth

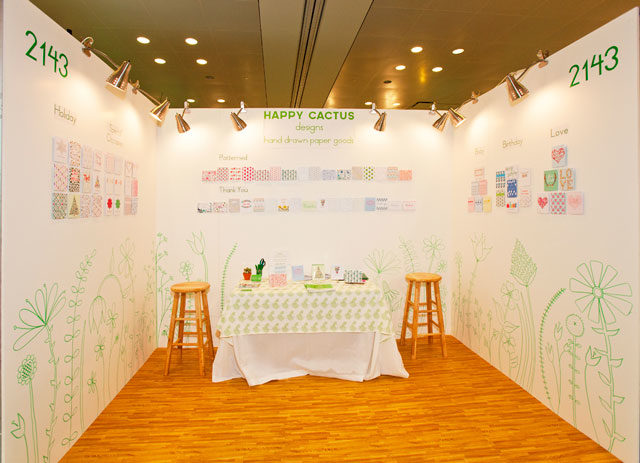
My first booth at the National Stationery Show in 2012. Exhibiting at a tradeshow takes a tremendous amount of work. Looking back, there’s many things about my debut that I’m proud of and many things I’d change. Drawing on the walls, while risky, was my favorite part.

  • Say yes to new opportunities! Some of my best learning experiences came from just saying yes to new projects, inquiries, professional development opportunities, and events.

Please feel free to offer your own words of wisdom or ask questions in the comments below!

The Stationery Designer’s Guide to Using Instagram

There’s no doubt that Instagram has exploded as a way for stationery designers, paper aficionados, and retail shop owners to connect and share their work with one another. With business page posts having less visibility on Facebook these days, many designers I know have transitioned the bulk of their social media efforts to Instagram. I personally use it as a place to promote my own brand, connect with the people who buy and support my goods, and keep up with industry colleagues (you can find me over @happycactusdesigns). Below are some tips, tricks, and best practices I’ve picked up along the way. I’d love to hear your thoughts on how you use Instagram – please share in the comments below!

thimblepress

A great shot from Thimblepress of their NSS mailers. // @thimblepress

Post high quality photographs.

The photo is first and foremost what Instagram is about, so you want to show off your work in its best light (literally and figuratively). Use Instagram’s in-app photo editing software or other apps (Afterlight for iPhone is my personal favorite) to lighten and brighten your snaps. I avoid using filters because I want the true colors of my paper goods to shine. I’ve also found that having a Dropbox folder full of your best product images and styled shots makes it easy to have photos at the ready.

antiquaria

A beautiful snap of Antiquaria’s painting process. // @antiquariadesign

Be authentic and be you.

Yes, you are representing your brand, but let’s not forget that there is a person or team behind that brand name. Your followers may like your products, but they will also love hearing the story behind your products. I’ve found that the accounts I love following the most have the perfect balance between sharing various aspects of business life – new products being released, behind-the-scenes peeks at the artistic process, announcements – and snippets of personal life and interests. In other words, I like learning more about other designers and their stories rather than feeling like I’m constantly being sold something.

jenipherlyn

Lots of eye candy from Jenipher of Nighly Doodles. // @jenipherlyn

Use appropriate hashtags.

Hashtags are a great way for Instagram users to discover you or to aggregate images under a particular theme or event. Many companies these days hashtag Instagram pics with a company hashtag. For example, I use #happycactusdesigns on my posts. By doing so, these photos and those tagged by other users are pulled and published on my website. Someone looking at your feed can also quickly tap on the hashtag to see all of the related photos.

Some of the more popular hashtags in the paper category include: #stationery, #greetingcards, #sendmoremail, #snailmail

I also love searching hashtags by method of production: #letterpress, #foilstamped, #handdrawn, #screenprint

Search #NSS2015 for a bunch of eye candy from this year’s National Stationery Show.

happycactus-paint

A behind-the-scenes shot from me of a recent painting. This one will be making its way to a card design later this summer. // @happycactusdesigns

Embrace the community and makes connections.

Don’t be afraid to comment on others’ posts! For me, Instagram has not only been a medium for staying connected to paper peeps I may rarely get to see, but also a place to connect with other likeminded paper folk. It’s a wonderful way to casually connect with retailers, bloggers, and others who love paper.

Engage your followers. I’ve seen designers use Instagram to poll their followers about different versions of cards – I think this is a great idea and one I should probably try. Nothing like a little free market research from your most dedicated followers!

betsywhite

Gia from Betsywhite Stationery used this post to poll followers on color choices. // @shopbetsywhite

Overcome counting likes and followers.

This is a hard one. Who doesn’t love opening the Instagram app and seeing how many people have double-tapped your photo? I’m definitely guilty of this one. As designers, we can feel quite vulnerable sharing new work and awaiting reactions (or lack thereof). But at the end of the day, what truly matters is quality over quantity and to not take reception of your photos too personally.

wildink

Wild Ink Press offers a peek into her studio. // @wildinkpress

I’d love to hear about your experience using Instagram. Comment below with your favorite tip or piece of advice!

Wedding Stationery Inspiration: Chalkboard Details

I love the versatility of chalkboard details at an event. They can be styled with everything from a rustic theme to something more elegant, but the best part is that they are easily customizable… which includes being able to use those details over and over after your big day. And you aren’t limited to buying boards in specific pieces anymore, there are great papers that can be used in any of these applications! Here are just a few of my favorite day of wedding details executed with chalkboards and chalkboard paper. –Lauren

chalkboard-wedding-details-1

Grab some chalkboard paper and create placemats // by giuli & giordi via Green Wedding Shoes

chalkboard-wedding-details-2

Use as table numbers // via BHLDN

chalkboard-wedding-details-3chalkboard-wedding-details-4

Cover votives and number your tables via Barnes & Noble // Place cards and favors in one! via By Stephanie Lynn

chalkboard-wedding-details-5

Create your menus on chalkboard paper // via Mary and Jack

chalkboard-wedding-details-6

Wrap matchboxes and give away as favors // via Lia Griffith

chalkboard-wedding-details-7chalkboard-wedding-details-8

Welcome sign by  Chris + Jenn via Wedding Chicks // Framed escort cards by Sandra Fazzino Photography via Style Me Pretty

chalkboard-wedding-details-9chalkboard-wedding-details-10

Placemats via A Sweet Spot: Home // Colorful welcome sign by GK Photography via Ruffled

What creative ways have you seen chalkboard details used at a wedding?

10 Awesome Wedding Escort Card Ideas

It’s May – which means LOTS of weddings just around the corner! For those of you searching for some inspiration for your wedding day stationery, I thought I’d round up a few favorite escort card ideas!

Wedding-Escort-Card-Ideas-OSBP

1. Beautiful watercolor escort tags by Blue Eye Brown Eye Calligraphy

2. Forest green painterly brushstroke + gold ink escort card tags by Anne Robin Calligraphy 

3. Escort cards paired with boutonnieres for guests! Dreamed up by the ladies of Karson Butler Events with calligraphy by Meant to Be Calligraphy / Photo by Jodi Miller Photography via Style Me Pretty

4. White calligraphy + kraft paper is the perfect combination for a garden party wedding! Event design by True Event with floral design by Petal Floral Design / Photo by Judy Pak Photography via Style Me Pretty

5. Feather shaped escort cards paired with gemstones! / Photo via Snippet & Ink

6. Mini scroll escort cards by The Aerialist Press / Photo by Delbarr Moradi via Martha Stewart Weddings

7. Square escort cards with rosemary sprigs against a dark wood background by Carissa Jones

8. This bow + arrow escort card display is bananas in the best possible way! Arrows by Mineral + Matter with calligraphy by Curlicue Designs / Photo by Rebekah Westover via Ruffled

9. Color dipped escort cards with gold ink by Wild Hart Paper Co

10. Mini envelope escort cards by A Fabulous Fete

Urbanic Faves | Rose Gold Everything

Hello Hello!  Delighted to be back here once again and sharing yet another one of our latest obsessions with you from around here at Urbanic.  Today’s topic is this darling little equation:

>>  Pink  +  Gold  =  Rose Gold!  <<

It’s pretty. It’s timeless. It’s now! We’ve hand-picked some of our favorite things from around the shop and beyond for your viewing pleasure. We’re talking about decorative arrows, bottle openers, desk lamps, candles, sticky notes, telegram pads … and even tape!  So basically, rose gold everything. âœ§

xo – Audrey

Urbanic Gift Guide: Rose Gold Everything

1.  The Social Type

2. Thimble Press

3. Chronicle Books

4. Kate Spade

5. Cool Material

6. Kate Spade

7. West Elm

8. Mineral and Matter

9. Uline

10. Kate Spade

11. Mine Design

12. Clover and Bloom

13. Kikkerland