2012 Calendar Round-Up, Part 2

As promised, I’m back with more lovely 2012 calendars to share!   I personally love calendars that function as both wall art and a useful date reminder (and use my weekly planner to keep track of appointments and , but for those of you who like to write important events on wall calendars, Snow & Graham has you covered with not one, two, but FIVE 2012 calendar formats – including a beautiful write-on monthly wall calendar!

Snow & Graham: 1) Accordion calendar; 2) Write-on wall calendar; 3) Monthly wall calendar; 4) Desk calendar; 5) Mini desk calendar

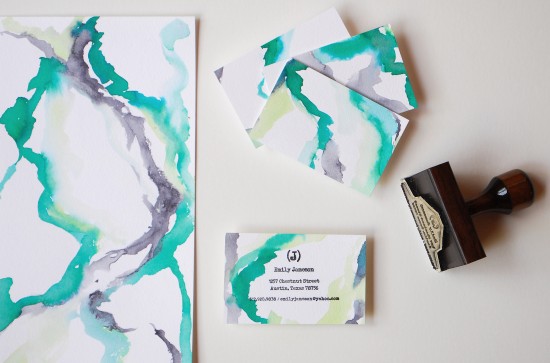
I love the illustrations and graphic patterns in these 2012 calendars from artist Leah Duncan:

Floral Wall Calendar 

Leah Duncan

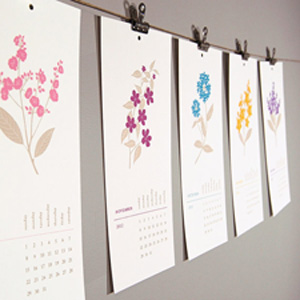
Beautiful pops of bright color in these lovely letterpress calendars from Smock:

Peacock Calenday Floral Calenday

Smock

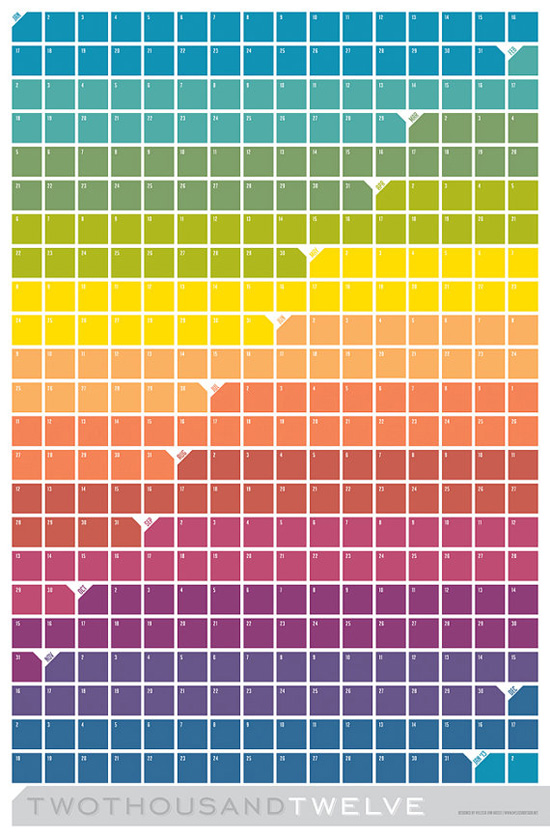
Once again, Hammerpress is offering a tear-away calendar for 2012, with seven different (and equally stunning) background design options:


Hammerpress

More bright color and pretty graphic patterns in the 2012 calendar from Egg Press:

Pattern Calendar Pattern Calendar

Egg Press

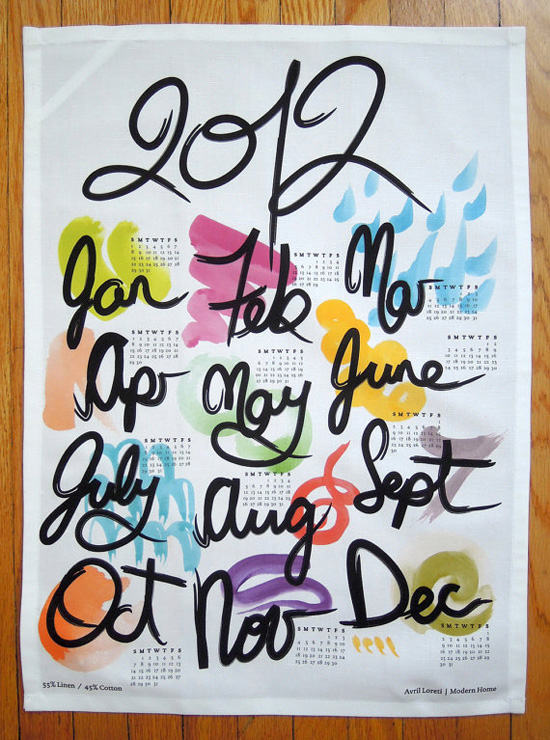
I love the hand lettering and pretty painterly elements in this tea towel fabric calendar from Avril Loreti:

Tea Towel Calendar

Avril Loreti

Beautiful illustrations in the 2012 wall calendar from Old School Stationers

 Letterpress Calendar

Old School Stationers

…and 1 Canoe 2!

Letterpress Calendar Letterpress Calendar

1 Canoe 2

This modern and minimalist calendar from Melissa Design is absolutely stunning:

Large Wall Calendar

Melissa Design

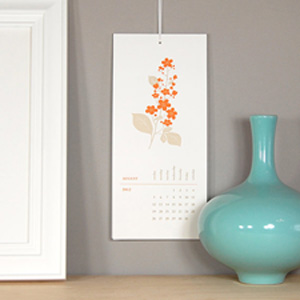
And, last up for today, pretty floral designs in the 2012 calendar from Silhouette Blue:

Floral Calendar Floral Calendar

Silhouette Blue

If you haven’t found your favorite calendars yet, don’t worry!  We’ll have more beautiful calendars to share with you soon!

{images via their respective sources}

*Smock is one of my fab­u­lous spon­sors; for more on my edi­to­r­ial poli­cies please click here.

DIY Rubber Stamp Calling Cards

The ladies of Anti­quaria took a quick break to relocate to California (congrats ladies!), but today they’re back with another fab­u­lous and cre­ative DIY project!  This week they’re here with three options for DIY rubber stamp calling cards!

After a studio relocation and move…we are back with more DIY stamp tutorials!!  This week, we are exploring the world of calling cards, a fun and unique way to make a lasting impression on someone you’ve just met.  By using a calling card rubber stamp, you can customize and really make them reflect you!  Also, because you can make them in small batches, you can change their design on a whim and reflect your current mood & style.

To create these three calling cards, we adapted techniques from our previous DIY posts (and one sneak peek).

Our Geek Chic tutorial, is super easy and uses very inexpensive and resourceful materials!!

1. Find vintage, or download & print (we used Hex Dot for this calling card) graph paper. Cut into 2×3″ rectangles.

2. Cut kraft colored card stock into 3.5 x 2.5″ rectangles.

3. Ink stamp (we used our Calligraphy Accent Calling Card stamp) with desired color and make print using even pressure on a hard surface.

4. Using fun colored or patterned washi tape, affix the stamped graph paper to the kraft paper backing. (If more security is desired, use double stick tape to affix the two together and use the washi tape as decoration)

As a teaser for our next Save the Date tutorial, this calling card uses stamp pad edge painting to make the cards really pop.  This technique is so simple, you won’t believe it!

1. Using a heavy cotton paper, cut into 2.5×3″ rectangles.

2. To make the mixed ombre stamp image, use 2 different but similarly shaded colors (we used a mix of orange & red, one dark, one light).  Ink the stamp (we used our Navajo Calling Card stamp) lightly in the darker of the two, then ink over it in the lighter shade.  Stamp image with even pressure on a hard work surface.  Let the images dry overnight.

3. To paint the edges, grasp each card in the middle.  Drag the edges through your stamp pad, applying even pressure to ensure an even border…it’s that simple!!!

By far one of the most popular DIY posts we’ve done, this calling card uses the techniques from the Hand Watercolor Save the Dates & Thank You Card tutorial.  It astounds us how many different looks you can achieve with this technique!

1. Choose the colors you desire to paint with (a few similar shades and one contrasting always looks nice).

2. Paint random and uneven lines on sheets of watercolor paper. When dry, cut each sheet into 2 x 3.5″ rectangles. Admire how lovely and unique each one is!

3. Ink stamp (we used our Typewriter Calling Cardstamp) and print, pressing evenly on a hard work surface.

So, get stamping and be creative with the most important brand you represent….you!!

Photo Credits: Antiquaria for Oh So Beautiful Paper

Hand Lettered Baby Shower Invitations by Scout’s Honor Co.

How cute are these hand lettered baby shower invitations from Scout’s Honor Co.?  The entire design was originally hand painted using gouache (a technique similar to watercolor) before being scanned and printed for the final layout.  I love the contrast of the soft blue hand painted type against the bright red envelopes.  Just lovely!

scouts-honor-co-red-blue-baby-shower-invitations

scouts-honor-co-red-blue-baby-shower-invitations-detail

scouts-honor-co-red-blue-baby-shower-invitations

You can see more from Scout’s Honor Co. right here!

Photo Credits: Scout’s Honor Co.

Custom Ketubahs and Wedding Certificates from Starshaped Press

I love it when couples incorporate ketubahs and wedding certificates into their wedding ceremony; my husband and I incorporated a ketubah into our wedding back in 2008 and I’m still smitten with the tradition.  I don’t often get to see custom wedding certificates, so I was thrilled when Jen from Starshaped Press sent me a note with some of her recent custom letterpress ketubah and certificate projects.  I’ve picked out a few of my favorites to share – aren’t they pretty?


Thanks Jen!

Did you have a custom ketubah or certificate created for your wedding?  If so, I’d love to see it!  You can send it to me right here!

Photo Credits: Starshaped Press

*Starshaped Press is one of my fab­u­lous spon­sors; for more on my edi­to­r­ial poli­cies please click here.

Claudine + Michael’s Unique California Wedding Invitations

Sarah from Studio SloMo sent over these cool and quirky wedding invitations for an upcoming wedding in California.  I love that the belly band over the photo is actually the invitation – such a great idea!  Sarah letterpress printed the invitation and rsvp card in a rich cornflower blue, which contrasts nicely with the kraft paper envelopes and orange envelope liner.

From Sarah: This couple has the best ideas.  They had some pictures taken of them running towards each other and wanted a belly band with the wedding invitation going through the center.  I helped make their idea a reality and we were all pleased with the result.  The belly band as well as the RSVP card is letterpress printed in one color on 100% cotton paper.

To keep with the rustic, modern feel of the wedding, I did a little illustration of the farmhouse where they are getting married.  The type as well as the the illustration have a clean look but still stay a little loose and casual.  We decided to finish the suite off with a pumpkin colored envelope liner which really allows the blue to pop.

Thanks Sarah!

Photo Credits: Studio SloMo

*Studio SloMo is one of my fab­u­lous spon­sors; for more on my edi­to­r­ial poli­cies please click here.