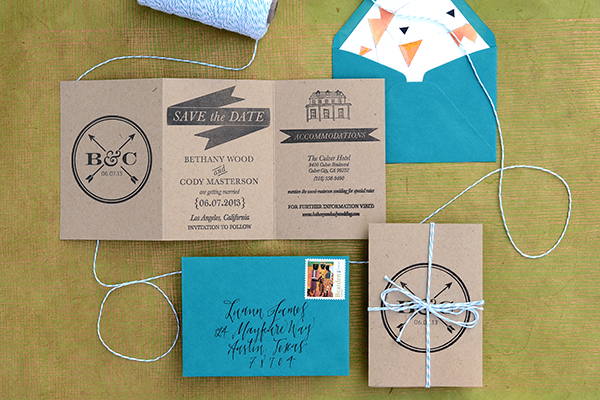
It can be a challenge to fit all of the necessary information into your save the date or wedding invitations. Hotels, directions, maps and websites can weigh down your envelope and easily distract guests from the main message. Today’s tutorial is the perfect solution to the headache… and couldn’t be simpler! Using one letter size piece of paper, we’ve created a tri-fold save the date that’s fun, modern and informational. – Bailey and Emma of Antiquaria
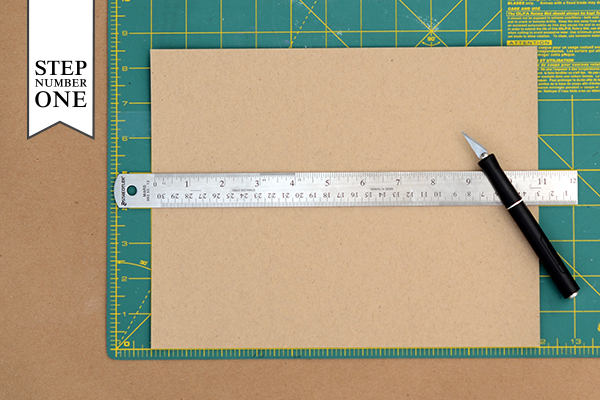
Step One: Cut your 8.5″ x 11″ piece of kraft card stock into cards sized at 5″ x 10.5″

Step Two: Once cut, you will want to make score marks every 3.5 inches using a bone folder and scoreboard tool. Do not fold the card yet!
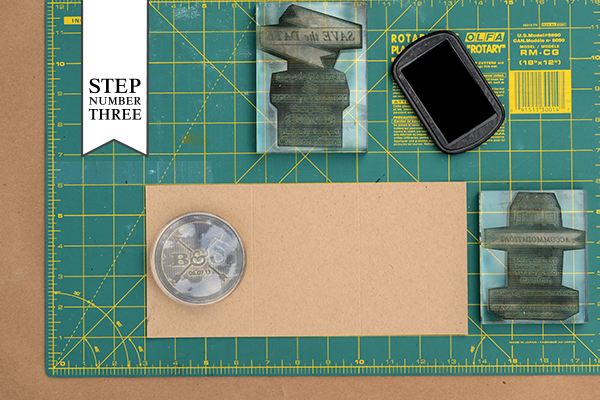
Step Three: While the card is scored but still flat, stamp your monogram (we used our Modern Arrow Monogram Stamp, No.2), centering on the first third (the one on the left). Repeat with your save the date stamp (we used our Modern Banner Save the Date Stamp) in the center and your accommodations stamp (we used our Modern Banner Accommodations Stamp, No.2) in on the right-hand side. To make a stamped print, ink your stamp thoroughly and center it over your card. Once it is positioned correctly, press down to make a print. Use both hands to ensure even pressure. Lift off and let the print dry. For a step-by-step video tutorial about this printing process go here.
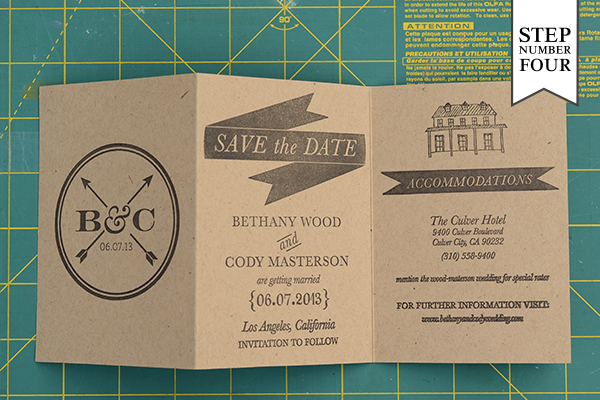
Step Four: Now you can fold your card! Carefully bend along score marks and use a bone folder to make certain the folds are crisp.
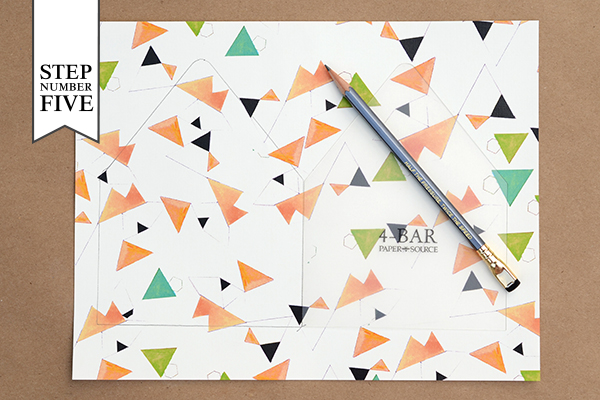
Step Five: Adding a printed liner is a great way to add color and pattern to your Save the Date design. To make the liner, trace the template onto your printed paper (we used our “Geo” Patterned Paper in text weight) and cut it out with scissors. To install, simply use stick glue or double sided tape to adhere them into your envelope.

Step Six: Next, you will stamp your return address on the back flap of your 4bar envelope using the same technique for printing as in step three. We used our Scripted Return Address Stamp for this design.
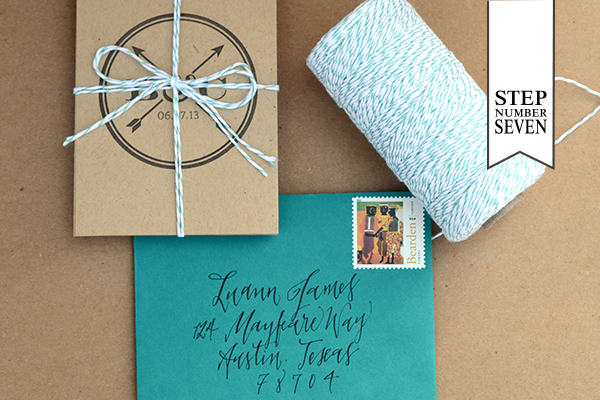
Step Seven: Now all that’s left is to tie the trifold design with twine, address the envelopes, add postage and send them on their way!
Materials:
Modern Arrow Monogram Stamp, No.2
Modern Banner Save the Date Stamp
Modern Banner Accommodations Stamp, No.2
Stamp Pad in Black
Card stock 8.5″ x 11″ sheets in paper bag
Self Healing Mat and Craft Knife
4Bar Envelopes in Peacock
Pencil and Paper
AntiÂquaria is a memÂber of the Designer Rolodex – you can see more of their beauÂtiÂful work right here or visit the real wedding invitations gallery for more wedding invitation ideas!
Photo Credits: Antiquaria

What a great tutorial! These look awesome!
Thanks Shelby! We’re thrilled you enjoyed it!
Great tutorial. I was looking for save the date ideas for my next party. I have to try these sometime!
This is a very nice tutorial, very easy to make and the end result is fabulous. Thank you very much!