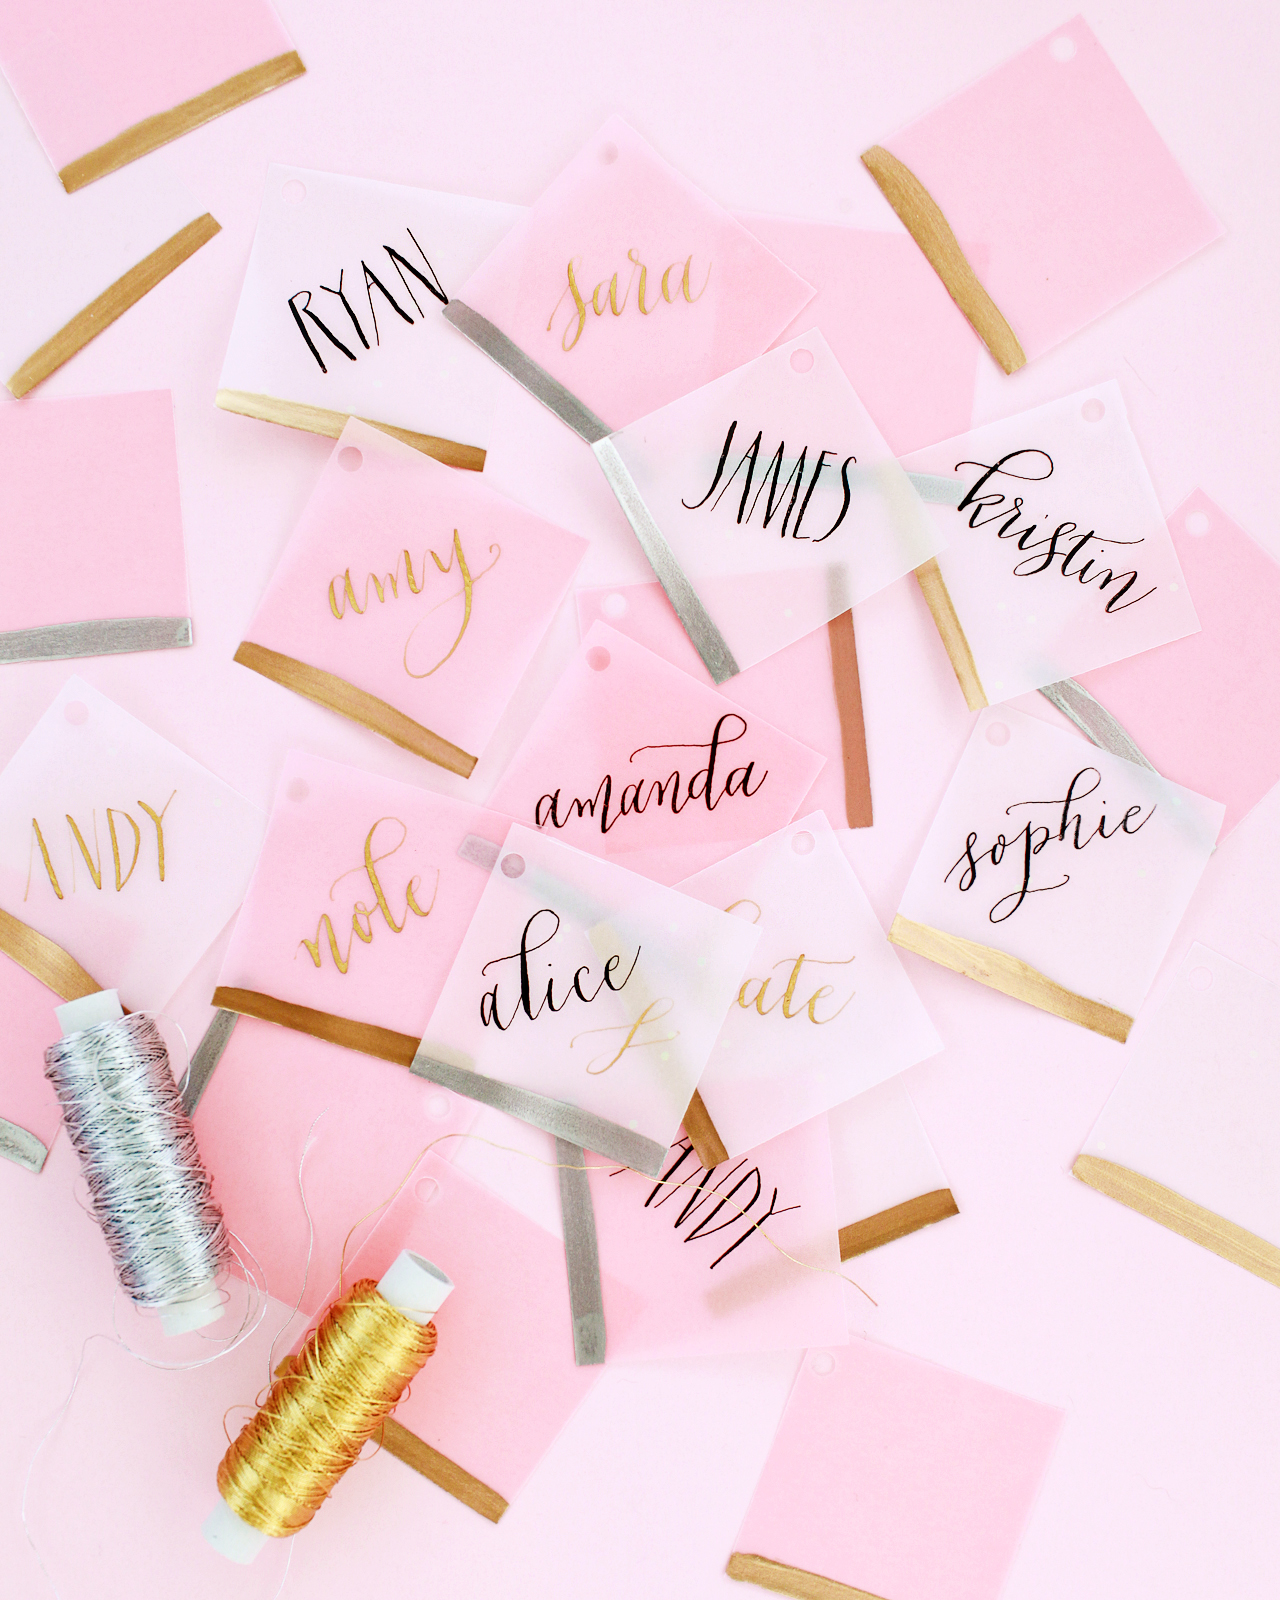
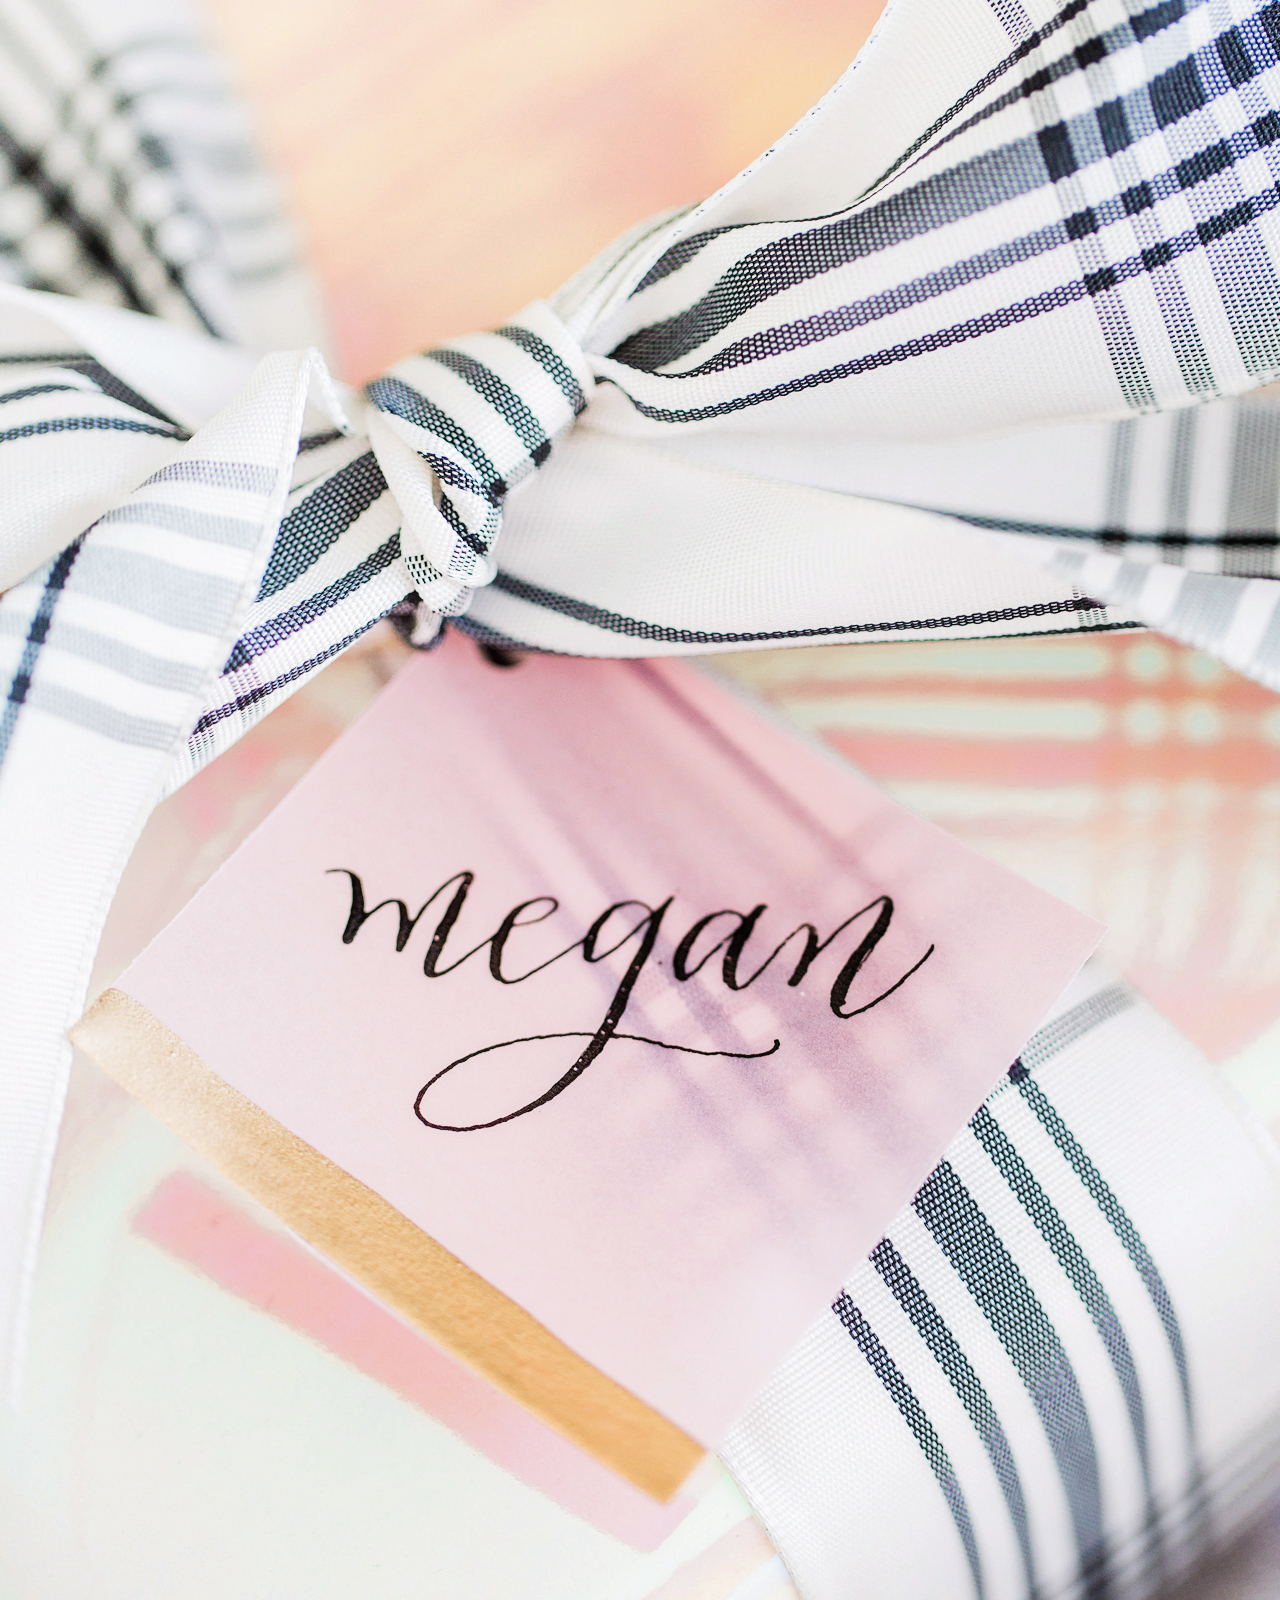
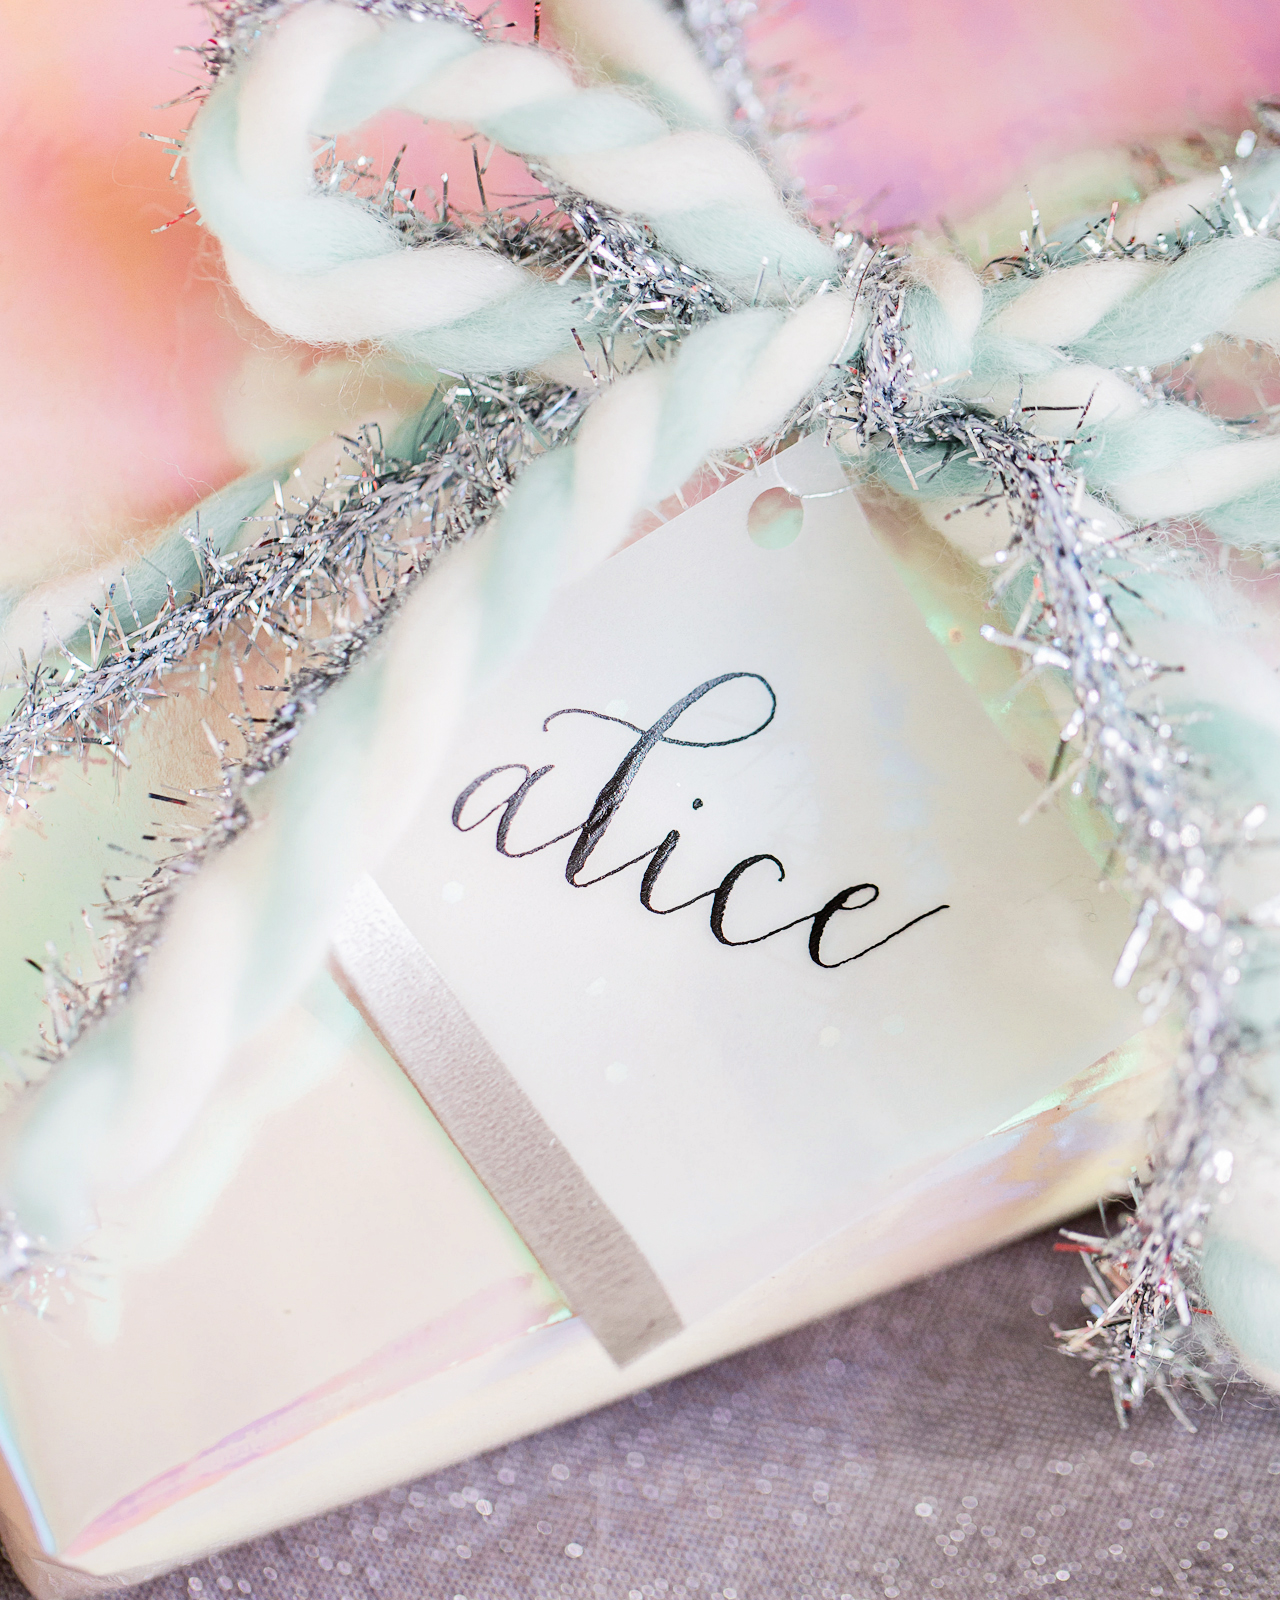
Yesterday I shared how I’m mixing and matching my holiday gift wrap pairings this year. You may have noticed the subtle vellum gift tags peeking through the ribbon and trim, and today I’m sharing the DIY tutorial with you! It’s no secret that I’ve been loving the vellum trend over the last couple of years, so I wanted to turn this gorgeous translucent material into quick and easy DIY vellum gift tags for the holidays. Seriously, these gift tags take approximately 30 seconds to make and look SO dreamy on any gift. Are you ready??

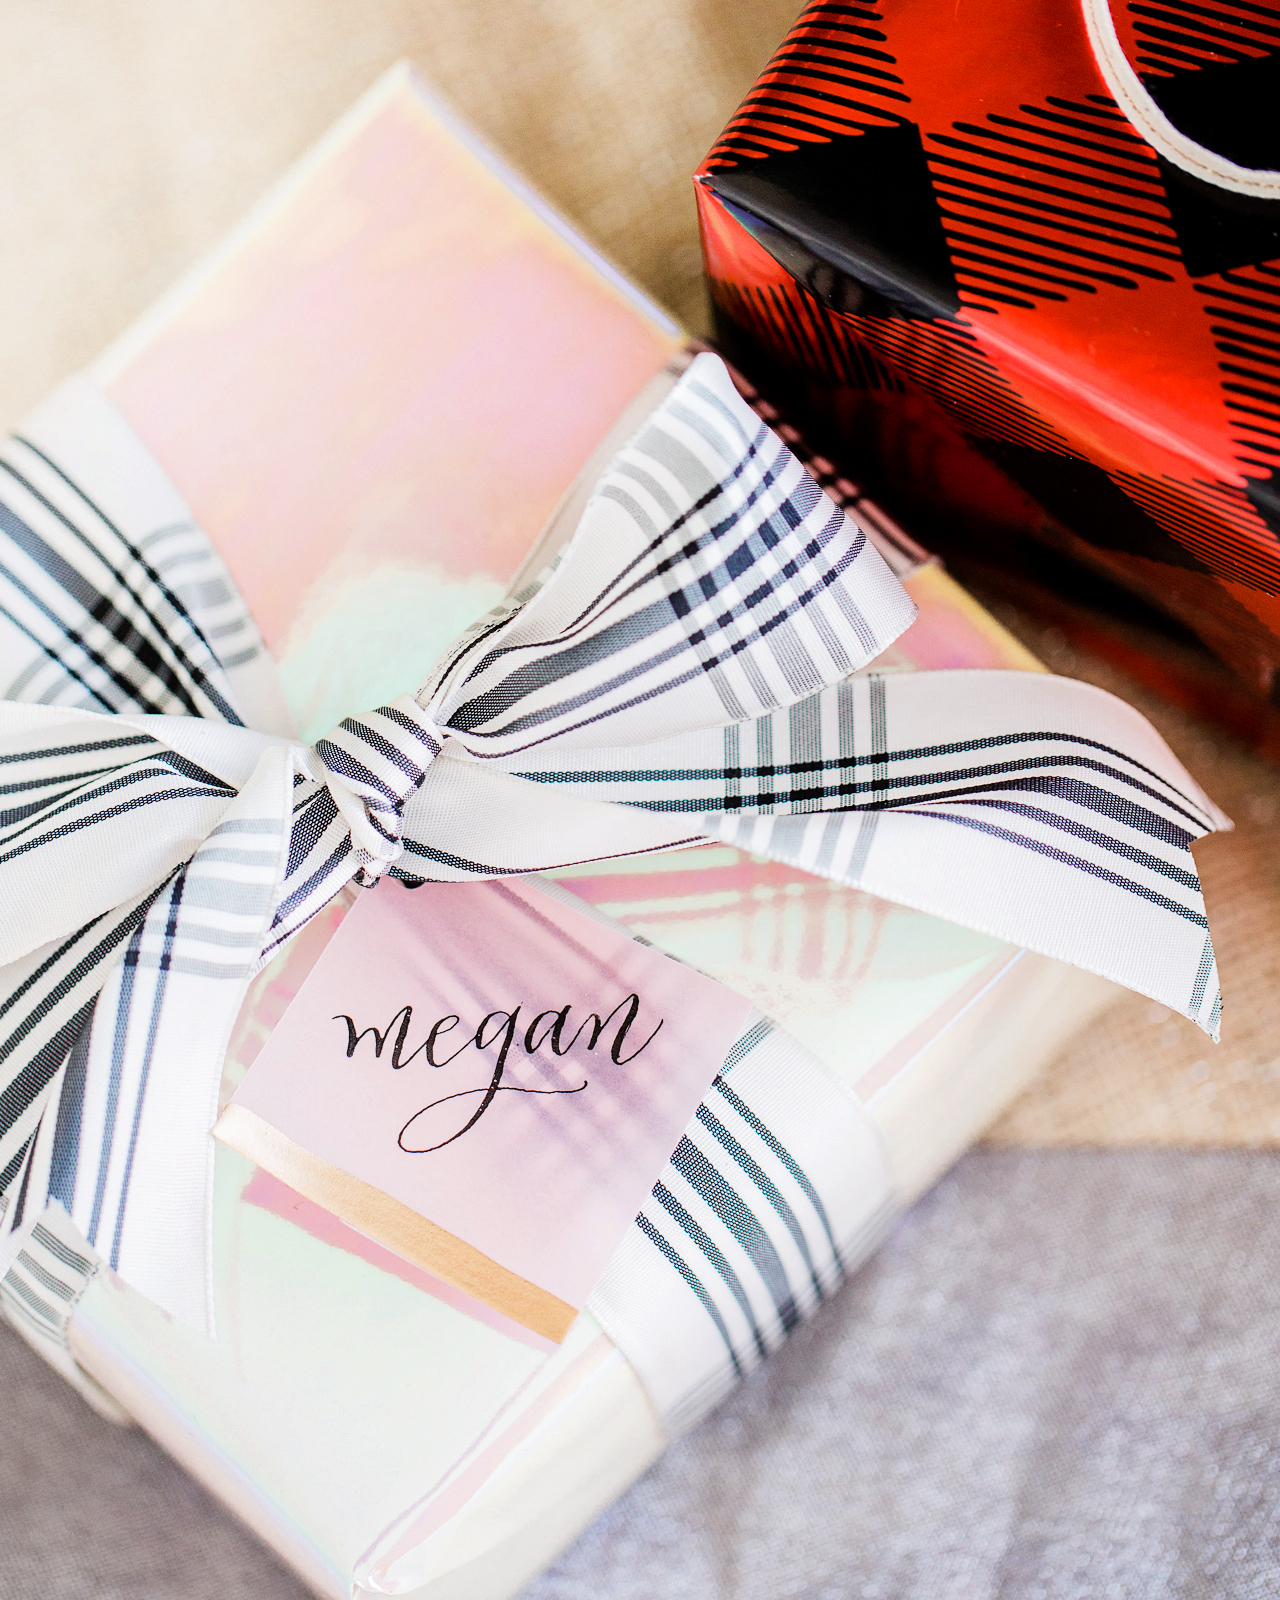
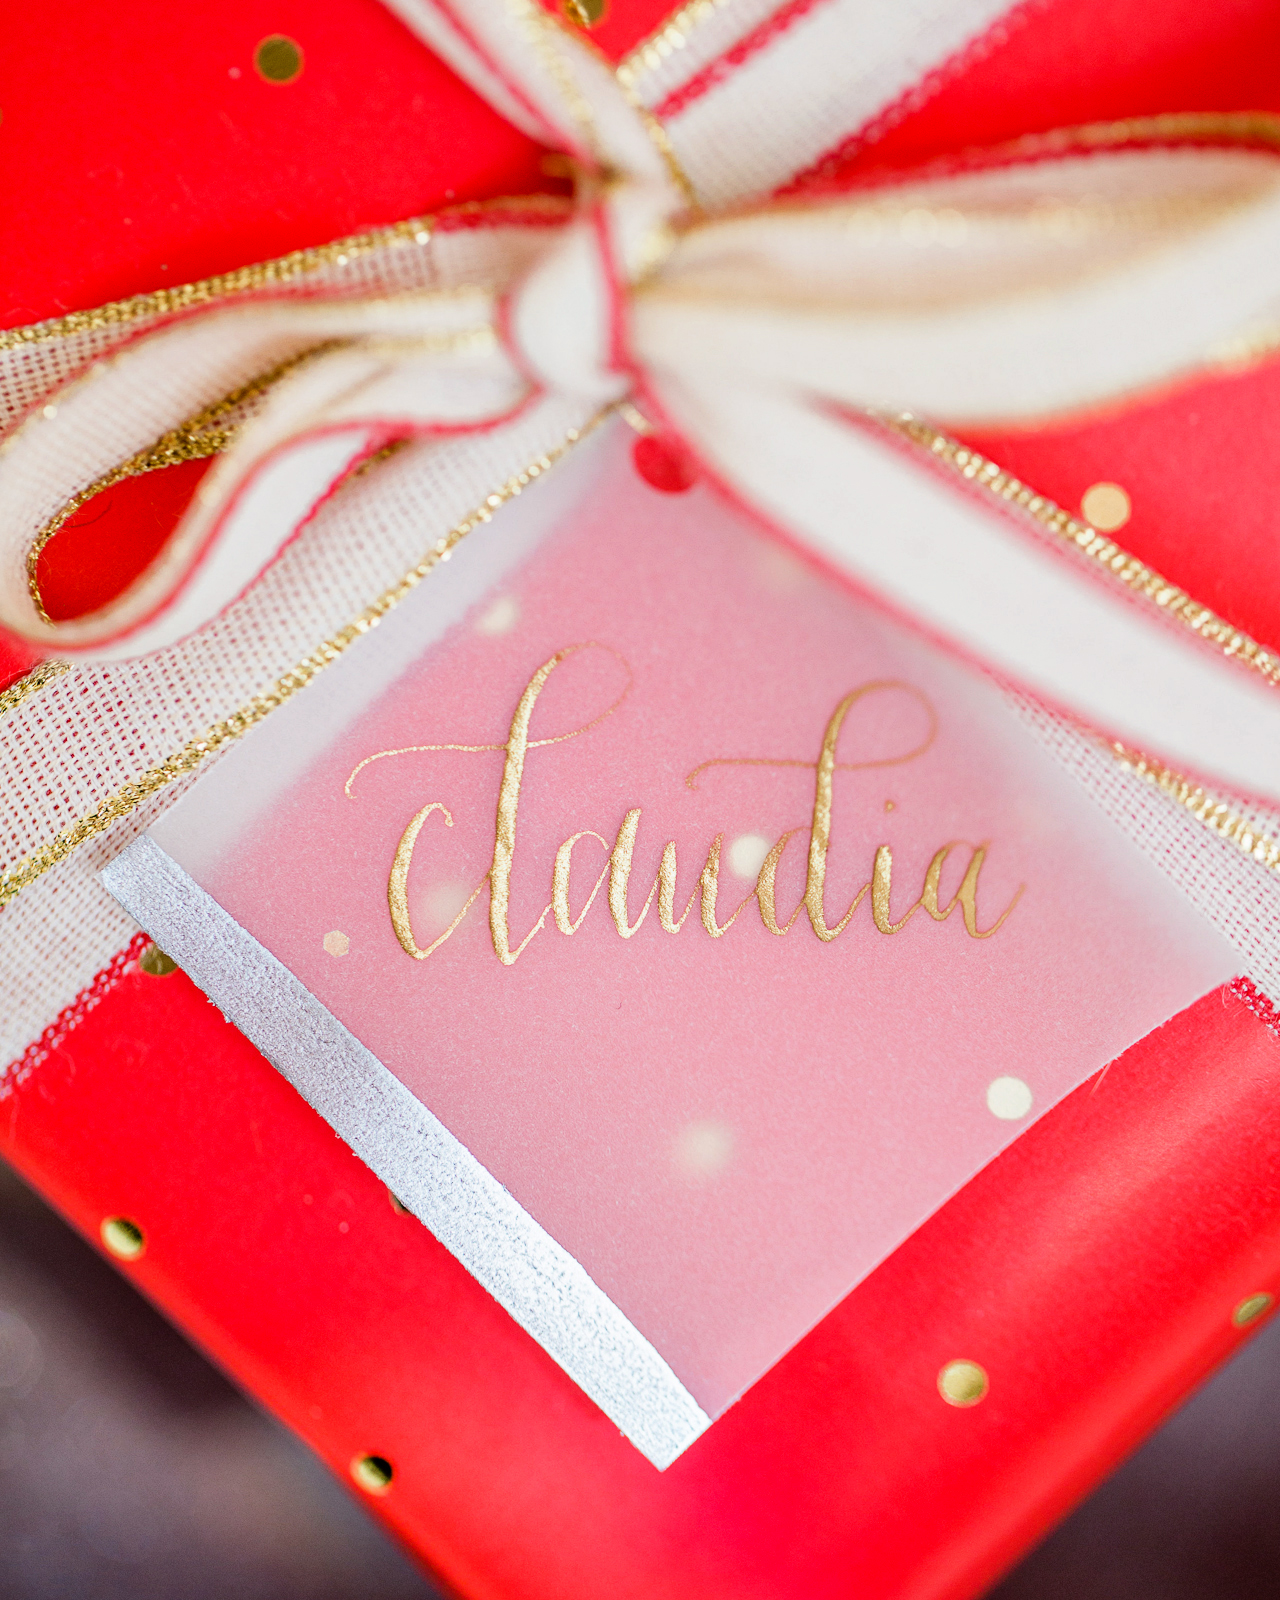
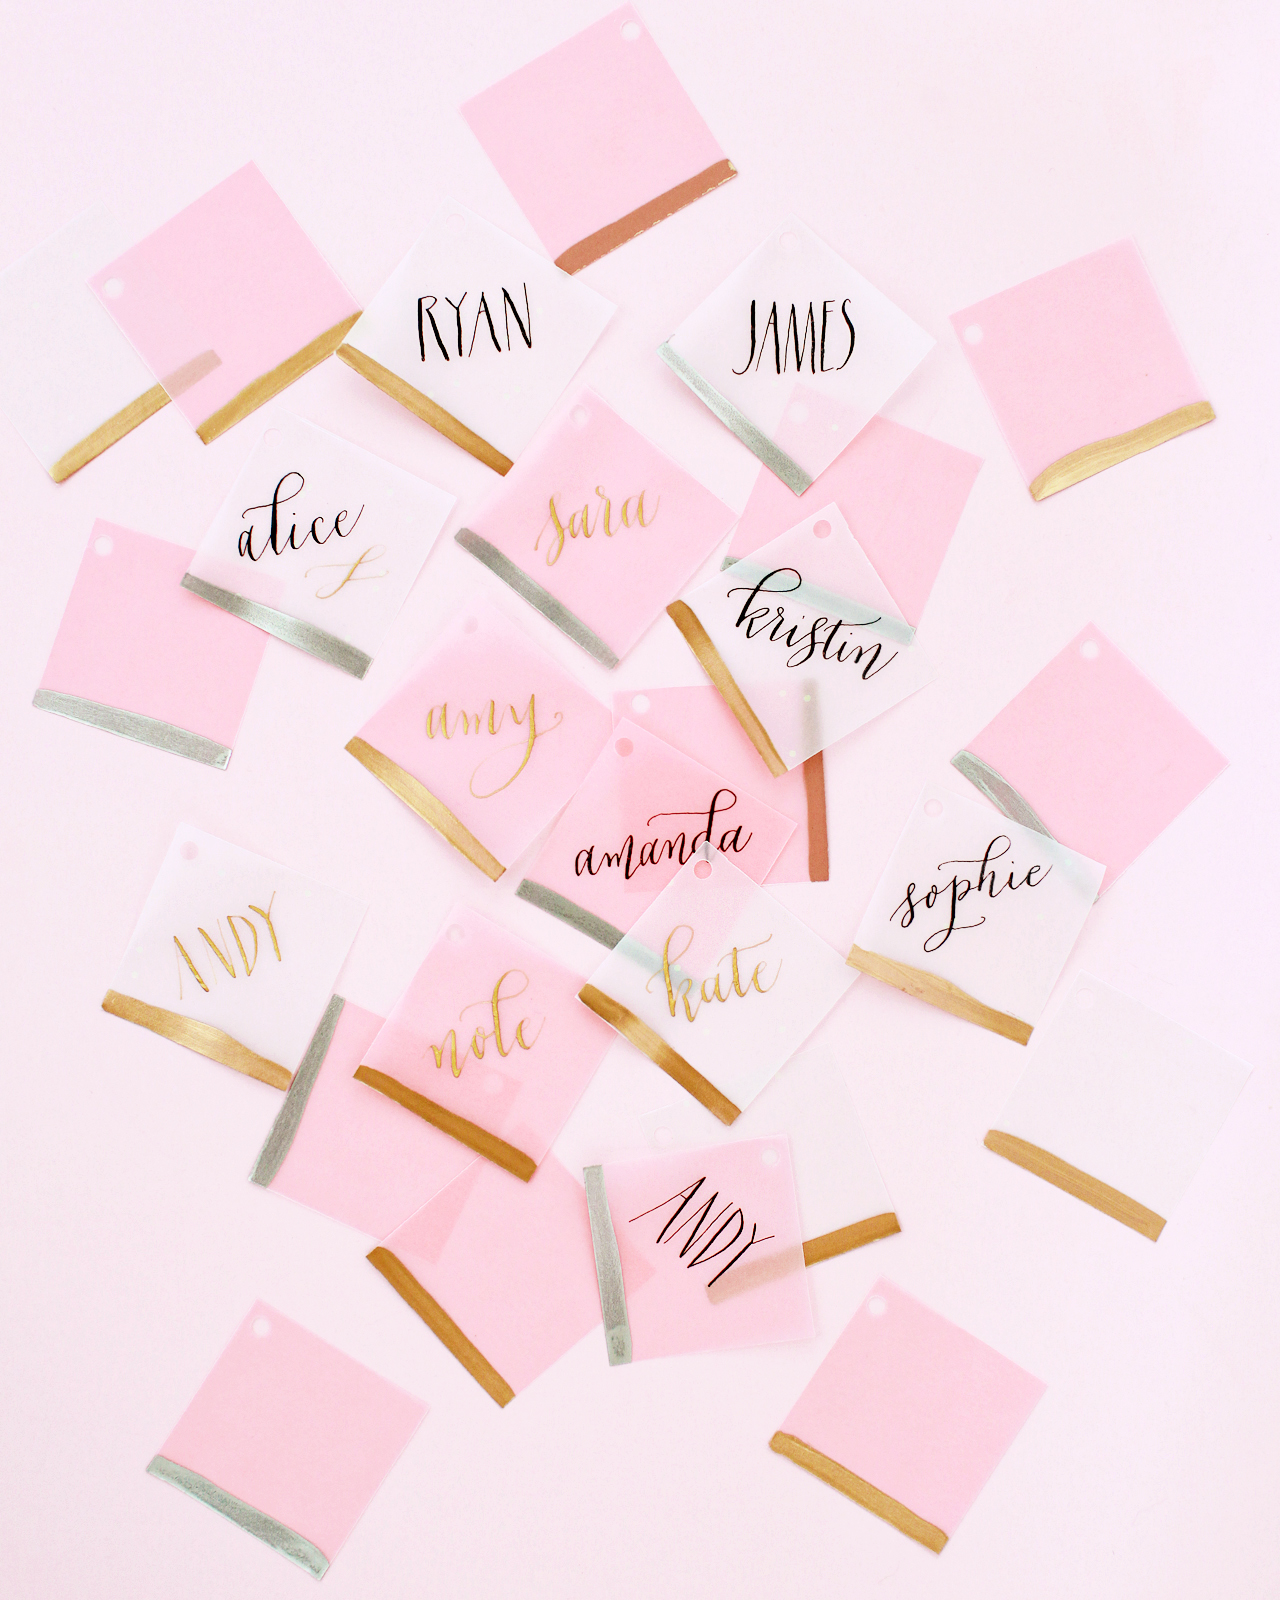
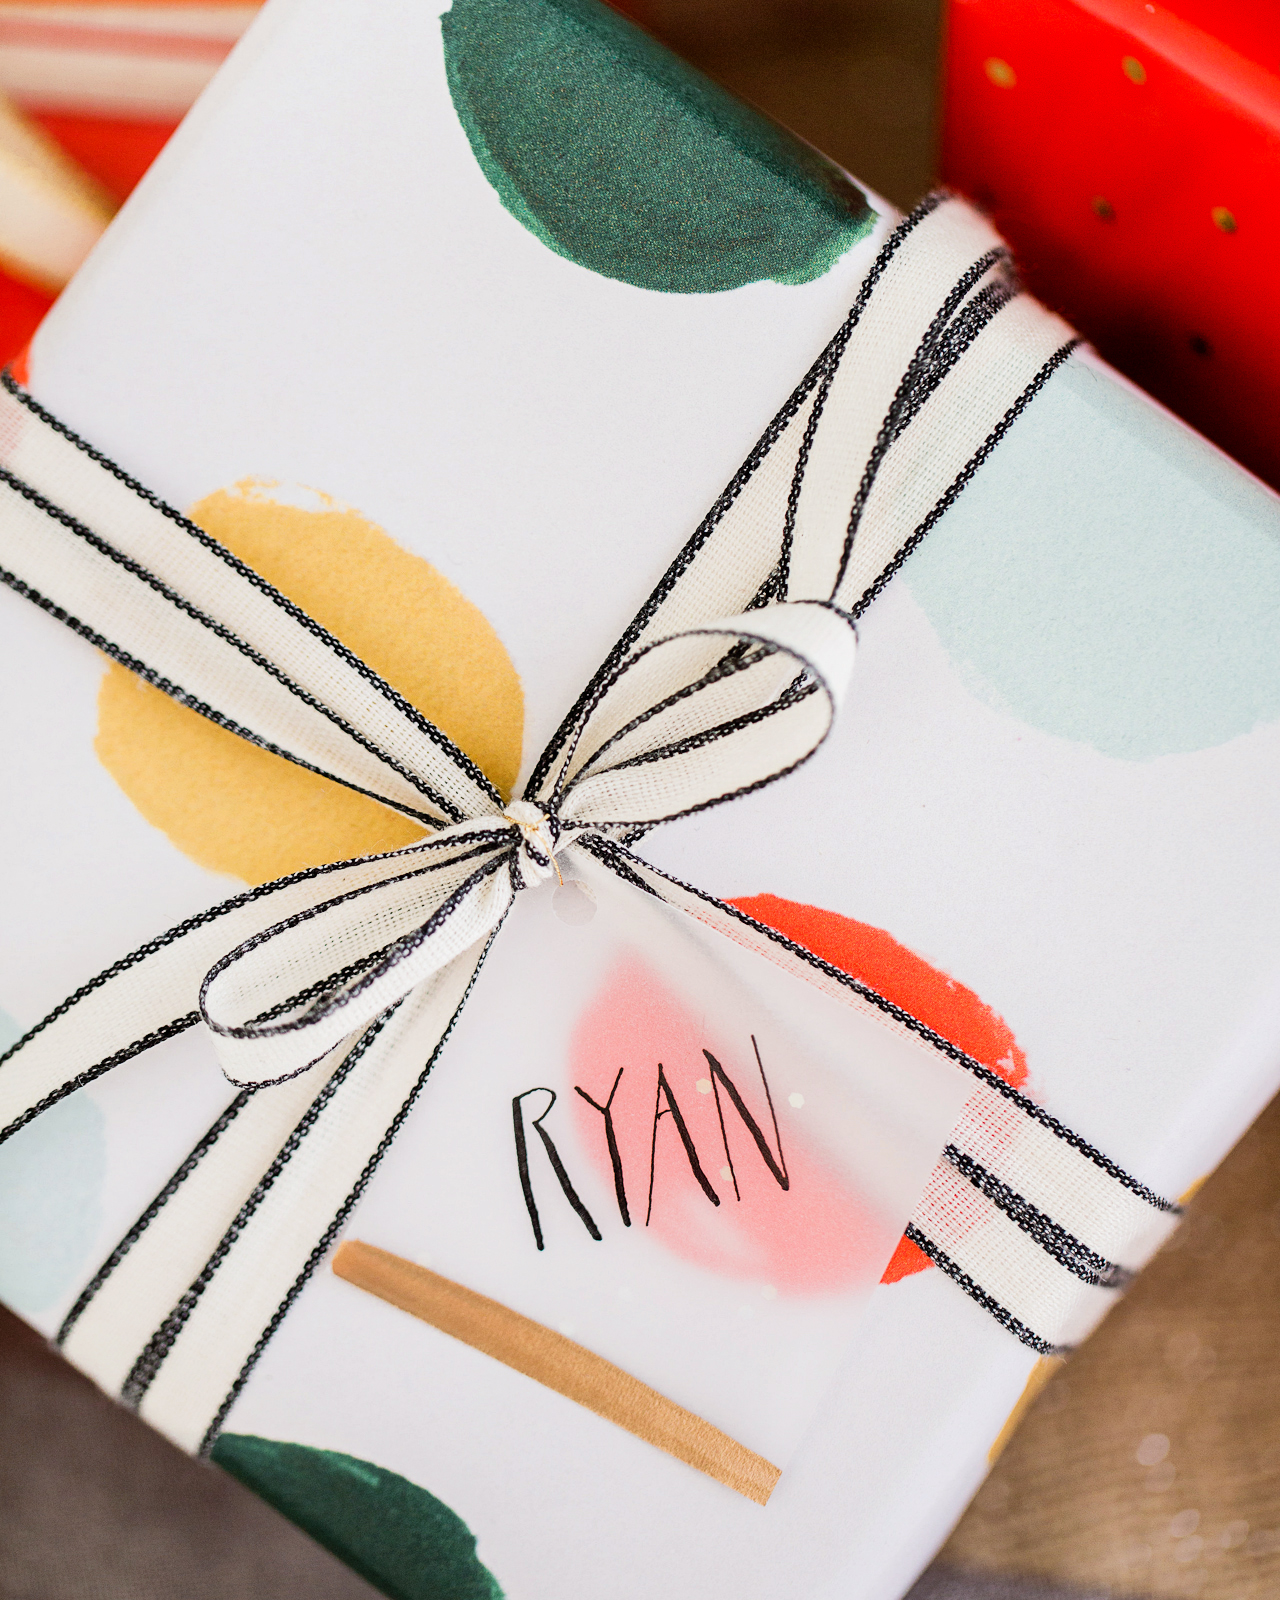
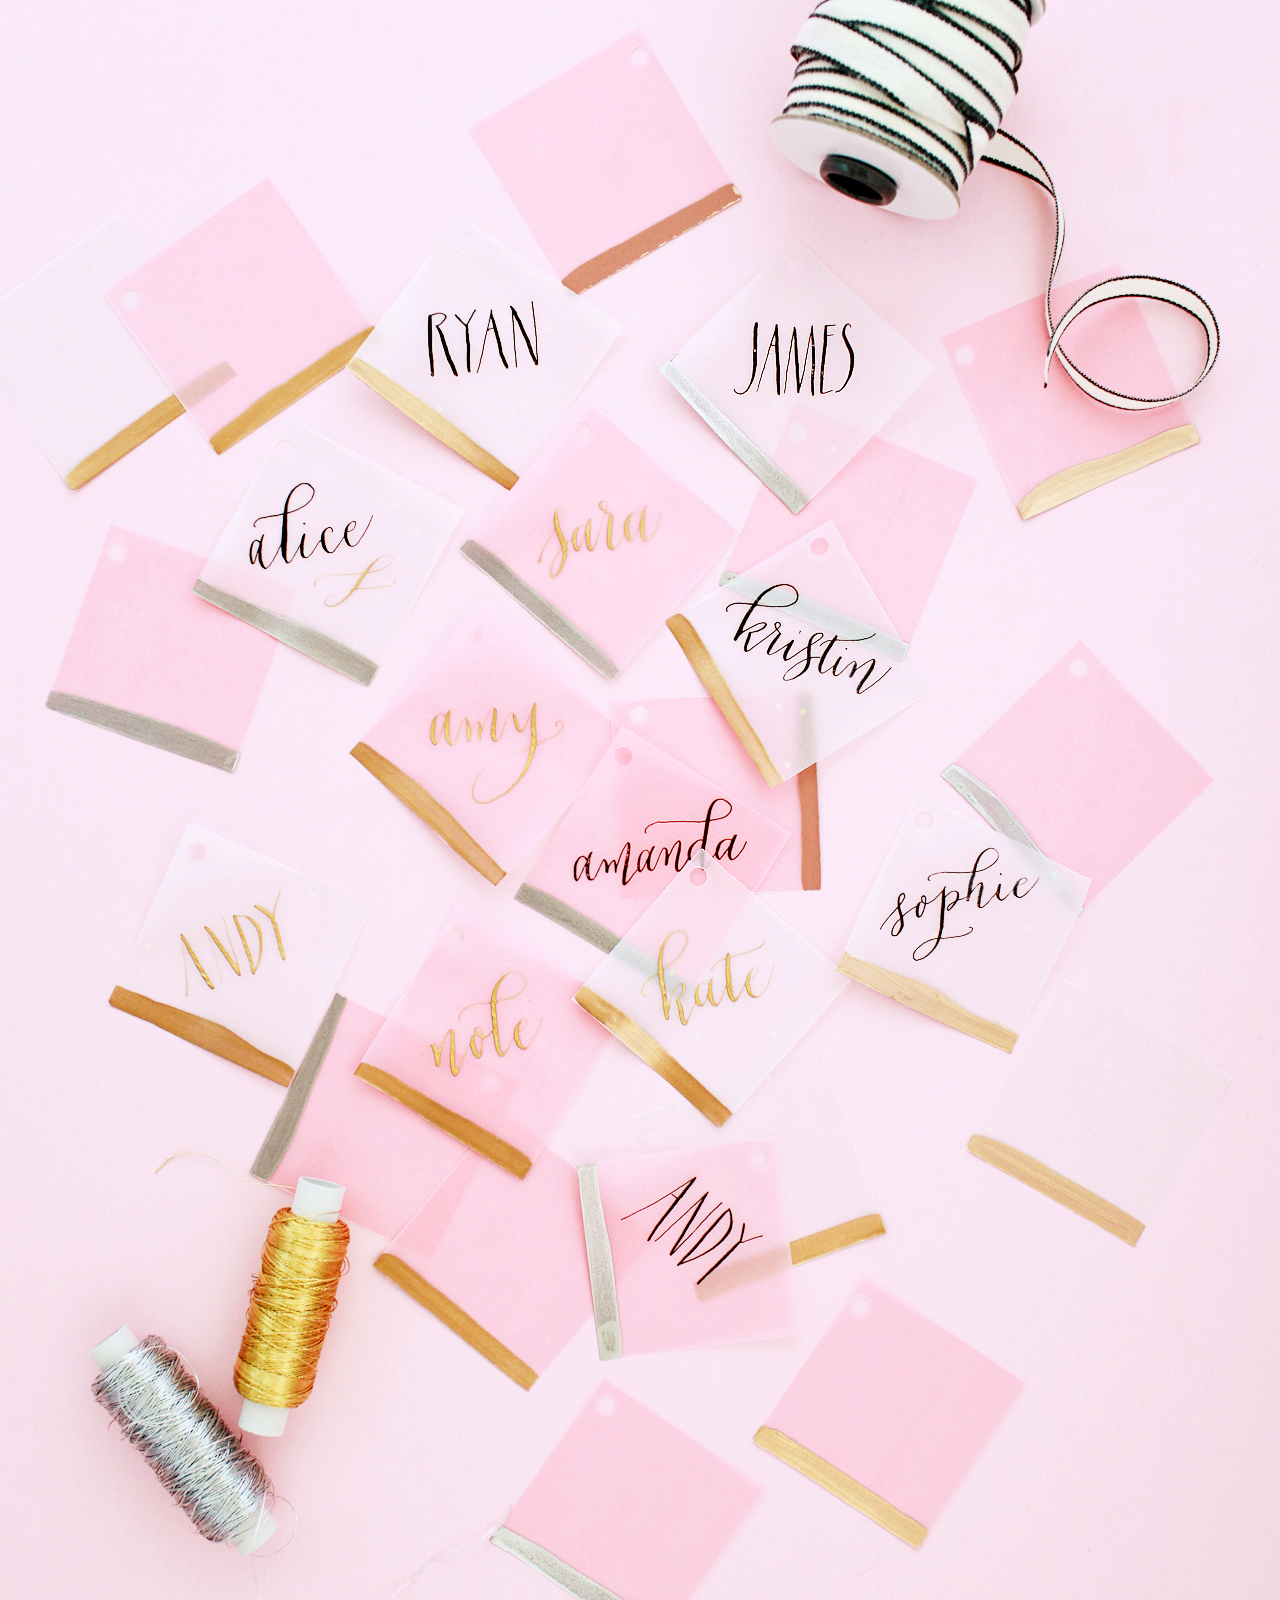
I always prefer smaller gift tags in simple shapes (squares, circles, even hexagons!) over larger gift tags in the traditional shape that you often see in stores. These gift tags are just simple vellum squares with a hole punched in one corner, then a quick swipe of gold or silver (or even copper!) liquid leaf on the bottom. Traditional gold or silver leaf (the kind that comes in sheets) would also work on vellum, but it tends to be a lot more time intensive, so I decided to stick with the liquid version to keep things simple.
Let’s start with the supplies that you’ll need to make these DIY vellum gift tags!
Supplies
Vellum (I like this iridescent vellum, and this variety pack has lots of fun colors)
Small Paint Brush
Gift Tag Maker with Built-in Eyelet Setter or 3/16″ Circle Punch
To make the DIY vellum gift tags:
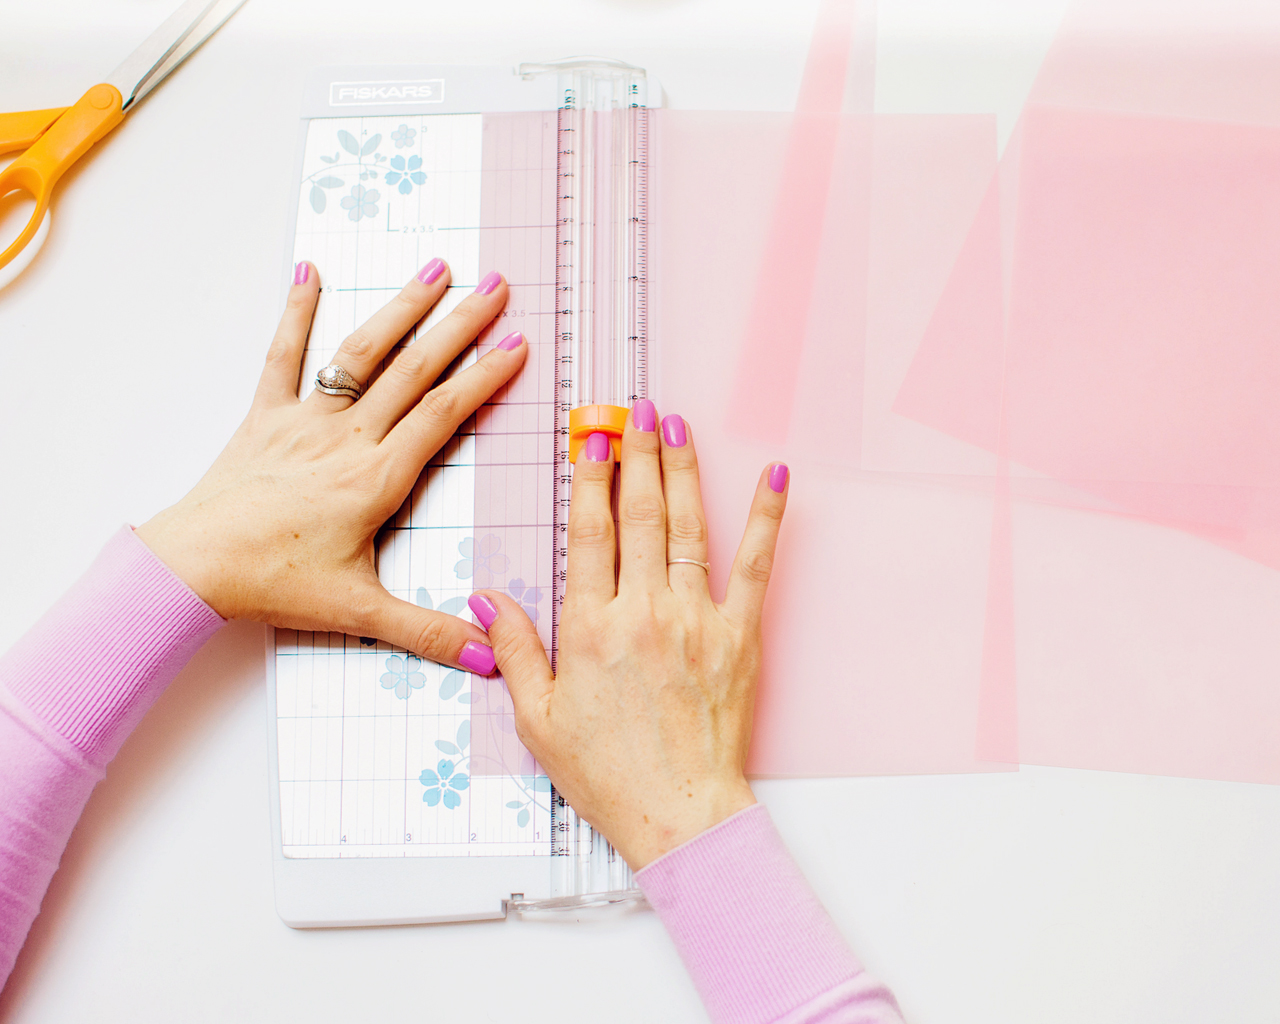
Step 1. Using your paper trimmer, cut a sheet of letter-sized vellum into 2″ strips, then cut the strips into 2″ squares. Pro tip: because vellum is fairly thin, you can stack 3-4 vellum strips and cut them into squares all at once! Makes things so much faster.
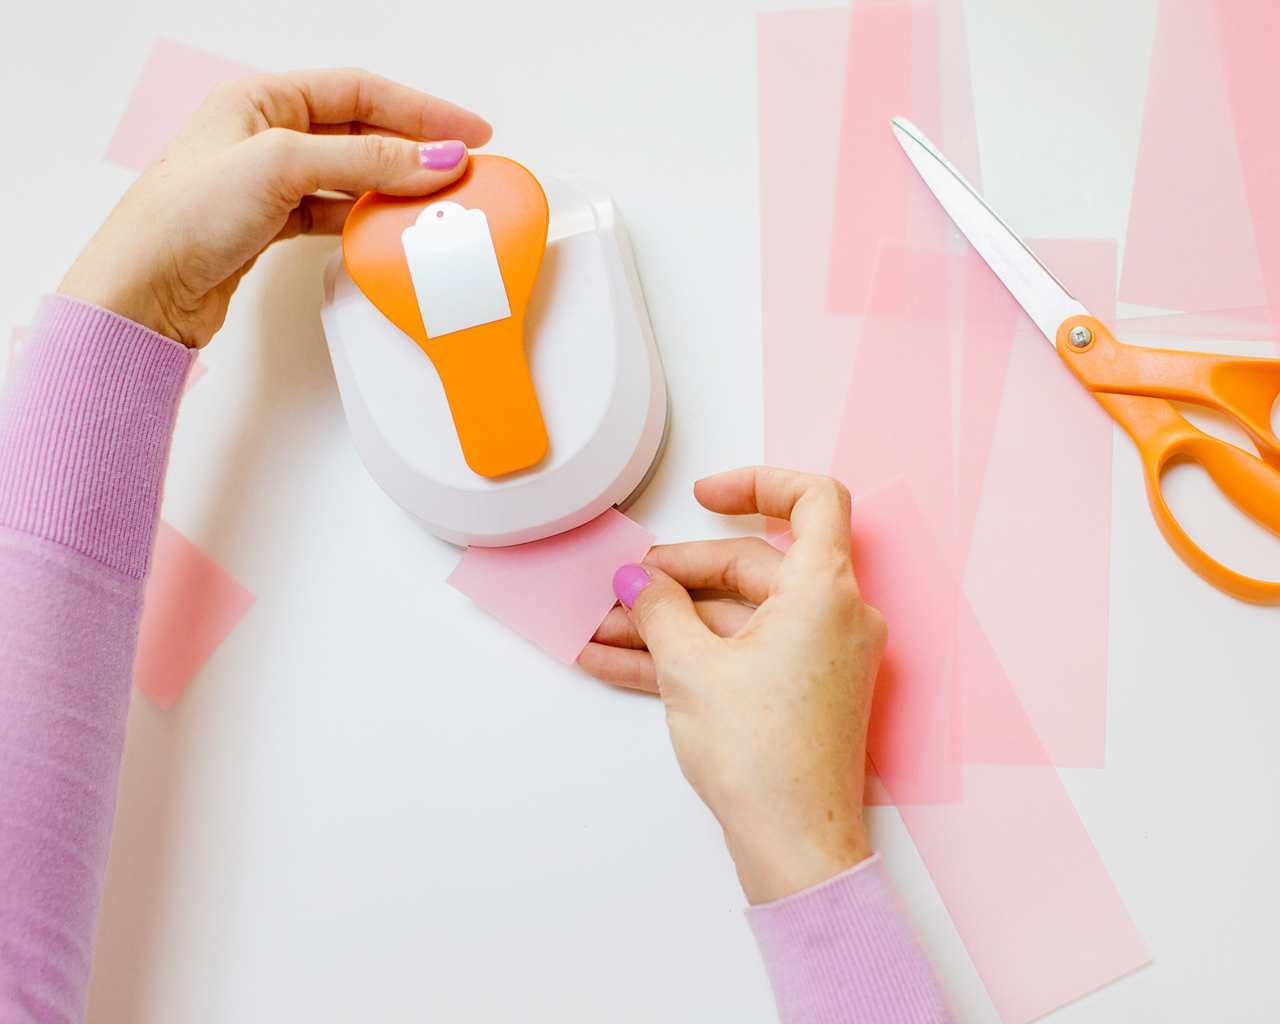
Step 2. Punch a 3/16″ hole in one corner of the gift tag. This is where you’ll eventually string your thread or ribbon. You can either use the eyelet hole punch on a gift tag maker, or just a stand alone 3/16″ hole punch. And yep, you can also stack several vellum squares and punch them all at the same time.
Step 3. Paint a thin strip of gold or silver leaf on the bottom edge of each square. I recommend placing a paper towel, sheet of newspaper, or even wax paper under the gift tags to protect your work surface, since gold and silver leaf can be difficult to clean up. If you’re using both gold and silver, you’ll need to use a different brush for each color – or thoroughly wash and dry the brush before moving from one to the other.
Step 4. After the metallic leaf has fully dried, write the name of the recipient on each gift tag. You could use gold or silver extra-fine paint markers to match the liquid leaf, or these archival black pens. Use gold or silver thread to attach the gift tags to the gift, and you’re all done!


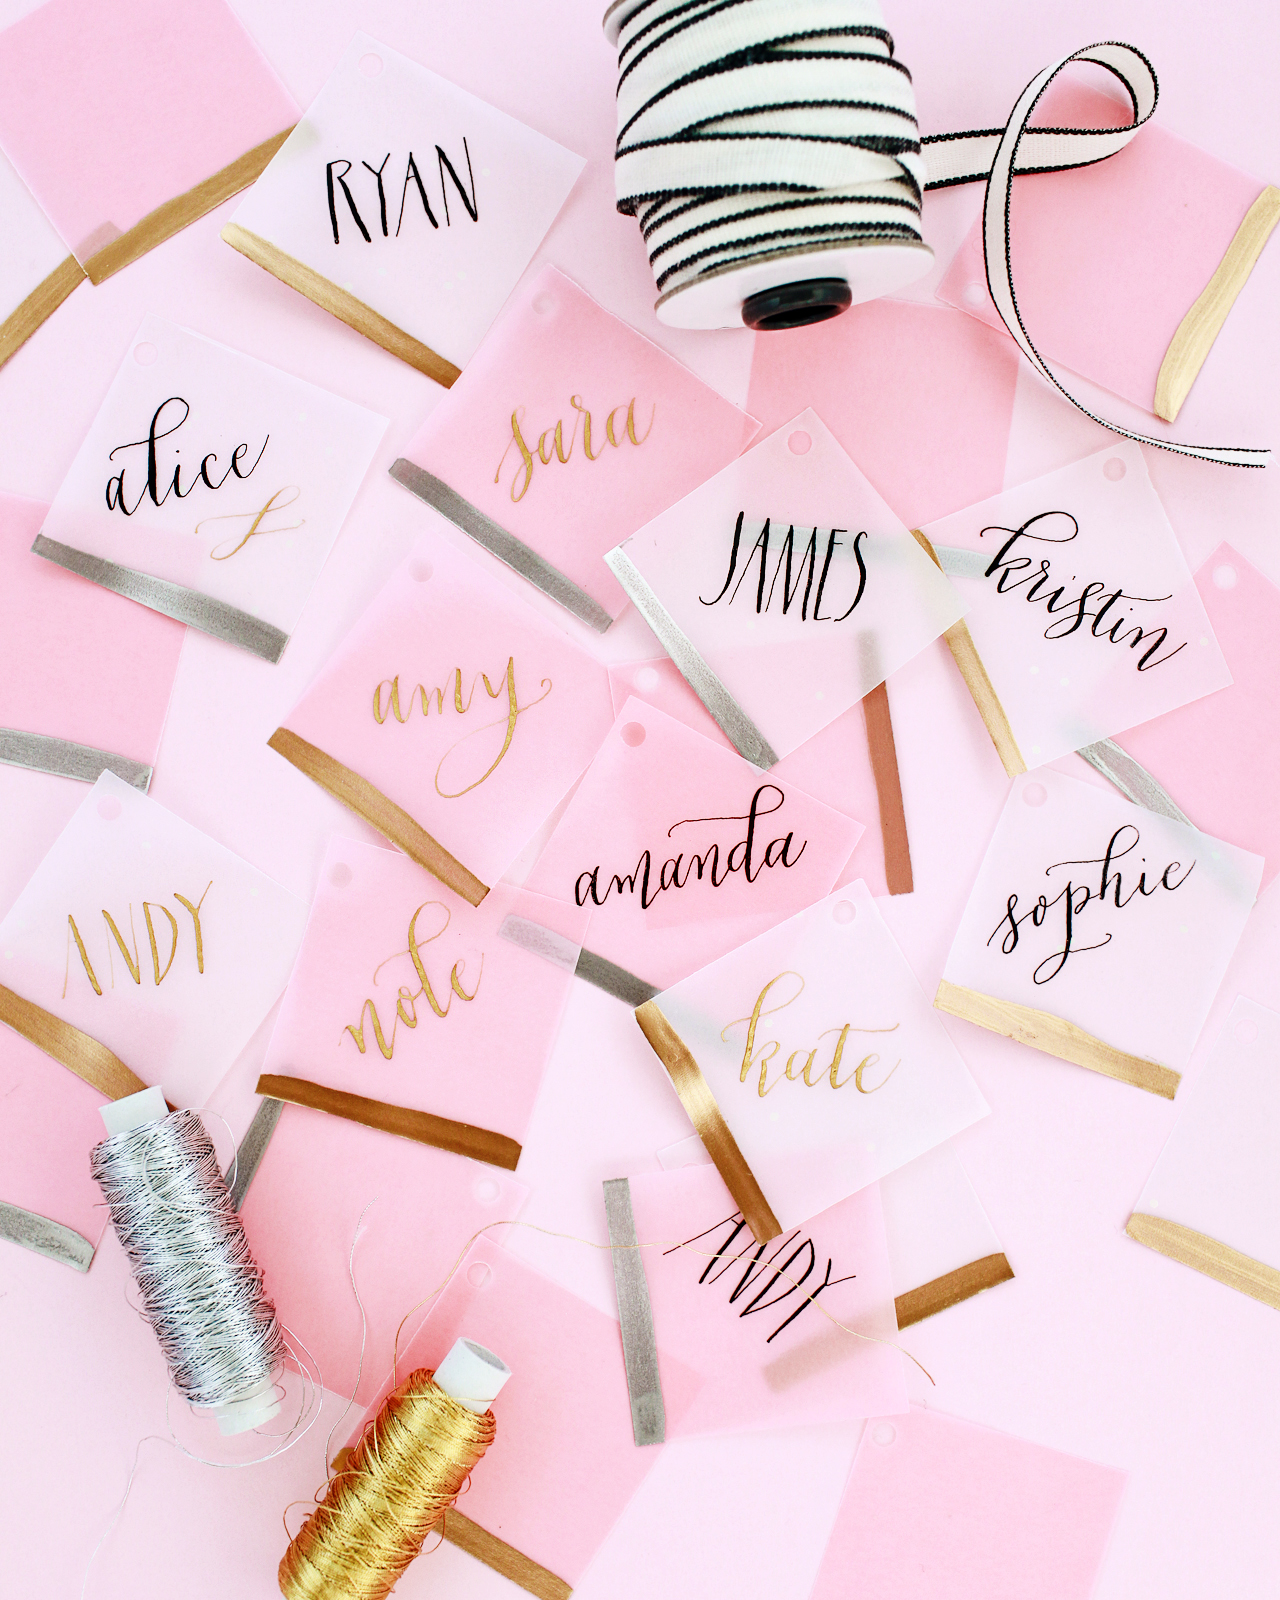
I love the way these gift tags are both elegant and modern at the same time, don’t you? The quick stripe of gold or silver adds just the perfect amount of shimmer, while the vellum makes everything feel fresh and modern. I used iridescent and pink vellum since that’s what I had on hand, but you can use whatever colors work for your holiday style. I’d love to try this with a dark green or navy blue vellum next!

Gift Tag Calligraphy: Meant to Be Calligraphy
p.s. How I’m wrapping my holiday gifts this year!
Photo Credits: Meghan Marie Photography and Nole Garey for Oh So Beautiful Paper