As you might be able to guess, we send quite a lot of snail mail in our line of work. Whether it’s thank you notes, catalogs, color samples, or a letter to our loved ones, we try to make all of our outgoing mail a treat for the recipient to receive. Since we have holiday cards on the brain, we decided to come up with some fun and easy addressing options suited to the season. They incorporate fun lettering styles as well as stamping and we just love them all! Want more DIY addressing styles? Check out our first envelope addressing post here. Have fun with the designs and happy addressing! –Bailey and Emma of Antiquaria
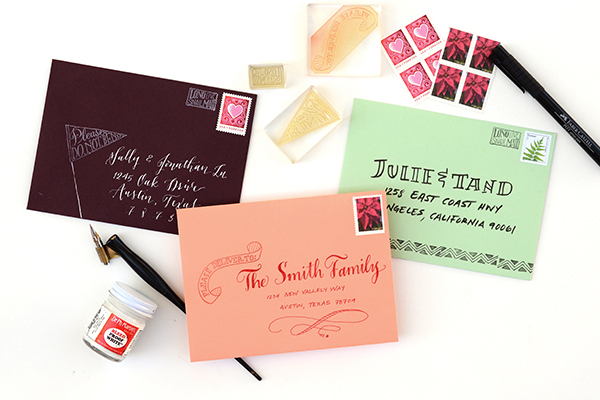
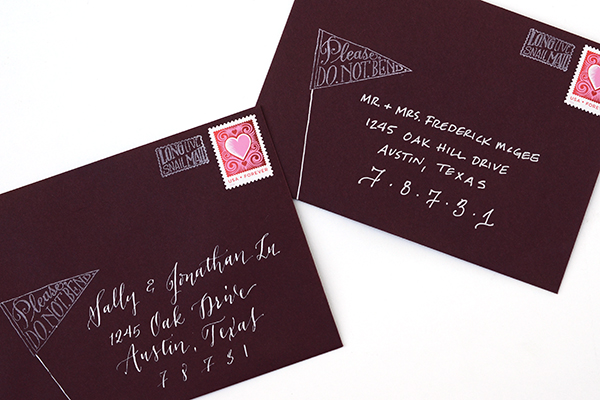
Option One: Do Not Bend Pennant Stamp + White DIY Pointed Pen Calligraphy Addressing. White stamping and white calligraphy ink really pop off of this gorgeous fig colored envelope. While it takes time to perfect using a pointed calligraphy pen, feel free to experiment also with white or silver gel pens for a similar (and easier) effect.
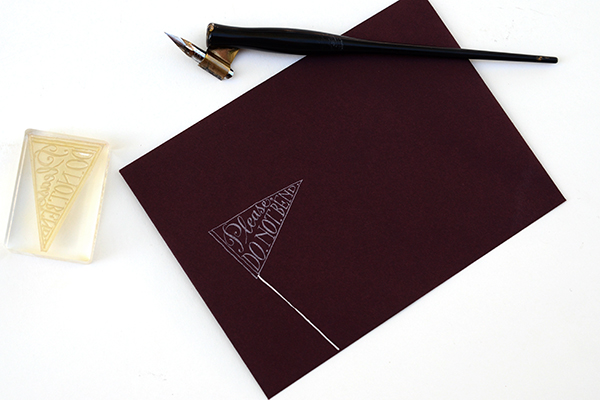
Stamp your Please Do Not Bend Pennant Stamp on the lefthand side of your envelope, just a hair above the center. With your pen, draw a line to the bottom with white ink.
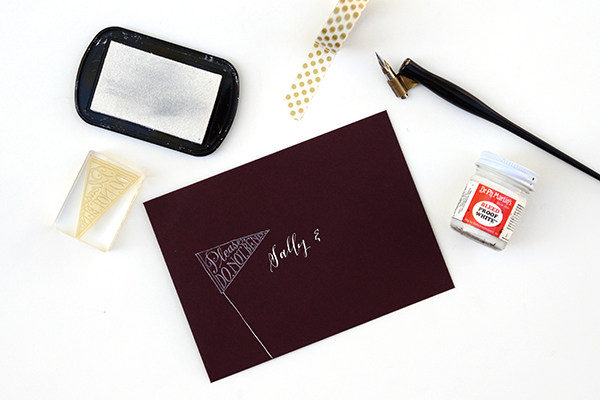
Next, address the envelope to your loved one using a pointed calligraphy pen and white ink. Start your addressing right below the pennant stamp, as shown above.
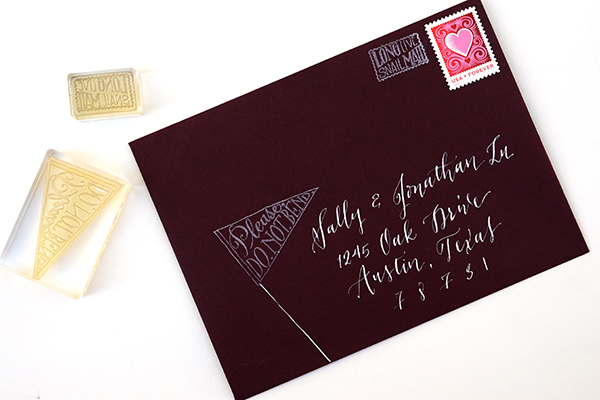
Let the addressing dry completely (with white calligraphy ink this can take a few hours). Once it’s dry, add your postage and then stamp our Long Live Snail Mail Stamp to the left. Feel free to play with the lettering style of addressing on this design! A simple hand-written block print with white or silver gel ink also looks lovely (see below)!
Option Two: Zig-Zag Stamp + Bold Brush Block Lettering. Adding a line of pattern along the bottom of the envelope instantly adds an air of “fun” to the design. When paired with an easy brushed address, the effect is bold and will stand out instantly among the bills and junk mail!
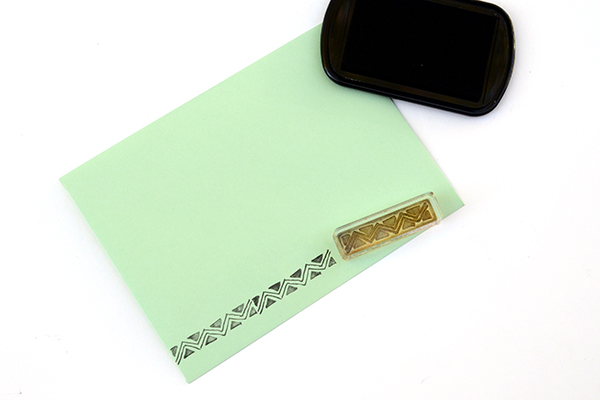
Print your zig-zag stamp in black ink along the bottom edge of the mint colored envelope. You’ll want to make sure that each printing is close together but not overlapping.
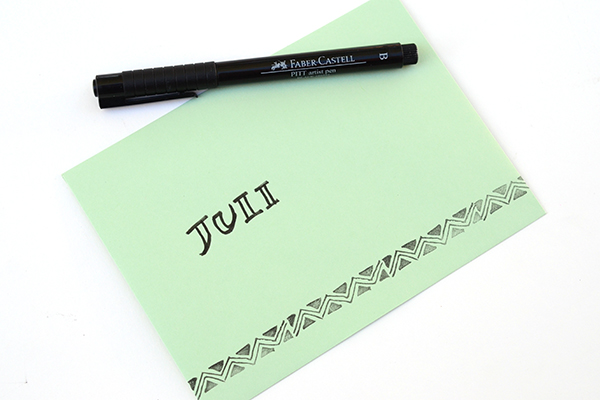
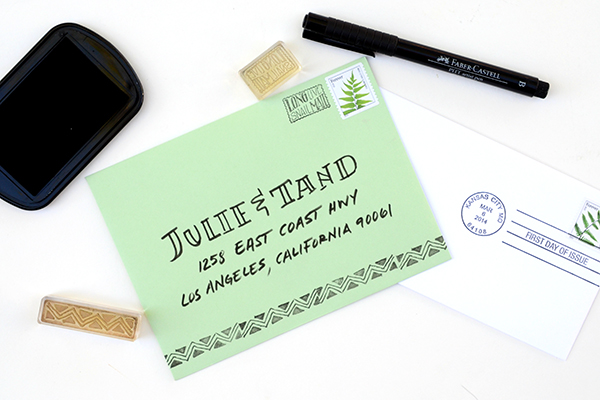
With a black brush pen, write out your loved one’s name. We decided to make big block letters for their name (with the mint color showing in the center) and a simple italic print for the address. Once the address is done, add your postage and our Long Live Snail Mail Stamp to complete the look!
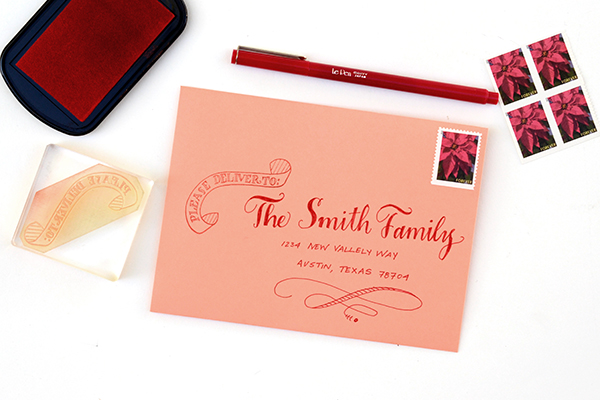
Option Three: Deliver To Banner Stamp + Hand-lettered Script. Bailey actually designed this adorable “Please Deliver To” stamp to use on her save the date a while back and we think that it makes the perfect snail mail statement on this coral envelope when combined with red addressing. The fun part of this design is that you get the look of calligraphy but with simpler tools! A common felt tipped pen made this gorgeous script. Incredible, right?
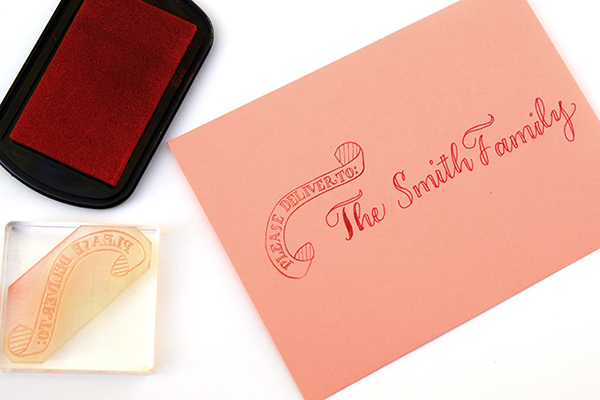
Start by stamping your Deliver To Banner Stamp on the left hand side of the envelope, a little above center. Angle it so that you can nestle the lettering in underneath it. To make the hand lettered script, use your prettiest cursive and write the name across your envelope. Then, draw a second line along each letter, creating the thick and thin look (as shown above). Refer to a favorite script font for letter shape and style, if needed.
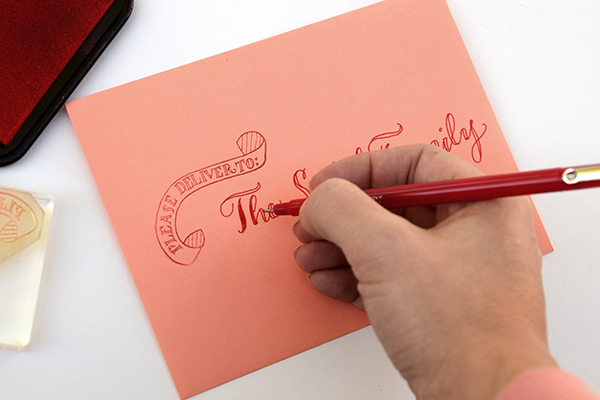
Once you’ve done that for the entire name, color in the letters so that they are solid red. Finish out the addressing with a simple italic print for the address. We also added a fun flourish underneath the last address line to gussy the envelope up even more! Draw it in pencil first or practice on a scrap piece of paper if you need to before executing it on your envelope.
While we think all of these styles would be perfectly suited to holiday greetings, we also think that they could be adapted and used on save the dates and Invitations as well! Play around with the techniques and find out what you like best with the cards that you’re sending. We hope that you have just as much fun addressing your cards as you do selecting them!
Materials and Resources
Special Delivery Stamp Kit:Â Deliver To Banner, Long Live Snail Mail and Do Not Bend Pennant
Feathers & Arrows Stamp Kit:Â contains the zig-zag stamp
Calligraphy Resources: Setting up your Tools,  Lower Case Alphabet by Bailey Rivera, Calligraphy Supplies
Brush and Felt Tipped Pens
For envelopes, we discuss many different envelope resources and options in a previous post, found here.
Photography by Antiquaria for Oh So Beautiful Paper

Time to start buffing up those calligraphy pen skills … Just stunning.
Jessica,
Yes! Addressing your holiday cards is the PERFECT way to practice your skills. Your friends and family will love receiving a card hand addressed by you!
Cheers!
Bailey
My understanding of diy is that the average person could do it. The average person absolutely could not do this. No real person has 10 minutes to address each and every Christmas card, and the average human being doesn’t just know how to do beautiful caligraphy. These envelopes are beautiful, but this is not a diy project, nor is it a tutorial.
Hi Alyse,
We’re sorry that you feel that way about this tutorial. Besides the first envelope design, the other two are designed to use common pens found at the local craft store and not specialized calligraphy tools. We’ve also included an alternative option for the first design that uses a normal print handwriting!
This post is intended to inspire readers to think outside of the box when it comes to addressing their holiday mail. Adding a special rubber stamped graphic or a fun ink color certainly makes an impression when it comes to pulling the envelope out of the mail box.
We love snail mail and dressing up our envelopes but we do understand that it’s not everyone’s priority. Thank you for your feedback and have a very Happy Holidays.
Best,
Bailey