Hi Everyone! The ladies of Ladyfingers Letterpress were kind enough to fill in during my summer vacation last year, and this post on Arley-Rose’s signature hand lettering was one of my favorite posts that week! So I jumped at the chance when Arley-Rose volunteered to stop by with some tips and tricks for adorning your envelopes with beautiful and whimsical hand lettered addresses. Take it away ladies! –Nole
With the majority of correspondence these days taking place in the digital realm, it’s always such a treat to get something real and tangible in the mail. Heck, even before e-mail dominated our lines of communication, you knew something was really special when it arrived through your mail slot all decked out with big, beautiful lettering that you knew someone took time to carefully create. Hopefully by the end of this post you will want to sit yourself down and experiment with some of the styles shown below to make your own beautifully styled envelope addresses. –Arley-Rose of Ladyfingers Letterpress
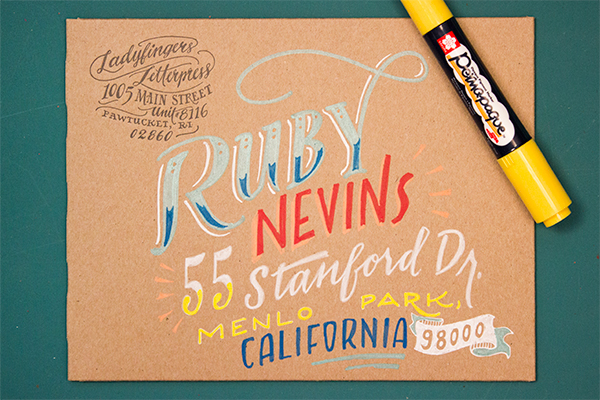
I like to think of hand-lettering as more of an “illustration using letters” more than a “trained handwriting” kinda thing, so I choose pens that give me the most control as possible. People are doing beautiful things with pointed pens and modern calligraphy these days, and I encourage you to experiment with pointed pens if you like, but for now I am going to stick the tools that I know and love.
We’ll begin our journey into the world of lettering with familiarizing ourselves with a few different lettering styles that will act as our foundation and give us some variation in style that we can draw upon throughout our lettering endeavors! Personally, I like to combine different lettering styles, fluctuating between scripts, roman, and sans-serif characters to give the piece a lot of motion and personality. Not sure what a roman character is? Read on! Have questions about the etiquette and formality of addressing your envelopes? Martha Stewart has a terrific go-to tutorial about that!

Roman lettering, which can also be called a “Serif,” has some of the earliest origins dating back to, well, the Romans! The word “Serif” is latin for “foot”, which makes sense when you look at the letters. See? They all have feet (except o’s)! Serifed typefaces such as Garamond or Baskerville look great as all caps and spaced out (which us type nerds refer to as “tracking”), or spelled out in both caps and lowercase with normal tracking. I sometimes like to make tall condensed roman letters if the address is really long and I need to make the most of my space. On capital As, Rs, Ns, Ys, Ks, Hs, and sometimes Gs, I like to add a little flourish, as you’ll notice on some of the envelope samples below.
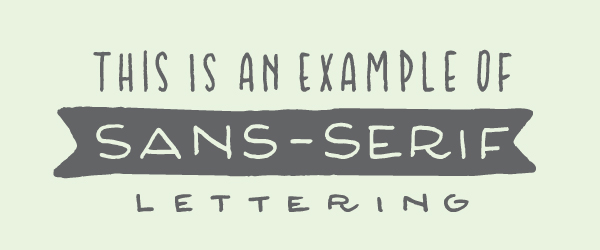
Now that you know that the word “Serif” means “foot”, naturally “Sans Serif” means “Without Feet!” Sans Serif letters were popularized in the mid twentieth century with the arrival of Helvetica, Gill Sans and Futura. I think they look great as all caps, tall and condensed! I also find that they’re easy to draw because they most closely resemble a clean, handwritten print style.
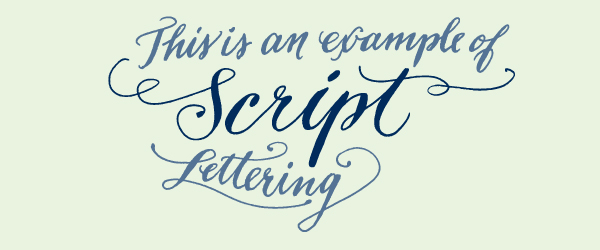
Now the fun part begins! Getting the hang of lettering a script might take some time to get the hang of, but here’s a secret! Write in cursive as you normally would, and then darken the strokes that should have accents. Feel free to refer to other scripts with a quick google image search to see where those accents should be. Have some fun with your script: it’s not necessary to keep a straight baseline, in fact I tend to like scripts that dance around a little bit on the page. They have more character! Ha! Get it! Character? Typography? Joke? Uhhh….. Nevermind.
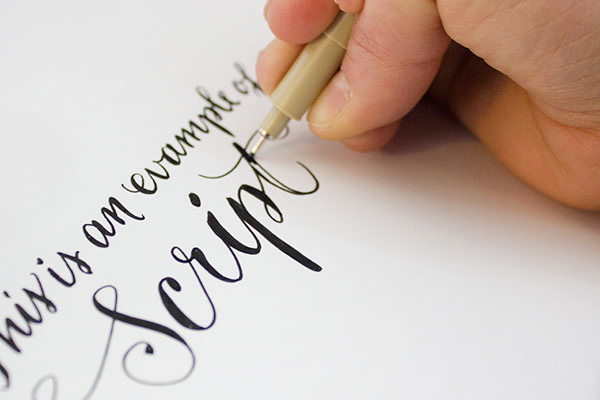
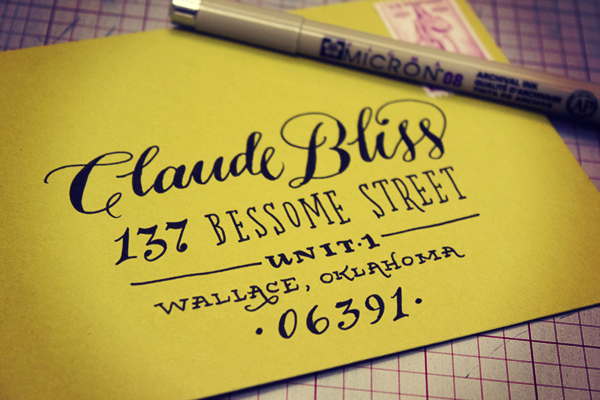
My favorite go-to pen is the Pigma Micron from Sakura of America. I’ve been drawing with Micron pens since I was a wee young artist, and they continue to be my favorite pen for all types of uses, especially drawing on light-colored envelopes. My size of choice is an 08 but there was a time when all I used was the smaller 03s to get a really nice fine line.
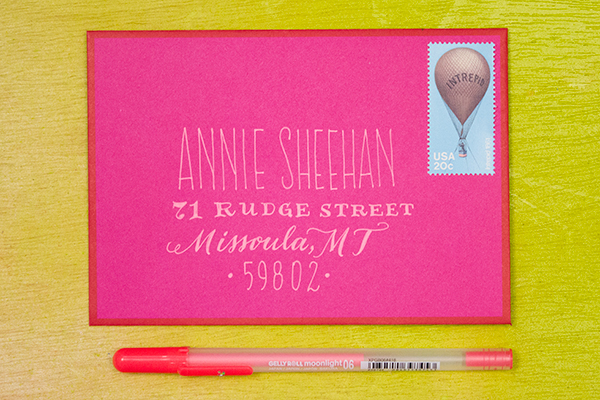
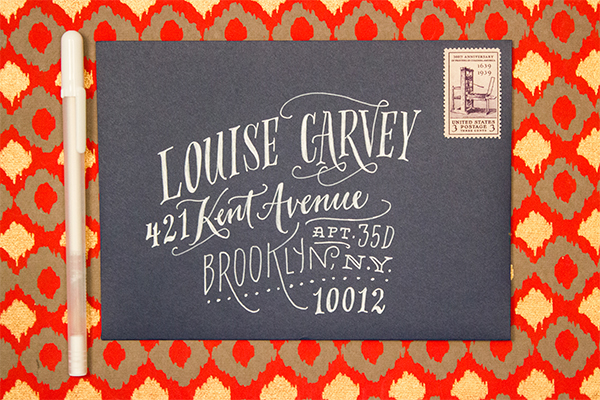
Keep it classy! Sometimes a white pen is all you need to do the trick, especially on dark or brightly colored envelopes. My go-to is the White Gelly Roll 08, which gives me a nice smooth line without any breaks or clogs. I’ve found that the Metallic Silver Gelly Roll pen is also super awesome! It’s not really too sparkly, but is super opaque which is exactly what I want. I also like the Moonlight pens for an extra burst of color.
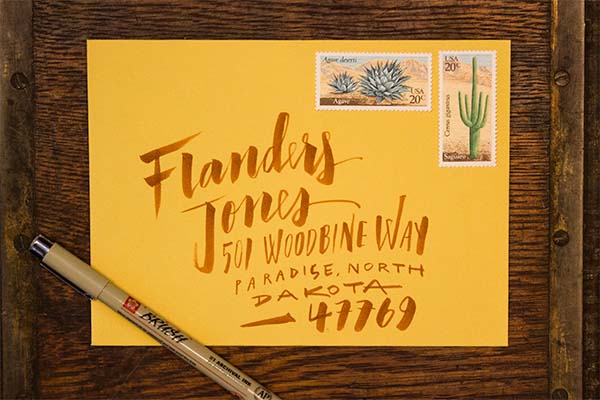
Sometimes I like the swift expression that can only be found with a brush pen. When I don’t have time to whip out the gouache and brushes, the Pigma Brush pens really do the trick. They also come in  a variety of colors, so if you’re not feeling like black ink is your thing that day, you can also choose from a variety of other colors that look great on white or light colored envelopes.
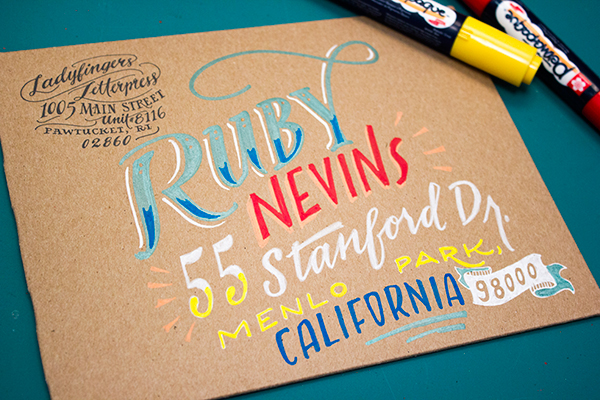
The Do Not Open Lettering Project  by Erik Marinovich was recently brought to my attention by my amazing typographer friend Jeremy Mickel, and it blew my mind. It still does blow my mind. Every time I look at it. I thought I would refer to it here because it shows how creative you can be with large oversize envelopes. Besides, envelopes: they’re really just a canvas for beautiful lettering, right? Anyway, the Permapaque markers are incredible for this task. They’re nice and opaque like a paint marker without the nasty smell, and you get a huge variety of colors!
Now that you’ve seen some samples, I’d love to see what you come up with! Don’t forget to tag your work on Instagram with @beautifulpaper, @ladyfingersletterpress and @sakuraofamerica. Thanks and happy lettering!
Pens provided by Sakura of America, with awesome stamps provided by Pack & Post!
Photo Credits:Â Ladyfingers Letterpress

This is totally awesome – best tutorial I’ve read in a long time. And now I’m going go buy a Gelly Roll for the first time since the 90’s.
This post is perfection! So much inspiration and I love all the information you provided too. I’ve been looking for a good white ink pen, and can’t wait to hit up Blick soon to get the one you recommend.
xo!
I agree with Brittany! One of the best tutorials in a long time. Throughly enjoyed it! Gelly Roll pens on the must have list!
I absolutely adored this post. Thanks for sharing some of the pens you use and inspiration for lettering! I did my own lettering for my wedding invites and am always looking for opportunities to practice on birthday cards and anything else I’m mailing!
You know… I would not have thought to use gel pens for lettering! I’m a pointed pen calligrapher trying to branch out into more mediums, so this is perfect – thanks!!
This is awesome! Definitely one of my favorite posts on OSBP. I decided a few weeks ago Ladyfingers Letterpress will have my business when it comes time to design my wedding invitations! Good work!
This was an awesome tutorial! I would LOVE (emphasis, highlight..etc. LOL) to see more tuts like this. I love typography and I would have never thought Gelly Roll pens would look that great on colored paper…. time for a trip to the craft store again. LOL
Amazing tutorials. Thank you so much for sparking my creative juices. I have only used jelly roll pens on white or cream colored paper it’s nice to know that the show up vibrantly on colored papers. Thank You for sharing.
I really like your blog.. very nice colors & theme. Did you make this website yourself or did you hire someone to do it for you? Plz respond as I’m looking to construct my own blog and would like to know where u got this from. thank you fgedbdcdgffk
Thanks for the post. So inspiring! I am going to definitely give it a try! 😃
hdmi to rca converter box