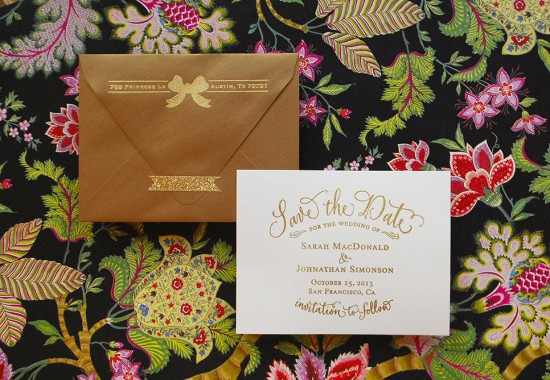
We’re huge fans of gold in pretty much all arenas: housewares, fashion, jewelry, and stationery just to name a few! That’s why this week’s gold on gold embossed save the date tutorial is so awesome. Plus, with this simple and affordable technique, you can create a custom invitation with a high end look on a budget. – Bailey and Emma of Antiquaria
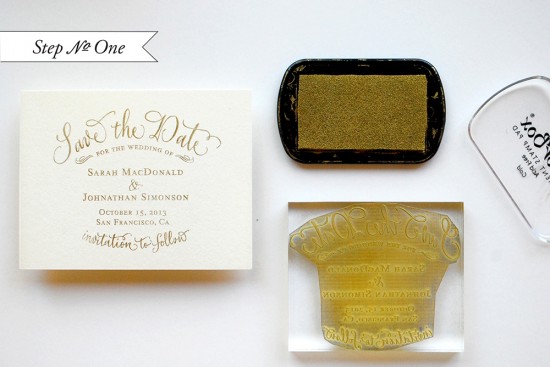
Step One: Unlike most of our stamping tutorials, this week’s embossing technique  is done one piece at a time. Start by inking your stamp (we used our Vintage Calligraphy Save the Date) with a gold metallic stamp pad. For specifics on how to ink your oversized stamp check out step one of this tutorial. Next, you’ll center the stamp over your A6 (4 1/2″ x 6 1/4″) card. Press down firmly to make the print. Lift the stamp off of the card and move quickly to step two.
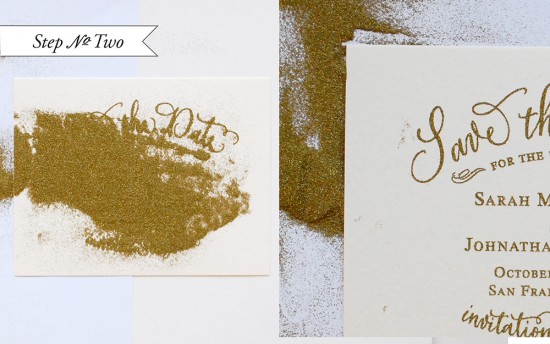
Step Two: While the ink is still wet (using pigment ink such as Colorbox is going to be your best bet for this project), sprinkle embossing powder over the print. Shift powder around the card until it is solidly covering all of the text and graphics. Gently tap the excess off onto a piece of loose leaf computer paper for reuse. If there are still specs of powder on the card, remove them very carefully with a small paint brush. Any powder left will solidify if exposed to the heat.
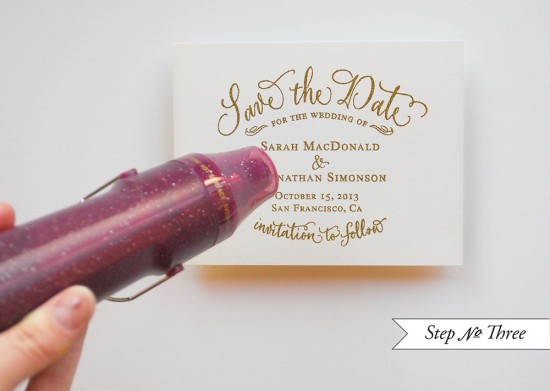
Step Three: Using an embossing heat tool, set the powder by heating it (not too close or you’ll burn the paper) until the powder has solidified. You will want to do a small area at a time to ensure proper solidification. When you’re done, double check you handiwork to make sure all of the areas have been set.
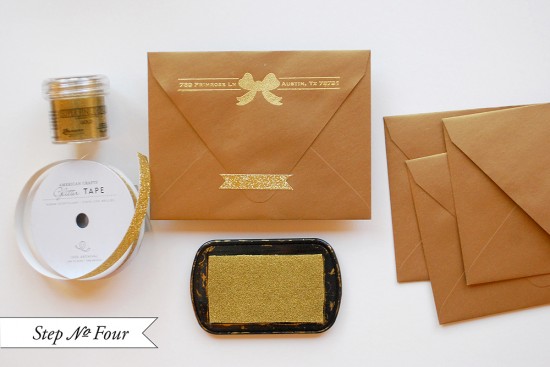
Step Four: You’ll want to repeat steps 1 – 3 for your return address (we used our Bow Return Address stamp). How amazing is the gold embossing on the gold envelope?! Swoon. We’re in love.
Finish them off with more gold – a fabulous piece of gold glitter washi tape on the back flap of the envelope!
Materials
Stamps:
“Vintage Calligraphy” Save the Date
Paper and Tools:
A6 Cards in Luxe White
A6 Envelopes in Stardream Antique Gold
Stamp Pad in Gold
Embossing Powder in Superfine Gold
Washi Tape Gold Glitter
AntiÂquaria is a memÂber of the Designer Rolodex – you can see more of their beauÂtiÂful work right here or visit the real wedding invitations gallery for more wedding invitation ideas!
Photo Credits: Antiquaria

Comments are closed.