It’s the ladies of AntiÂquaria, back with another fabÂuÂlous and creÂative DIY project for you!  This week they’re here with some awesome DIY moving announcement bookmarks!
Here at Antiquaria, we’ve got moving on the brain. Â Emma recently moved the Antiquaria design studio out to sunny California and Bailey is prepping to relocate the vintage shop and registry at the end of the year. Â As lovers of all things paper… this means only one thing, sending out moving announcements!
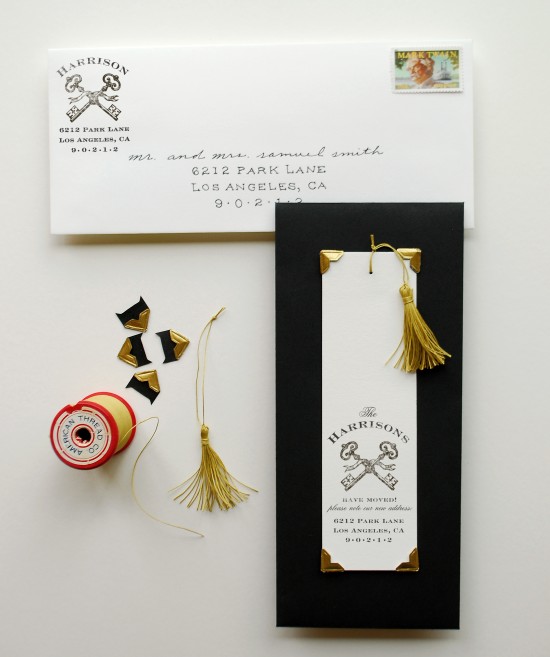
We were brainstorming, looking for something that might be fun to send out; that recipients interact with and can use…instead of just a card to keep on their fridge. Â And voila…moving bookmarks! Â So fun, useful and an impressive little gift to receive in the mail.
We love the coordinating designs of the moving announcement and the matching return address stamp.
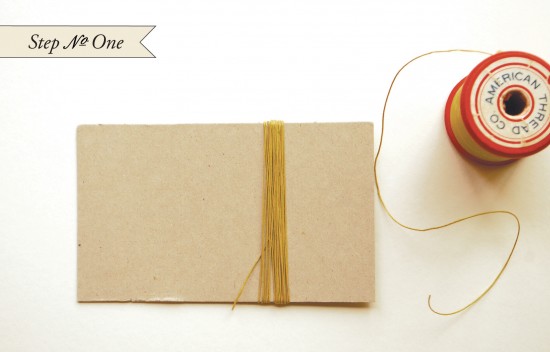
Step One: Get a little rectangle of cardboard and cut it to the height that you would like your tassle to be (we made ours 3 inches). Â Wrap your thread around the card approximately 20 times or until you reach your desired thickness. Â Leave the tail at the bottom as seen in the photo above.
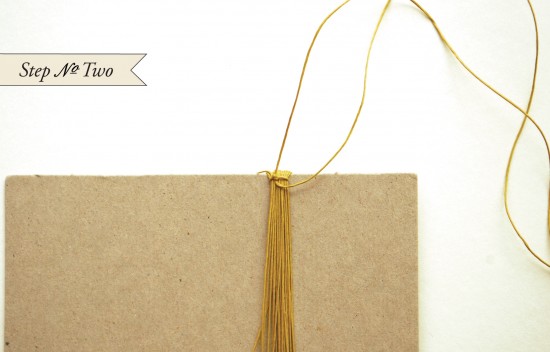
Step Two: Using another piece of thread (~10 inches long), tie a knot at the top of the cardboard, securing all the loops together.
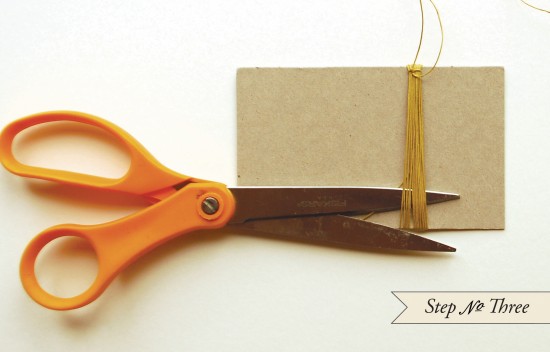
Step Three: Cut the bottom loops, freeing the tassel from the cardboard.
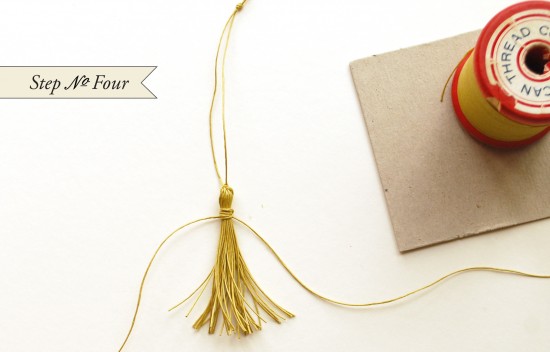
Step Four: With another length of thread (~15 inches), wrap thread close to the top of the tassel and secure with a knot. Â Trim the ends, ensuring that you don’t cut the knot.
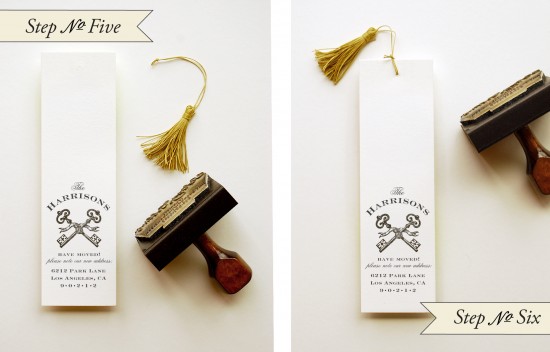
Step Five & Six: Cut bookmarks to desired size (2.125 x 7.25″). Â On the bottom of the bookmark, print your stamp (we used our Keys Moving Announcement Rubber Stamp). Â Ink stamp throughly and press evenly on a hard surface. Â Lift stamp straight up and let ink dry. Â Once dry, punch a small hole at the top center of the bookmark and tie on the tassel.
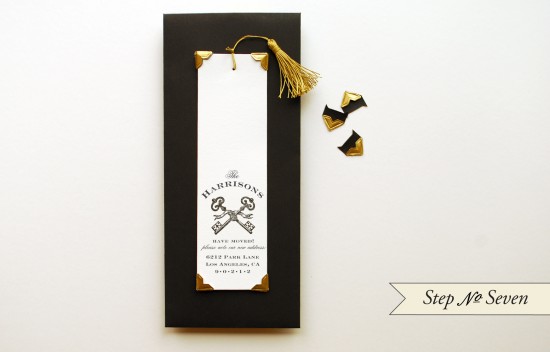
Step Seven: Cut black backers to (4 x 9.25″). Â Stick gold photo corner on each corner of the bookmark, lick to activate the adhesive. Â Center and press the bookmark down onto the backer. Â Let adhesive dry.
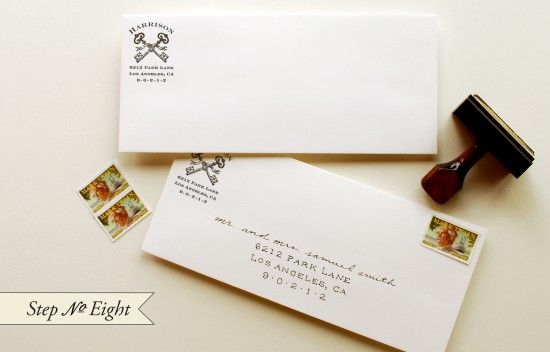
Step Eight: Stamp upper left hand side of an #10 envelope with your new return address stamp. Â Address, apply postage and mail them out!!
Materials:
Stamps:Â Keys Moving Announcement Rubber Stamp, size medium, Keys Return Address Rubber Stamp
Thread: Thrift for vintage thread or buy some at your local craft or fabric store. Â Use a thicker cotton thread, such as one for hand quilting.
Scrap Cardboard
Scissors
Hole Punch
Paper for Bookmarks cut to (2.5 x 7.25″), we used luxe white
Paper for Backers:Â #10 or (4 x 9.25″), we used black
#10 Envelopes (we used luxe white)
Photo Credits: Antiquaria

What a creative and interesting way to share a move. I love it! The golden tassel just makes it. Great job!