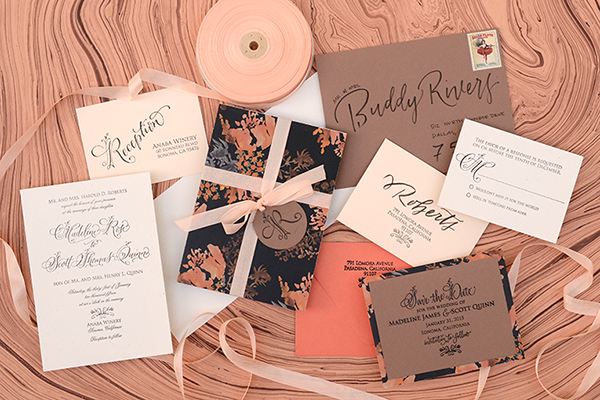
Summer may just have arrived, but in the world of wedding invitations, we’re already looking forward toward the autumn and winter seasons. We love this fresh take on an autumn color palette – mixing a dark watercolor pattern with lovely shades of peach, coral, and blush – for a beautiful suite of autumn floral wedding invitations and save the dates. It has romance written all over it! – Bailey and Emma of Antiquaria
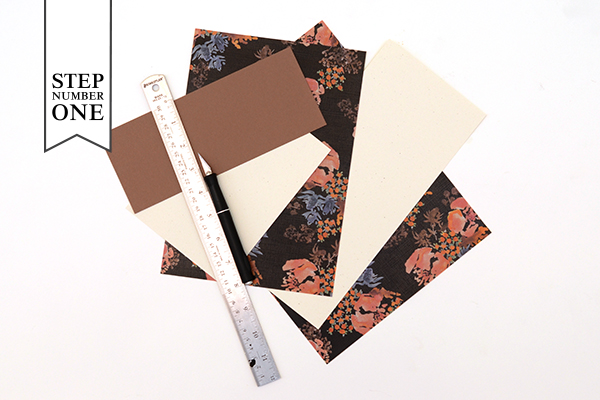
Step One: For this design, we’re making a save the date and wedding invitation suite together. None of the paper came cut to size, so we had to cut the paper and cards ourselves. You can manually cut them with a self healing mat, kraft knife, and metal ruler or you can take everything to be cut at a local printer (the best idea for precision).
You’ll need these final paper sizes:
Save the Date – Java, 3.75″ x 5″
Save the Date Backer – “Zoe” Floral Patterned Cover, 4.25″ x 5.5″
Invitation – Milkweed, 5″ x 7″
Invitation Folder – “Zoe” Floral Patterned Text Weight, 10″ x 7″
Reply Card – Milkweed, 3.5″  x 4.875″
Reception Card – Old Lace, 3.5″ x 4.875″
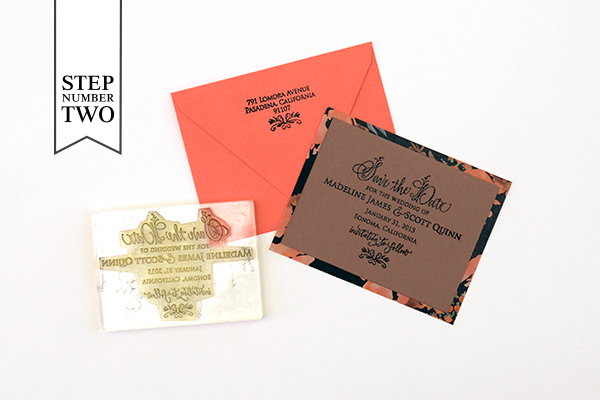
Step Two: Create your save the date. We embossed our Floral Calligraphy Save the Date design onto a Java card with black embossing powder for a great opaque look (see steps below). We also embossed our return address stamp on the back flap of our envelope. You will mount the Java card onto the patterned backer, using double sided tape or stick glue, making certain that the margins are equal on all sides.
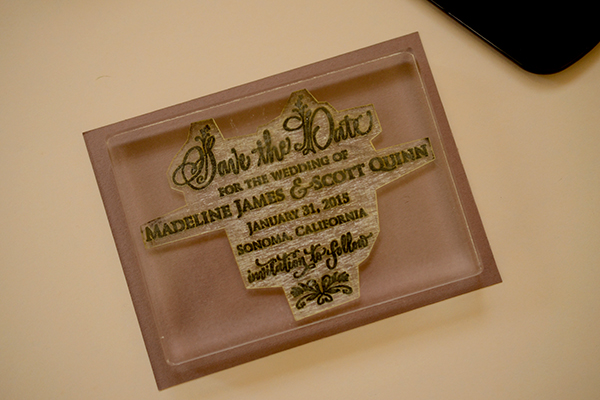
Stamp the save the date onto your card using black ink.
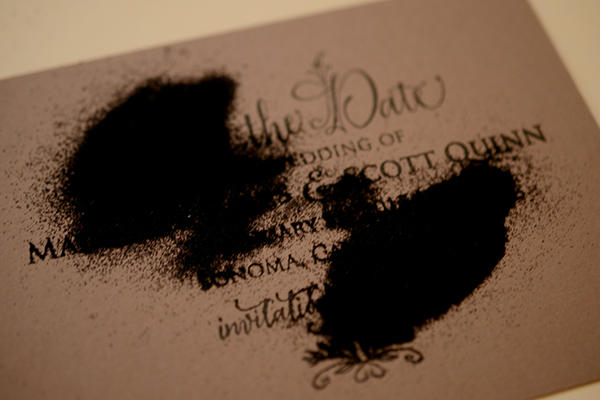
Immediately cover the printed image with black embossing powder (best to do this step over scrap paper). Shift it around to cover the entire image and tap off  the excess.

Heat set the design with an embossing heat tool.  For more information about this process, please watch our video tutorial found here.
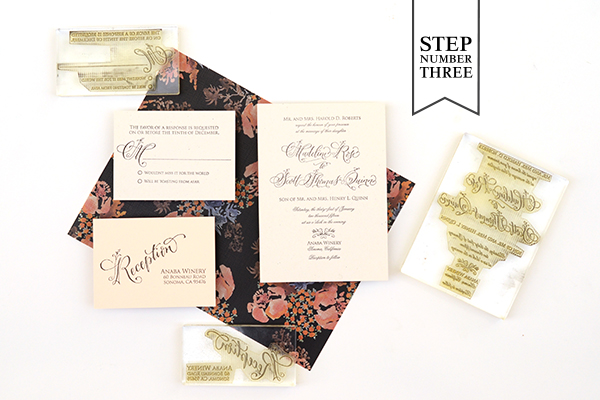
Step Three: Stamp all of your invitation suite cards. We used designs from our Floral Calligraphy Collection for this suite, including the Floral Calligraphy Invitation Stamp, Floral Calligraphy Reply Card Stamp and Floral Calligraphy Reception Stamp. We used black ink with the designs to tie everything together with the floral watercolor paper!
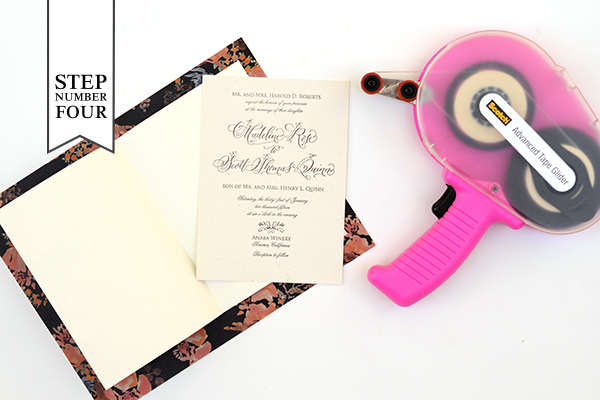
Step Four: We love coming up with new ways to incorporate pattern and color into our designs. This patterned invitation “folder” is one fun way! Fold your 10″ x 7″ patterned text weight paper in half. Apply double sided tape or stick glue to the back of your invitation card. Stick it into the right hand side of the “folder” and press to adhere. The invitation card and right hand side of the folder should be the same size, 5″ x 7.”

Step Five: Next, we’ll make our reply envelopes. Our return address stamp design didn’t include a name – but that’s okay! We’ll simply add one! With a black brush pen, we wrote the last name across the envelope, a little higher than center. Then we stamped our return address design in black right below it. Mission accomplished!
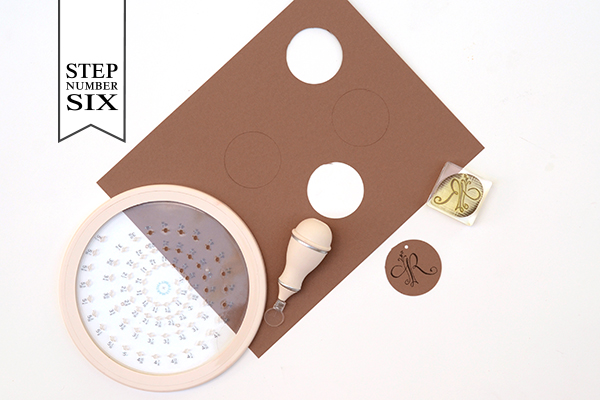
Step Six: A monogram tag is a really great way to tie the suite together. And you can also use it at your reception and on personal stationery after the wedding! We cut out 2″ circle tags using a circle making tool (or using a circle punch). Then, we stamped our Floral Calligraphy Monogram Initial Stamp in black in the center. Finally, we punched a small hole in the top center so that we have something to thread our ribbon through!
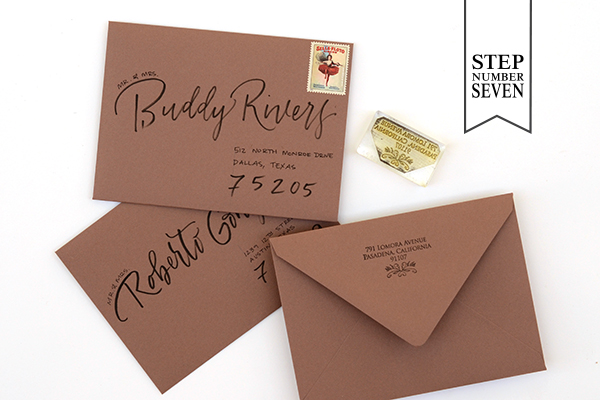
Step Seven: A big consideration for any invitation suite is how your are going to address them. We decided that a modern brush style in black would be fun with this design. After stamping our return address on the back flap, we addressed them using this calligraphy addressing tutorial.
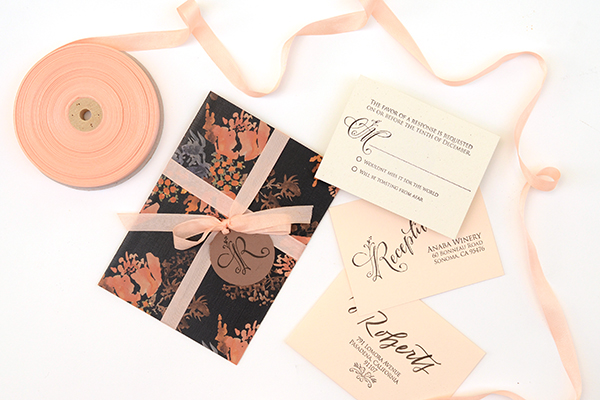
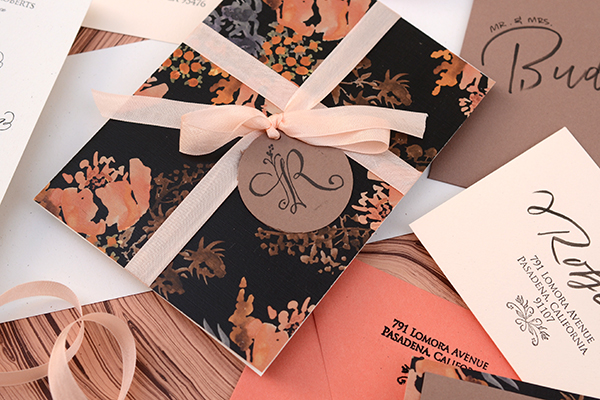
The Final Touches: To finish off the suite, we tucked all of the cards inside our “folder” and then tied it all up with some gorgeous blush colored tailors ribbon. Guests will feel like they’re opening a gift when they receive it in the post and get a small glimpse of the fun to come!
Materials
Stamps
Floral Calligraphy Save the Date Stamp
Floral Calligraphy Return Address Stamp, No.2
Floral Calligraphy Invitation Stamp
Floral Calligraphy Reply Card Stamp
Floral Calligraphy Reception Stamp
Floral Calligraphy Initial Monogram Stamp
Paper
“Zoe” Floral Patterned Paper-in Cover weight and Text weight
Other Items
Self Healing Mat, Kraft Knife and Metal Ruler
Double sided tape or stick glue
Circle Cutter or Circle Punch
Stamp Pad in Black
Embossing Powder and Heat Tool
Brush Pen
Hole Punch
Tailors Ribbon in Grecian Pink
AntiÂquaria is a memÂber of the Designer Rolodex – you can see more of their beauÂtiÂful work right here or visit the real wedding invitations gallery for more wedding invitation ideas!
Photo Credits:Â Antiquaria for Oh So Beautiful Paper

Comments are closed.