
Every designer has a unique method that works for them. With so many different ways to arrive at the final product, there is always room for experimenting with different styles, supplies and ideas; it’s all about trial and error. Illustration is a process that is near and dear to my heart. I studied illustration at Syracuse University and it’s been the consistent force in my life (sorry flair jeans). I thought I’d share our illustration process here and give you a few tips on how we go about our projects. – Courtney of Swiss Cottage Designs
This one is a fun one: it was a crest for a client’s wedding invitation suite. Her last name is Buck and his last name is Scott, so they wanted to play off that and personify drawings of a deer and scottie dog to represent them. I was in love with this idea right from the get-got! Here is how we started Marie’s crest.
Tools
Every good project starts with your most tried and trusted tools. The ones shown here were not all used for this project but I thought I’d share a few of our favorites:
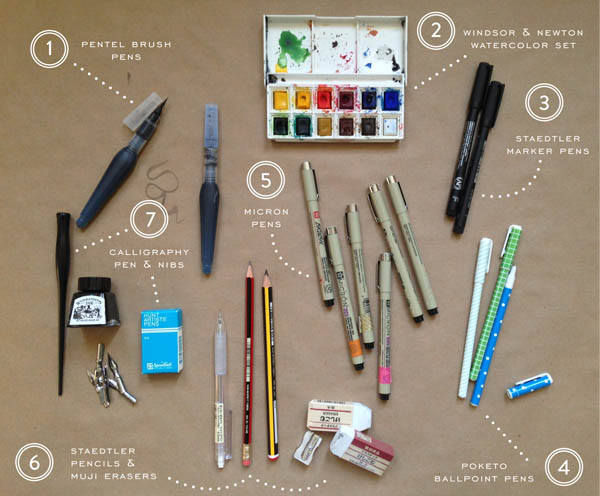
1. Pentel Brush Pens: I bought these while in London recently and they blew me away. They are amazing for loose sketches and lettering.
2. Poketo Ballpoint Pens: I couldn’t go a day without these guys. They have a fine point and make marking up proofs pretty neat and tidy.
3. Micron Pens: The amount of Micron pens I have is unhealthy. I color code them with Washi tape so I know which points work better than others.
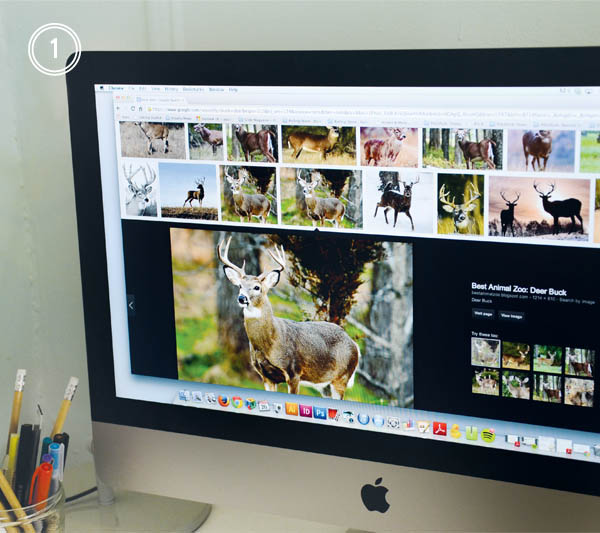
Step 1: After I get my supplies sorted out, I like to start with sourcing a few inspiration images. While the internet can be both blessing and a curse (who hasn’t fallen down a Pinterest black hole before?), it’s a wonderful resource to get started! I always remind myself that I don’t have to create in a vacuum. If I’m struggling to draw a deer, a million source images are only a few clicks away. One of the lessons I’ve had burned in my mind from college was photographic reference. It helps bring a certain likeness to the drawings.
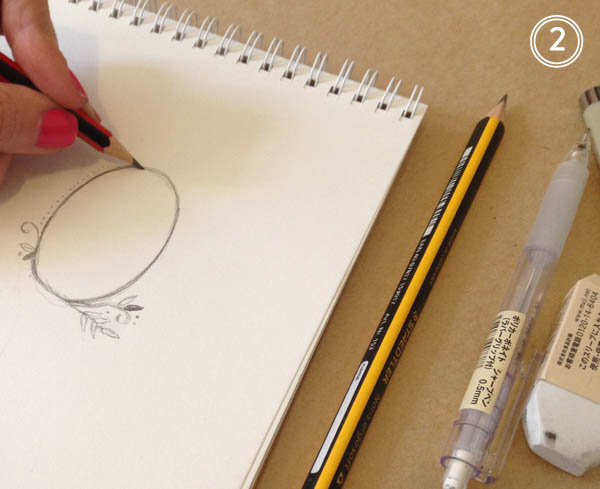
Step 2: Next, I sketch out a few options in my sketch book. I love using Straedtler pencils, I find they erase nice and clean so I don’t end up with a muddy mess before it’s all over. If you find yourself at an art supply shop, there are loads of options for leads, colors, weights, etc. so you can find what works best for you and your drawing style.
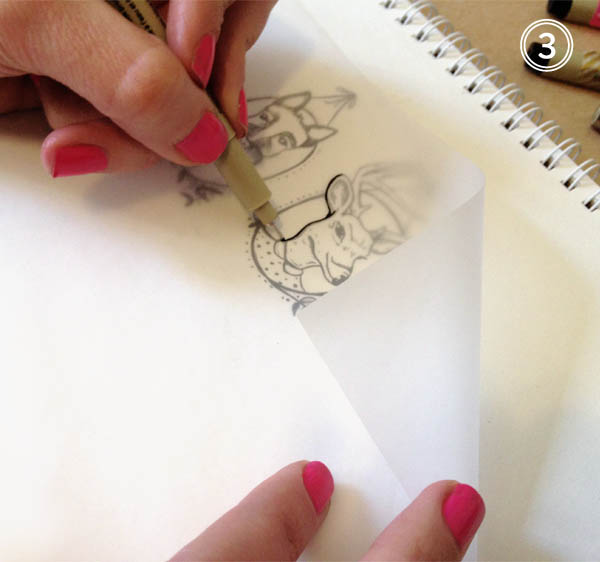
Step 3: Once I’m happy with the sketches, I’ll redraw them on vellum tracing paper using micron pens. Micron pens come in every thickness and weight under the sun, so I never have trouble creating the line style I’m after. Line weight change is key! The beauty of this step is that is allows me to add or subtract anything I wasn’t wild about from the original sketch.
Step 4: Next I head over to my trust scanner! This little guy is key in the whole process. While I love digital illustration, nothing beats drawing by hand. Without my scanner, I wouldn’t be able to translate anything to digital. I scan in each image at a high resolution and always in black and white as I find it maintains the line integrity better.

Step 5: Now that everything has been scanned, I can start working with color and placement. When I draw, I tend to illustrate everything in smaller pieces. This provides more flexibility in terms of adding, subtracting, or moving elements around. If I drew everything in one large image, it’d be more difficult to edit it down the road. Photoshop brushes are my best friend! It’s astounding how many textures and styles you can achieve using them. For this particular project, I’m looking for a softer, watercolor wash effect. This is the really fun part as it allows for experimentation. If I don’t like it, I can always undo or delete the layer.
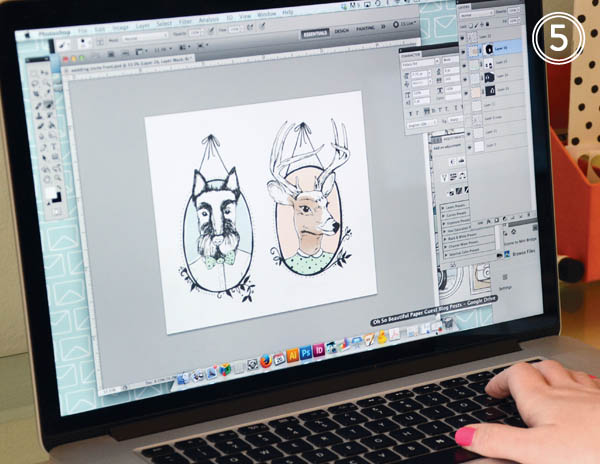
And finally (drum roll!) I’m all done and ready for the client to have a look.
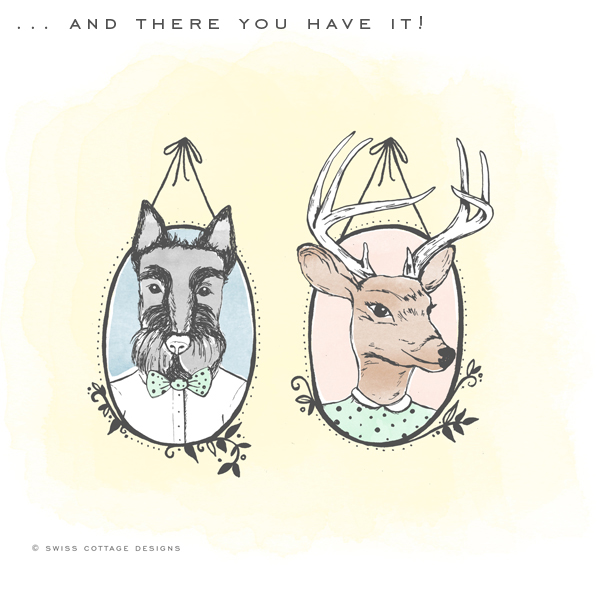 … an illustration from start to finish! Some days I might bust out the watercolors or my trusty brush pens depending on the project, but it’s always great to experiment with what works best for you and refine your process as you learn. It’s always a lot of fun and very exciting to see the end result.
Photo/Image Credits: Swiss Cottage Designs

I love this. I have been doing watercolors for a bit but am just beginning to wade into illustration as well. What size Micron Pens would you suggest I start with. Are they sold in stores? I am so bd with buying online because I can’t touch and feel first!
Thanks Sarah! For the Micron pens, I’d start with the following sizes: 005, 02 and a Brush pen. That should be a good jumping off point! They also sell starter kits as well. Any art store should carry loads of options, good luck!
What scanner do you use? I’ve been looking for a really good one that picks up pen and pencil marks really well rather than a blotchy blurred mess.
Hi Faye! Our scanner actually isn’t all that fancy, it’s a really basic one in fact. It’s a CanoScan LIDE 210. What makes the biggest difference when scanning is the resolution you scan it in at. Also, play around with your levels and brightness/contrast in Photoshop, that should help with the line work. Good luck!
I’m constantly amazed at the generosity of this community. Thanks so much for sharing this with us! xo
Thanks for reading Heather! xo
I’ve been shopping for scanners and found all the reviews very conflicting. I would be curious which one you use as it seems to get all of the small details very well.
Hi Max,
I completely hear you- it’s hard. It’s really important to make sure you’re scanning at a very high resolution as that will help with the small details. My scanner is a pretty basic one, just a CanoScan LIDE 210. Sometimes I’ll scan things in separte pieces to get the most detail. Good luck!
I was wondering what type of scanner you use as well. It’s nice to get a recommendation from someone in the industry. Thanks in advance!
Hi Emily! Try the CanoScan LIDE 210, that is what we use and we’re happy with it. Good luck!
Thanks for the information about how you transition from sketch to digital, I’ve done some sketches and always scan directly from my pencil sketch. Now that you showed that you use vellum paper and micron pens, I will definitely be investing in those. Thanks for the info!
So impressed!
So cool to see the process; so talented!
So interesting to hear about your process. Thanks so much for sharing Courtney! 🙂
What a pretty illustration Courtney! Thank you for sharing your process, it’s so interesting to see it unfold! The watercolor effect is beautiful! I hope to see more inspirational posts on art and paper (stuff I looove!) again. x
I love this! I would love to see more designer tutorials – they are so helpful for me when I feel stuck in my process. It’s great to see how other designers translate drawings into digital art. Those brush pens look perfect; I will have to go buy some when I get a chance. I have never been able to find the right brush pens; the ones in my local art supply store are too small or thin. I actually do use the same Staedtler pens – nothing holds up to water better than those!
dELIGHTED TO SEE THE (sorry, caps on) process and the end result. THank you for sharing!
Thank you so much for sharing! I’m just starting my micron collection and I can see by this post how it will add to my illustration.
That is a really awesome idea. I wish that I could have a beautiful drawing talent like you too.
Thanks for sharing <3