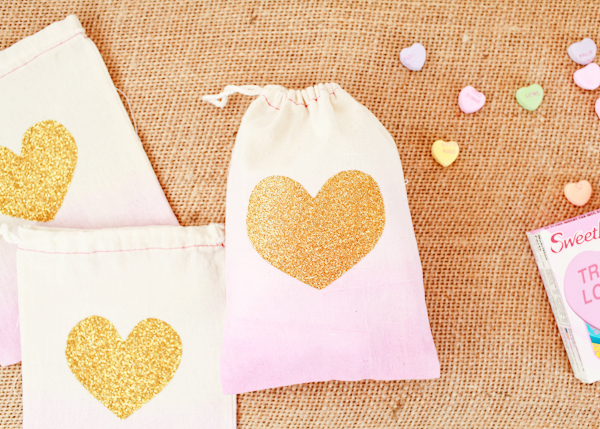
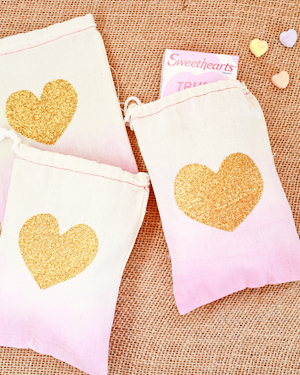
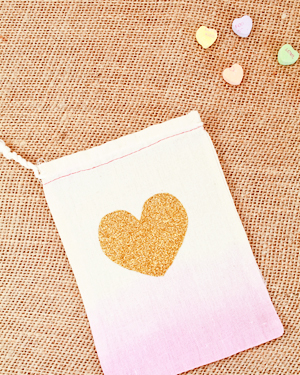
I can’t be trusted in craft stores. When I was out shopping for materials for our New Year’s Eve cocktail party shoot with St-Germain, I came across some gold glitter iron-on transfer sheets and immediately knew I wanted to use them… I just didn’t know how. I’ve also wanted to share one of my favorite (and quick and easy!) ways for dressing up muslin favor bags. Then it hit me: combine the two! So today I’m sharing some adorable dip dye heart bags, perfect for Valentine’s Day treats, weddings, birthday parties, and so much more!
Materials
White Muslin Bags (available from Paper Source in small packs or here in bulk)
Fabric Dye
Iron-on Gold Glitter Transfer Sheets
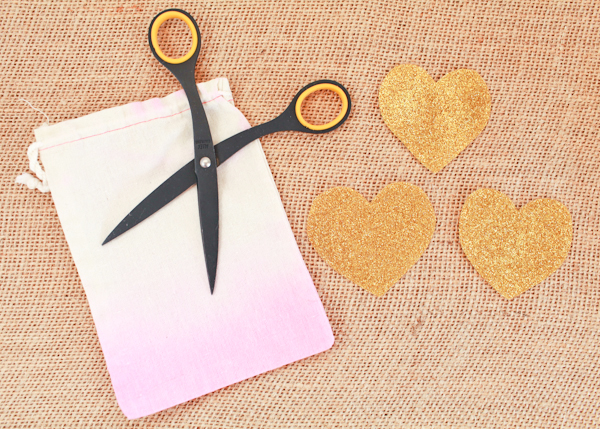
Scissors or Craft Punch
Iron
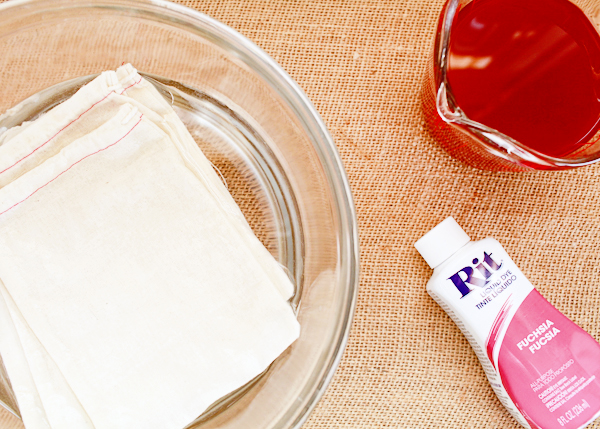
Step 1: Prepare your materials. You’ll want to thoroughly pre-rinse your muslin bags to prepare them for absorbing the dye, and it’s important to make sure you get them completely wet both inside and outside the bag. Don’t skip this step or your bags will come out splotchy! You can pre-wash them in a washing machine, but I usually just run the bags under a faucet or soak them in a large bowl. You’ll also need to prepare your dye bath. I used a measuring cup with two cups of warm water, a teaspoon or so of salt, and eyeballed the amount of dye (maybe three tablespoons). For more saturated color, just use more dye. You can test the color with a piece of scrap fabric or paper towel.
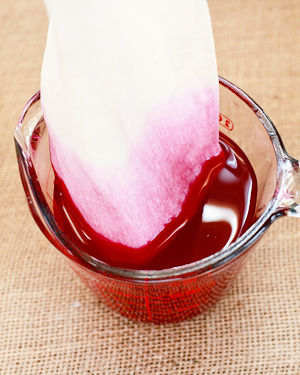
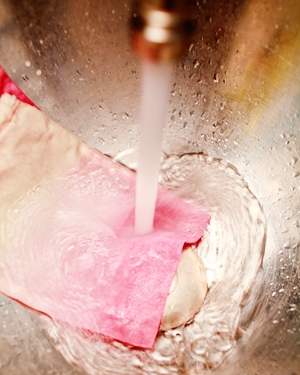
Step 2: Dye and rinse. (Note: This entire process should be done next to a sink) Dip a muslin bag into the dye bath very quickly – it really only takes a second to absorb the color! Slowly raise and lower the bag into the dye bath several times to achieve the gradient effect, gradually raising the bag as you go and leaving the bottom in the dye bath for the longest amount of time. The entire dyeing process takes about 30-45 seconds. Once the bottom of the bag looks saturated enough, immediately rinse the bag under cool water to remove any remaining dye. Set aside and repeat this process with your remaining bags.
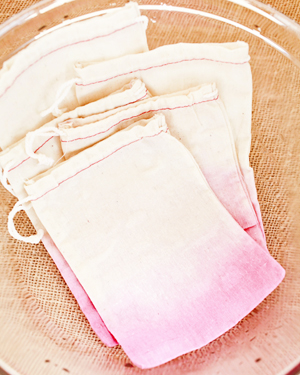
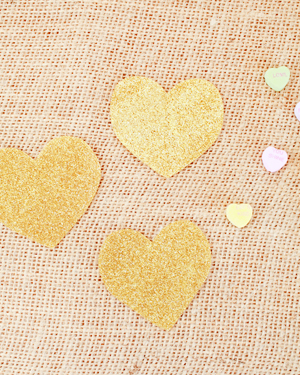
Step 3: Dry and cut. Throw all of your muslin bags in the dryer to set the fabric dye. While you’re waiting for everything to dry, cut out your shapes from the iron-on sheets. You can trace a template onto the back of each transfer sheet or use a craft punch. My hearts were approximately 2″ wide and I was able to get 16 hearts from each iron-on transfer sheet.
Step 4: Iron. Place a heart on your muslin bag (I aimed for the middle of mine), then place a kitchen towel or pillowcase on top. Using the highest temperature setting, press firmly with your iron for approximately 40 seconds. Repeat for each bag.
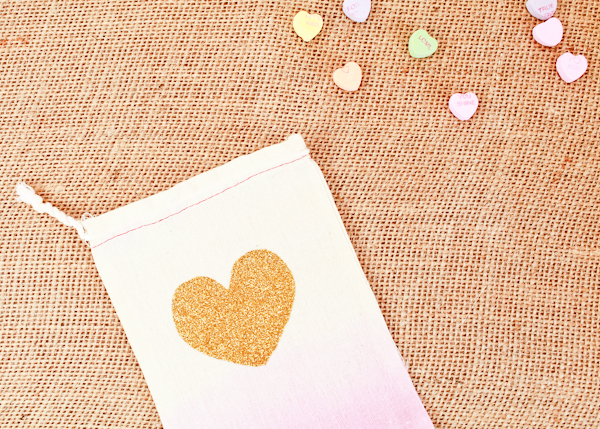
Step 5:Â Done! Fill with your favorite goodies and hand them out!
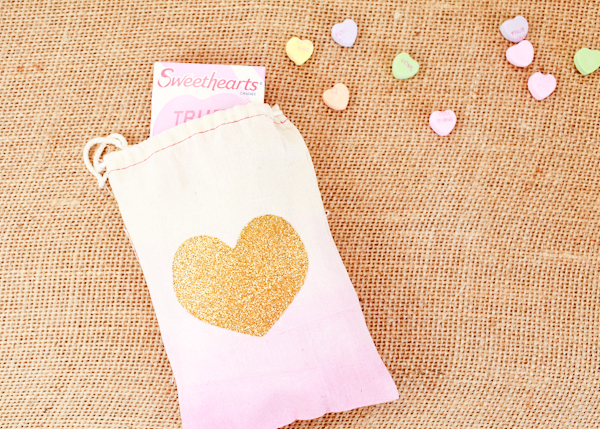
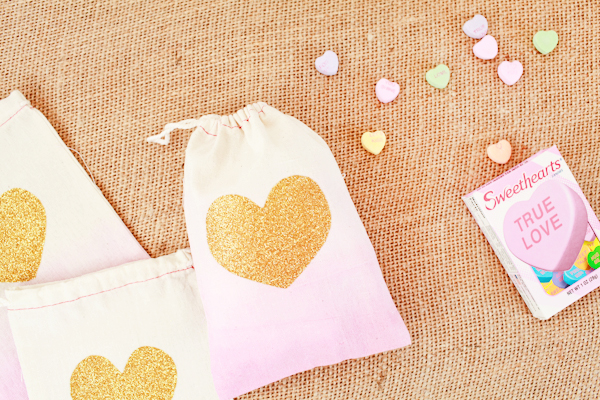
Photo Credits: Nole Garey for Oh So Beautiful Paper
I love this!! I pretty much love anything that’s gold and glittery. And the dip-dye is such a great touch.
Thanks Michelle!
Love love love!!!!!
Thank you thank you thank you!
So simple yet so beautiful! Easy to do too.
Thank you! And yes – quick and easy is always my first requirement!
So pretty! I’m going to look for those gold glitter transfer sheets. (Never met a metallic I didn’t like. :))
Thanks so much Ann! You can also find them on Amazon if you don’t have any luck locally! xoxo
It looks so pretty! I love the gold glitters 🙂 Such a wonderful idea!