Who doesn’t love washi tape? Ever since this awesome product arrived state side, we’ve been on board. We typically use it to seal envelopes, paper or belly bands but lately, we’ve had a desire to make it the real star. In this DIY, we use different tapes to add a bit of graphic drama to our stamped save the date cards. The effect you get is so much fun, especially considering it’s humble beginnings as tape! – Bailey and Emma of Antiquaria

Each save the date is its own, unique piece of art. The best part is that you can make it as simple or tricked out as you like!

Step One: Before you decorate, you’ll need to stamp your save the date (we used our Art Deco Save the Date stamp) on the bottom of a blank, cream A7 card. Choose an ink color that will coordinate nicely with the tape that you’ve selected. For a step-by-step video tutorial about this printing process go here.

Step Two: Let your creative flag fly! Adorn the top of the card with washi tape in any pattern you like. We used a simple design with straight line and pop of diagonal tape for this example.

Step Three: Next, you’ll need to square up the tape so that you have a clean, professional look. Using a straight edge metal ruler and a craft knife, carefully cut the tape, making sure not to press so hard that it cuts the paper as well.

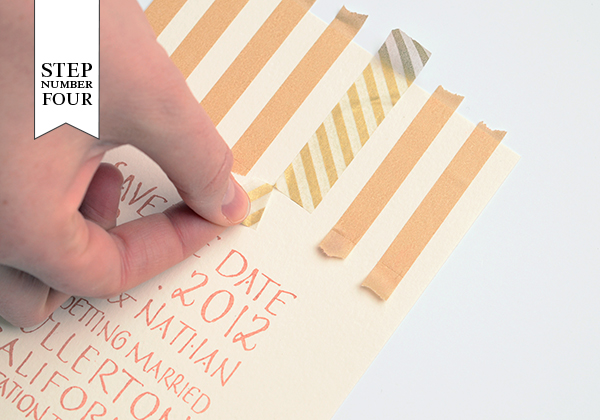
Step Four: Peel off the tape and press down the cut edge. Repeat the process on the top.

There are an infinite amount of possibilities for the tape designs. Get creative and experiment with tape colors and patterns. We love the way that they all look together, so don’t feel limited to one design!

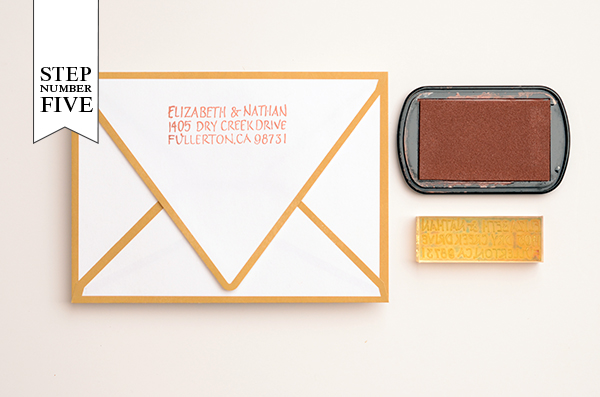
Step Five: Next, you’ll need to stamp your return address (we used our Art Deco Return Address stamp) on the back flap of your envelopes. Now all that’s left is to address them, add postage and send them on their merry way!
Materials:
Stamp Pad in Cocoa
Metal Ruler and Craft Knife
AntiÂquaria is a memÂber of the Designer Rolodex – you can see more of their beauÂtiÂful work right here or visit the real save the dates gallery for more save the date ideas!
Photography: Antiquaria for Oh So Beautiful Paper
