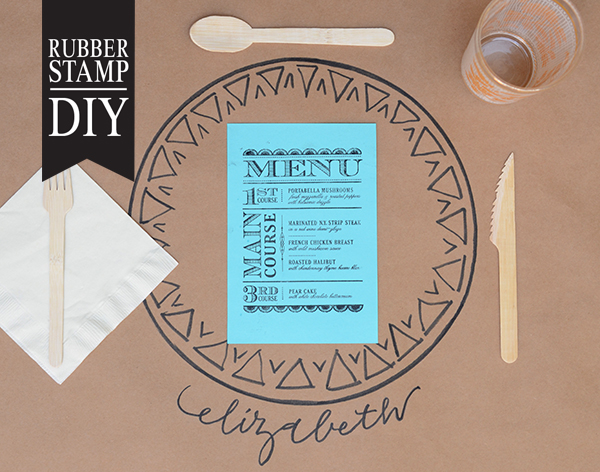
One of the most fun aspects of a throwing a great party is designing the decor. There are so many creative options to choose from and it can really help accentuate the aesthetics of the event. Today, we designed a fun, easy and inexpensive option perfect for a western style wedding or even a dinner party! – Bailey and Emma of Antiquaria


Step One: Cut a section of kraft paper off of a gift wrap roll sized to fit the length of your table. At each seat, trace a plate using a black brush marker so that you have the correct plate proportion.

Step Two: Decorate each plate! Using the same brush marker, draw a pattern on the circle you’ve just traced. We used a triangle motif to stay with the western theme…but scallops or flowers could be super cute too!

Step Three: So that everyone knows exactly where to sit, write each guests name under the plate. We penciled the name lightly first so that we could be sure that it was centered. Then, we traced over it in black to match the rest of the setting.

Step Four: Now it’s time to stamp your menus. Ink your menu stamp (we used our Old West Menu Stamp) with a black pad. On the oversized stamps, such as menus, it works best to hold the stamp facing you and dab and swipe the pad onto the stamp image.

Step Five: Once the stamp is inked, center it over your menu card. Press down using moderate pressure. Lift it off and set aside to dry thoroughly. For a step-by-step video tutorial about the stamp printing process go here.
Materials
Stamp Pad in black
Turquoise 5″ x 7″ card stock
Wrapping Paper in paper bag
Scissors
Plate
Photo Credit: Antiquaria for Oh So Beautiful Paper

Great creative ideas you have! Thank you for sharing this..
The placemat idea is great. It’s perfectly festive, cheap, and easy. However, the menu card stamp only works for a single meal. For a wedding, I suppose that’s all right, but it would be unrealistic for dinner parties. I suggest that if you really like the idea of stamped menus, create a menu template stamp that has the general layout and titles, but then fill in the details by hand so you can reuse the stamp for any meal.