Every once in a while, we’re fortunate enough to stumble upon a material that is just crying out for us to test our rubber stamps on it.  That’s exactly what happened on a recent trip to our local art supply store.  A lightbulb went off the second we spotted the wood veneer sheets – and this nature-inspired DIY was born! – Bailey and Emma of Antiquaria
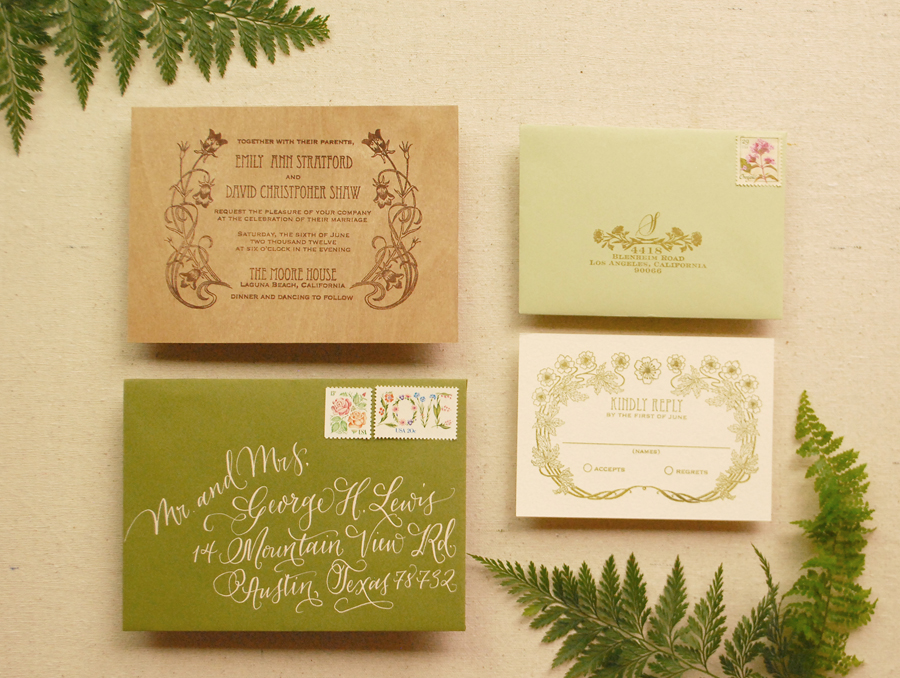
The wood veneer material adds a natural warmth to the invitation suite.
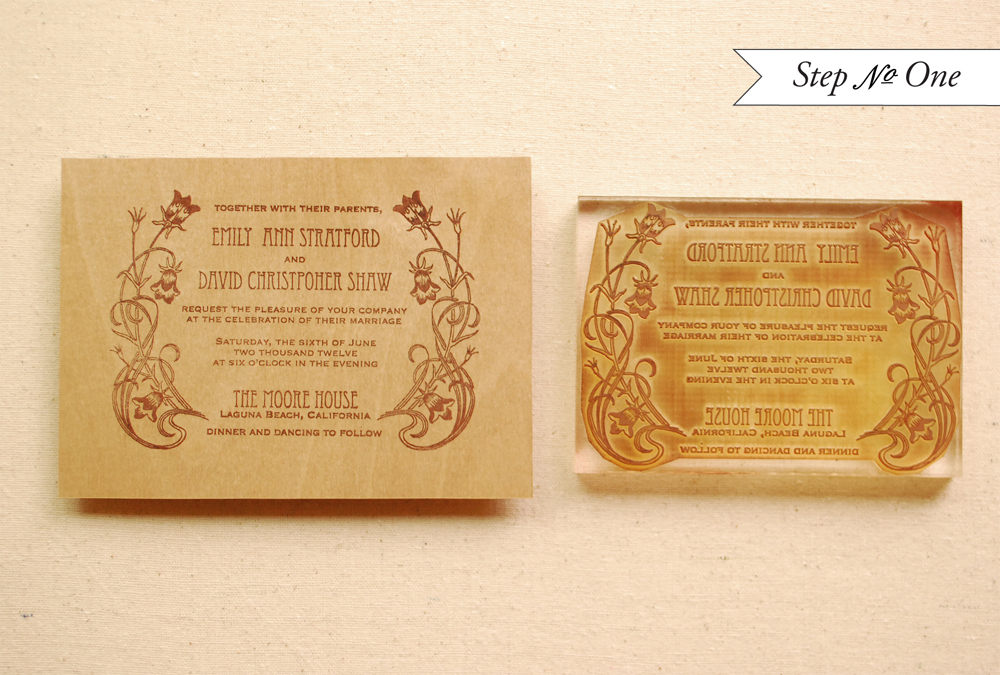
Step 1: Lay an A6 (4 1/2″ x 6 1/4″) piece of wood veneer on a hard, flat surface. Â Ink your invitation stamp (we used our Art Nouveau Invitation Stamp) evenly, using a brown stamp pad and center over the wooden card. Â Press down on stamp making certain to apply even pressure on the entire mount. Â Lift stamp and let the print dry overnight.

Step 2: Print your reply card. Â We used our Art Nouveau Reply Card stamp printed on a 4bar (3 1/2″ x 4 7/8″) cream card in moss green ink to coordinate with the suite.
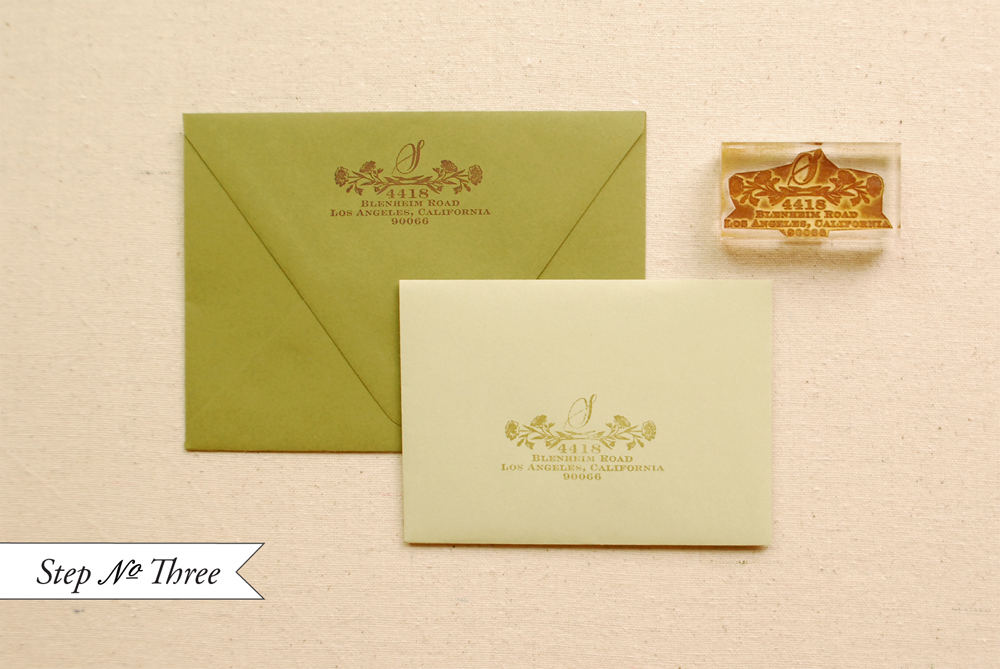
Step 3: Stamp your return address and your reply envelope address. Â For this, we used our Wildflowers Return Address stamp. Â Printing on envelopes can be quite costly, so it’s a great budget saver to use the same return address stamp on both your outer envelope and your reply envelope, as we have above.
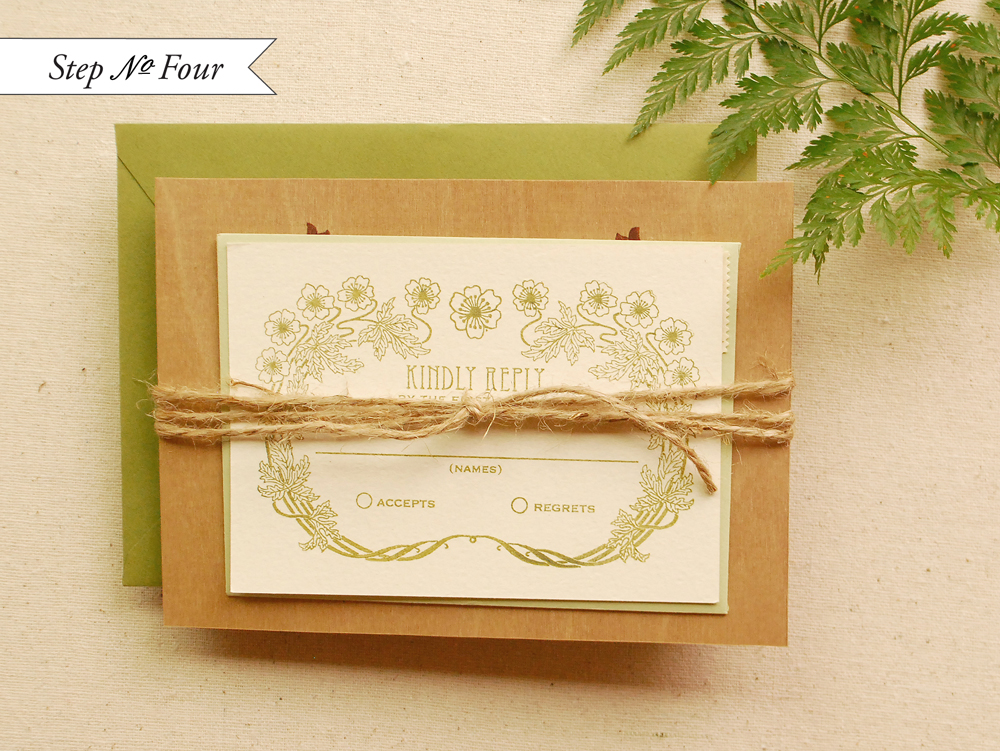
Step 4: Using rustic twine, wrap the entire suite to tie it together and secure it with a basic knot. Â Address, stamp, and send them on their way to all of your lovely guests. Â We guarantee that they will be thrilled to find this unique and natural invitation suite in their mailbox!

Step 5: One thing that you may not think about as you are planning for your wedding is just how many thank you notes will be in your very near future! Â A great way to have everything ready to thank your guests after your nuptials is to make your thank you notes as you make your invitation or reception stationery.
On a 4bar (3 1/2″ x 4 7/8″) folded notecard, stamp your monogram (we used our Antique Monogram Stamp) in the center of the card in moss ink. Â Use your return address stamp (we re-used our Wildflowers Return Address Stamp from the invitation suite) to stamp on the back of your 4bar envelope. Â Now all you need is to sit down and write them!
Materials:
Acrylic Mounted Stamps
Wildflowers Return Address Stamp
Additional Materials
Stamp Pad in Chestnut and Moss
Wood Veneer sheets, cut to A6 (4 1/2″ x 6 1/4″) cards (this material can be easily cut with scissors)
A6 Envelopes in Moss
4Bar Flat Card in Luxe Cream
4Bar Folded Cards in Luxe Cream
4Bar Envelopes in Leaf
AntiÂquaria is a memÂber of the Designer Rolodex – you can see more of their beauÂtiÂful work right here or visit the real wedding invitations gallery for more wedding invitation ideas!
Photo Credits:Â Antiquaria
i always love seeing what you ladies come up with, im pretty much obsessed with your stamps! the wood veneer is genius for a woodland wedding