It’s the ladies of AntiÂquaria, back with another creÂative DIY project for you!  Today they’re sharing a fun tutorial on how to make gorgeous rubber stamp wedding invitations with a floral motif!
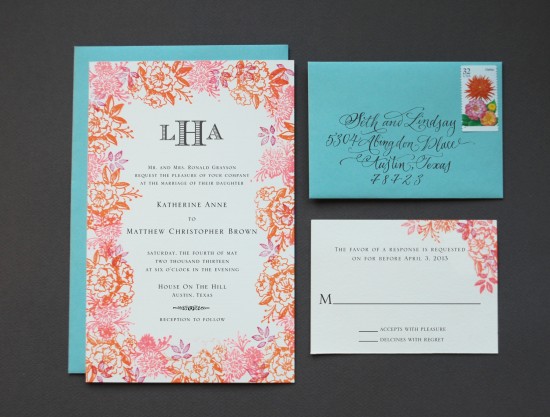
We love the versatility and custom look that rubber stamps can give your invitation suite. Â This week, we wanted to show how the same stamp designs can lead to two very different wedding invitation suites: one designed for a festive tropical bash, and the other for more traditional, sophisticated affair! Â It’s as simple as changing the stamp pad and envelope colors! Â Let us show you…
Option 1: For the tropical fete… shades of coral, mango, and berry make the floral border. Â Lovely pool colored envelopes complement the suite.
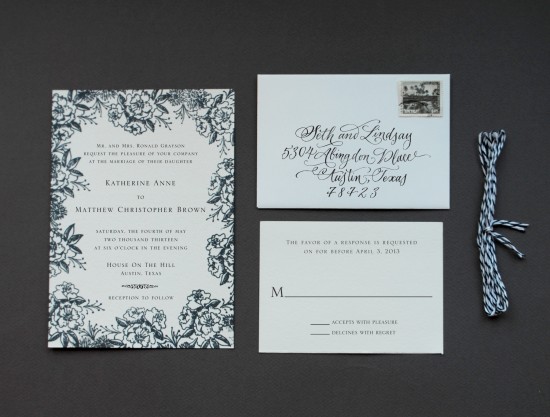
Option 2: Traditional black and white convey elegance and sophistication.
Step 1:  You’ll want to stamp your invitation wording first… it makes things much more simple.  Ink your stamp (we used our classic invitation stamp) thoroughly, and center it over your paper.  Press firmly but moderately, using the handle as your primary pressure point to avoid an uneven print.  Let dry.
Step 2: Put a sheet of regular text weight paper underneath your already printed invitation. Using your border stamps, (we used our camellia pattern stamp, daisy pattern stamp and small leaves pattern stamp) begin stamping the motifs around the border, making sure not to cover any text.  Go in a clockwise pattern and stamp the images sparsely first… you can always come back in and add more in each circular pass.  It also helps to stamp off of the page, giving the invitation a full bleed effect.  It  would be wise to start with your largest motif and move to the smaller ones to fill in the border.  If you are using multiple colors, be certain to make the overall border balanced in color and design.
Step 3: Print your reply card (we used our classic reply card stamp) in the same manner as you did the invitation text. Â If you like, you can also add your floral motifs to this card, like in the tropical suite, or keep it simple, as shown above.
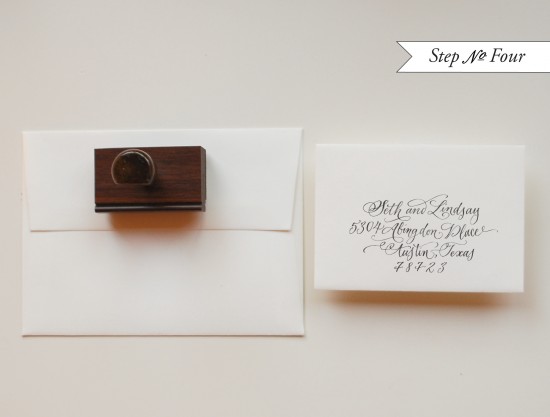
Step 4: Stamp your return and reply addresses (we used our calligraphy return address stamp) on your envelopes.  You can re-use the stamp long  after your wedding is over… maybe on all those thank you notes!!!
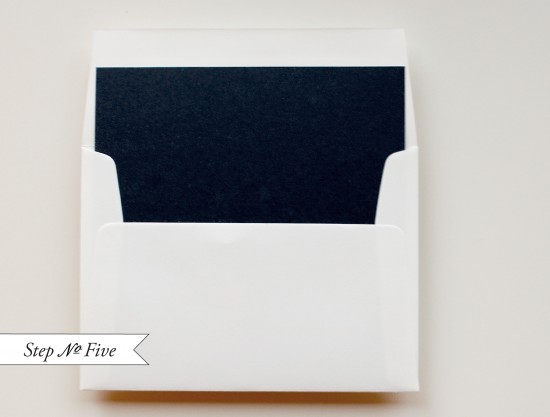
Step 5: We’ve chosen to add a black text weight paper liner to the outer envelope.  This is a great way to bring in some additional color to the suite and to create a nice balance.  It’s simple to do as well… you can find envelope liner template kits or pre-cut liners at Paper Source and local craft stores.  If you’re using square envelopes, you can also have your local print shop cut paper down to your envelope specifications.  Then just put a line  of double stick tape or stick glue across the top, slide them into position and press to secure.  Fold at the crease with a bone folder to get a nice, crisp edge.
Now all that’s left is to tie the suite together, address them and hand them off to your post office to deliver to your lovely guests!!
Materials:
For the classic invitation suite
Calligraphy Return Address Stamp
Stamp Pad – in Black
Cover Weight Paper, cut to A7 (5″x7″) and 4bar (3″x5″)
Liner paper in black, cut to size
Double Stick tape
Twine – in black and white
For the tropical invitation suite
Calligraphy Return Address Stamp
Stamp Pad – in Coral, Mango Tango, Magenta and Antique Pewter
Cover Weight Paper, cut to A9 (5.5″x8.5″) and 4bar (3″x5″)
4bar Envelope – in Pool


I love this idea!! love, love!!
As a stationery designer, I find this style very appealing and lovely! It is classy and elegant. Thank you for sharing!
Hi there! The links do not work for the flower stamps. Do you have any updated links or ideas where to get stamps like that?
Thanks!