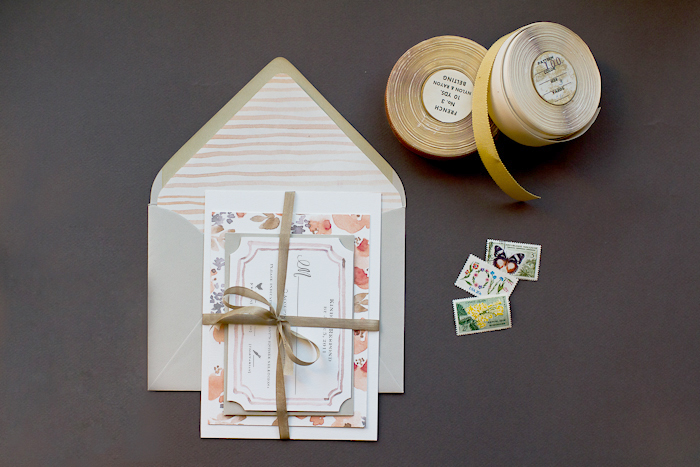
It’s the ladies of AntiÂquaria, back with another creÂative DIY project for you!  Today they’re sharing a gorgeous floral watercolor wedding invitation tutorial!
This week, we are challenging your inner artist and showing you how to design your own floral watercolor print invitation suite. Â We have so much fun putting together our artwork and painting watercolors for our online magazine, The Antiquarian Post, we thought, why not incorporate the same technique into a DIY invitation suite? Â We’ve chosen a coral, toffee and lavender-grey palate to work with but the options are as endless as your supply of paint!
No need to feel intimidated about this one though…we’ll take you through the process, step-by-step.
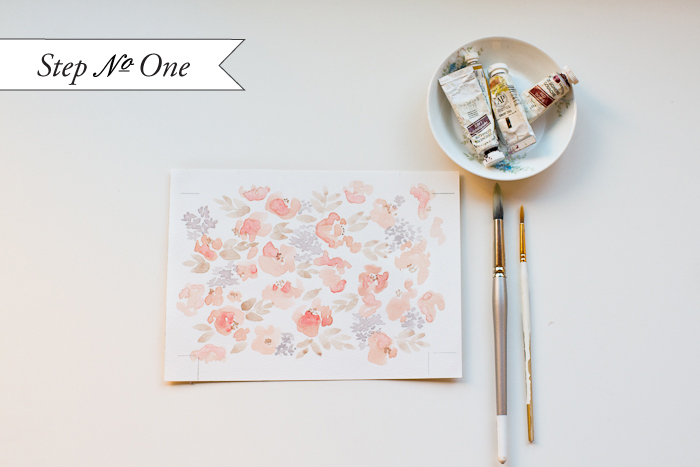
Step One: On an 8.5 x 11″ sheet of heavy watercolor paper, paint your botanical watercolor pattern. Â We used a palette of coral, toffee and lavender gray for our floral pattern. Â To create watercolor flowers, use 2 different size round brushes, one large and one small. Â Wet the large brush, dip it in the coral color and paint petals. Â The more non-uniform each petal is, the more organic and natural the flowers turn out. Â Wet the small brush, dip it into the toffee paint and add the centers of the flowers. Â Also with the small brush, you will want to fill in-between the large coral flowers with clusters of small lavender gray flowers. Â Fill in further with toffee leaves (made with the large brush). Â Fill the whole sheet of paper, making sure that the overall composition is balanced and full of pattern. Â Set aside to dry completely.
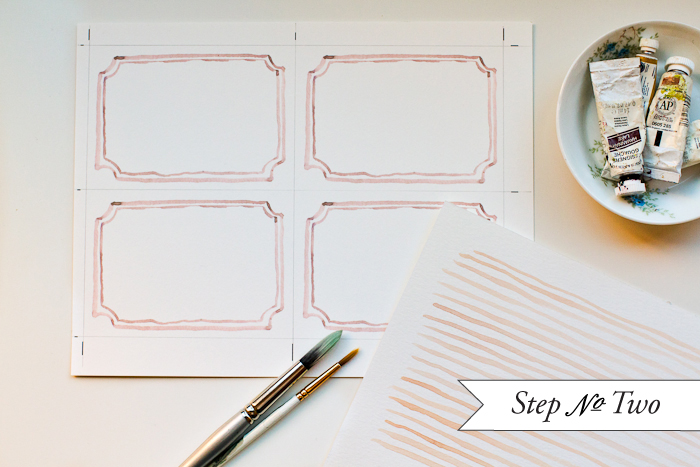
Step Two: On another 8.5 x 11″ sheet of heavy watercolor paper, measure out four 3.5 x 5″ rectangles.  Lightly draw yourself an outline in pencil.  Just outside the lines, draw yourself crop marks which will be used as guides to cut the final printed product.  Paint a coral border in each rectangle making sure not to get to close to the edges.  When the paint dries, erase your pencil guide lines leaving just your crop marks.  For the envelope liner pattern, we used an simple striped pattern.  On a clean 8.5 x 11″ sheet of watercolor paper, simply  paint horizontal coral lines, as even or uneven as you please!
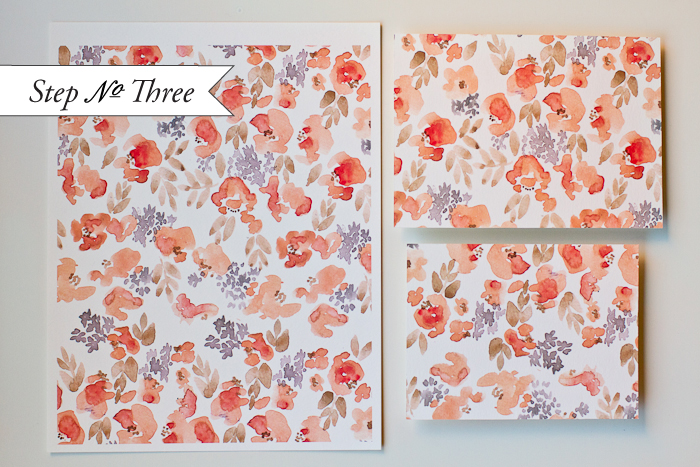
Step Three: Â Place each sheet of artwork on a flatbed scanner and scan at 300 dpi. Â Print the patterns 100% scale on high quality card stock (the thickest you can get through your printer). Â Make sure to set your printer margins to the smallest they will allow to maximize your printable area. Â For the striped pattern, print it on high quality text weight paper… you will be installing it later in the envelopes and thinner paper works better for this!
Out of each printed  sheet of the floral pattern paper, cut a 5 x 7″ card and a 4 x 6″ card, as shown above.  You will see that since you’ve created the whole page as a pattern, the cards will have a full bleed (meaning that the pattern will flow off the page).
Alternatively, you can take in your artwork to your local print shop (bring the scans on a zip drive or ask them to scan them for you). Â Here they can print out the paintings on card stock and text weight using a high quality digital printer. Â You can also have them professionally cut all the pieces down to your desired size!
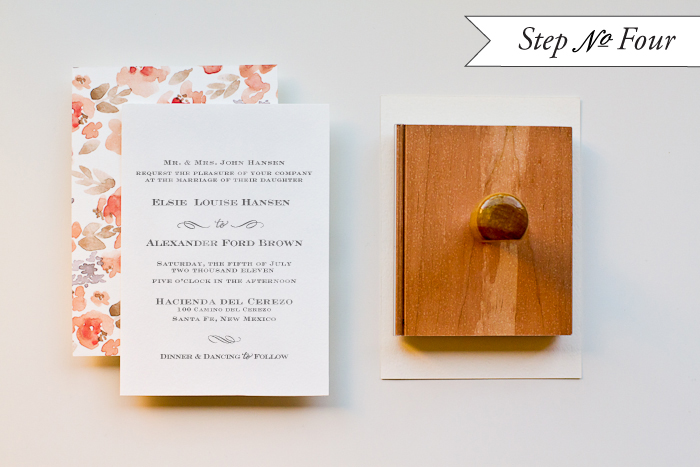
Step Four: Now you can stamp your invitation! Â Ink your invitation stamp thoroughly (we used our “Sophisticate” Invitation Stamp) and line it up, centered over your card. Â Of course, you will be printing on the “back” blank side of the 5 x 7″ floral card. Â Press down on the stamp evenly and moderately with the handle to get a crisp image. Â Let dry.
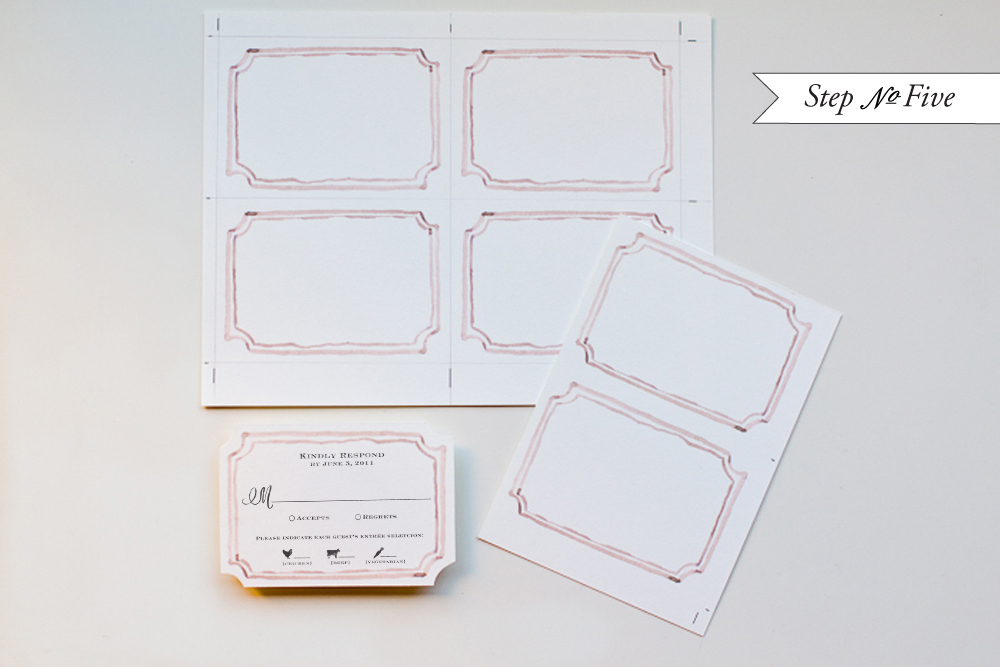
Step Five: Using the crop marks, cut your reply cards (we typically use a paper cutter or x-acto and ruler) to size. Â Ink your reply stamp thoroughly (we used our “Sophisticate” Reply Stamp, option B) and line up, centered over your card. Â Press down on the stamp evenly and moderately with the handle to get a crisp image. Â Let dry. Â Notch in the corners, if you like, to create the look of a die cut card.

Step Six: On the back of the 4 x 6″ card, ink your accommodations stamp thoroughly (we used our “Sophisticate” Accommodations Stamp) and line up, centered over your card. Â Press down on the stamp evenly and moderately with the handle to get a crisp image. Â Let dry.

Step Seven: Cut the liners using a template made for your envelopes. Â These do the job well! Â Trace the template with a pencil and cut on the line. Â Use stick glue or double stick tape along the triangular end to adhere the liner to your envelope.
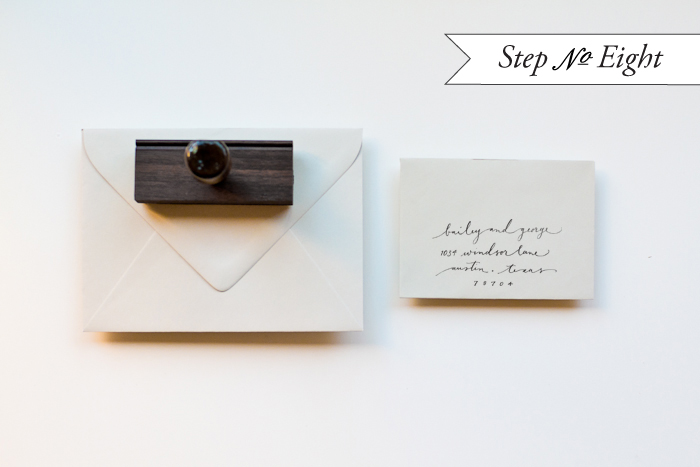
Step Eight: Once again, we are using stamps to save on our invitation budget. Â We printed our “Scripted” Return Address stamp for both the return address on the outer envelope and for the reply address. Â The great part is that you can also use it on your thank you notes!!
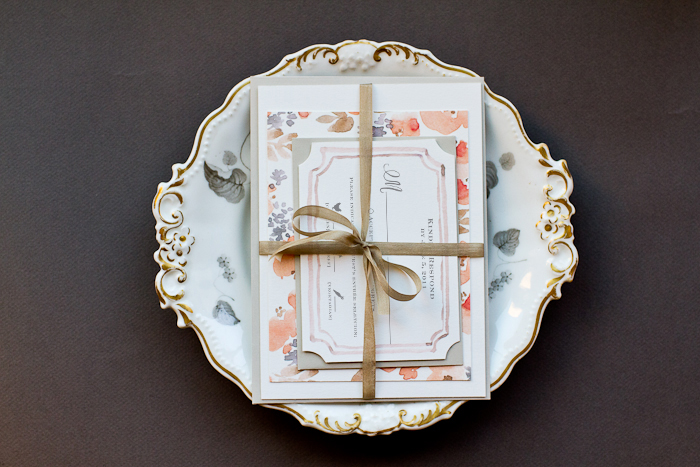
Now all that’s left is to tie them together with a beautiful ribbon, address the envelopes and get them into the post! Â Your guests will be thrilled to receive your very own watercolor artwork in the mail.
Materials List:
Sophisticate Wedding Invitation Stamp (from Antiquaria)
Sophisticate Reply Card Stamp (from Antiquaria)
Sophisticate Accommodations Card Stamp (from Antiquaria)
 Scripted Return Address Stamp (from Antiquaria)
Stamp Pad, we used Antique Pewter
Water color paints (preferably in 3 or more colors)
Paint brushes, 1 large & 1 small
Jar filled with water to wash brushes
Card stock, in soft white
Text Paper, in soft white
Scanner
Printer
Paper cutter or x-acto knife
Ruler
Pencil
Scissors
Glue stick or double stick tape
Ribbon
Patterns painted by Emma James for Antiquaria.  Custom watercolor invitations are available from Antiquaria’s Custom Design Division.  Please email them for more information!
Photography by Jamie Simon of Intertwyned
This must be a very well written tutorial, because I read to the end and thought that sounds like a lot of steps but I want to do them all straight away. 🙂 Looks beautiful and would be fun to create individualized stationery packs as thank you gifts for bridesmaids as well. Think I’ll give my own version a try this weekend!
A wedding invitation definitely made with love and one of a kind. Love it how you encourage your readers to be crafty! And it looks so good!
I like it, I love it …
Gah! This is seriously one of the most beautiful invitations I have ever seen. Gorgeous!
Great tutorial! I personally am not that much into the colours or the flowers pattern, but I love the idea of making a watercolour pattern, and stamping the info on the back… I´ll definitely try this one!
I love this tutorial. Thanks so much for sharing! 🙂
this is so awesome. i want to do this for some garden parties, this summer. and wedding inspiration. thanks so much!
These are absolutely stunning!!! Thanks for sharing!