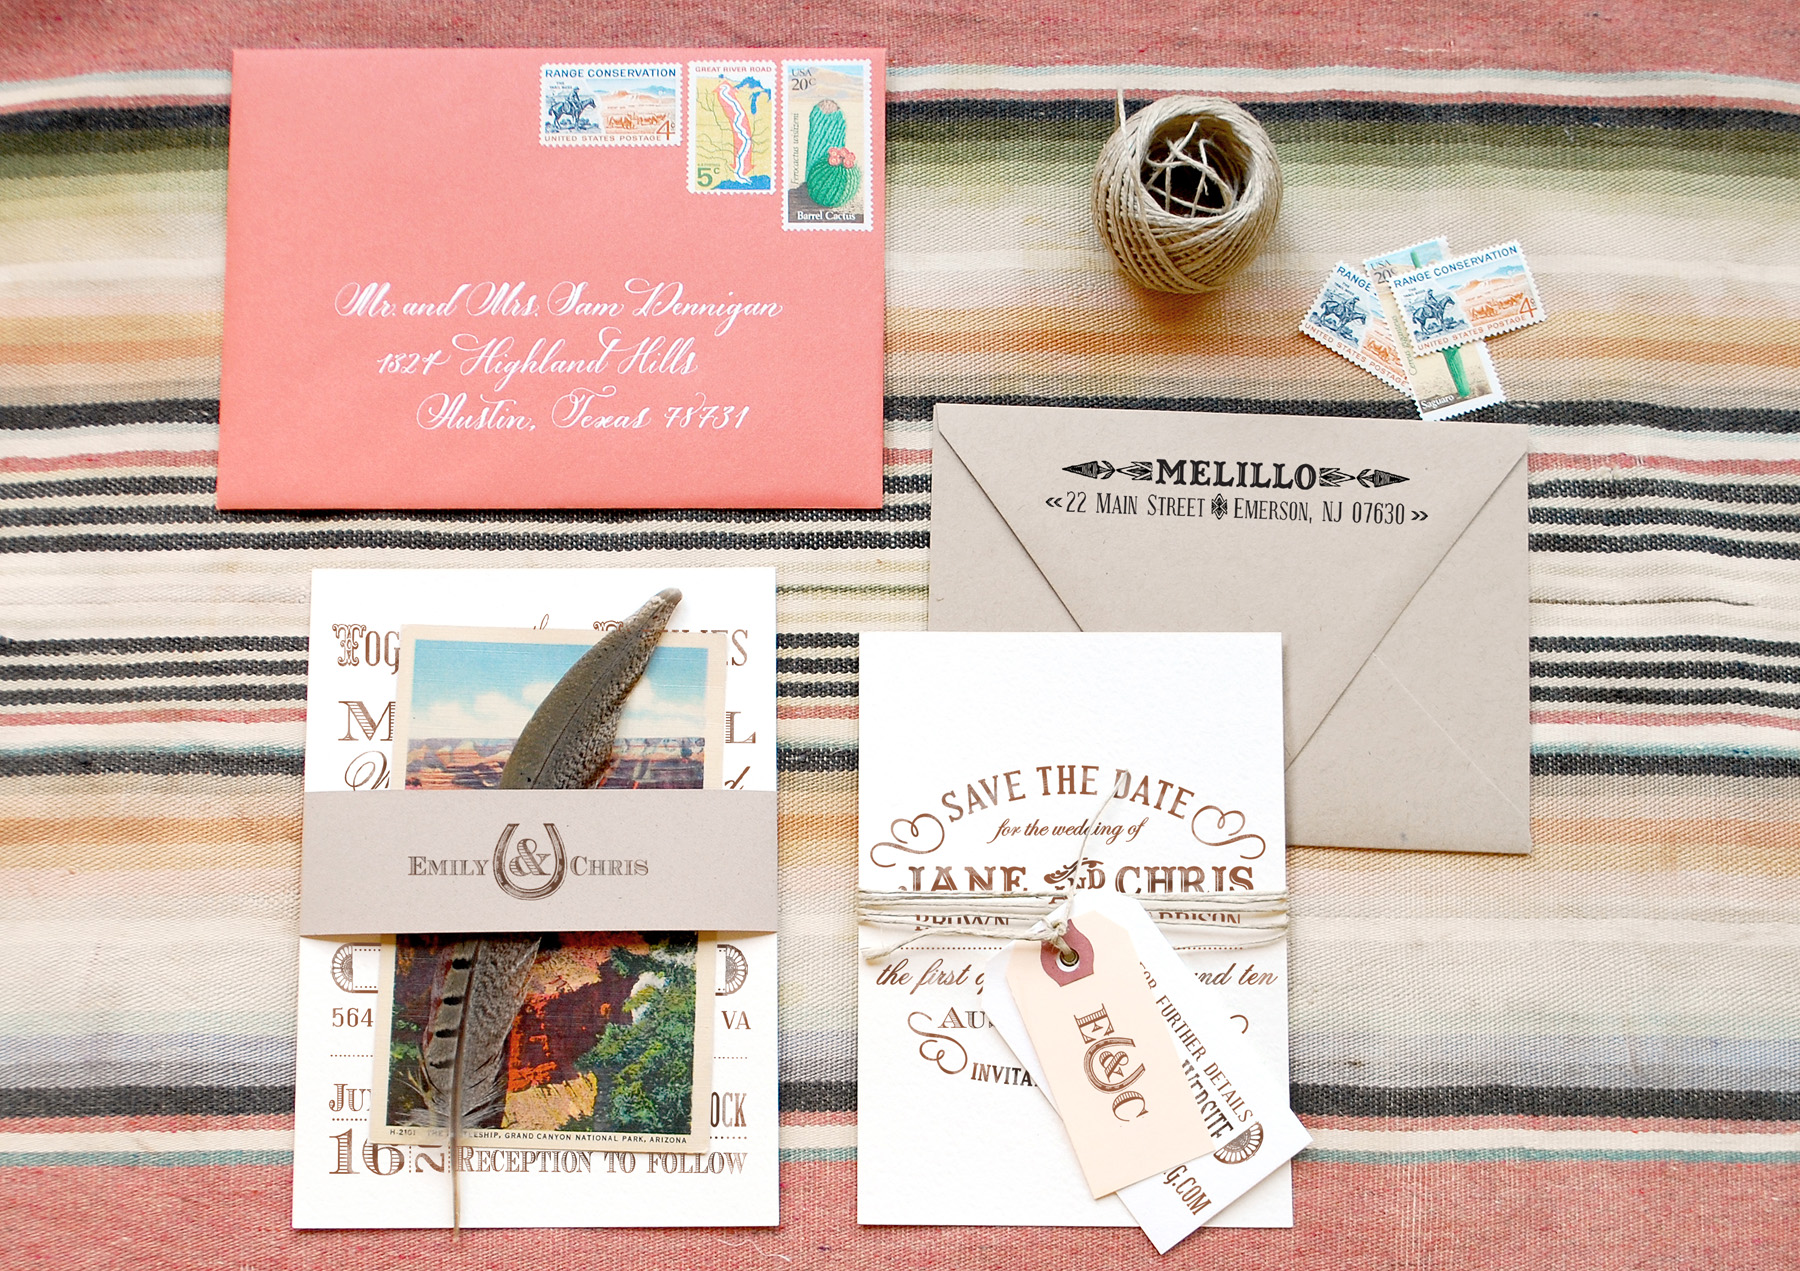
It’s the ladies of AntiÂquaria, back with their first fabÂuÂlous and creÂative DIY project for you in the new year!  This week they’re sharing an aweÂsome DIY tutorial for Western rubber stamp wedding invitations and save the dates!
It really is true that the second you start sending out your save the dates, you begin setting the tone for your wedding. Â It’s always important to think about your venue, colors and tone of the day before deciding on any of your wedding stationery. Â Today’s DIY tutorial is for complementing save the dates and wedding invitations! Â We utilized many different stamps & paper components to illustrate our theme: A Vintage-Western Wedding Fete! Â Here’s how to put it all together:
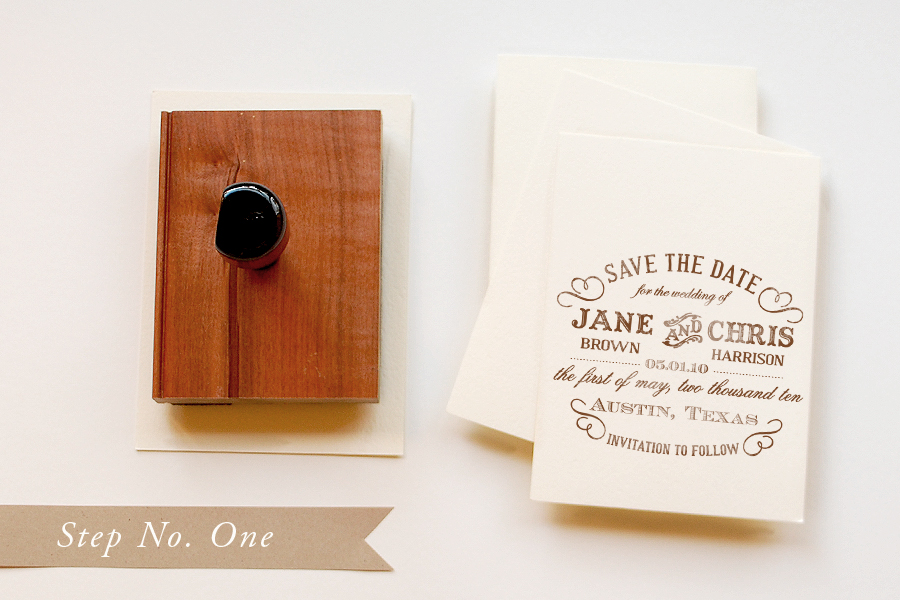
Step 1: Starting with the save the date, use A2 cards or cut paper to 4.25″ x 5.5″”. Â Ink the stamp (we used our “Typography” Save the Date stamp) thoroughly and make a print. Â When you are making the print, be sure to center the stamp on the paper. Â You will want to apply moderate and even pressure to the stamp in order to get a good print. Â Also, it is important to stamp on a solid and stable surface. Â Any movement can cause shifting. Â Let each print dry to avoid smearing.
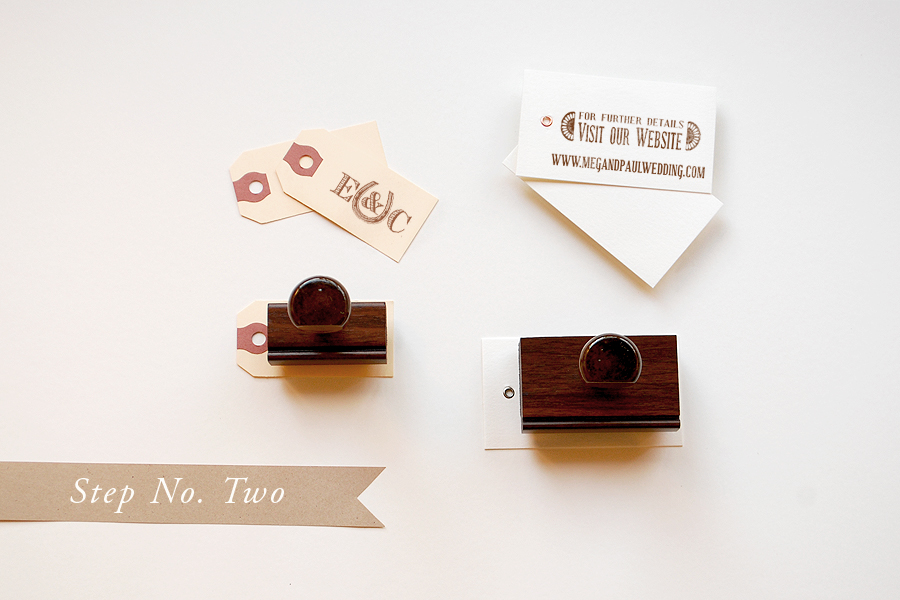
Step 2: Make the tags for the save the date. Â We stamped our website card (“Old West” web card stamp) on a grommeted gift tag. Â For our monogram tag, we used a small shipping tag and stamped our “Lucky in Love” Initial Monogram stamp on it.
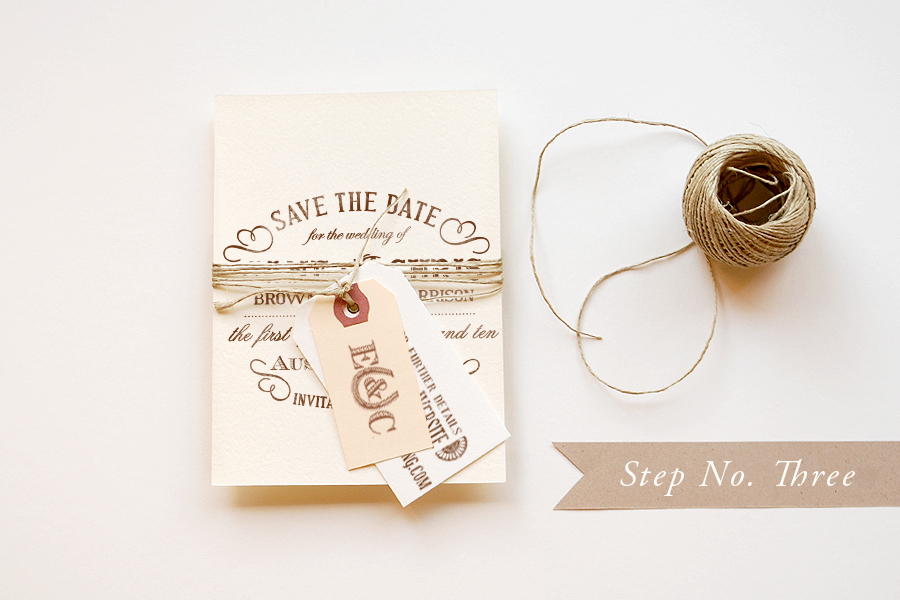
Step 3: This save the date has a fabulous mix of textures and really sets the stage for the invitation and event to come. Â To combine all the pieces, simply tie basic thin kitchen twine around the save the date, going around multiple times. Â Secure it with a basic knot and trim the ends to desired length.
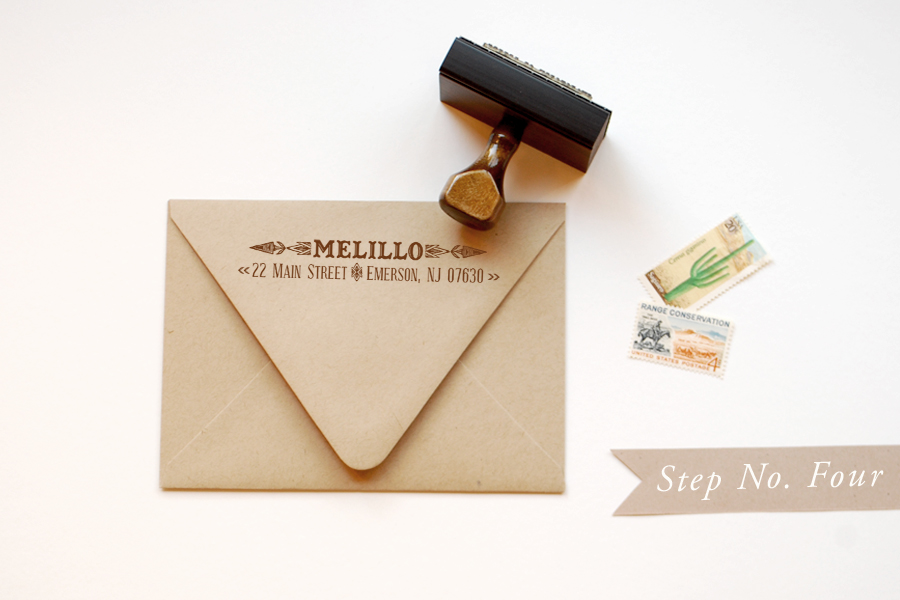
Step 4: A great way to save a little money on your wedding paper (and who doesn’t love doing that!) is to get one return address stamp for all of your envelopes. Â You will potentially be able to use it on your save the dates, invitations (even if you have them professionally printed), reply envelopes and lastly, your thank you notes. Â It can really help your bottom line in the long run. Â Once you’ve stamped your envelopes, simply address them, add postage (there are some fabulous new 2012 stamps out), and send them to your loved ones.

Step 5: Now on to the Invitation suite! Â Use and A6 card or cut paper into 4.5″ x 6.25″ rectangles. Â Following the same steps as the save the date, make prints of the stamp (we used our “Old West” Invitation stamp) on your cards.
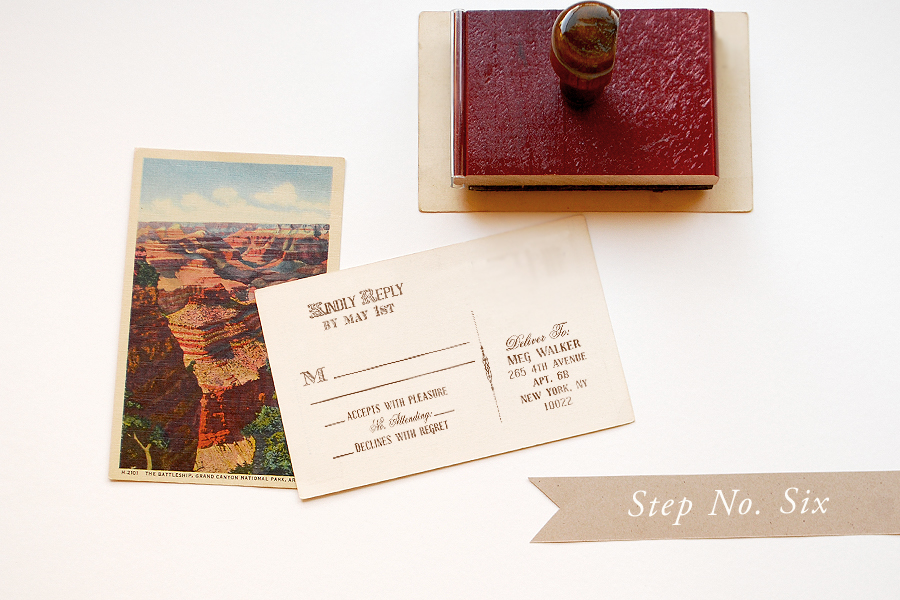
Step 6: Vintage postcards are a great way to incorporate color and personality into your invitation suite. Â We chose a great image of the Grand Canyon and had it copied on linen card stock. Â On the back, we stamped our “Old West” Reply Postcard stamp.

Step 7: To tie it all together, we chose to create a monogram belly band. Â To do this, cut a piece of kraft card stock into 2″x11″ pieces (you’ll get 4 out of each 8.5″x11″ sheet). Â Then stamp your monogram (we used “Lucky in Love” Name monogram) in the center.
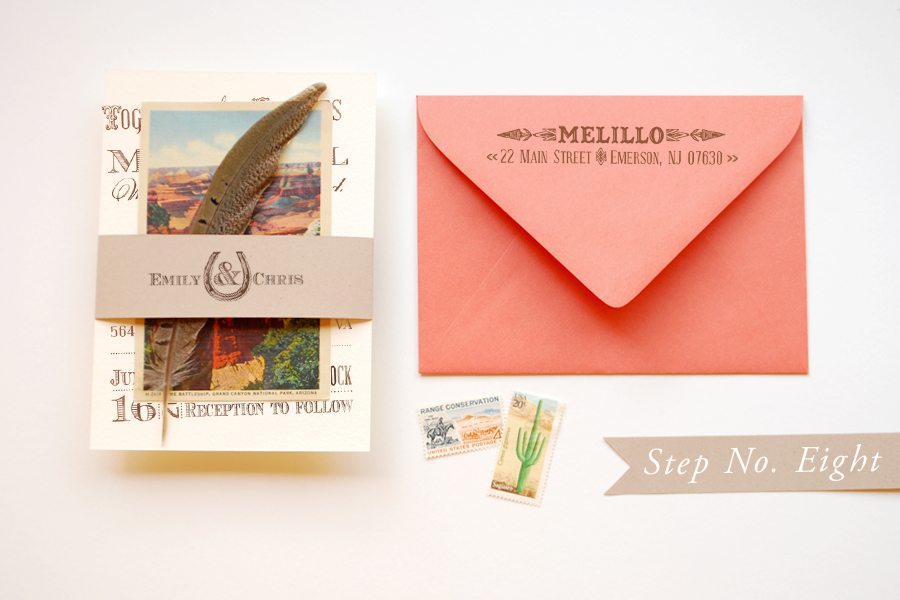
Step 8: Place the invitation, reply postcard, & a feather in a bundle. Â Wrap the belly band around the suite, centering the monogram. Â When you’re happy with the placement, make hard folds with your nail or a bone folder. Â Flip the suite over and secure the belly band with a 1.5″ long piece of double stick tape. Â Use the same return address (we used our “Navajo” return address stamp), stamping it this time on a beautiful coral envelope. Â Again, address, add postage to your invitation and let the compliments roll in!!
Materials:
Customized Rubber Stamps:
“Lucky in Love” Initial Monogram
“Old West” Reply, postcard option
“Lucky in Love” Names Monogram
Stamp Pad (we used a combination of chestnut and cocoa throughout this tutorial)
Linen Card Stock (you can find vintage designs online on websites like Café Press)
Scissors
Double Stick Tape
AntiÂquaria is a memÂber of the Designer Rolodex – you can see more of their beauÂtiÂful work right here!
Photo Credits: Antiquaria
p.s. Have you entered the giveaway from One Plus One yet? Â Check out the details right here!
Love the use of the postcards for the RSVP! It would be fun to do this for a kids birthday party too! I know all the kids really loved getting actual invites in the mail to the party. So I bet my son would love getting all the RSVP letters in the mail!
Love this!! Could you tell me where that blanket is from in the first photo?? A-mazing!
I love this! The feather in it is fabulous 🙂
The blanket is a vintage throw we found at an estate sale in Austin, Texas.
Woah!! Soon to be hubby and I were talking about doing this last night. I search today for more inspiration and find you, AND this is the date of our wedding. I guess we need to get a move on. THANK YOU this is beautiful!
xo