Best of 2013: Wedding Invitations

Another year is coming to a close – so in keeping with my annual tradition, it’s time to recap some of my favorite posts from the year that was. And today I’m starting with some of my very favorite wedding invitations from 2013!

Travel-Inspired-Wedding-Invitations-Ruby-the-Fox2

Charles + Sara’s Travel-Inspired Calligraphy Wedding Invitations by Ruby the Fox and Molly Jacques

Orange-Teal-Chevron-Stripe-Fabric-Pocket-Wedding-Invitation8

Janine + Craig’s Modern Fabric Pocket Wedding Invitations by Janine Rae Design and Boxcar Press

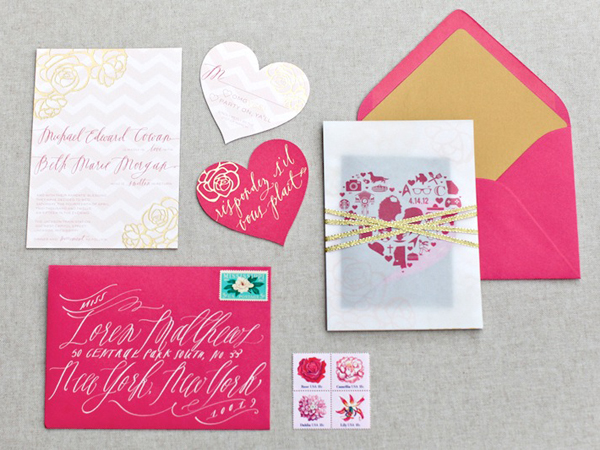
Pink-Gold-Foil-Heart-Wedding-Invitations-August-Blume

Michael + Beth’s Modern Pink and Gold Foil Wedding Invitations by August Blume

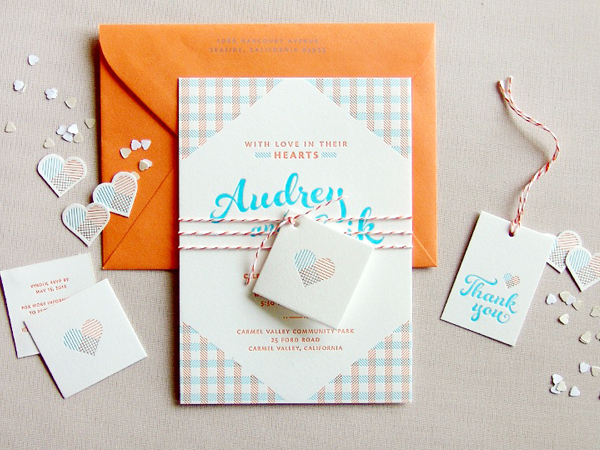
Orange-Blue-Letterpress-Overprint-Wedding-Invitations-Studio-SloMo

Audrey + Erik’s Gingham Overprint Wedding Invitations by Studio SloMo

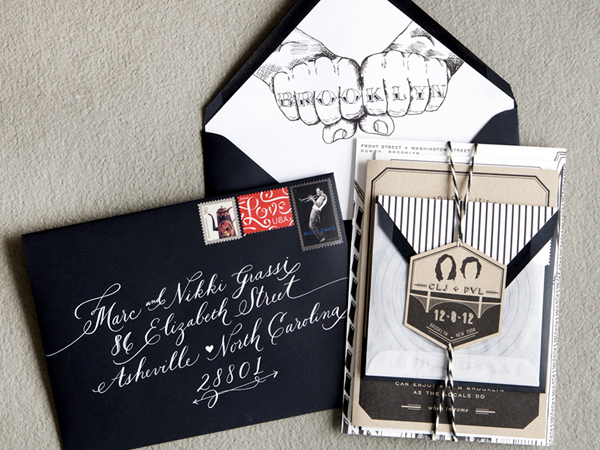
Brooklyn-Wedding-Invitations-Swiss-Cottage-Design2

Courtney + Paul’s Brooklyn Wedding Invitations by Swiss Cottage Designs

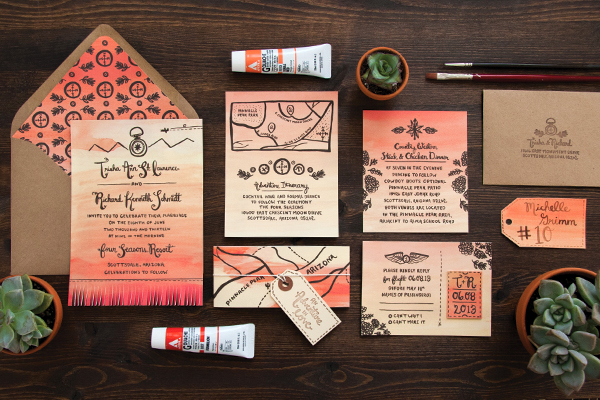
Arizona-Desert-Sunset-Wedding-Invitations-Lovely-Paper-Things

Trisha + Richard’s Arizona Sunset Wedding Invitations by Lovely Paper Things

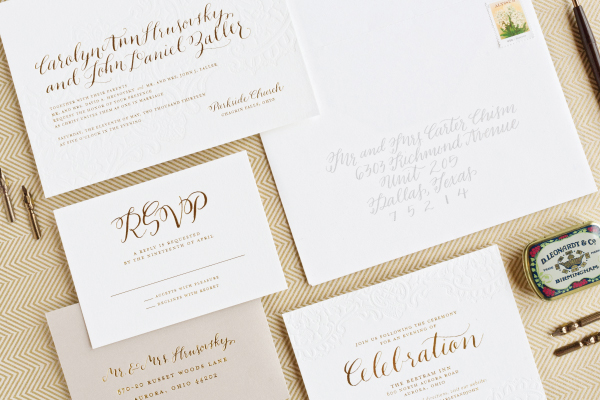
Gold-Foil-Calligraphy-Wedding-Invitations-Lauren-Chism-Fine-Papers

Carly + John’s Calligraphy Gold Foil Wedding Invitations by Lauren Chism Fine Papers

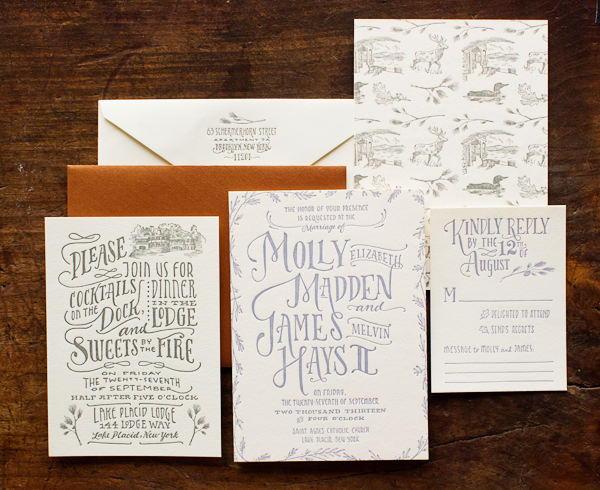
Woodland-Toile-Wedding-Invitations-Ladyfingers-Letterpress

James + Molly’s Woodland Toile Wedding Invitations by Ladyfingers Letterpress

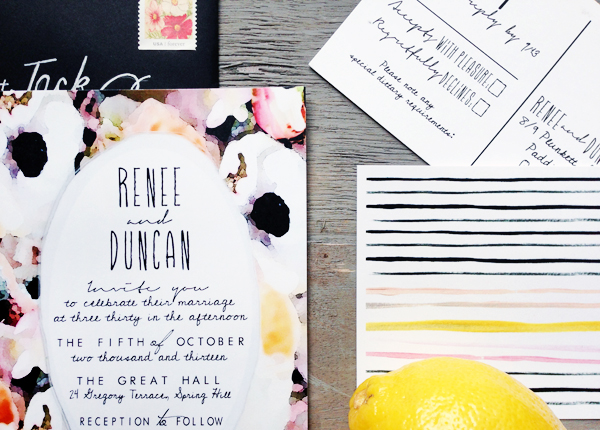
Watercolor-Flower-Stripes-Wedding-Invitations-Hoopla-Love3

Renee + Duncan’s Modern Floral Watercolor Wedding Invitations by Hoopla Love

Looking for more inspiration? Check out the real wedding invitations gallery right here!

DIY Tutorial: Handmade Patterned Notebooks

A handmade gift (or wedding favor) is always such a special way to show someone how much you care. With the holiday season in full swing, we’ve been brainstorming what handmade gifts to make this year for family and friends (an Antiquaria tradition!). This year, one gift that will be under the tree of all of our loved ones are a set of these patterned journals. They’re small enough to be carried around in a handbag which is ideal so that they’ll always be there to capture a great idea or quick thought. – Bailey and Emma of Antiquaria
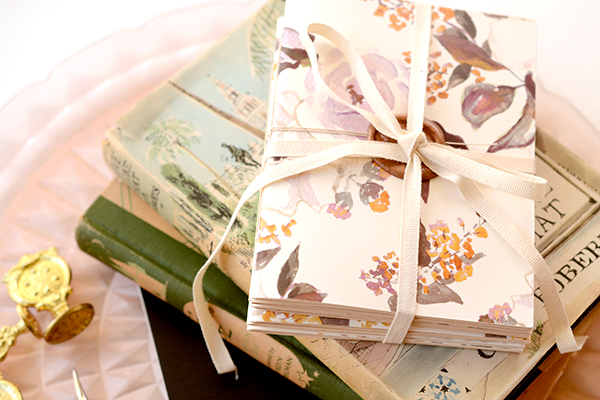
DIY Tutorial: Pattern Notebook Gifts or Wedding Favors by Antiquaria for Oh So Beautiful Paper

We will be bundling them into sets of three but any quantity would be lovely! Six would be so luxurious for a friend who loves to write or sketch! While the process of making these journals has quite a few steps, they are fast and easy…we promise. You can easily knock out making them for all of your loved ones in a day if you work in an assembly line process!
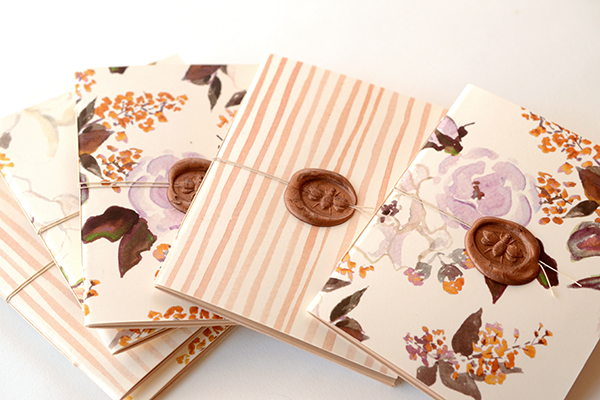
DIY Tutorial: Pattern Notebook Gifts or Wedding Favors by Antiquaria for Oh So Beautiful Paper

Step 1: First, you will need to cut your cover sheets (we used our “Annabelle Violet” Floral Patterned Paper) and your text interior sheets (we used 4 sheets) to size. For ease, we just cut the 8.5″x11″ into 2 pieces (final measurement 8.5″x5.5″) using a metal ruler, craft knife and self healing mat. This way, there is not any paper waste! This also makes a wonderfully small pocket notebook size.
DIY Tutorial: Pattern Notebook Gifts or Wedding Favors by Antiquaria for Oh So Beautiful Paper

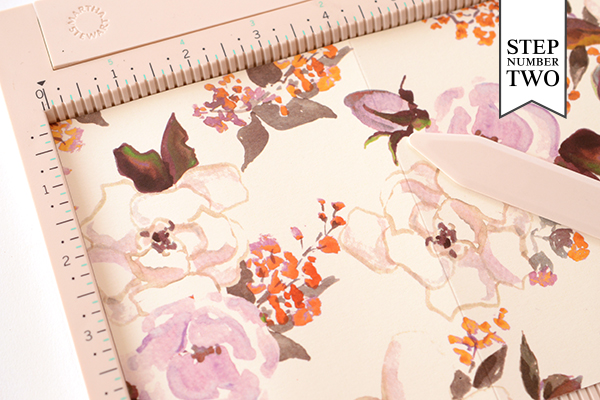
Step 2: Next, you’ll fold both the cover and interior pages in half. In order to make a clean fold on our cover paper we scored it down the center (at the 4.25″ mark). The interior sheets (8 in total) we just folded in half and used a bone folder to make the fold crisp.
DIY Tutorial: Pattern Notebook Gifts or Wedding Favors by Antiquaria for Oh So Beautiful Paper

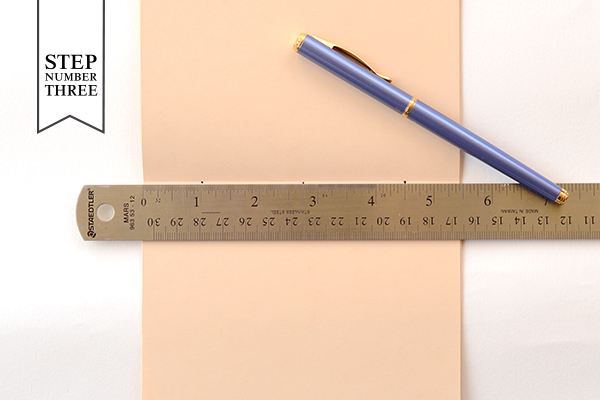
Step 3: We will be stitching these notebooks together, so we’ve got make holes to thread our needle through. Position your ruler over the center fold in the text paper stack. Make marks at 1 inch, 2.75 inches and 4.5inches. We’ve used a dark pen here so that you can see the dots…but feel free to use a pencil or whatever you have on hand.
DIY Tutorial: Pattern Notebook Gifts or Wedding Favors by Antiquaria for Oh So Beautiful Paper

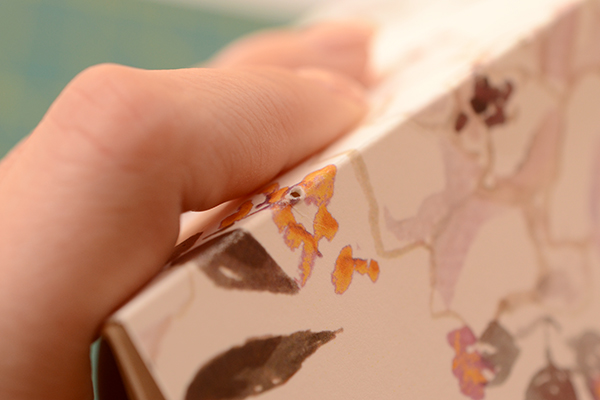
Step 4: After you’ve marked your holes, you will need to punch through them with an awl. Stack your cover and interior pages together before making clean puncher marks though ALL of the sheets. This doesn’t take much force. If it helps, you can use binder clips to hold the pages and cover together and keep it straight.
DIY Tutorial: Pattern Notebook Gifts or Wedding Favors by Antiquaria for Oh So Beautiful Paper

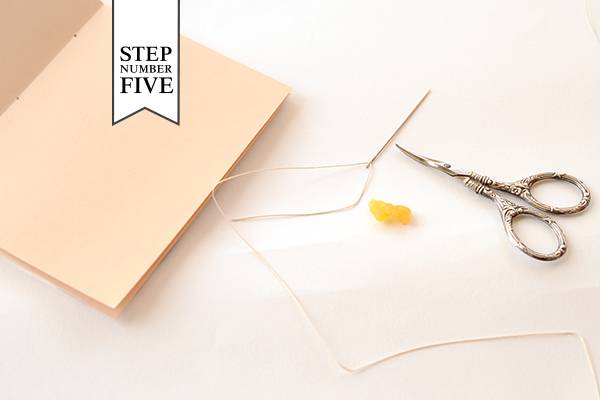
Step 5: Now you’re ready to sew! This step contains many sub-steps that go quickly once you get the hang of it. Thread your needle with bookbinding thread. We used approx. 18 inches for each book because it’s better to cut off extra than to come up short! If you’re having a hard time threading your needle, you can run a little beeswax on the tip to make it stiff and easier to thread through.
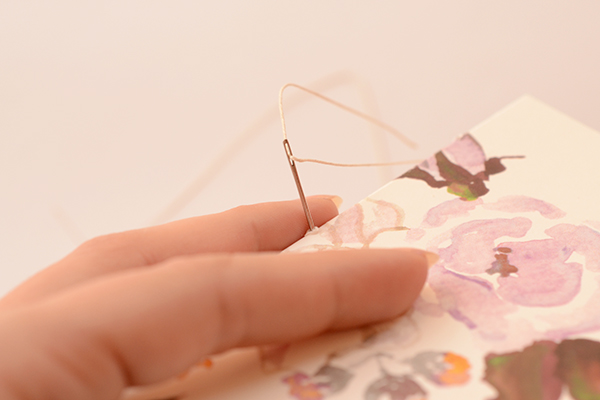
DIY Tutorial: Pattern Notebook Gifts or Wedding Favors by Antiquaria for Oh So Beautiful Paper

Step 5a: Thread your needle through the center hole on the outside of your journal as shown above. Pull through, leaving a tail that is approximately 6 inches long.
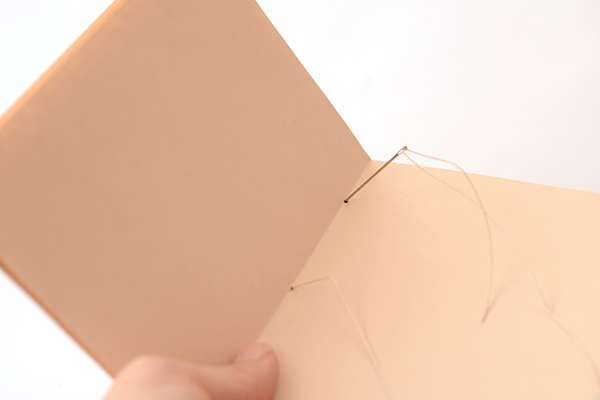
DIY Tutorial: Pattern Notebook Gifts or Wedding Favors by Antiquaria for Oh So Beautiful Paper

Step 5b: Now sew through the top hole in the inside of the journal as shown above. Make sure you still have your 6″ tail on the outside and you don’t pull it through!
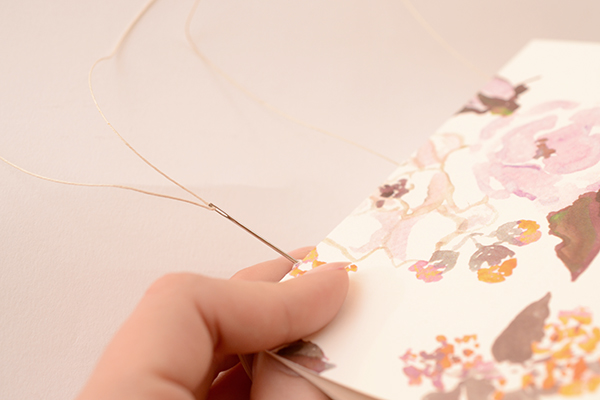
DIY Tutorial: Pattern Notebook Gifts or Wedding Favors by Antiquaria for Oh So Beautiful Paper

Step 5c: Next, you’ll bring your needle down and sew through the bottom hole on the outside of your journal.
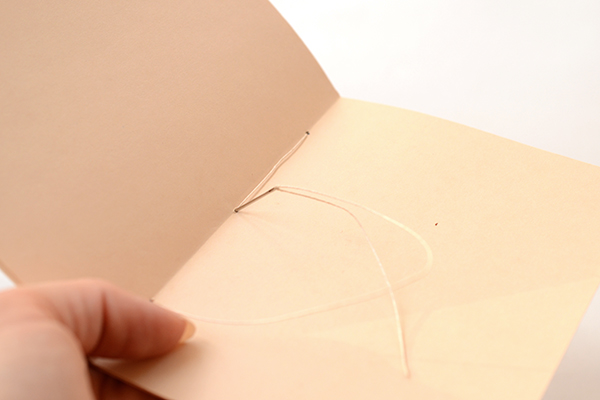
DIY Tutorial: Pattern Notebook Gifts or Wedding Favors by Antiquaria for Oh So Beautiful Paper

Step 5d: Now, you’ll sew through the center hole once more, ending up on the outside cover.
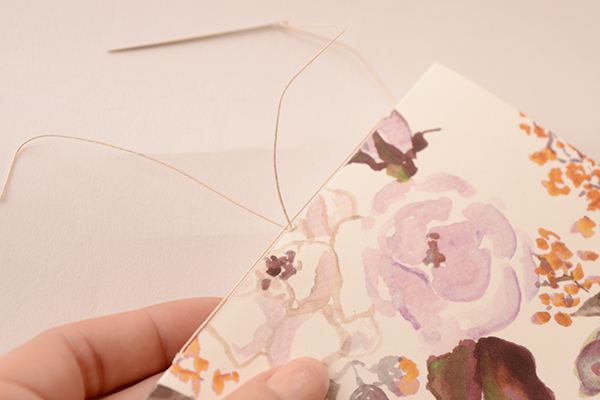
DIY Tutorial: Pattern Notebook Gifts or Wedding Favors by Antiquaria for Oh So Beautiful Paper

Step 5e: Once you’ve pulled your thread through the center a second time, you can take your needle off of the thread. Make sure that there is one thread end on either side of the spine thread (the one that’s down the center).
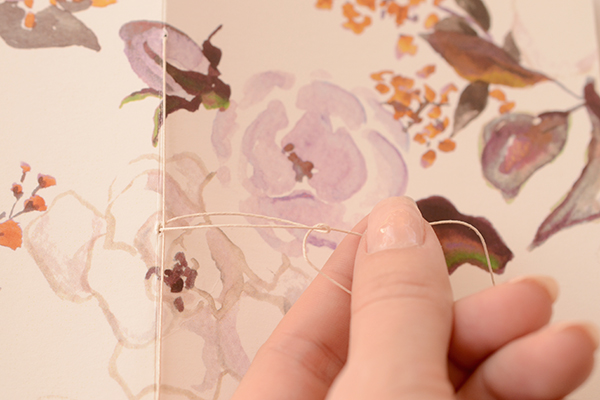
DIY Tutorial: Pattern Notebook Gifts or Wedding Favors by Antiquaria for Oh So Beautiful Paper

Step 5f: Pull your thread taught (not too hard or you’ll rip the paper) making sure that there is no slack on the outside or inside of the journal. Loop one thread under the other into a knot to tie off the binding.
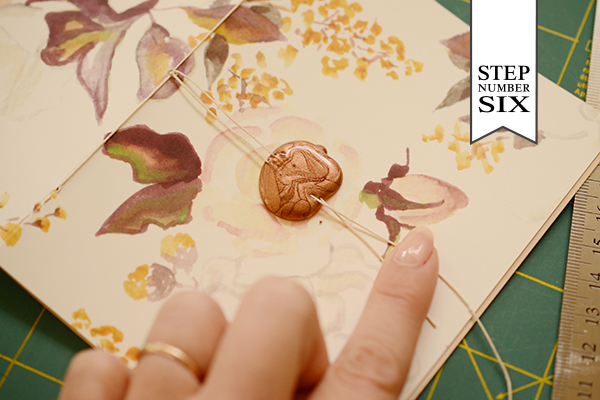
DIY Tutorial: Pattern Notebook Gifts or Wedding Favors by Antiquaria for Oh So Beautiful Paper

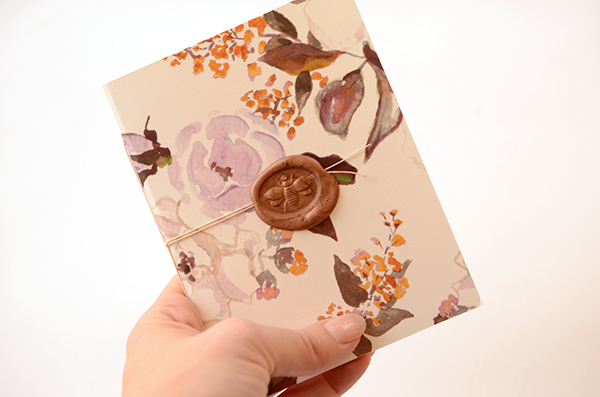
Step 6: Now we decorate! Instead of having loose string on the binding or tying it into a bow, we decided to secure it with sealing wax! Pull your two binding threads across the center front of the journal. Drip hot wax (we use a wax formulated for a glue gun-for ease) in the center over the threads (see above). Using your wax seal of choice, press it into the hot wax until it cools and releases (see below). Trim off and make the thread ends even, if desired.

Step 7: We’re not going to lie… this may be the trickiest step out of the whole process! Once the journal is finished and  folded, you’ll need to make the edges of the book even so that they’re crisp and clean, like the journals that you buy in a store. The trick to this is using a REALLY sharp, new blade on your craft knife. If you’re making a lot of these journals, you may need to change your blade more than once!

Line up your ruler with the edge of your front cover. Make sure that all of your pages and the back cover are flat and pressed down (we kinda lean on the whole journal and ruler at the same time so that it doesn’t shift). Now, start trimming off the excess. It will take a few passes but will eventually be a clean, straight edge!
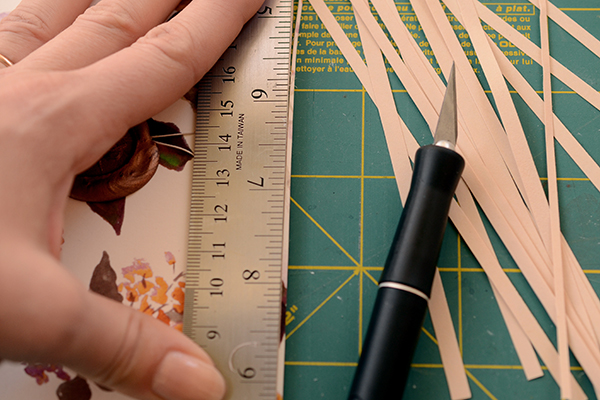
DIY Tutorial: Pattern Notebook Gifts or Wedding Favors by Antiquaria for Oh So Beautiful Paper

Et voila! Now your journal is finished and ready to give! We guarantee that your loved ones will cherish these little pretties for years to come. They may even ask for them year after year.
DIY Tutorial: Pattern Notebook Gifts or Wedding Favors by Antiquaria for Oh So Beautiful Paper

Materials

“Annabelle”  Patterned Paper, in Cover

“Annabelle Violet”  Patterned Paper, in Cover

“Watercolor Stripe” Coral Patterned Paper, in Cover

Text Paper for interior pages

Metal Ruler, Self Healing Mat and Craft Knife

Bone Folder

Scoreboard

Awl

Bookbinding Thread

Needle

Wax Seal

Sealing Wax and Glue Gun

Scissors

Beeswax (optional)

Photos: Antiquaria for Oh So Beautiful Paper

DIY Hand Painted Envelopes

We all love to dress up our envelopes with beautiful postage stamps, gorgeous calligraphy, and pretty address labels. But what about cards (and envelopes) delivered in person? I always try to personalize the front of my hand delivered envelopes, whether it’s a simple hand drawn border or a pretty flourish around the recipients’ names. This week I thought I’d share a few of the ways I’m personalizing my hand delivered holiday cards, although you can totally use these ideas year round. These aren’t really tutorials – just a few ideas that I wanted to share. Today we’re starting with my favorite idea: hand painted envelopes!

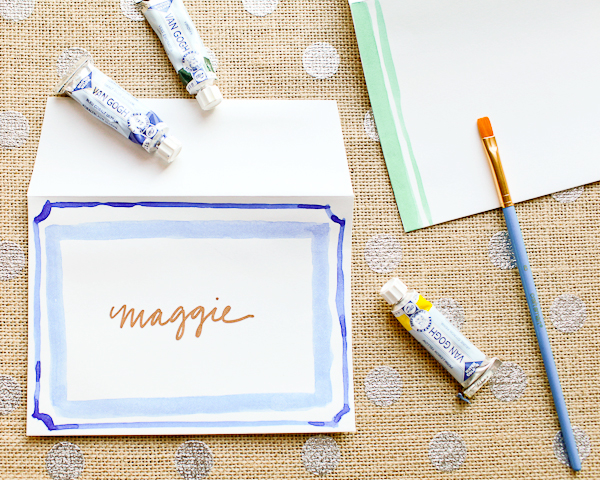
OSBP-DIY-Tutorial-Painted-Envelopes-6

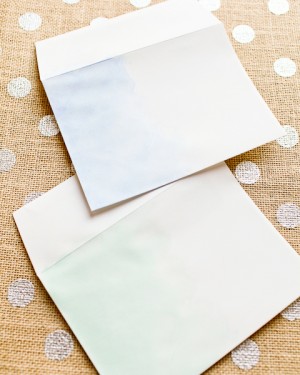
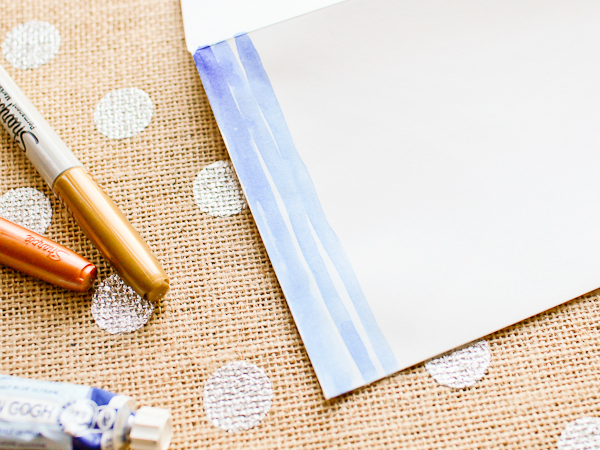
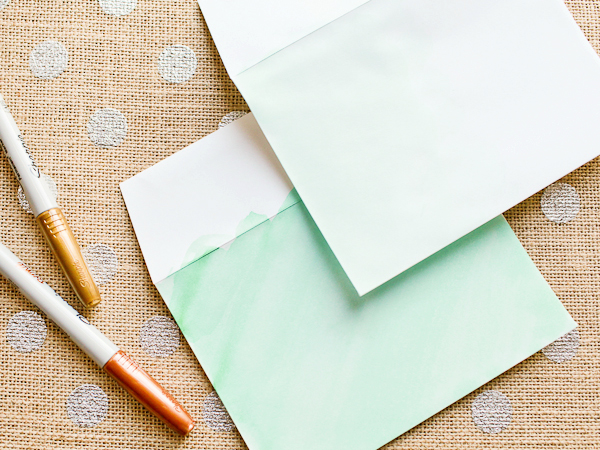
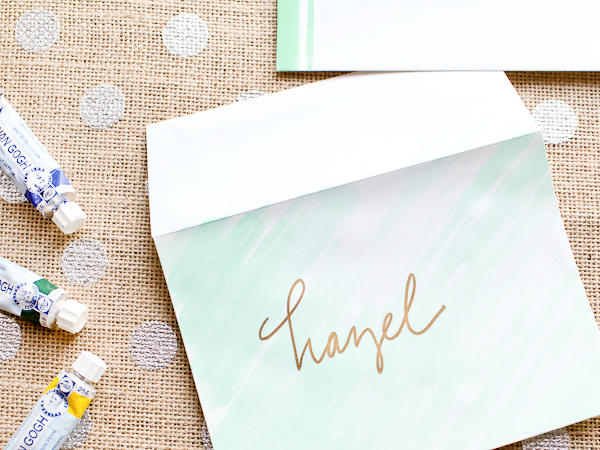
Watercolor paints are one of my favorite ways to dress up light color envelopes – the pattern options are endless! I’m partial to stripes and line borders, but you can also create a watercolor wash by using more water to dilute your chosen color. For this example, I used a deep cobalt blue and emerald green on Mohawk Superfine White envelopes.

OSBP-DIY-Tutorial-Painted-Envelopes-55OSBP-DIY-Tutorial-Painted-Envelopes-45

OSBP-DIY-Tutorial-Painted-Envelopes-54

You’ll probably want to play around with colors and patterns on some scrap paper before moving on to your envelopes. Normally, watercolors would be used on super thick paper, so depending on your particular envelopes there will most likely be some warping/wrinkling in the paper. I’m not bothered by this, but just make sure that the envelopes are completely dry before you insert your card or address the finished envelope.

OSBP-DIY-Tutorial-Painted-Envelopes-46

OSBP-DIY-Tutorial-Painted-Envelopes-16

OSBP-DIY-Tutorial-Painted-Envelopes-26

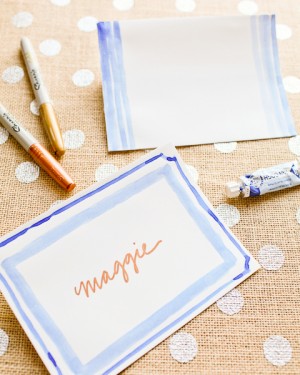
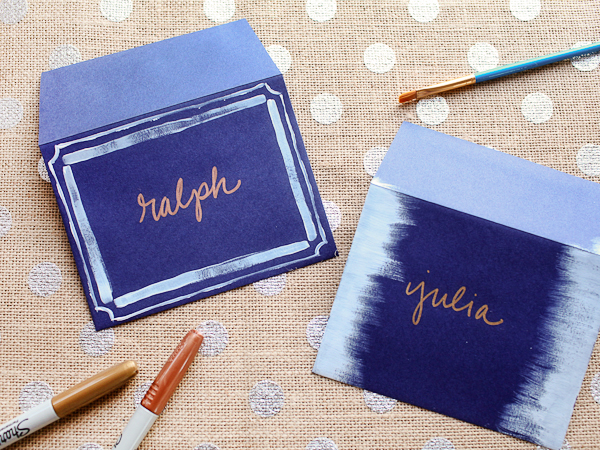
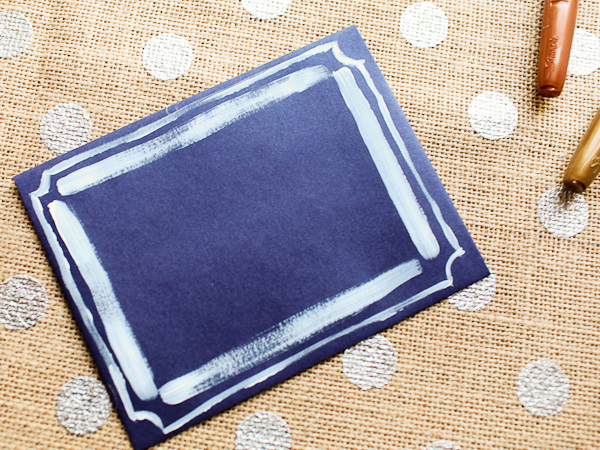
For darker envelopes, I like to use opaque acrylic paint for a fun light-on-dark effect. Here I used white acrylic paint on Mohawk antique vellum envelopes (in Iris) paired with my favorite gold and copper metallic Sharpie markers.

OSBP-DIY-Tutorial-Painted-Envelopes-29OSBP-DIY-Tutorial-Painted-Envelopes-40

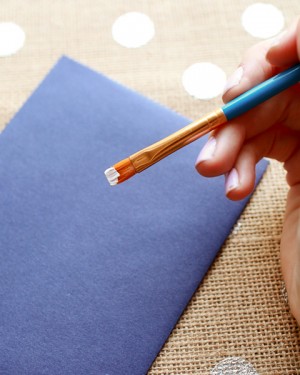
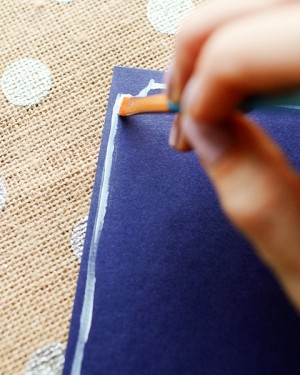
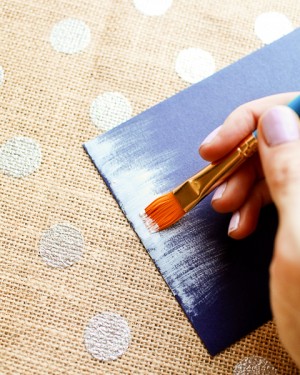
To create a dry brush effect along the edge, simply start out with a small amount of paint on the edge of your brush. Too much paint, and you’ll loose the feathery texture. Starting at the top left corner of your envelope, paint a horizontal stroke – moving in a single motion until your brush runs out of paint. Repeat down each side of the envelope. Let dry, then write the name of your recipient on the envelope!

OSBP-DIY-Tutorial-Painted-Envelopes-31

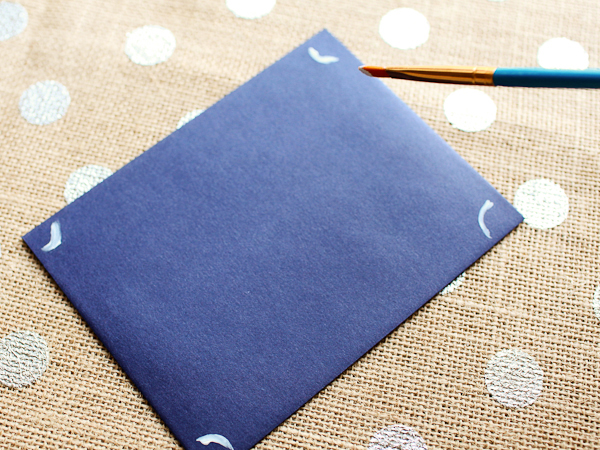
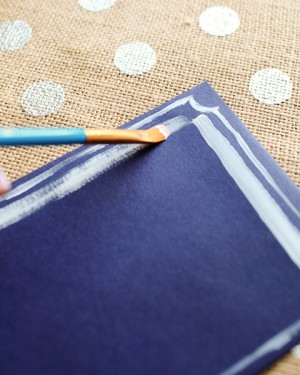
For the border effect, I like to start with the small curves in each corner to serve as guides. Then draw lines to connect the ends of each curve. I used the flat edge of my brush for the outer frame to achieve a thinner line, then switched to the broad edge of the brush for a thicker inner frame. Don’t worry about painting perfectly straight lines – any wobbly lines or changes in texture will only add to the hand painted charm. Let dry, then write in the name of your recipient – and done!

OSBP-DIY-Tutorial-Painted-Envelopes-32OSBP-DIY-Tutorial-Painted-Envelopes-34

OSBP-DIY-Tutorial-Painted-Envelopes-38

I’ll be back with a couple more ideas later in the week!

Photo Credits: Nole Garey for Oh So Beautiful Paper

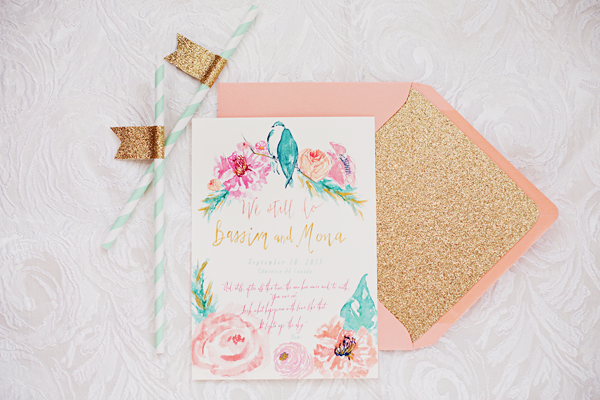
Mona + Bassim’s Calligraphy and Floral Vow Renewal Invitations

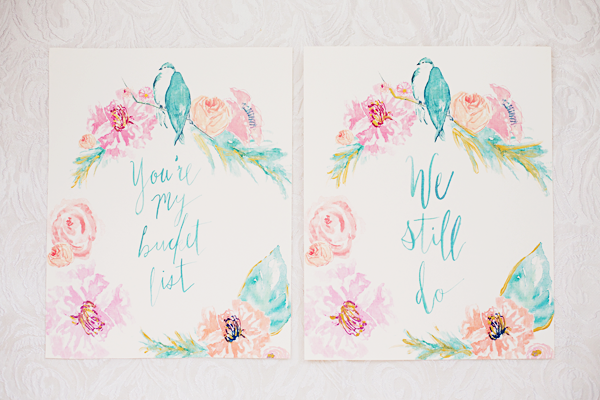
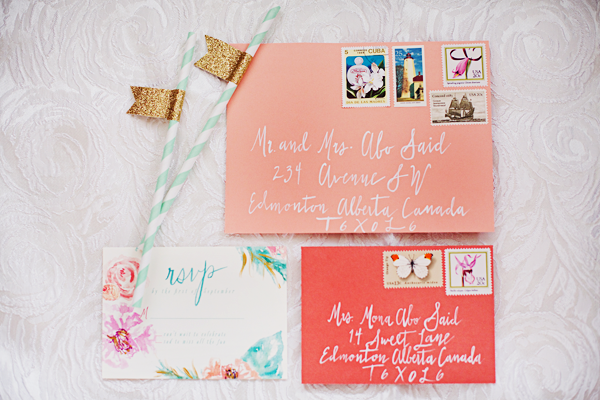
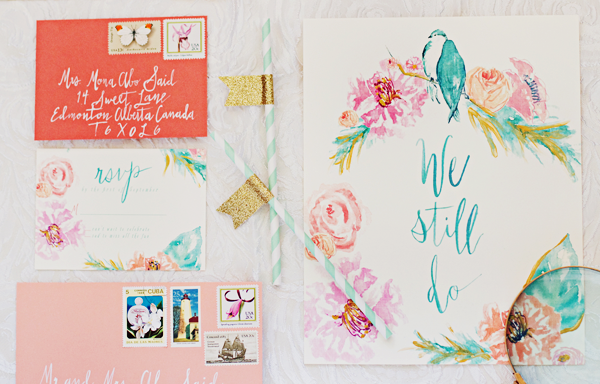
Mona of Birds & Honey Events recently celebrated ten years with her husband Bassim – so they decided to renew their wedding vows as part of their anniversary celebrations! Mona worked with Sarah at The Stationery Bakery to create a gorgeous invitation suite featuring lush floral watercolor illustrations and calligraphy. So pretty!

Floral-Calligraphy-Vow-Renewal-Invitations-Stationery-Bakery2

From Mona: I recently renewed my vows and I just couldn’t get over the beauty of my invitation suite. My dear friend Sarah Donovan from the lovely Stationery Bakery designed the suite of my dreams. I knew that I wanted to incorporate my love of birds on our stationery suite. I also adore anything written by Rumi and Khalil Gibran so it meant the world to me that she incorporated some of my favorite quotes into the invitation.

Floral-Calligraphy-Vow-Renewal-Invitations-Stationery-Bakery4

Floral-Calligraphy-Vow-Renewal-Invitations-Stationery-Bakery5

Floral-Calligraphy-Vow-Renewal-Invitations-Stationery-Bakery7

Thanks Mona!

Invitation Design: The Stationery Bakery

Check out the Designer Rolodex for more tal­ented wed­ding invi­ta­tion design­ers and the real invi­ta­tions gallery for more wedding invitation ideas!

Photo Credits: Katch Studios

2013 Gift Guide: Designers + Calligraphers

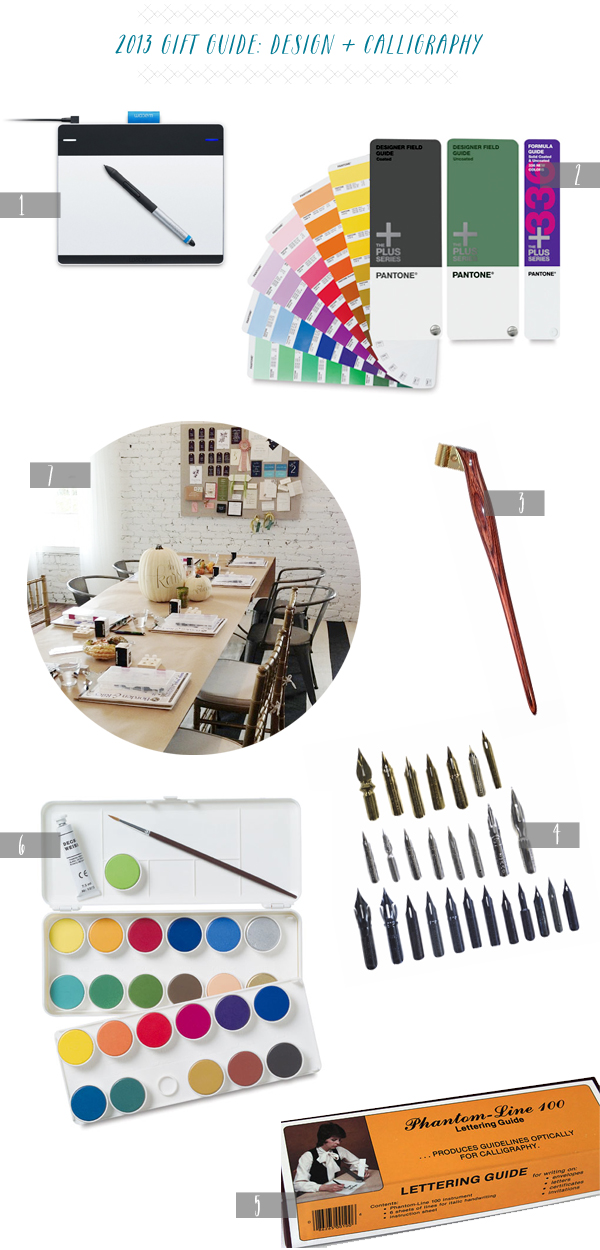
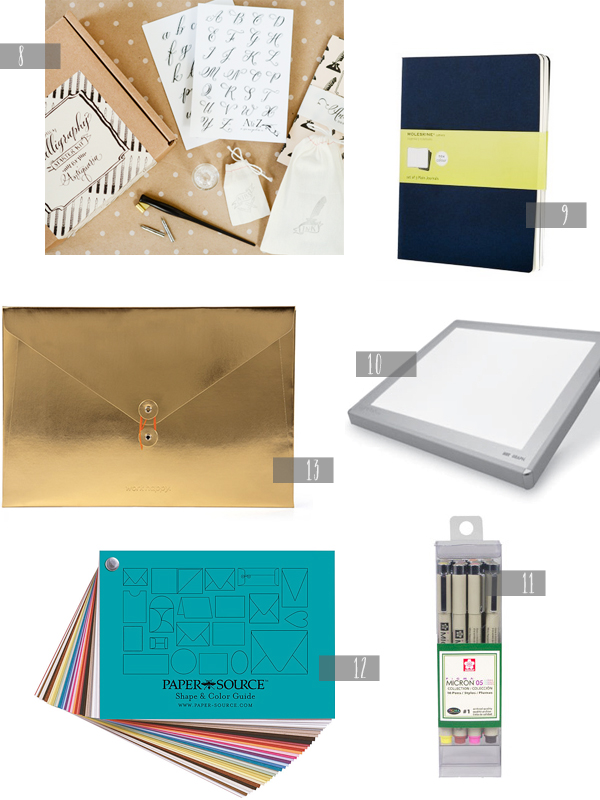
Our next gift guide was inspired by a very sweet husband looking for ideas for his graphic designer (and aspiring hand lettering artist) wife. I turned to some friends, including Christine from Yellow Owl Workshop, Michele from Meant to Be Calligraphy, Courtney from Swiss Cottage Designs, Arley-Rose and Morgan from Ladyfingers Letterpress, and Liz from Linda & Harriett, for their recommendations. So whether you’re in the same predicament, looking for someone who dabbles in design or calligraphy, or just want to forward this post to your significant other – here are a few gift ideas!

 OSBP-2013-Gift-Guide-Design-Enthusiast

1. Wacom Tablet; 2. Pantone Guide Book; 3. Oblique Calligraphy Pen Holder; 4. Copperplate Nib Sampler; 5. Phantom Line Lettering Guide (found one on ebay here!); 6. Watercolor Set (and small pads of watercolor paper); 7. Calligraphy + Letterpress Classes (like this class from Meant to Be Calligraphy)

OSBP-2013-Gift-Guide-Design-Enthusiast-Part2

8. Calligraphy Starter Kit; 9. Moleskine Notebooks; 10. Calligraphy Light Box; 11. Micron Pens and black Uniball Pens; 12. Paper Source Swatch Book; 13. Poppin Metallic Folio
2 + 12 Pantone guide book + swatch books! Both essential tools for any artist, but also a great source of inspiration! The ladies of Ladyfingers Letterpress also recommend Soho Paper, French Paper Co., and Cards and Pockets.
5 + 10 Arley-Rose from Ladyfingers Letterpress also recommended a vintage tool called the Phantom Line Lettering Guide that projects guidelines onto a page, although you’ll have to do some digging to find one. Alternatively, a light box is an essential tool for any aspiring or hobbyist calligraphers!

7 + 8 Classes are such a great way to both learn and connect with fellow designers and calligraphy enthusiasts in your area! I’ve listed some DC-area classes here, but look for letterpress workshops and calligraphy classes in your area or even explore online classes. But if you really can’t find a class that works, a calligraphy starter kit makes a wonderful gift.

13 Pretty office supplies! Because really, nothing is more of a bummer for creative energy than sad pocket folders and organization supplies. Courtney from Swiss Cottage Designs and I are both loving all the colorful office supplies from Poppin these days!

A couple of additional ideas from Courtney: consider treating your significant other to their very own business cards, perhaps with a gift certificate to their favorite printer. Or track down a web developer who can help build a website or blog. These two investments are particularly big deals for any designers that might just be starting out, and any little help towards both projects can mean the world to a growing business!
{images via their respective sources}