Envelope Address Hand Lettering Tutorial from Ladyfingers Letterpress

Hi Everyone! The ladies of Ladyfingers Letterpress were kind enough to fill in during my summer vacation last year, and this post on Arley-Rose’s signature hand lettering was one of my favorite posts that week! So I jumped at the chance when Arley-Rose volunteered to stop by with some tips and tricks for adorning your envelopes with beautiful and whimsical hand lettered addresses. Take it away ladies! –Nole

With the majority of correspondence these days taking place in the digital realm, it’s always such a treat to get something real and tangible in the mail. Heck, even before e-mail dominated our lines of communication, you knew something was really special when it arrived through your mail slot all decked out with big, beautiful lettering that you knew someone took time to carefully create. Hopefully by the end of this post you will want to sit yourself down and experiment with some of the styles shown below to make your own beautifully styled envelope addresses. –Arley-Rose of Ladyfingers Letterpress
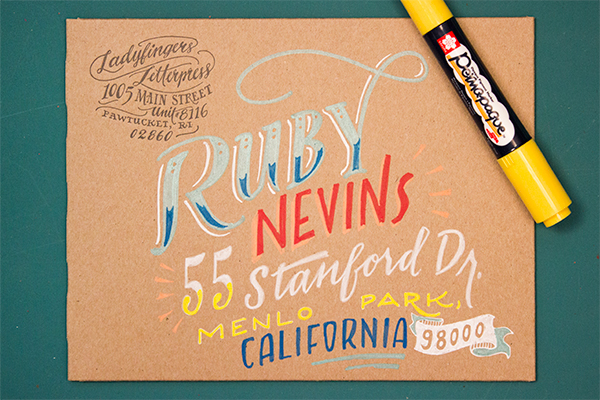
Envelope Address Hand Lettering Tutorial by Ladyfingers Letterpress / Oh So Beautiful Paper

I like to think of hand-lettering as more of an “illustration using letters” more than a “trained handwriting” kinda thing, so I choose pens that give me the most control as possible. People are doing beautiful things with pointed pens and modern calligraphy these days, and I encourage you to experiment with pointed pens if you like, but for now I am going to stick the tools that I know and love.

We’ll begin our journey into the world of lettering with familiarizing ourselves with a few different lettering styles that will act as our foundation and give us some variation in style that we can draw upon throughout our lettering endeavors! Personally, I like to combine different lettering styles, fluctuating between scripts, roman, and sans-serif characters to give the piece a lot of motion and personality. Not sure what a roman character is? Read on! Have questions about the etiquette and formality of addressing your envelopes? Martha Stewart has a terrific go-to tutorial about that!

Hand Lettering Envelope Address Tutorial by Ladyfingers Letterpress / Oh So Beautiful Paper

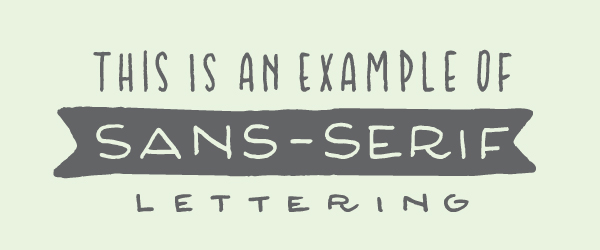
Roman lettering, which can also be called a “Serif,” has some of the earliest origins dating back to, well, the Romans! The word “Serif” is latin for “foot”, which makes sense when you look at the letters. See? They all have feet (except o’s)! Serifed typefaces such as Garamond or Baskerville look great as all caps and spaced out (which us type nerds refer to as “tracking”), or spelled out in both caps and lowercase with normal tracking. I sometimes like to make tall condensed roman letters if the address is really long and I need to make the most of my space. On capital As, Rs, Ns, Ys, Ks, Hs, and sometimes Gs, I like to add a little flourish, as you’ll notice on some of the envelope samples below.
Hand Lettering Envelope Address Tutorial by Ladyfingers Letterpress / Oh So Beautiful Paper

Now that you know that the word “Serif” means “foot”, naturally “Sans Serif” means “Without Feet!” Sans Serif letters were popularized in the mid twentieth century with the arrival of Helvetica, Gill Sans and Futura. I think they look great as all caps, tall and condensed! I also find that they’re easy to draw because they most closely resemble a clean, handwritten print style.
Hand Lettering Envelope Address Tutorial by Ladyfingers Letterpress / Oh So Beautiful Paper

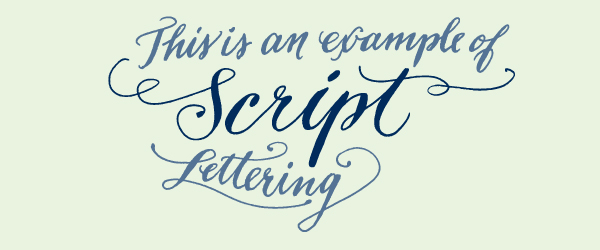
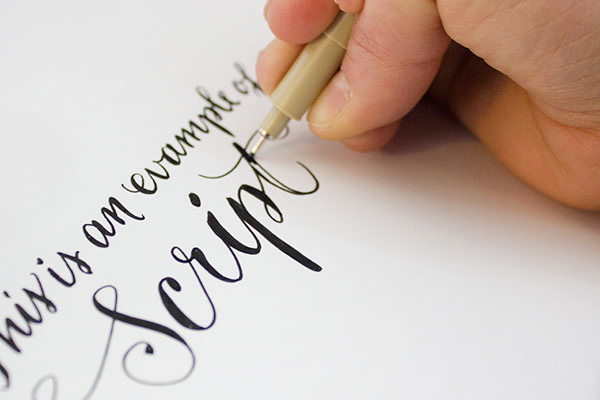
Now the fun part begins! Getting the hang of lettering a script might take some time to get the hang of, but here’s a secret! Write in cursive as you normally would, and then darken the strokes that should have accents. Feel free to refer to other scripts with a quick google image search to see where those accents should be. Have some fun with your script: it’s not necessary to keep a straight baseline, in fact I tend to like scripts that dance around a little bit on the page. They have more character! Ha! Get it! Character? Typography? Joke? Uhhh….. Nevermind.
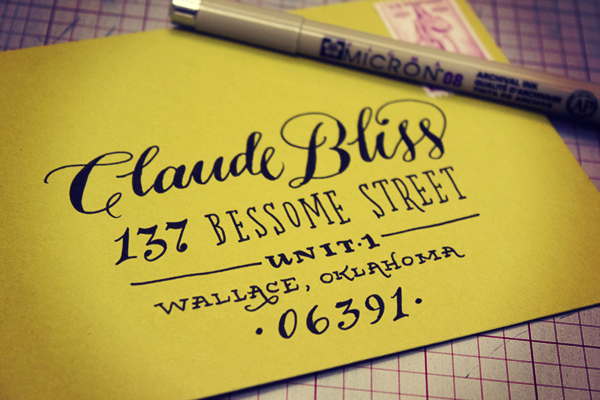
Hand Lettering Envelope Address Tutorial by Ladyfingers Letterpress / Oh So Beautiful Paper

Hand Lettering Envelope Address Tutorial by Ladyfingers Letterpress / Oh So Beautiful Paper

My favorite go-to pen is the Pigma Micron from Sakura of America. I’ve been drawing with Micron pens since I was a wee young artist, and they continue to be my favorite pen for all types of uses, especially drawing on light-colored envelopes. My size of choice is an 08 but there was a time when all I used was the smaller 03s to get a really nice fine line.
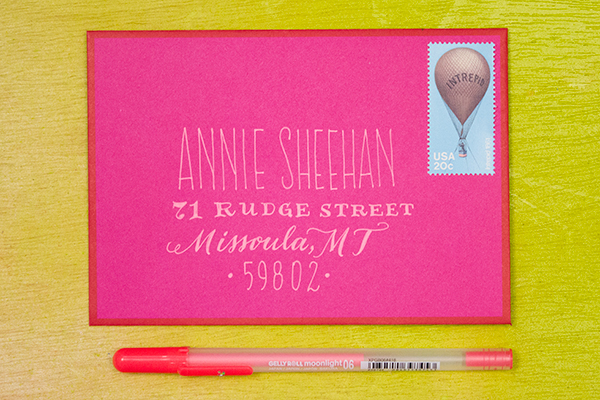
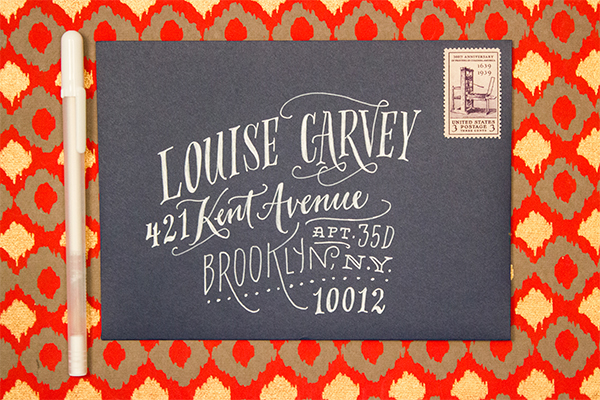
Hand Lettering Envelope Address Tutorial by Ladyfingers Letterpress / Oh So Beautiful Paper

Hand Lettering Envelope Address Tutorial by Ladyfingers Letterpress / Oh So Beautiful Paper

Keep it classy! Sometimes a white pen is all you need to do the trick, especially on dark or brightly colored envelopes. My go-to is the White Gelly Roll 08, which gives me a nice smooth line without any breaks or clogs. I’ve found that the Metallic Silver Gelly Roll pen is also super awesome! It’s not really too sparkly, but is super opaque which is exactly what I want. I also like the Moonlight pens for an extra burst of color.
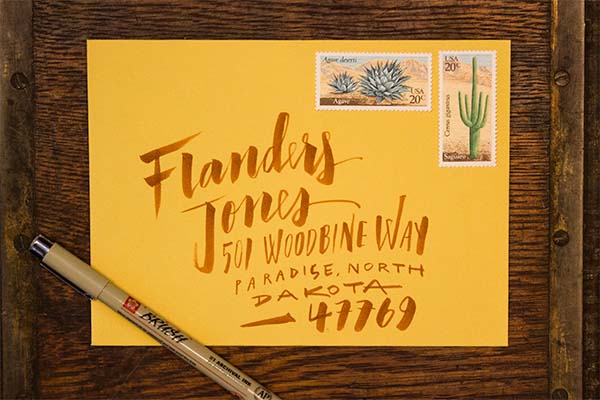
Envelope Address Hand Lettering Tutorial by Ladyfingers Letterpress / Oh So Beautiful Paper

Sometimes I like the swift expression that can only be found with a brush pen. When I don’t have time to whip out the gouache and brushes, the Pigma Brush pens really do the trick. They also come in  a variety of colors, so if you’re not feeling like black ink is your thing that day, you can also choose from a variety of other colors that look great on white or light colored envelopes.
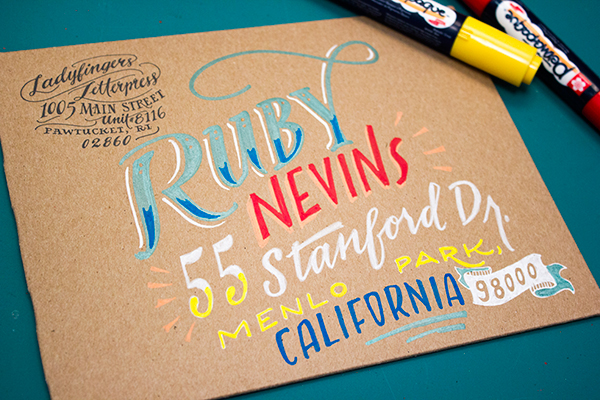
Envelope Address Hand Lettering Tutorial by Ladyfingers Letterpress / Oh So Beautiful Paper

The Do Not Open Lettering Project  by Erik Marinovich was recently brought to my attention by my amazing typographer friend Jeremy Mickel, and it blew my mind. It still does blow my mind. Every time I look at it. I thought I would refer to it here because it shows how creative you can be with large oversize envelopes. Besides, envelopes: they’re really just a canvas for beautiful lettering, right? Anyway, the Permapaque markers are incredible for this task. They’re nice and opaque like a paint marker without the nasty smell, and you get a huge variety of colors!

Now that you’ve seen some samples, I’d love to see what you come up with! Don’t forget to tag your work on Instagram with @beautifulpaper, @ladyfingersletterpress and @sakuraofamerica. Thanks and happy lettering!

Pens provided by Sakura of America, with awesome stamps provided by Pack & Post!

Photo Credits: Ladyfingers Letterpress

Emily + Mike’s Desert Botanical Wedding Invitations

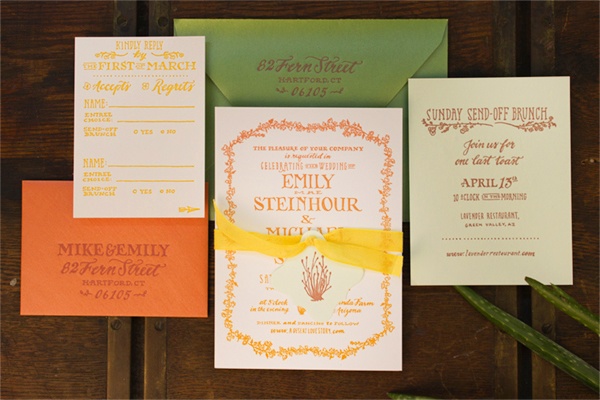
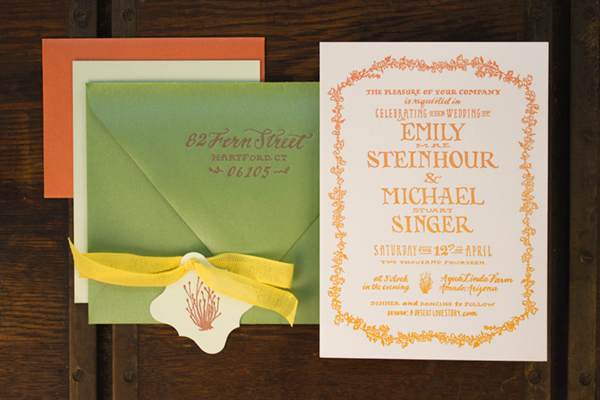
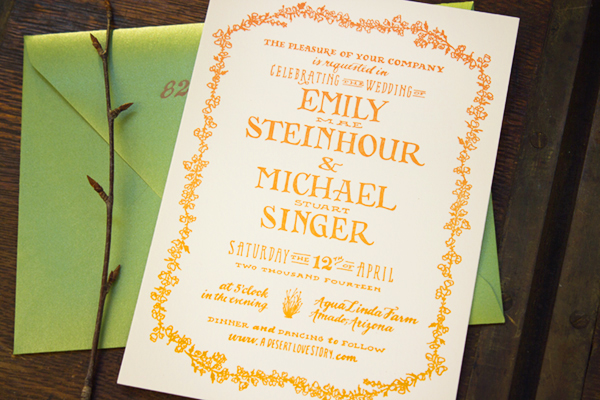
When these two botanists decided to get married in the Arizona desert, they turned to Arley-Rose and Morgan of Ladyfingers Letterpress to incorporate their favorite plant specimens into their wedding invitations. Paired with Arley-Rose’s signature hand lettering, the invitation suite features desert cacti and floral illustrations – all letterpress printed in desert-inspired hues of pink and orange. So pretty!

Hand-Lettered-Wedding-Invitations-Ladyfingers-Letterpress-OSBP

From Arley-Rose and Morgan: Emily and Mike are a lovely couple whose botanical passions inspired the look and feel for their entire wedding. When they showed us photos of the beautiful Arizona desert landscape where they will have their ceremony, they pointed out each plant specimen in the photo with great excitement – as if they were characters in their favorite book! 

Hand-Lettered-Wedding-Invitations-Ladyfingers-Letterpress-OSBP2

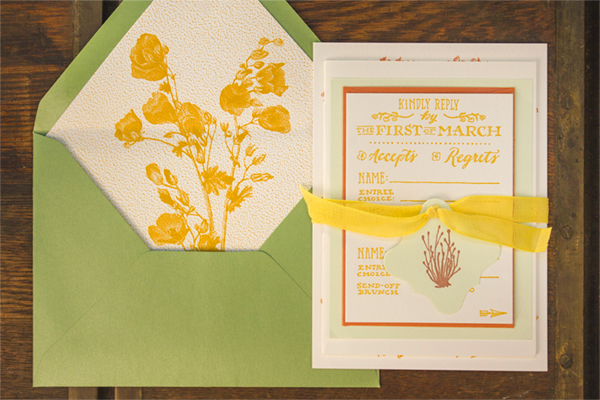
We knew that integrating the objects of desire of these two botanists would be a focal point for the wedding invitations. They sent us tons of photos of desert cacti and gorgeous blossoming flowers that I didn’t even know existed! Emily said that she was especially smitten with the Globe Mallow, which we letterpress printed into the envelope liner.

Hand-Lettered-Wedding-Invitations-Ladyfingers-Letterpress-OSBP10 

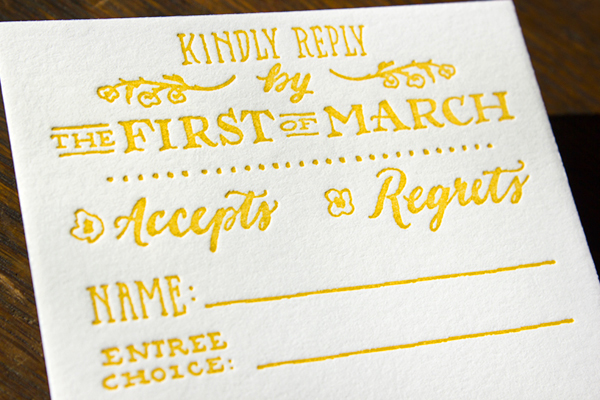
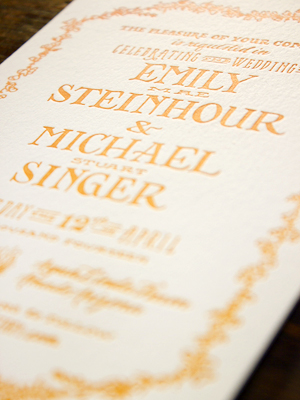
The suite was tied together using a loose weave Italian ribbon and decorated with a letterpress hang tag that featured an illustration of one of their favorite desert cacti. The main invitation is bordered with a delicate botanical illustration and letterpress printed with a rainbow roll effect that evokes a late summer pink-to-orange desert sunset. The RSVP card was multi-tiered for guests who were RSVPing for different events. Also included was a double sided send off brunch and a rehearsal dinner card that was letterpress printed on a soft mint green paper.

Hand-Lettered-Wedding-Invitations-Ladyfingers-Letterpress-OSBP3

Hand-Lettered-Wedding-Invitations-Ladyfingers-Letterpress-OSBP8 

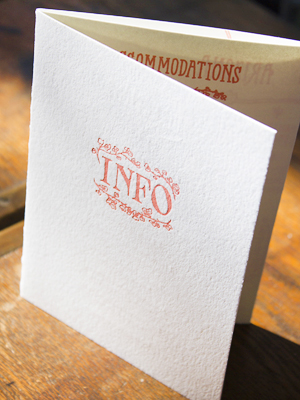
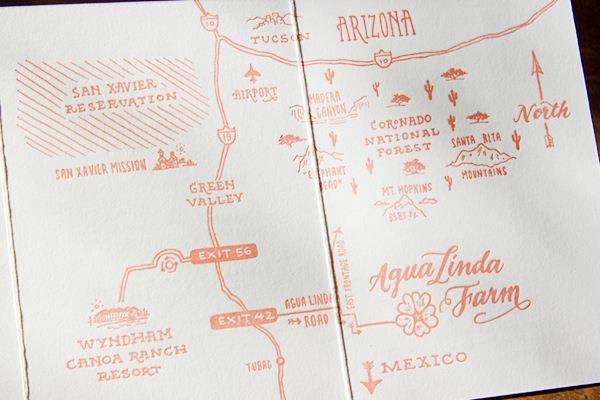
The suite also included an extensive info booklet that gave information on where to stay, what sort of weather to expect, and a handy map of the area since GPS is unreliable in that neck of the woods.

Hand-Lettered-Wedding-Invitations-Ladyfingers-Letterpress-OSBP4Hand-Lettered-Wedding-Invitations-Ladyfingers-Letterpress-OSBP7

Hand-Lettered-Wedding-Invitations-Ladyfingers-Letterpress-OSBP9

Thank you so much ladies!

Design + Letterpress Printing: Ladyfingers Letterpress

Italian Cotton Ribbon: Studio Carta

Ladyfingers Letterpress is a member of the Designer Rolodex – check out more of their beautiful work right here or visit the real invi­ta­tions gallery for more wedding invitation ideas!

Photo Credits: Ladyfingers Letterpress

Michelle + Matt’s Whimsical Watercolor Save the Dates

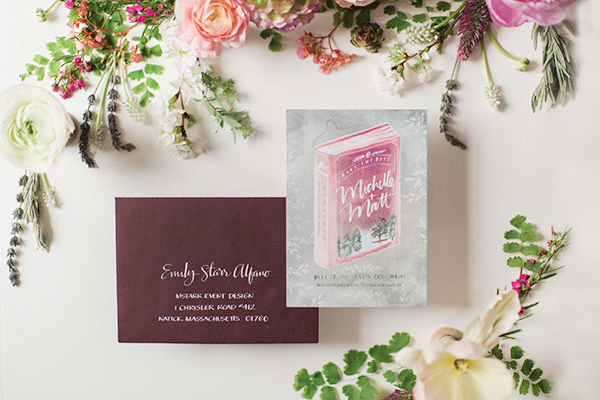
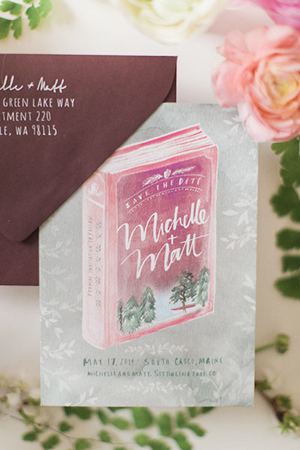
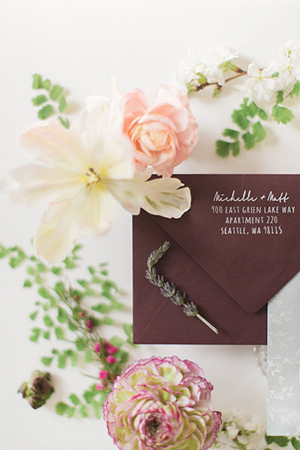
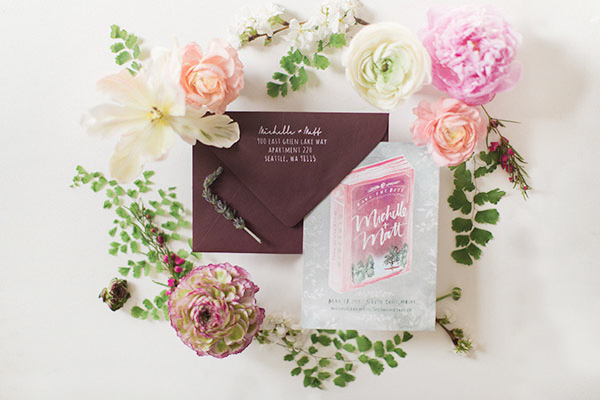
Happy Monday everyone! Emily from mStarr event design sent over these whimsical wedding save the dates for a couple with a fondness for libraries and the great outdoors. After deciding on the overall concept with her clients, Emily turned to Julie Song Ink for the watercolor illustration and design, then to Anne Robin Calligraphy to address the deep plum envelopes. The result is simply stunning!

Watercolor-Wedding-Save-the-Dates-Julie-Song-Ink

From Emily: Michelle and Matt met in their college library and both are doctors (she a medical doctor, he a PhD), so they’ve seen their fair share of libraries! They’ll be taking over the Migis Lodge and its campgrounds for their wedding, with a reception in the main lodge overlooking Sebago Lake, fire pits, and cabins! From the very beginning of our overall design process, we envisioned a “summer camp chic” weekend with books and organic and whimsical elements woven throughout.

Watercolor-Wedding-Save-the-Dates-Julie-Song-Ink6Watercolor-Wedding-Save-the-Dates-Julie-Song-Ink5

So when it came time to think about their wedding stationery, I suggested the one and only Julie Song to bring the vision to life with her free flowing calligraphy and watercolor illustrations. We shared the general color palette along with the idea to incorporate a book and the outdoors – and let her run with it! We decided on that gorgeous deep berry color for the envelope and asked one of my favorite calligraphers Anne Robin to do the addresses in white ink. She nailed it.

Watercolor-Wedding-Save-the-Dates-Julie-Song-Ink2

Thanks Emily!

Design: Julie Song Ink

Envelope Calligraphy: Anne Robin Calligraphy

Art Direction: mStarr event design

Floral Styling: Petal Floral Design

Julie Song Ink is a member of the Designer Rolodex – you can see more of Julie’s beautiful work right here or visit the real invi­ta­tions gallery for more wedding invitation ideas!

Photo Credits: Hello Love Photography

Happy Weekend!

So… you may remember that I booked my family a little beach vacation a couple of weeks ago. Well, we’re off to warmer weather next week! We’ll be visiting Puerto Rico for the very first time and we’re all very excited. Luckily, the wonderful Courtney from Swiss Cottage Designs has agreed to help hold down the fort here next week, along with a few regularly scheduled posts – so you’ll be in great hands! But in the meantime…

OSBP-St-Lucia

Photo by me (via Instagram) from a trip to St. Lucia two years ago

…a few links for your weekend!

This week on Oh So Beautiful Paper:

That’s it for me this week! I hope you all have a wonderful weekend, and don’t forget to check back next week for some fantastic guest posts from Courtney! xoxo

DIY Tutorial: Spring Watercolor Wedding Invitation Suite

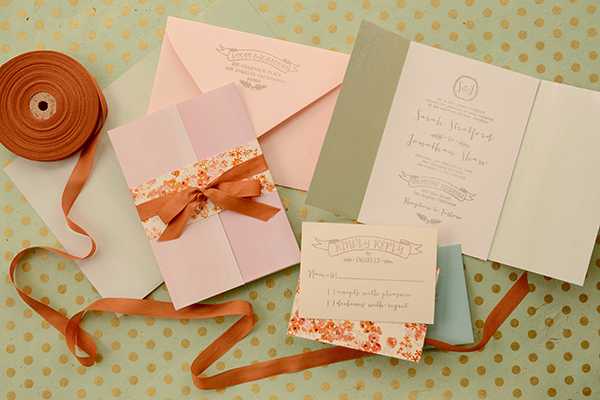
Spring is finally here and we couldn’t be more excited! When we stumbled across this gorgeous double sided watercolor paper by Rifle Paper Co., we just knew that it would be making a starring appearance in a future DIY tutorial. To kick off the season, we’ve designed a gorgeous, pastel invitation suite that would be perfect for any spring or summer event. The decorative watercolor paper trifold is just icing on the cake! We absolutely love it  this season as an alternative to the envelope liner! – Bailey and Emma of Antiquaria

DIY Tutorial: Watercolor Trifold Wedding Invitation by Antiquaria for Oh So Beautiful Paper

DIY Tutorial: Watercolor Trifold Wedding Invitation by Antiquaria for Oh So Beautiful Paper

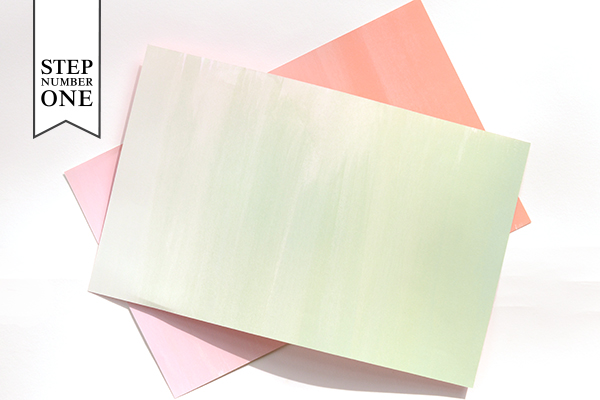
Step One: Gather and cut the decorative paper that is destined to be your trifold wrap around your invitation. To fit an A7 (5″ x 7″) card cut the paper into rectangles measuring 7″ tall by 11″ long. This will allow for an inch of overlap around your invitation card. The decorative paper that you choose doesn’t have to be double sided like ours is but we would recommend selecting a paper with a pretty back, either clean white or a color or pattern. Remember that the back will be seen when your guests view the invitation!

DIY Tutorial: Watercolor Trifold Wedding Invitation by Antiquaria for Oh So Beautiful Paper

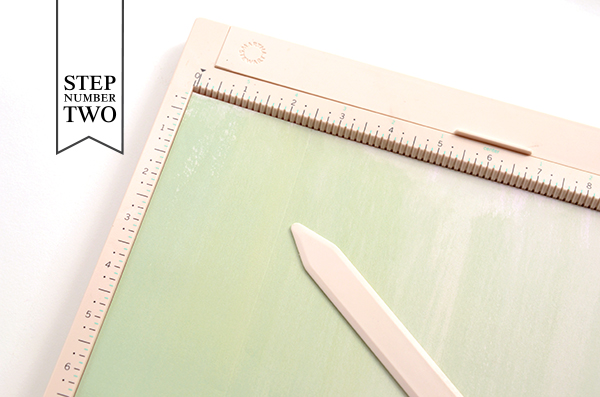
Step Two: For ease of folding and to make sure the line was straight, we scored one side of our decorative paper at the 2.5″ mark. Fold along the line and set the paper aside.

DIY Tutorial: Watercolor Trifold Wedding Invitation by Antiquaria for Oh So Beautiful Paper

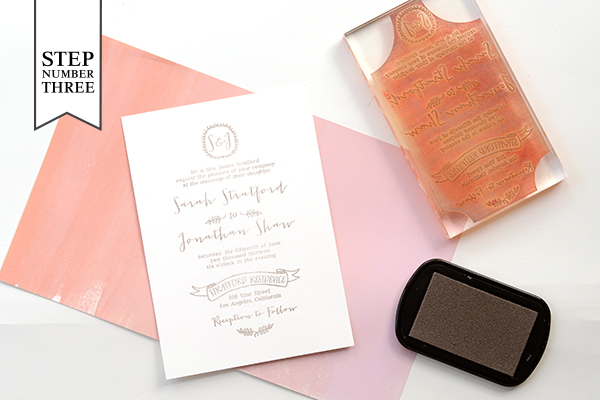
Step Three: Next we stamped our invitation piece on an A7 card. For this design we used our Mod Invitation Stamp and an antique pewter stamp pad. For a step-by-step video tutorial about this printing process go here.

DIY Tutorial: Watercolor Trifold Wedding Invitation by Antiquaria for Oh So Beautiful Paper

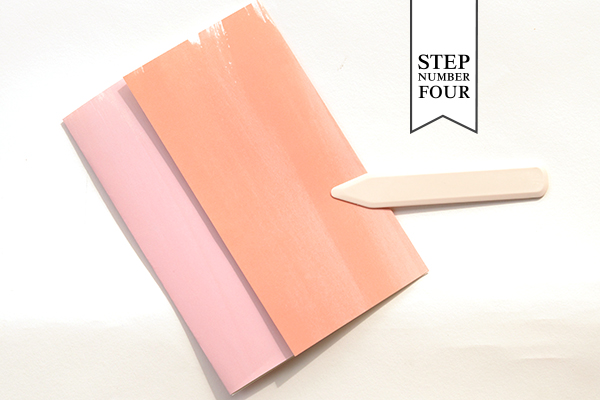
Step Four: Next, we folded the other side of our decorative paper trifold around the A7 card, making sure it was a snug fit. We used a bone folder to make a crisp, folded edge.

DIY Tutorial: Watercolor Trifold Wedding Invitation by Antiquaria for Oh So Beautiful Paper

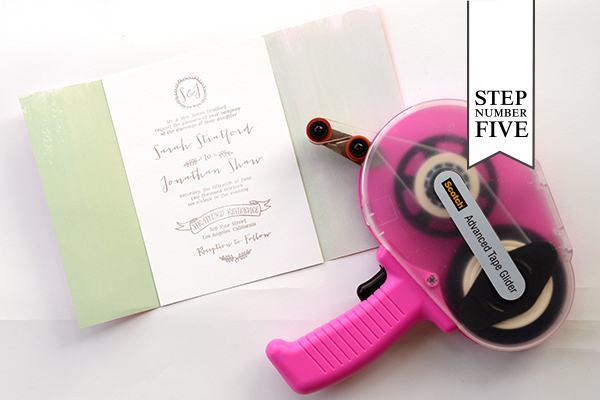
Step Five: Insert the A7 invitation card into the trifold decorative paper with double sided tape or stick glue. Put the tape on all four corners of the back of your card. Carefully place it over the center of the trifold and press it down to adhere it to the decorative paper.

DIY Tutorial: Watercolor Trifold Wedding Invitation by Antiquaria for Oh So Beautiful Paper

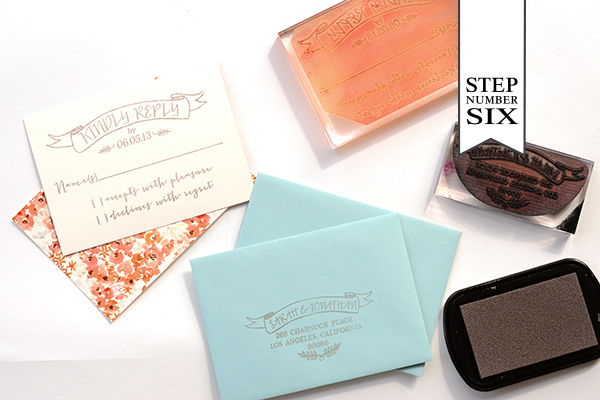
Step Six: For the reply card, we wanted to add some pattern and color to tie together the coral and turquoise sides of our decorative paper. For the reply card itself, we cut 4bar cards (3 1/2″ x 4 7/8″) out of our Paloma Patterned Coral Cover Paper and stamped our Mod  Reply Card Stamp on the blank, non-patterned side. We used a turquoise colored 4bar envelope stamped with our Mod Banner Return Address Stamp to coordinate. You will get four 4bar cards out of one sheet of card stock.

DIY Tutorial: Watercolor Trifold Wedding Invitation by Antiquaria for Oh So Beautiful Paper

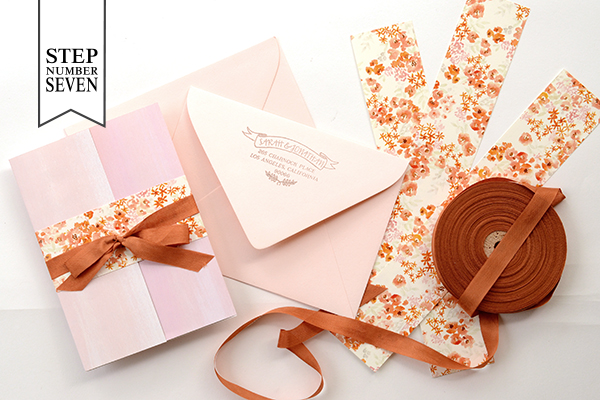
Step Seven: The last step puts all of the gorgeous finishing touches on the suite. We used the Paloma Coral Paper again, except in text weight, to make the belly bands wrapped around the suite. We cut them into strips of 2″ x 11″ – meaning you will get four belly bands per sheet of paper. After taping the belly band, we tied a piece of ribbon around the band to soften the look and add a bit of texture to the design.

We stamped the same return address (Mod Banner Return Address Stamp) on the back flap of a blush envelope before addressing them and sending them on their merry way! We promise that each guest will be truly delighted to receive such a present in their mailbox!

Materials

Mod  Invitation Stamp

Mod  Reply Card Stamp

Mod Banner Return Address Stamp

Stamp Pad in Antique Pewter

Decorative Paper (we used these ombré gift wrap sheets from Rifle Paper Co.) cut to 7″ x 11″

A7 Cards in Superfine White

A7 Envelopes in Luxe Blush

Paloma Coral Patterned Paper in Cover and Text weight

4bar Envelopes in Pool

Double sided tape or stick glue

Scoring Board

Ribbon

Anti­quaria is a mem­ber of the Designer Rolodex – you can see more of their beau­ti­ful work right here or visit the real wedding invitations gallery for more wedding invitation ideas!

Photo Credits: Antiquaria for Oh So Beautiful Paper