Mina + Ian’s Modern Wood Veneer Wedding Invitations

These wedding invitations are part natural rustic beauty and part bold modern design. Created by Mina and Ian of Birdwalk Press for their own wedding, the suite reflects both Mina’s upbringing in the Northwest and Ian’s love of cinema. Such a great combination of influences!

Modern-Wood-Veneer-Letterpress-Wedding-Invitations-Birdwalk-Press-OSBP

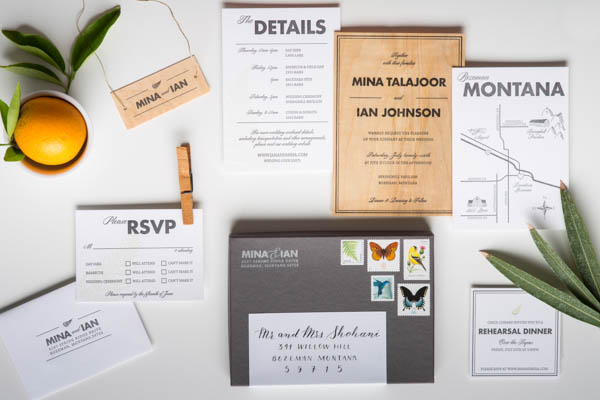
From Mina and Ian: As wedding suite designers and letterpress printers, we didn’t take our own wedding invitations lightly. In fact, it was quite the challenge to develop a suite that we were both happy with – we were our most difficult clients yet! Here’s what resulted from months of design revisions and printing tests.

Modern-Wood-Veneer-Letterpress-Wedding-Invitations-Birdwalk-Press-OSBP2

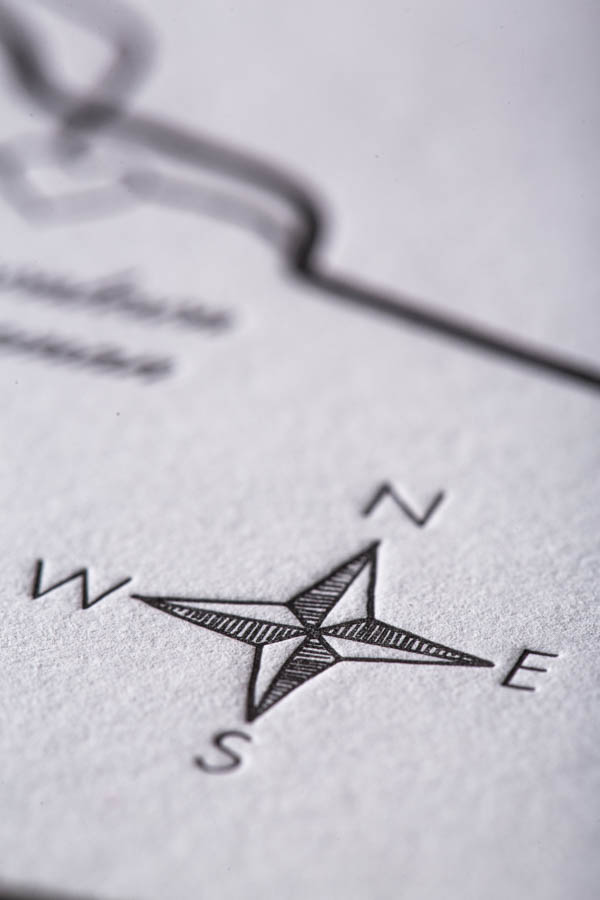
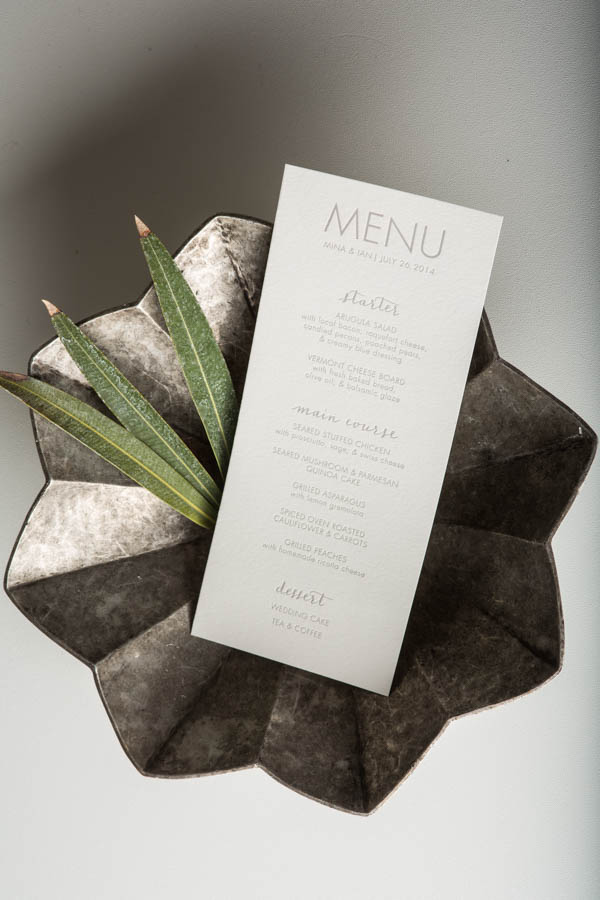
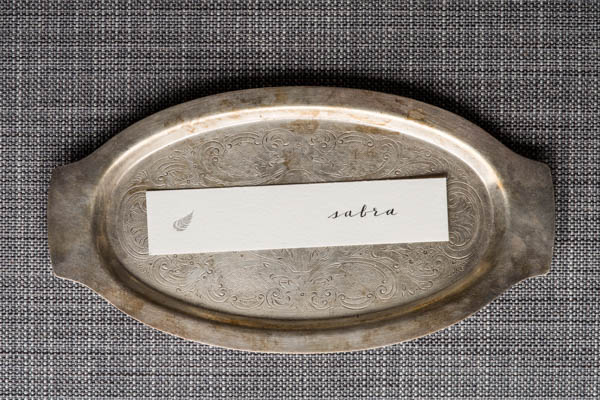
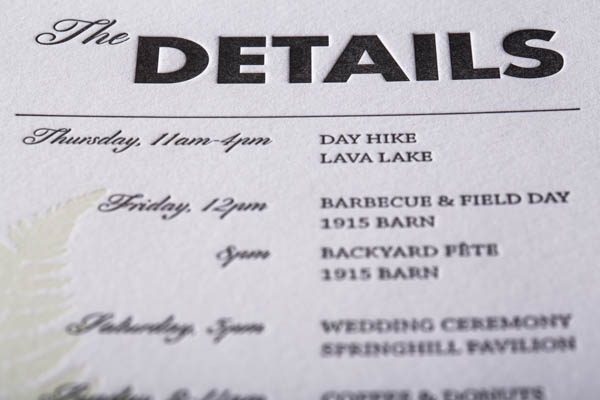
The suite was conceived and printed by yours truly (Mina & Ian Johnson of Birdwalk Press). We wanted to design a bold, modern feeling invitation that incorporated elements of Mina’s Northwest upbringing and Ian’s passion for cinema and typography. The suite features bold, structured design elements as well as light, organic forms to give a balanced feel reflective of our wedding’s aesthetic. It was all printed on our first press: a treadle-powered 200 year old Old Style Gordon restored and recovered from a chicken coop.

Modern-Wood-Veneer-Letterpress-Wedding-Invitations-Birdwalk-Press-OSBP8

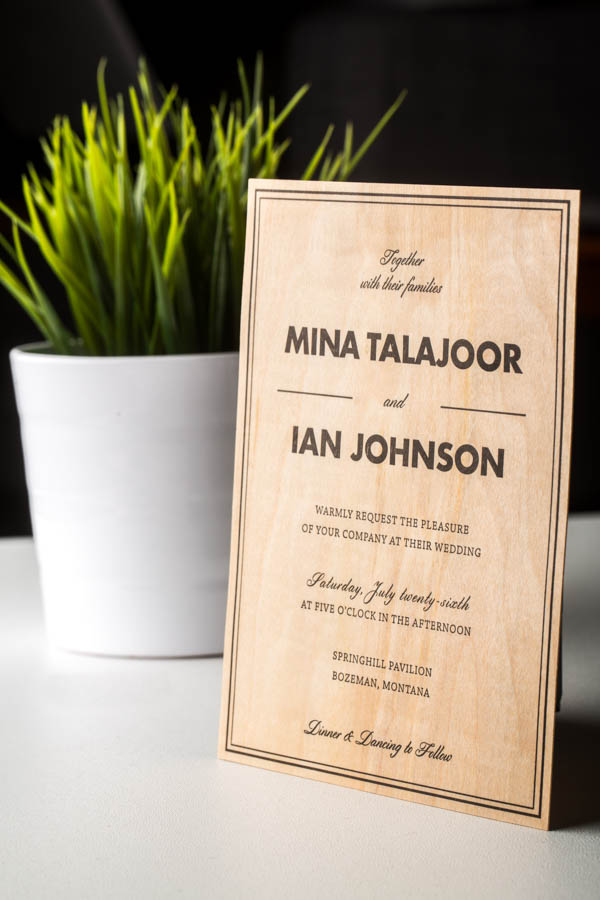
The star of our suite is the invitation itself: letterpress printed on real maple wood veneer, each invitation was completely unique with its own grain pattern and unique texture. The title font is Futura, one of filmmaker Wes Anderson’s go-to fonts for his films (remember the yellow titles in Life Aquatic?). Three of the four paper pieces are printed with incredibly light green fern silhouettes, incorporating that lush Northwest rainforest feel. We printed these inserts on 220# fluorescent white Crane’s Lettra.

Modern-Wood-Veneer-Letterpress-Wedding-Invitations-Birdwalk-Press-OSBP10

Modern-Wood-Veneer-Letterpress-Wedding-Invitations-Birdwalk-Press-OSBP4

Modern-Wood-Veneer-Letterpress-Wedding-Invitations-Birdwalk-Press-OSBP6

Modern-Wood-Veneer-Letterpress-Wedding-Invitations-Birdwalk-Press-OSBP7

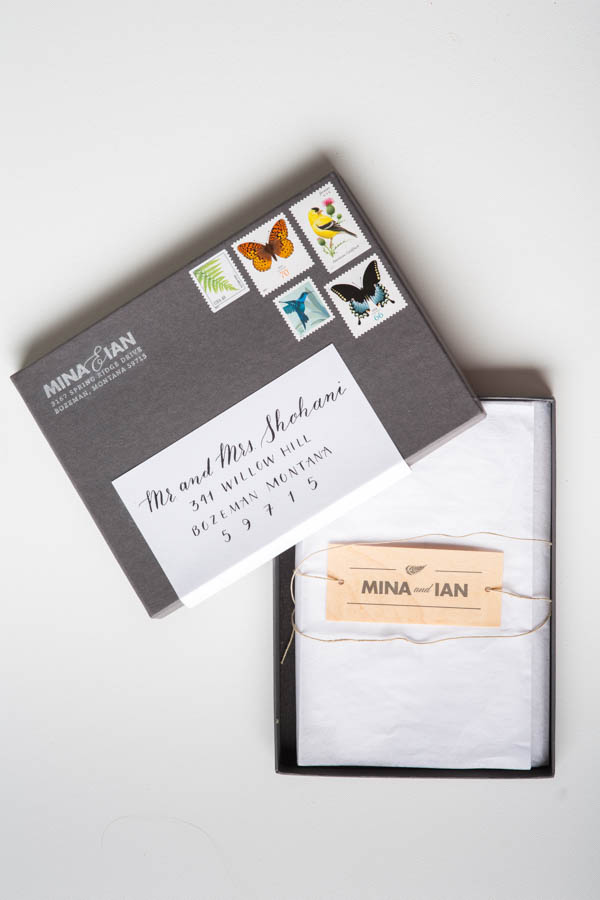
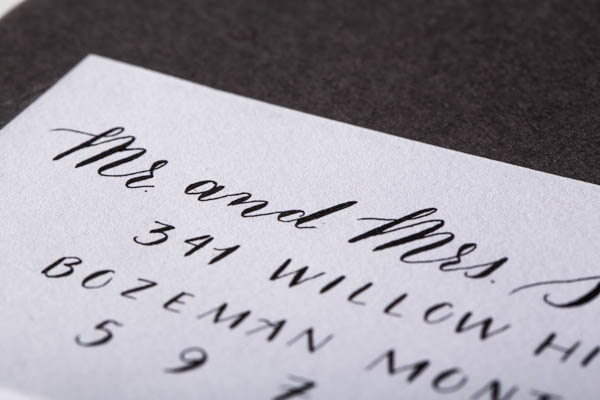
The whole suite was wrapped in jute twine with a printed maple tag, and sealed in a charcoal gray mailing box from Design Aglow.

Modern-Wood-Veneer-Letterpress-Wedding-Invitations-Birdwalk-Press-OSBP9

Thanks (and congrats!) Mina and Ian!

Check out the Designer Rolodex for more tal­ented wed­ding invi­ta­tion design­ers and the real invi­ta­tions gallery for more wedding invitation ideas!

Photo Credits: Lockie Photography

Casey + Blain’s Brewery Baby Shower Invitations

I love the idea of a laid-back baby shower – aka pre-baby party celebration! Laura from Duncan Park Papers drew inspiration from the venue (a brewery!) when designing these baby shower invitations, incorporating casual lettering in a silhouetted pilsner glass. So fun!

Brewery-Baby-Shower-Invitation-Duncan-Park-Papers2

From Laura: My brother-in-law and his wife, Jackie, came to me looking for an out of the ordinary baby shower invitation for Jackie’s sister Casey and her husband Blain. The event was a couples shower, hosted at a local brewery for a fun and laid-back vibe.

Brewery-Baby-Shower-Invitation-Duncan-Park-Papers

For the design, we went with a ‘baby is brewing’ theme. I chose a vertical layout inspired by a drink menu, and completed the look with a pilsner glass silhouette filled with hand drawn elements, subtle texture, and modern type. The mint green and yellow we used are the colors of the baby’s nursery: neutral, because the couple is waiting until the baby’s birth to learn the gender. Registry information and additional details were included on the back of the digitally printed invitation, and the package was completed with a top opening kraft envelope.

Brewery-Baby-Shower-Invitation-Duncan-Park-Papers9

This was one of my favorite custom projects to date, the location provided such an immediate inspiration and I love where it ended up!

 Brewery-Baby-Shower-Invitation-Duncan-Park-Papers5

Thanks Laura!

Photo Credits: Duncan Park Papers

DIY Tutorial: Duck Tape Calligraphy Cocktail Glasses

The holidays are here which means, lots of parties to prepare for! One of my favorite ways to spruce up our bar for get togethers is grabbing a few new cocktail glasses to add to the collection. This year, I thought I would give a few DIYs a try and change up what we already had in our cabinets – starting by creating some custom calligraphy cocktail glasses. I used my calligraphy for this project and you can use your handwriting, or a font you already have on your computer! Here’s how to customize your cocktail glasses this holiday season. –Lauren

DIY Tutorial: Custom Duck Tape Calligraphy Cocktail Glasses by A Fabulous Fete for Oh So Beautiful Paper

DIY Tutorial: Custom Duck Tape Calligraphy Cocktail Glasses by A Fabulous Fete for Oh So Beautiful Paper

Supplies

Duck Tape sheets

Cutting machine like a Cricut or Silhouette

Plain glasses

DIY Tutorial: Custom Duck Tape Calligraphy Cocktail Glasses by A Fabulous Fete for Oh So Beautiful Paper

Step 1. Letter the words that you would like to cut for your glasses. The thicker the letters the easier you will be able to cut them out of the tape. You can also create files with your favorite fonts if you don’t want to use a hand lettered font.

DIY Tutorial: Custom Duck Tape Calligraphy Cocktail Glasses by A Fabulous Fete for Oh So Beautiful Paper

Step 2. Scan and upload your words to your program and cut per the directions on the machine you have.

Step 3. Carefully peel each word up and apply to the glasses. I found it was easiest to peel a few letters at a time and apply rather than trying to take the whole word off of the sheet.

DIY Tutorial: Custom Duck Tape Calligraphy Cocktail Glasses by A Fabulous Fete for Oh So Beautiful Paper

That’s it! Now you have new (or maybe just updated!), custom glasses for your party! You can stick with general exclamations or even cut out your guests’ names so everyone can keep tabs on their cocktails.

DIY Tutorial: Custom Duck Tape Calligraphy Cocktail Glasses by A Fabulous Fete for Oh So Beautiful Paper

Tips

– Buy extra duck tape! It will take a bit to get a hang of applying and removing so buy a practice sheet to get you started.

– White or light colors will look best as the back of the sheet is a white adhesive and it stuck out of bit on the black tape.

– Keep your font THICK if you can.

How do you guys customize your cocktail glasses for the holidays?

Photos by Lauren Saylor of A Fabulous Fete for Oh So Beautiful Paper

Happy Thanksgiving!

Happy Thanksgiving everyone! I hope you all have a wonderful (and restful) holiday weekend with friends and family – and wish those of you traveling for the holiday a safe journey!

Shop-Small-Business-Cautiously-Obsessed

Lettering via Cautiously Obsessed

In lieu of weekly links – a few holiday events and sales from some of my favorite shops and stationers! I may add a few more here between now and Monday if you want to check back!

Silhouette America is offering several options for OSBP readers through Monday 12/8 at 11:59pm MST – just use the code IHEARTPAPER to access all the sales below!

  • Portrait Bundle: Portrait machine & 1 free year to Club Silhouette for $179.99
  • CAMEO Bundle #1: CAMEO machine, Designer Edition software upgrade, Dust Cover, 4 Tools and $25 Download card to the Silhouette Design Store for $269.99
  • CAMEO Bundle #2: CAMEO machine, Design Edition software upgrade and 1 free year to Club Silhouette for $299.99
  • CAMEO & Portrait Bundle (One for you, one for a friend!): CAMEO machine, Portrait machine and 2, $25 Download cards to the Silhouette Design Store for $299.99
  • Already a Silhouette user? Use my code to receive 40% off at SilhouetteAmerica.com (*excluding machines, design downloads, download cards, subscriptions and gift cards) PLUS Free Shipping on orders over $25 for the lower 48 states
  • 50% off all designs at SilhouetteDesignStore.com – no code needed!

Cyber Monday Sales!

  • 9th Letter Press is offering 30% off for Cyber Monday (with code CYBER30)
  • Almanac Industries is offering 25% off through Monday (with code givethanks)
  • AHeirloom is offering 25% off (with code AHcyber25)
  • Angela Liguori is offering 15% off through Monday (with code grazie14)
  • Ban.do is offering 25% off the entire site through Monday – no code needed!
  • Betsywhite Stationery is offering 30% off on Monday
  • Blabla is offering 20% off on Monday (with code wow20)
  • Blackbird Letterpress is offering 20% off Friday through Monday (with code xmas14)
  • Brightroom Studio is offering 20% off through Thursday December 4 (with code SHOPSMALL)
  • Britt Bass is offering 20% off through Monday (with code HOLIDAY HANGOVER)
  • Dinara Mirtalipova is offering 15% off Friday through Monday (with code BLACK15)
  • Egg Press is offering 30% off on Monday (with code cyberfunday)
  • Emily McDowell is offering 20% off everything through Monday (with code IGFOODCOMA)
  • Farewell Paperie is offering 35% off through Monday (with code YAYINTERNET)
  • Fig.2 Design is offering 30% off on Monday (with code CYBERMON14)
  • Forage is offering 35% off the entire site (with code HOLIDAY) and free shipping through December 8!
  • Graceline Illustration + Calligraphy is offering 30% prints and classes on Monday (with code shopsmall)
  • Hammerpress is offering 20% off (with code THANKYOU20)
  • Hello Tosha is offering 20% off on Monday (with code THANKFUL)
  • Honeycomb Studio is offering free shipping through Monday (with code shopsmall14)
  • Idlewild Co is offering 30% off + free shipping (with code BABYITSCOLD)
  • Julie Song Ink is offering 25% off her Etsy shop (code BLACK14)
  • Knot and Bow is offering 25% off through Monday (with code 25PERCENT)
  • Ladyfingers Letterpress is offering 30% off plus a free letterpress surprise through Friday December 5! (with code OMGDEALZ)
  • Linda & Harriett is offering 30% off through Monday (with code THANKS)
  • MAIKA is offering 40% off through Monday (with code SOTHANKFUL)
  • Mon Voir is offering 25% off her shop (with code BLACKFRIDAY)
  • One Canoe Two is offering 25% off on Monday (with code CyberMonday25)
  • Our Heiday is offering 30% off (with code CELEBRATE30)
  • Parrott Design Studio is offering 30% off Monday through Thursday (with code HOLIDAYCHEER)
  • Postable is offering 26% off on Monday (with code CYBERMON)
  • Printerette Press is offering 30% off in their Etsy shop (with code MONDAYMONDAY)
  • Rifle Paper Co is offering 30% off site wide through Monday – no code needed!

DIY Tutorial: Wire Leaf Fall Table Decor

Last November was my very first project here on OSBP – a set of mini pinecone wreath place cards for your Thanksgiving table. I’ve created a lot of tutorials over the last few years, but those little wreaths are still one of my favorite projects. I used them so many times last fall, and they made me realize how much I love a little decorative item delicately placed upon a plate and how something very simple can elevate a place setting without much effort. It is for this reason that I so love today’s project – delicate wire fall leaves that look so adorable when greeting a dinner guest. Let them shine on their own, or pair them with a placecard. Enjoy!  – Mandy Pellegrin of Fabric Paper Glue

DIY Wire Fall Leaves  10

DIY Wire Fall Leaves  1

Materials
Brass jewelry wire – 20 gauge
Green floral wire – 20 gauge
Scissors
Wire pliers
Fall leaf template

DIY Wire Fall Leaves  2

Step One: Cut a piece of wire approximately 18″ long.

DIY Wire Fall Leaves  3

Step Two: Bend the wire into the shape of a maple leaf using the template as a guide. For curves, hold the wire down onto the template with one hand while bending the wire with your other hand.

DIY Wire Fall Leaves  4

Step Three: To get sharp corners and tips, use your fingernail to make a small divot where you want a bend, and then use the pliers to grasp the wire at that point and bend at a right angle.

DIY Wire Fall Leaves  5

Step Four: To get a defined point, squeeze the two sides of a bend together between the pliers.

DIY Wire Fall Leaves  6

Step Five: Finish each leaf off by twisting the wire around itself, and snipping off the end. Once finished, you can reshape the wire as needed.

DIY Wire Fall Leaves  7

Step Six: Use different colors of wire to create different leaves. Here, I’ve made an oak leaf with brass wire to contrast with my green maple leaves. (Ed Note: These would look SO amazing in copper wire! – Nole)

DIY Wire Fall Leaves  8

DIY Wire Fall Leaves  9DIY Wire Fall Leaves  12

Photo Credits: Mandy Pellegrin for Oh So Beautiful Paper