NYIGF August 2011, Part 1

As promised, today I’m kicking off my coverage of the Summer 2011 New York International Gift Fair.  If you follow me on twitter or instagram you’ve already seen a few sneak peeks, but there’s tons more that I’m excited to share.  Like the National Stationery Show, the Gift Fair is a wholesale trade show, but this show takes place twice a year and covers way more than paper.  There are sections just for global importers, handmade products, home and bath, baby and kid products, and lots, lots more.  It’s huge!  I only feature a small part of the show here – and today we’re starting with a few of my favorite exhibits in the Handmade section!

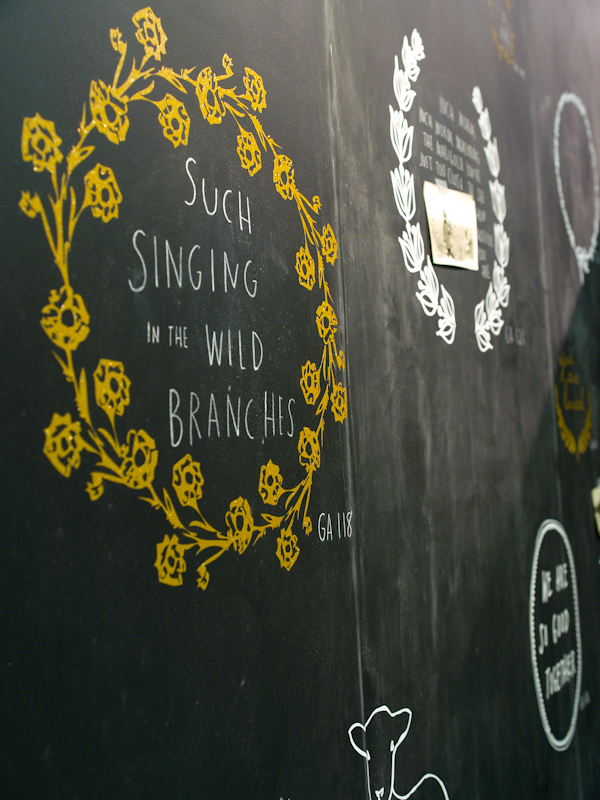
First up, the lovely Shanna Murray, making her trade show debut at this show.  I’m a longtime fan of Shanna’s wall decals and was thrilled to see her beautiful booth at NYIGF.  Shanna recently introduced some gorgeous new designs, as well as a brand-new collection of decals specifically for windows!


Shanna Murray

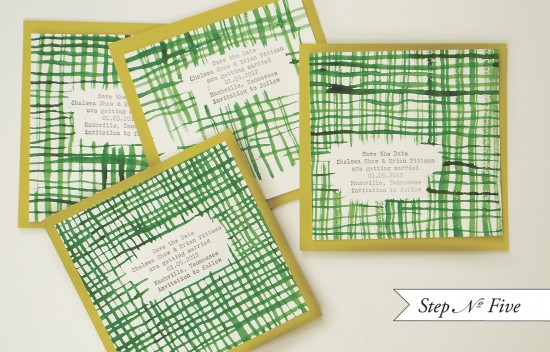
My friend Laurel from Laurel Denise is a trade show veteran and I always look forward to seeing her creative booth displays.  This year Laurel went with a cool industrial vibe – using old manuals and charts! – as a cool contrast against her delicate jewelry and beautiful glass vases.  I’m loving the colorful new silk edition of her simply stated collection below.

The 2012 edition of Laurel’s awesome yearly planner (available for pre-order here).

Laurel Denise

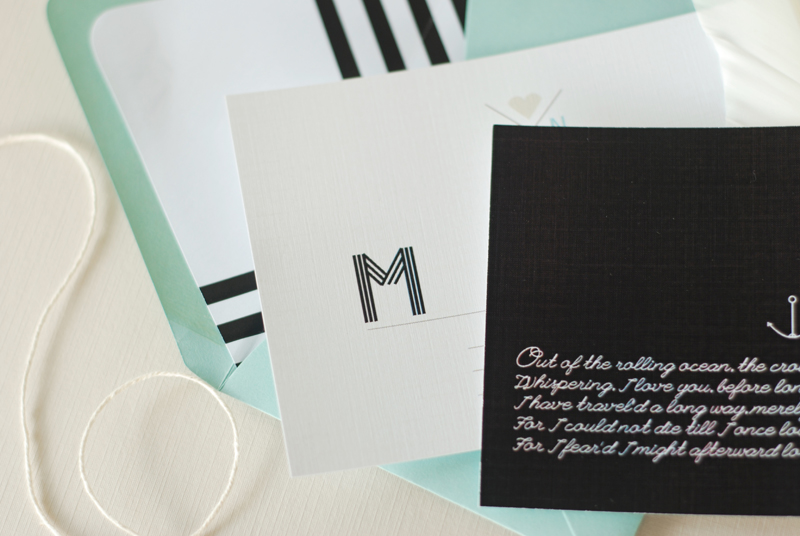
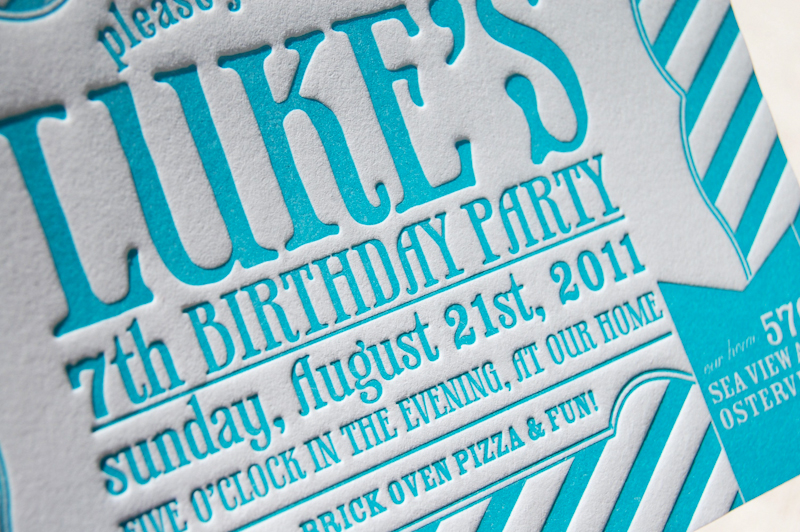
I also checked out the Walk Up Press booth a couple aisles over.  The fill-in-the-blank letterpress cards and day of the week lunchbags are so much fun, and I’m loving the new letterpress gift wrap sheets!

2012 write-on monthly desk calendar

New letterpress wrapping paper!

Walk Up Press

It was such a pleasant surprise to find Jessica Rust Designs at this year’s show.  I love Jessica’s personalized mugs and heirloom plates (they make a perfect wedding gift).  Jessica recently added some new etched glasses made from recycled wine bottles to her collection, along with some farm animal designs and cute personalized pet food bowls.

Jessica Rust Designs

Speaking of dinnerware, it was wonderful to see Asya from Gleena at this year’s show.  I’ve been a fan of her beautiful numbered porcelain bowls for a couple of years now, and I love the newer botanical designs and color additions to her collection.

Gleena


Also in the Handmade section, Brooklyn-based Haptic Lab – they make the most gorgeous embroidered fabric map quilts.  Each of the large quilts is literally hand sewn (no machines)!  Such a lovely heirloom.  They also have a fun DIY option; city maps are screen printed onto smaller quilts and come with little icons and patches that can be sewn onto the quilt to indicate homes, locations of first dates, etc.  They also have a DC version, which made me very happy.

Haptic Lab

After checking out the exhibitors in the Handmade section, I wandered off to Baby & Child where I had a great time catching up with the folks from Wee Gallery.  We played with their rubber stamp sets and checked out the new (moveable) wall decals and art cards, and my husband and I totally want to get the temporary tattoos for our niece and nephew!

Wee Gallery

I’ll be back with more from NYIGF tomorrow!  You can check out past year coverage from NYIGF right here.

Photo Credits: Nole Garey for Oh So Beautiful Paper

DIY Hand Painted Watercolor + Rubber Stamp Save the Dates

Hi Everyone!  I’ll be starting my NYIGF recaps later this morning – but first, it’s the ladies of Anti­quaria, back with another fab­u­lous and cre­ative DIY project for you all!  This week they’re here with instruc­tions for a summer-inspired watercolor design for your invi­ta­tions or save the dates!

This week our DIY project is a twist off of our popular post “Hand Watercolored Save the Dates.”  Using watercolor we created an freehand crosshatch effect around the text.  By adding hand painted elements, each card becomes its own unique work of art.  You don’t have to have highly tuned artistic skills to achieve this look, in fact, the more uneven and irregular the lines turn out, the better it looks!  The combination of the watercolor lines and the vintage typewriter text of the stamp reminds us of cheery and picnic-filled days of summer.

DIY Watercolor Save-the-Date Step 1

Step One: Using a pencil and ruler, grid out 5×5 squares on a pad of watercolor paper.  Ink stamp and press evenly in each square, varying location makes for an even more interesting result.  For this save the date, we used our “Old Typewriter” stamp.

DIY Watercolor Save-the-Date Step 2

Step Two: With your choice of color, paint vertical lines in uneven and organic stripes, covering each 5×5″ stamped square invitation.  Again, try not to make each too uniform.  Let it dry (watercolors don’t take long).

DIY Watercolor Save-the-Date Step 3

Step Three: With the same watercolor, go back over each 5×5″ square and the paint horizontal lines.

DIY Watercolor Save-the-Date Step 4

DIY Watercolor Save-the-Date Step 4

Step Four: Using your pencil lines as a guide, use a paper cutter or X-acto and self healing mat to trim each save the date into a 5×5″ square.

DIY Watercolor Save-the-Date Step 5

DIY Watercolor Save-the-Date Step 5

Step Five: Using double stick tape, mount each 5×5″ square on a 5.5×5.5″ square backer in a coordinating or complementing color.  You’re done!  These are quick and simple, yet make a huge statement!

Materials:

Custom Save the Date Stamp – “Old Typewriter” Save the Date

Watercolor Pad

Pencil & Ruler

Watercolor paint, color(s) of your choice.

Watercolor Brush – Spending a little more on a brush will pay off if you are producing a large quantity of save the dates.  Make sure that the brush you choose won’t lose its bristles.

Paper cutter or x-acto, self healing mat & ruler – Find at your local office supply or hobby store.

5.5×5.5″ square backers – We used moss green

Square Envelope

Photo Cred­its: Antiquaria

Modern Nautical Black + White Wedding Invitations

Today I’m loving these crisp black and white wedding invitations from Nicole at Umama.  Nicole drew her inspiration from her favorite Walt Whitman poem, Out of the Ocean, incorporating a sweet anchor pattern in the envelope liner and a bold enlarged stripe pattern.

Modern-Black-White-Wedding-Invitations

From Nicole: In this suite, I drew upon the words from Whitman’s poem, Out of the Ocean:

Out of the rolling ocean, the crowd, came a drop gently to me,
Whispering, I love you, before long I die,
I have travel’d a long way, merely to look on you, to touch you,
For I could not die till I once look’d on you,
For I fear’d I might afterward lose you.

Modern-Black-White-Wedding-Invitations-Stripes

I was inspired to create a subtle nautical invite that captured the ocean from Whitman’s point of view, pensive and bold.
The design includes stripes along the bottom, a nautical monogram, and sweet anchors in the envelope liner.

Modern-Black-White-Wedding-Invitations

Modern-Black-White-Wedding-Invitations-Detail

Modern-Black-White-Wedding-Invitations-Tiffany-Blue-Envelopes

Just lovely!  Thanks Nicole!

Photo Credits: Umama

Luke’s Striped Letterpress Birthday Party Invitations

Rachelle from Wiley Valentine sent over these adorable custom birthday party invitations that she recently designed for Desiree from Desiree Spinner Events.  Desiree’s son Luke will be turning seven later this month, so Rachelle went with a modern one-color design with playful stripes.  The invitations were letterpress printed on thick cotton paper with corresponding envelopes – so fun!

Blue-Letterpress-Striped-Birthday-Party-Invitations

Blue-Letterpress-Striped-Birthday-Party-Invitations

Blue-Letterpress-Striped-Birthday-Party-Invitations


Blue-Letterpress-Striped-Birthday-Party-Invitations

Thank you so much Rachelle!

Photo Credits: Wiley Valentine

p.s. Have you entered this week’s giveaway with Moontree Letterpress?  The contest ends tonight at midnight!

*Wiley Valentine is one of my fab­u­lous spon­sors; for more on my edi­to­r­ial poli­cies please click here.

Christine + Ian’s DIY Lasercut Woodland Wedding Invitations

After a week away from my computer, I’m jumping right back into the swing of things. I’m spending a few days in New York for the New York International Gift Fair – I’ll have a couple of recaps from the show later this week! But first, Christine sent over her amazing DIY wedding invitations last week, and I just couldn’t wait to share them! Christine and Ian were inspired by the woodland setting of their wedding venue, creating an incredibly cool lasercut invitation with pop-up cut out details!

DIY-Woodland-Cutout-Wedding-Invitation

From Christine: Our wedding will be in the woods on Ian’s parent’s home. From the first day of brainstorming, we both agreed that we wanted our wedding to take place amongst the trees. For the past few months we’ve spent nearly every weekend at the property, building and landscaping to make what we hope will be an incredibly beautiful wedding location.

DIY-Woodland-Cutout-Wedding-Invitation

DIY-Woodland-Cutout-Wedding-Invitation

We wanted the invitations to give our guests a sneak peek into our wedding, without revealing too much.  We used a laser cutting machine to create a pop-up forest that surrounds the headline message on our invitations – Join Us in the Woods.  The laser cut cover stock was then sewn to laser cut kraft paper for a cool multidimensional effect.

DIY-Woodland-Cutout-Wedding-Invitation-Suite

Within the full invitation suite we included a perforated RSVP card and a field guide with sketches of local wildlife.

DIY-Woodland-Cutout-Wedding-Invitation

We completed the invitation package with handmade buttons cut from branches found on our property.  The invitation suite was wrapped in red and white butcher’s twine around a paper bag belly band.

DIY-Woodland-Cutout-Wedding-Invitation-RSVP

The perforated response card leaves guest with helpful information and local map.  Food is selected by drawing a line from “Yes” to the corresponding food selection.  Names were hand-stamped using a Japanese stamp-kit, while the card was printed on kraft paper using our home printer.

DIY-Woodland-Cutout-Wedding-Invitation-RSVP-Back

DIY-Woodland-Cutout-Wedding-Invitation-Field-Guide

The final enclosure was an accordion style, fold-out booklet with illustrations of area wildlife.

DIY-Woodland-Cutout-Wedding-Invitation-Field-Guide

So cool!  For more on the invitation production process, you can check out Christine’s blog right here.  Thanks Christine and Ian!

Photo Credits: Christine and Ian