Printable Hologram Foil Ice Cream Cone Wrapper

I’ve been foiling everything in sight since getting my hands on a Heidi Swapp Minc foil applicator a few weeks ago, and today I’m thrilled to share another project using this amazing machine! My obsession with all things holographic/iridescent is still running strong, so when I found out about this hologram foil I just knew I wanted to do something fun and summery with it. So here’s a little something to jazz up any backyard BBQs or late summer picnics – hologram foil ice cream cone wrappers!

Printable Hologram Foil Ice Cream Cone Wrapper / Oh So Beautiful Paper

Printable Hologram Foil Ice Cream Cone Wrapper / Oh So Beautiful Paper

These ice cream cone wrappers are super cute in just black and white, so you can totally use the printable template even if you haven’t yet gotten yourself a Minc. But seriously, you should totally get one. I’ve been having SO much fun with mine, and there are tons of foil colors and options to play around with!

Printable Hologram Foil Ice Cream Cone Wrapper / Oh So Beautiful Paper

To make the ice cream cone wrappers:

Step 1. Print out the template on text weight paper using a laser printer. The Minc foil applicator works with toner ink, so if you don’t have access to a laser printer you can print the template on an ink jet printer and then make copies on a copier.

Step 2. I found I got better results and more mileage from the foil if I cut out each individual wrapper before running it through the Minc foil applicator. Cut out each individual ice cream cone wrapper, being careful to cut just outside the outline. Cut a piece of hologram foil just large enough to cover the ice cream wrapper.

Step 3. Place as many ice cream cone wrappers and pieces of foil as you can fit inside the transfer folder – foil side up. Run through the Minc foil applicator. Peel away the excess foil and voila!

Printable Hologram Foil Ice Cream Cone Wrapper / Oh So Beautiful Paper

Printable Hologram Foil Ice Cream Cone Wrapper / Oh So Beautiful Paper

Printable Hologram Foil Ice Cream Cone Wrapper / Oh So Beautiful Paper

I just can’t get enough of those rainbow shimmers. Holographic everything!

Printable Hologram Foil Ice Cream Cone Wrapper / Oh So Beautiful Paper

Download the printable ice cream cone wrapper template right here!

This post was created in partnership with American Crafts. All content and opinions are my own. Thank you for supporting the sponsors that make Oh So Beautiful Paper possible!

Photos by Nole Garey for Oh So Beautiful Paper

Printable Tropical Envelope Liners

Are you ready for something SUPER fun?!? Sakura of America recently released a set of amazing new brush pens called the Pigma Professional Brush, and we wanted to do something really awesome to show you what these babies can do! Nothing makes me smile more than a colorful envelope and patterned envelope liner – and today we have printable tropical envelope liners in TWO gorgeous patterns for you to enjoy!

Printable Tropical Envelope Liners / Illustrated by Swiss Cottage Designs with Sakura Pigma Professional Brush Pens / Oh So Beautiful Paper

Courtney from Swiss Cottage Designs illustrated the tropical patterns using all three Pigma Professional Brush pen weights – fine, medium, and bold. Courtney and I are still feeling the tropical vibe from the Paper Party so we decided to keep on running with a tropical theme. One pattern features illustrations of watermelons, pineapples, and palm fronds, and the other has flamingos, toucans, coral, and fish! Both patterns make me wish I was somewhere on a beach with a tropical drink in hand!

Printable Tropical Envelope Liners / Illustrated by Swiss Cottage Designs with Sakura Pigma Professional Brush Pens / Oh So Beautiful Paper

You can print the envelope liner patterns on text weight letter size paper. You can leave the patterns black and white – or add a dose of color using colored pencils or your favorite Gelly Roll pen! The Glaze pens almost look like watercolor and are great for coloring in those fine details! You can even use the patterns as coloring sheets just for fun!

Printable Tropical Envelope Liners / Illustrated by Swiss Cottage Designs with Sakura Pigma Professional Brush Pens / Oh So Beautiful Paper

Here are the instructions for making the envelope liners:

Step 1. Lightly trace an outline of the envelope on the back of the liner page. If you’re using Paper Source envelopes, you can use one of these handy envelope liner template kits. Cut out the liner, being careful to cut on the inside of the lines. Trim an additional 1/16″ off each side and 3/4″ off the bottom of the liner.

Step 2. Place the liner in the envelope. Use a glue stick or double sided tape on the back of the liner (along the top triangle and just above the crease) to adhere the liner to the envelope.

Printable Tropical Envelope Liners / Illustrated by Swiss Cottage Designs with Sakura Pigma Professional Brush Pens / Oh So Beautiful Paper

Printable Tropical Envelope Liners / Illustrated by Swiss Cottage Designs with Sakura Pigma Professional Brush Pens / Oh So Beautiful Paper

The Pigma Professional Brush pens use archival waterproof ink, which also makes them my new favorite pen for addressing envelopes. The brush nibs respond to changes in pressure or direction while maintaining smooth and consistent ink flow, so they’re super easy to use! The flexible brush nibs offer both thin and thick brush strokes and they won’t smear, feather, or bleed through on most paper. Courtney addressed a few envelopes using the different pen weights – I love the subtle gradient in the bold brush!

Printable Tropical Envelope Liners / Illustrated by Swiss Cottage Designs with Sakura Pigma Professional Brush Pens / Oh So Beautiful Paper

Printable Tropical Envelope Liners / Illustrated by Swiss Cottage Designs with Sakura Pigma Professional Brush Pens / Oh So Beautiful Paper

Printable Tropical Envelope Liners / Illustrated by Swiss Cottage Designs with Sakura Pigma Professional Brush Pens / Oh So Beautiful Paper

And yes, I may have foiled an envelope liner or two (in light pink metallic foil) using my Minc foil applicator. The Minc works with toner ink, so just print the liner patterns on a laser printer, or use a copying machine to make as many copies of the liner as you’ll need, and foil away!

Printable Tropical Envelope Liners / Illustrated by Swiss Cottage Designs with Sakura Pigma Professional Brush Pens / Oh So Beautiful Paper

Download the envelope liner patterns from Swiss Cottage Designs right here! And you can pick up a set of the Pigma Professional Brush pens right here!

All artwork © 2015 Swiss Cottage Designs created exclusively for Oh So Beautiful Paper. All artwork is made available for personal use only. By downloading the patterns you agree to the terms of use.

Swiss Cottage Designs is a mem­ber of the Designer Rolodex â€“ you can see more of Courtney’s beau­ti­ful work right here!

Photos by Nole Garey for Oh So Beautiful Paper

This post is sponsored by Sakura of America. All content and opinions are my own. Thank you for supporting the sponsors that make Oh So Beautiful Paper possible!

DIY Gold Foil Place Cards

You heard me. DIY. Gold. Foil! At the National Stationery Show in May, I wandered upon a demo in the American Crafts booth of the amazing new Heidi Swapp Minc foil applicator – and I’m pretty sure my jaw dropped all the way to the floor. The Minc makes it possible to foil pretty much anything – you could even foil a spreadsheet if you wanted! Today I’m sharing the first in a series of projects using the Minc foil applicator: DIY gold foil place cards! Just think of all the new foil place card possibilities, from bridal showers to holiday dinners!

DIY Gold Foil Place Cards with Watercolor Background / Heidi Swapp Minc Foil Applicator / Oh So Beautiful Paper

The Minc works with a special type of reactive foil that adheres to toner ink. For custom designs, you need to be able to print the foil portion of your design on a laser printer or copier but you don’t need any special design software. You can use Photoshop, Illustrator, or even Word – as long as you can print it out using toner ink you can foil it with the Minc! Heidi Swapp also offers a range of products that you can use for non-custom designs!

DIY Gold Foil Place Cards with Watercolor Background / Heidi Swapp Minc Foil Applicator / Oh So Beautiful Paper

These place cards would look gorgeous and completely classic with just gold foil against white paper, but I decided to make things a bit more interesting with a whimsical watercolor background! I used a printable watercolor download from one of Antiquaria’s past DIY tutorials – you could also hand paint your watercolor background!

Supplies

Minc foil applicator and transfer folder

Reactive gold foil

Printable tent cards

DIY Gold Foil Place Cards with Watercolor Background / Heidi Swapp Minc Foil Applicator / Oh So Beautiful Paper

Instructions

1. Download the watercolor background right here and print it onto the printable tent cards using an ink jet printer. Print your text in a favorite font on the tent cards (you can find templates right here) using a laser printer. Black toner ink works best with the reactive foil.

2. Cut strips of gold foil just big enough to cover the text you want to foil. Place the foil strips over the printed tent cards, then place everything in the transfer folder foil side up.

3. Run the transfer folder with your tent cards and gold foil through the Minc foil applicator. Peel away any excess foil and voila!

DIY Gold Foil Place Cards with Watercolor Background / Heidi Swapp Minc Foil Applicator / Oh So Beautiful Paper

DIY Gold Foil Place Cards with Watercolor Background / Heidi Swapp Minc Foil Applicator / Oh So Beautiful Paper

DIY Gold Foil Place Cards with Watercolor Background / Heidi Swapp Minc Foil Applicator / Oh So Beautiful Paper

DIY Gold Foil Place Cards with Watercolor Background / Heidi Swapp Minc Foil Applicator / Oh So Beautiful Paper

Photos by Oh So Beautiful Paper

This post was created in partnership with American Crafts. All content and opinions are my own. Thank you for supporting the sponsors that make Oh So Beautiful Paper possible!

NSS 2015 Mailers

Back in March, Emily and I shared some thoughts on pre-trade show mailers along with some of our favorite mailers from the 2014 National Stationery Show. I shared this year’s mailers over on Instagram, but I thought I’d share them here, too, so that you all have them in one place! I put them in alphabetical order just for my own sanity – and I’m loving the range of design styles and formats reflected in the mailers for this year’s show!

OSBP-NSS-2015-Mailer-Alexis-Mattox-Design

A beautiful tropical laser cut mailer from Alexis Mattox Design (and how great is that pineapple envelope liner?!)

NSS-2015-Mailers-Antiquaria-OSBP

I loved Antiquaria‘s peach box mailer with a little sample notebook inside – and that beautiful wax seal!

OSBP-NSS-2015-Mailer-Dahlia-Press

Dahlia Press

Continue reading

Paper Party 2015!

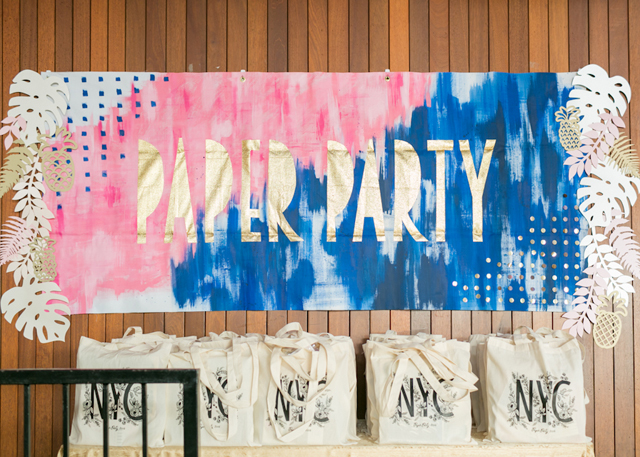
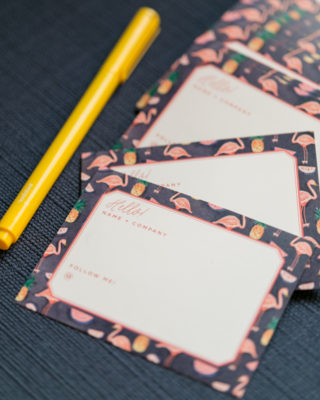
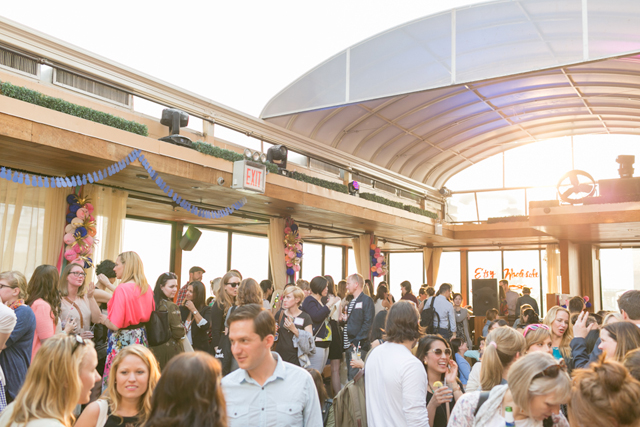
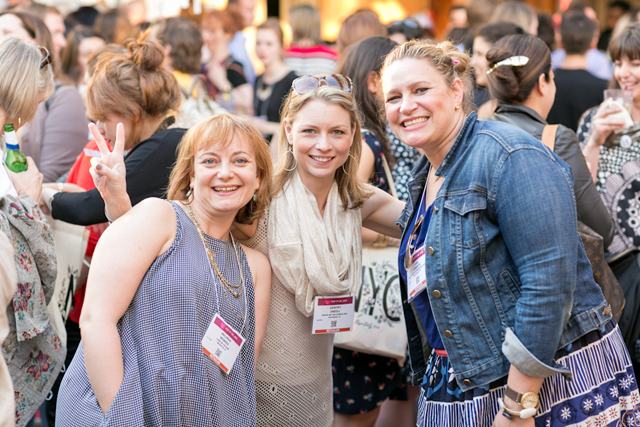
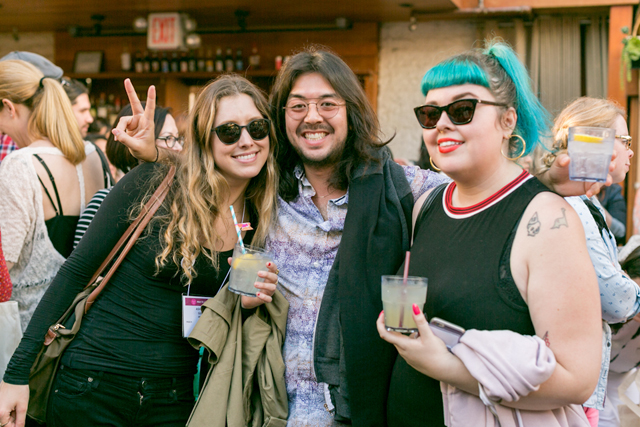
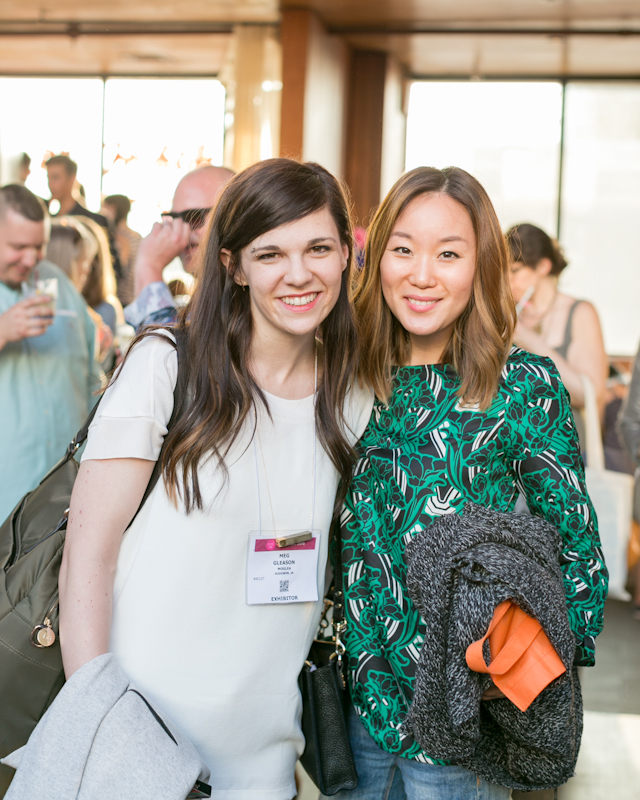
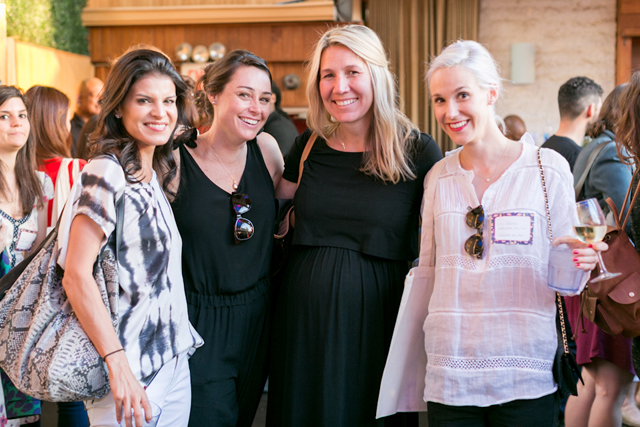
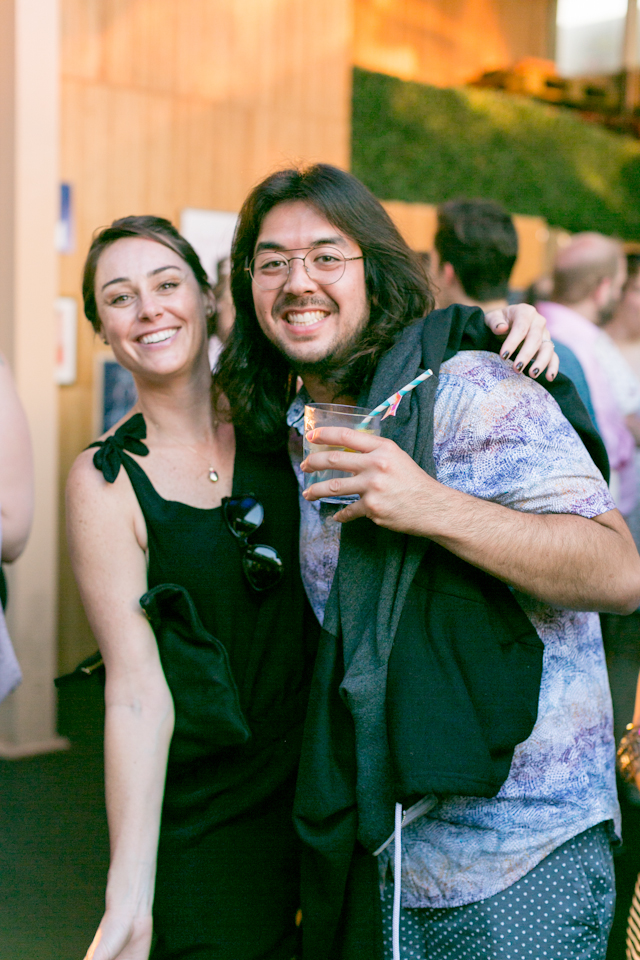
I’m so excited to FINALLY share the photos from this year’s Paper Party during the National Stationery Show! I can’t believe the party was almost two weeks ago already – the whole evening went by so fast! I shared the party invitations designed by Moglea and printed by Bella Figura a couple of weeks ago, and the invitations really helped guide the overall party design. This year’s party had a tropical vibe, with a color palette inspired by the party invitations – shades of pink, dark blue, and gold – and lots of tropical details from foliage to flamingos!

OSBP-Paper-Party-2015-Charlie-Juliet-Photography-73

This year’s party was again held at Hudson Terrace – but this time in their rooftop terrace! My talented friend (and professional event planner) Janice from Bellwether Events helped me plan the party and kept the entire evening running smoothly and Mandy (one of our resident DIY mavens) helped with a lot of the party décor. We also partnered with an incredible team of sponsors and creative companies to bring the party to life, including The National Stationery Show, Minted, Etsy Wholesale, Silhouette America, Smock, Simply Framed, Rifle Paper Co., Hester & Cook Design Group, Legion Paper, Postable, Mailchimp, May Designs, Flower Muse, StationeryHQ, Foryourparty.com, and Swiss Cottage Designs.

OSBP-Paper-Party-2015-Charlie-Juliet-Photography-148OSBP-Paper-Party-2015-Charlie-Juliet-Photography-76

OSBP-Paper-Party-2015-Charlie-Juliet-Photography-109OSBP-Paper-Party-2015-Charlie-Juliet-Photography-80

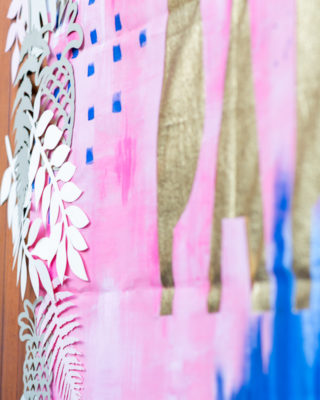
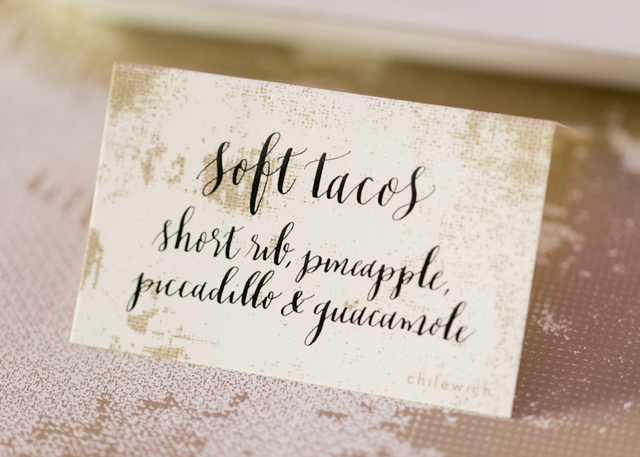
Mandy made the most amazing sign for the Paper Party this year! She hand painted some white canvas fabric in our party colors then cut out the letters and backed them with gold fabric! We accented with lasercut tropical paper foliage and pineapples from Alexis Mattox Design. Our tables featured gorgeous table runners and placemats from the new Chilewich + Hester & Cook collaboration (so pretty!) and table confetti from Minted! Michele from Meant to Be Calligraphy also lettered our menu selections on Chilewich + Hester & Cook place cards.

OSBP-Paper-Party-2015-Charlie-Juliet-Photography-102

OSBP-Paper-Party-2015-Charlie-Juliet-Photography-1

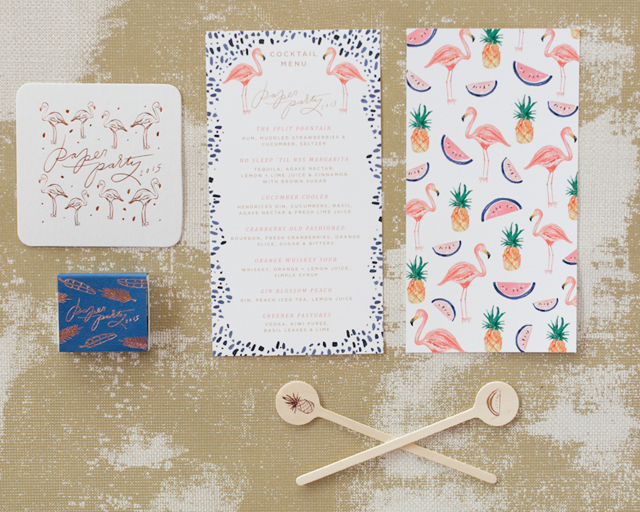
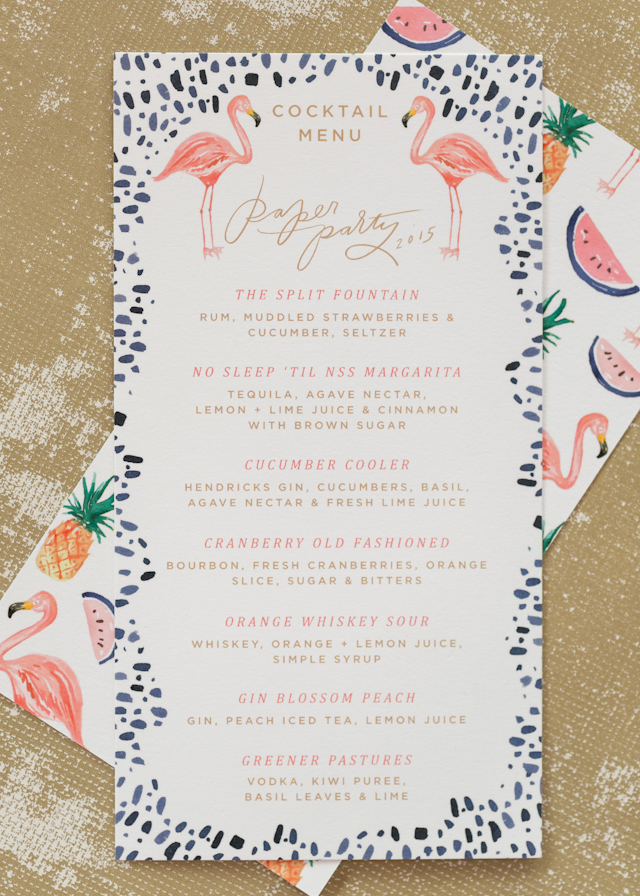
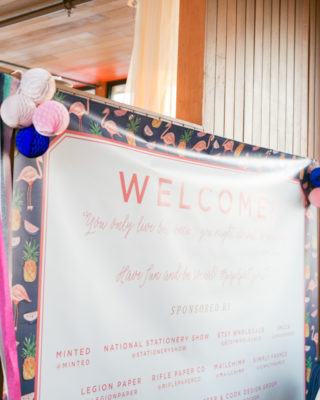
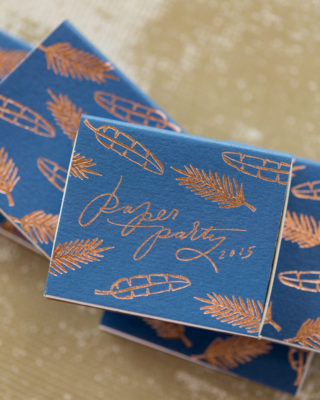
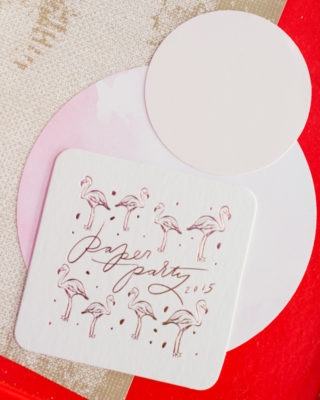
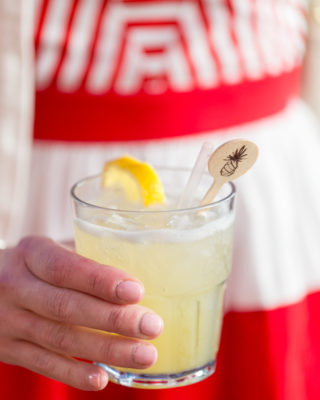
Courtney from Swiss Cottage Designs offered to help out with some of the day-of stationery pieces – didn’t she do the most amazing job?? Courtney designed a fun tropical-inspired cocktail menu, name tags, cocktail stir sticks, coasters, matchboxes, and a giant welcome sign! For Your Party printed the coasters, matchboxes, and stir sticks in rose gold foil.

OSBP-Paper-Party-2015-Charlie-Juliet-Photography-7

OSBP-Paper-Party-2015-Charlie-Juliet-Photography-154OSBP-Paper-Party-2015-Charlie-Juliet-Photography-43

OSBP-Paper-Party-2015-Charlie-Juliet-Photography-6

OSBP-Paper-Party-2015-Charlie-Juliet-Photography-45OSBP-Paper-Party-2015-Charlie-Juliet-Photography-5

OSBP-Paper-Party-2015-Charlie-Juliet-Photography-49

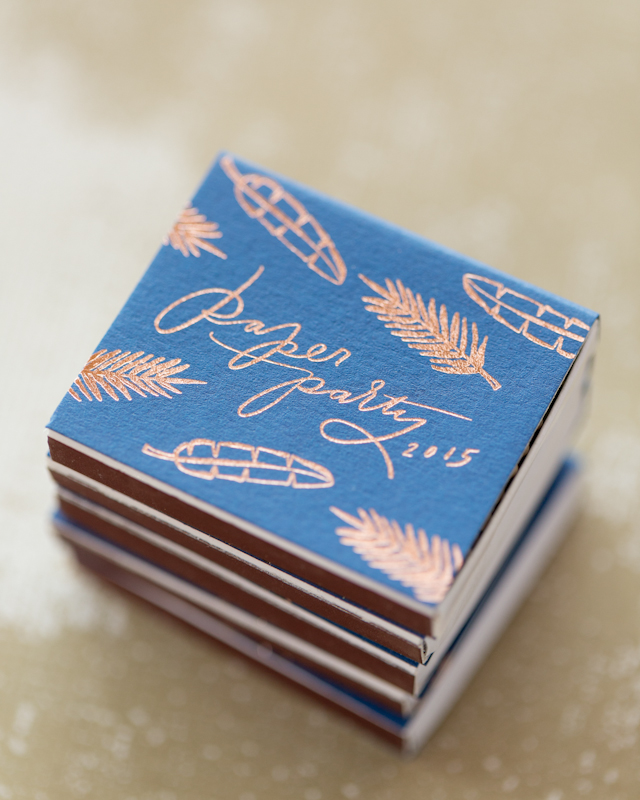
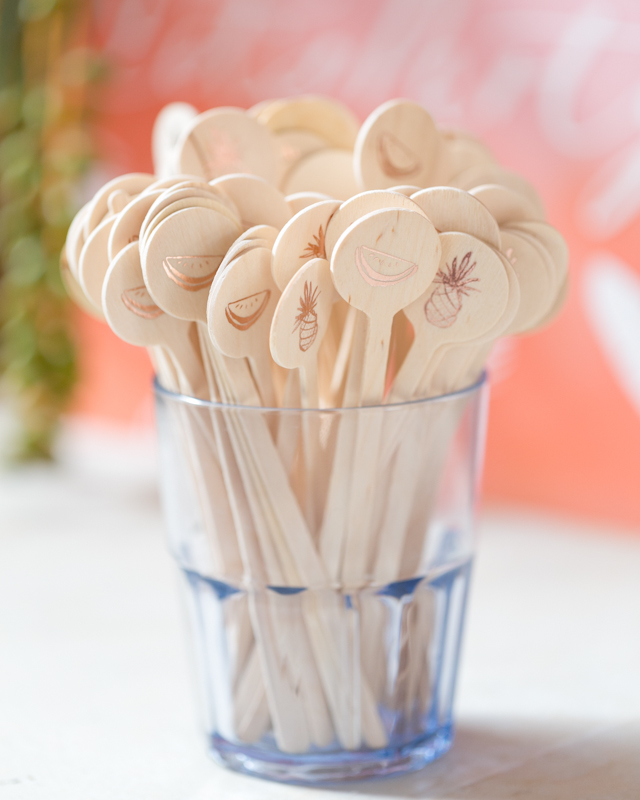
Coasters, stir sticks, and matchboxes from For Your Party!

OSBP-Paper-Party-2015-Charlie-Juliet-Photography-70OSBP-Paper-Party-2015-Charlie-Juliet-Photography-74

OSBP-Paper-Party-2015-Charlie-Juliet-Photography-12OSBP-Paper-Party-2015-Charlie-Juliet-Photography-14

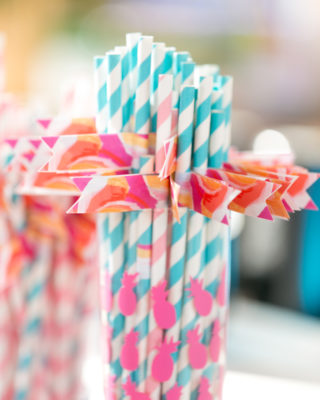
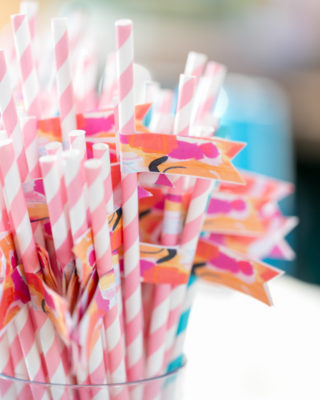
Stripey party straws and drink flags from Minted!

OSBP-Paper-Party-2015-Charlie-Juliet-Photography-42OSBP-Paper-Party-2015-Charlie-Juliet-Photography-166

OSBP-Paper-Party-2015-Charlie-Juliet-Photography-171

OSBP-Paper-Party-2015-Charlie-Juliet-Photography-51

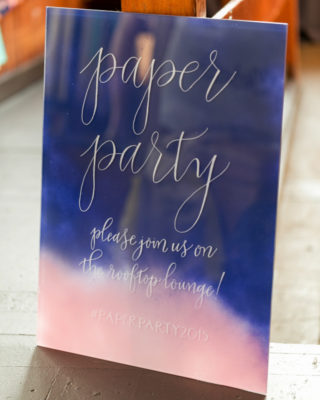
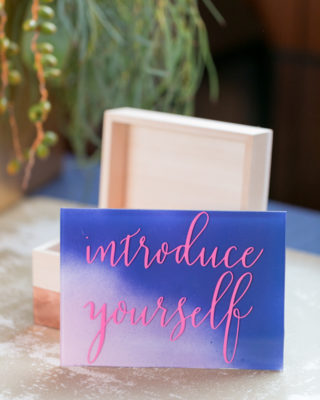
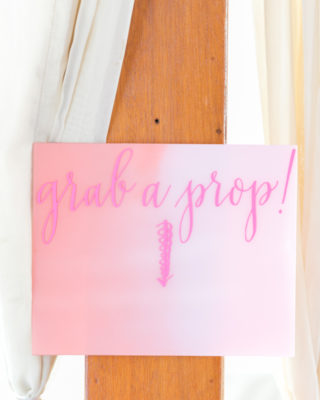
I had a blast making signs for the party! I used my favorite DIY technique for making spray painted acrylic signs – but instead of a paint pen I used my Silhouette CAMEO to cut out vinyl decals! Michele from Meant to Be Calligraphy and Jenna from Mon Voir kindly provided lettering, which I cut out in white and hot pink vinyl. The signs ranged in size from 5″ x 7″ to 18″ x 24″ and were seriously so easy to make!

OSBP-Paper-Party-2015-Charlie-Juliet-Photography-62

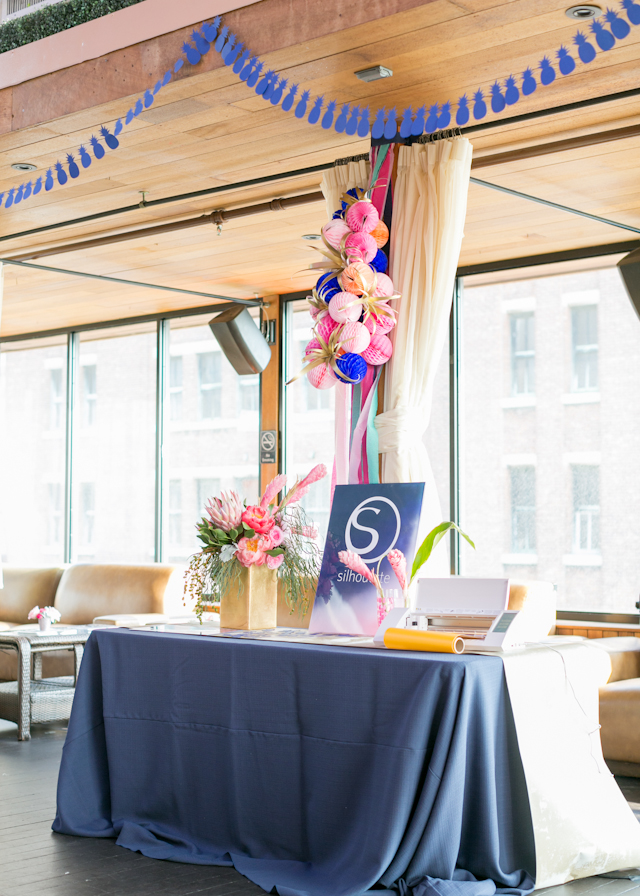
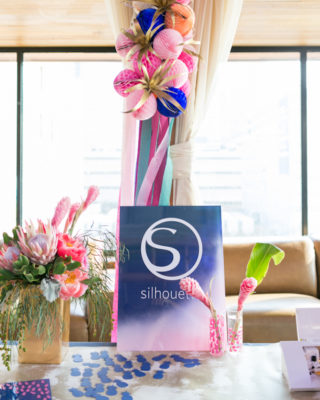
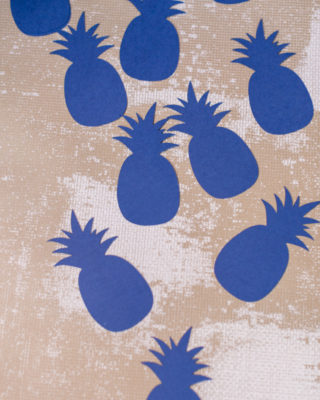
We also had a table with a demo of the Silhouettte CAMEO for party guests – we cut pineapples out of yellow and navy vinyl to wear as stickers around the party. They were such a hit! Mandy made a pineapple garland from navy card stock (so cute).

OSBP-Paper-Party-2015-Charlie-Juliet-Photography-64OSBP-Paper-Party-2015-Charlie-Juliet-Photography-179

OSBP-Paper-Party-2015-Charlie-Juliet-Photography-9

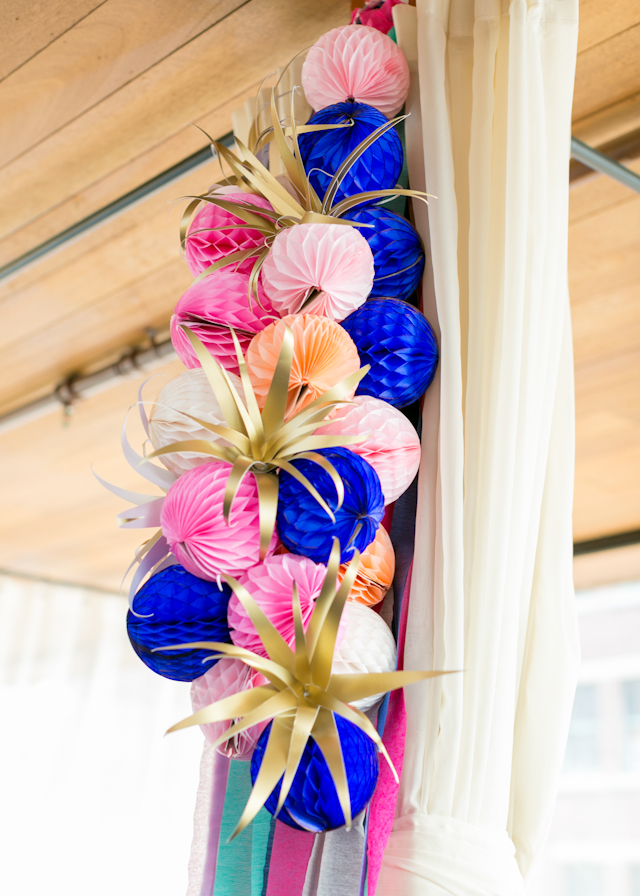
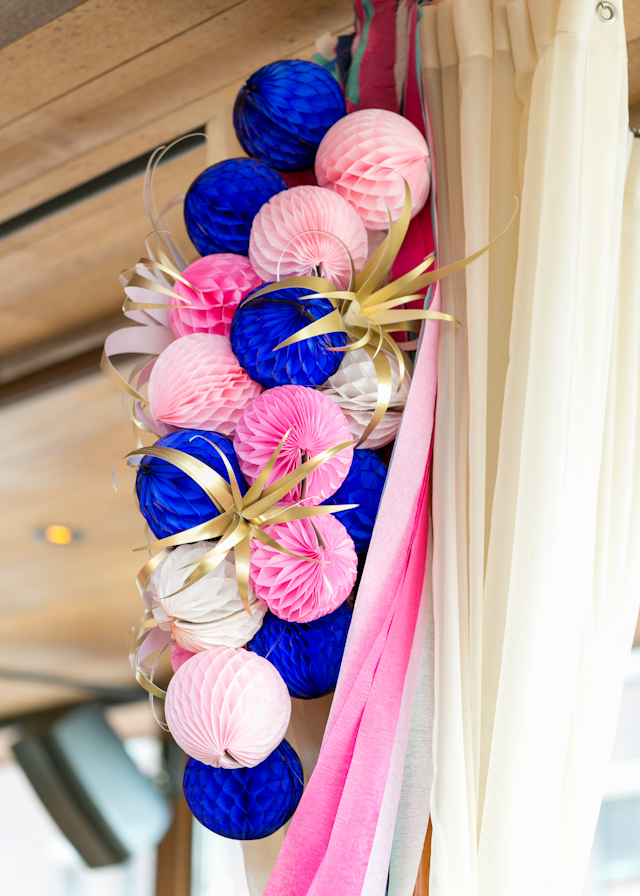
These cascading honeycombs probably made the biggest visual impact and were one of my favorite decorations at the party! We mixed 5″ honeycombs with crepe paper streamers and Mandy‘s DIY air plants. We had 4 or 5 of these cascades around the party. I love how they turned out!

OSBP-Paper-Party-2015-Charlie-Juliet-Photography-10

OSBP-Paper-Party-2015-Charlie-Juliet-Photography-83

OSBP-Paper-Party-2015-Charlie-Juliet-Photography-140

OSBP-Paper-Party-2015-Charlie-Juliet-Photography-90OSBP-Paper-Party-2015-Charlie-Juliet-Photography-40

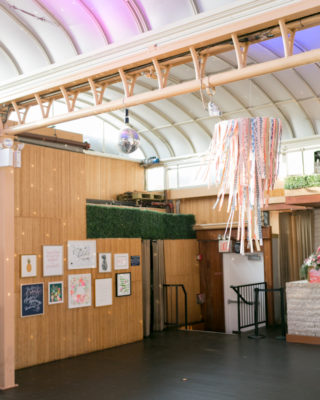
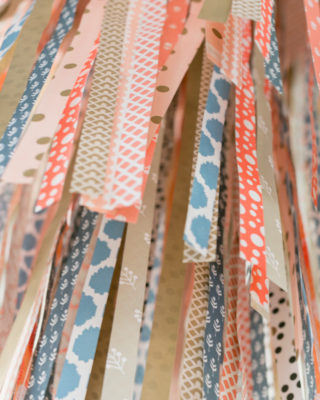
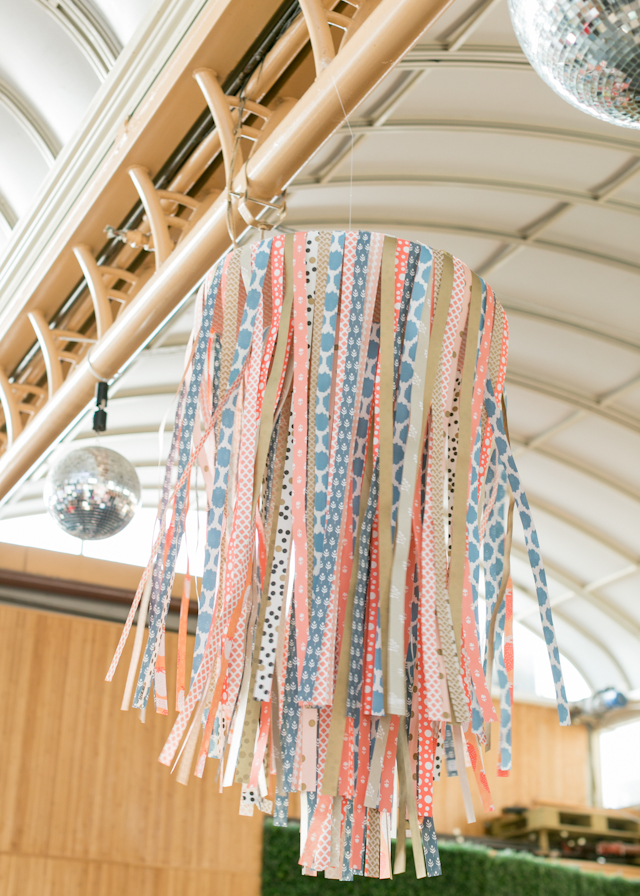
The team from Smock made a couple of these “chandeliers” using strips of their gift wrap! They looked so beautiful blowing in the breeze.

OSBP-Paper-Party-2015-Charlie-Juliet-Photography-41

OSBP-Paper-Party-2015-Charlie-Juliet-Photography-26

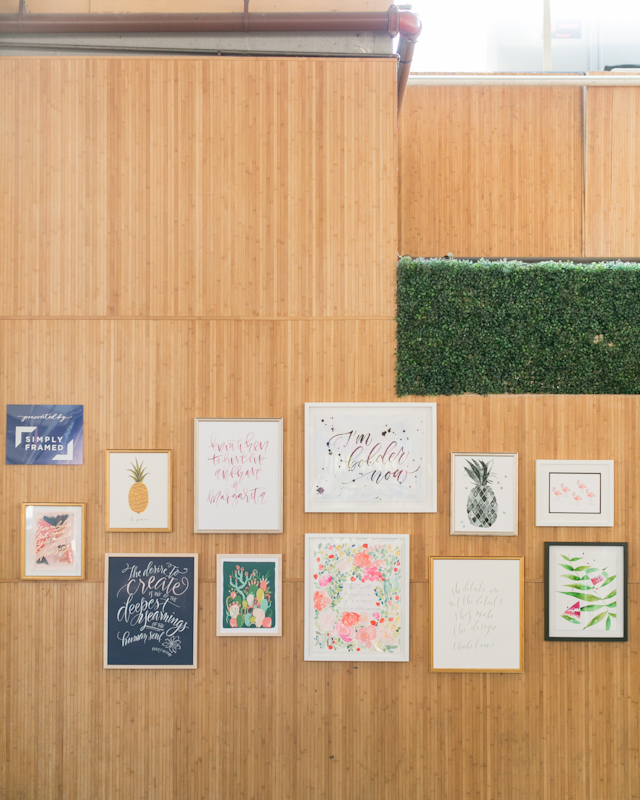
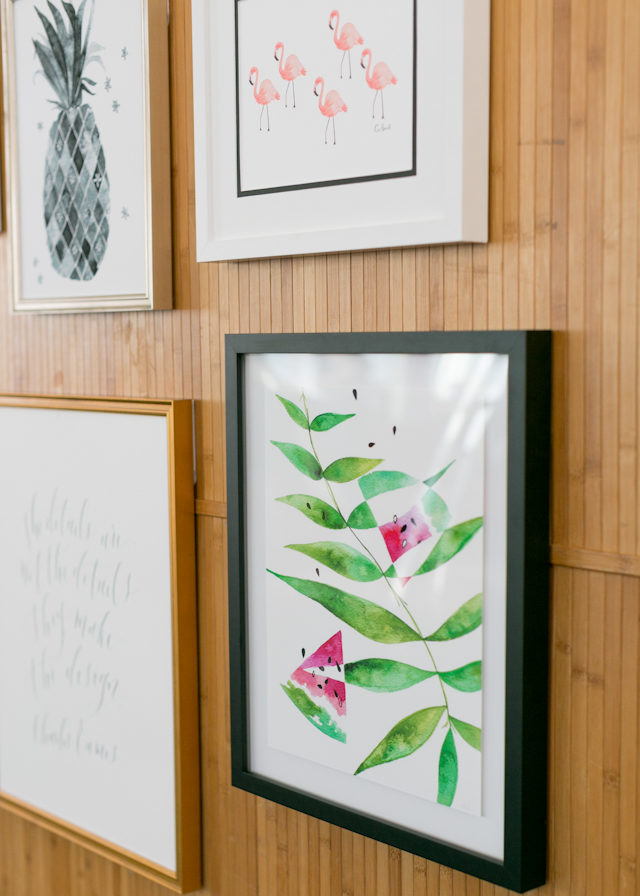
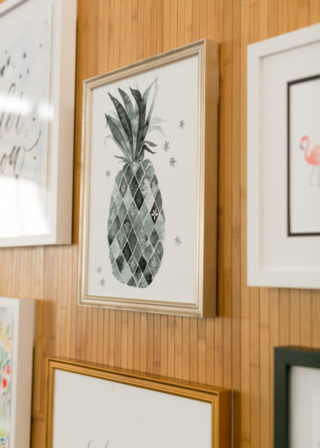
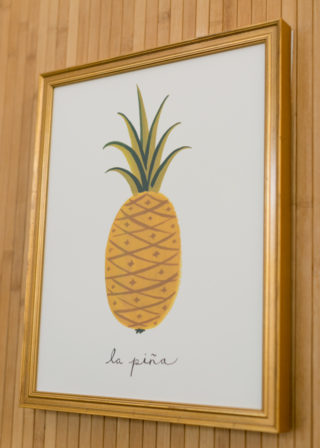
This gallery wall in collaboration with Simply Framed was hands down my favorite element of the party! We mixed original calligraphy artwork from some of my favorite calligraphers with tropical-inspired illustrations, and I looooooove how it all came together! The prints all look amazing together and Simply Framed did a wonderful job matching each print to its perfect frame. Stay tuned for a little something special involving these prints tomorrow!

Artwork sources top row from left: Moglea, Idlewild Co., A Fabulous Fete, Ashley Buzzy Calligraphy and Letterpress, Meera Lee Patel, Rifle Paper Co.

Bottom row from left: Fleur de Letters, Idlewild Co., Mon Voir, Blue Eye Brown Eye Calligraphy, Meera Lee Patel

OSBP-Paper-Party-2015-Charlie-Juliet-Photography-29

OSBP-Paper-Party-2015-Charlie-Juliet-Photography-28OSBP-Paper-Party-2015-Charlie-Juliet-Photography-32

OSBP-Paper-Party-2015-Charlie-Juliet-Photography-18

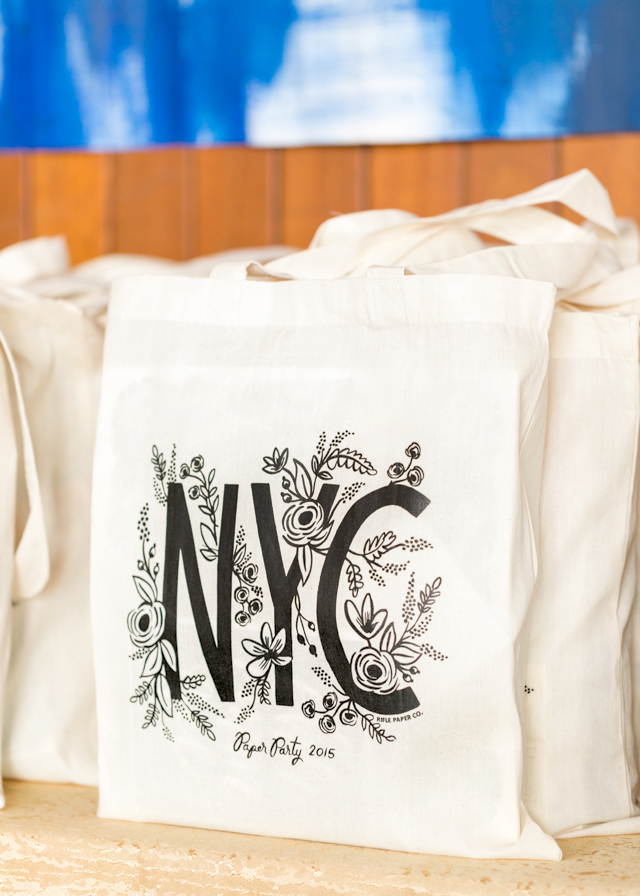
For this year’s party gift bags we partnered with the amazing Rifle Paper Co.! The bags feature a gorgeous custom Rifle design created just for the party – and don’t worry, I set some bags aside for a few lucky readers! Stay tuned for more details soon!

OSBP-Paper-Party-2015-Charlie-Juliet-Photography-91

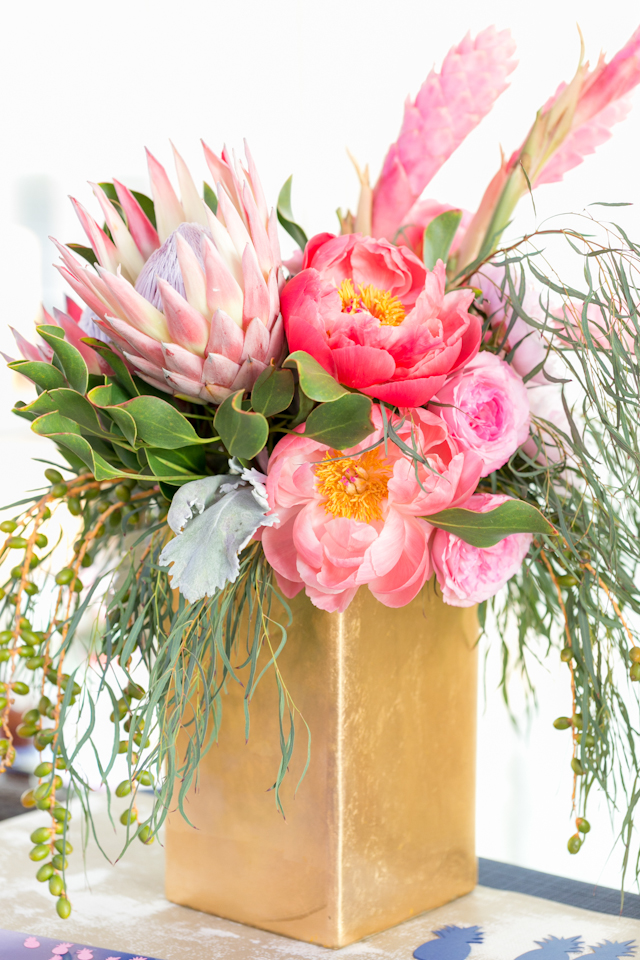
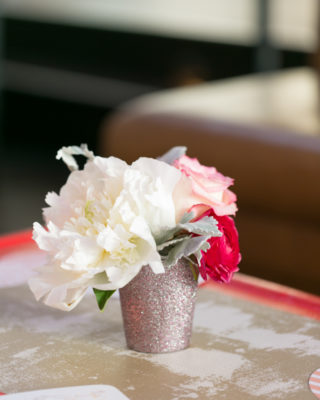
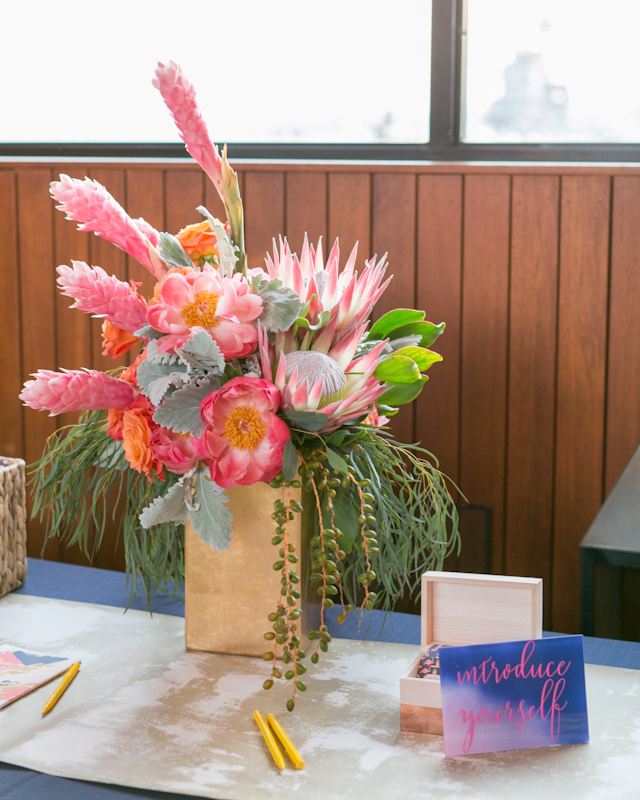
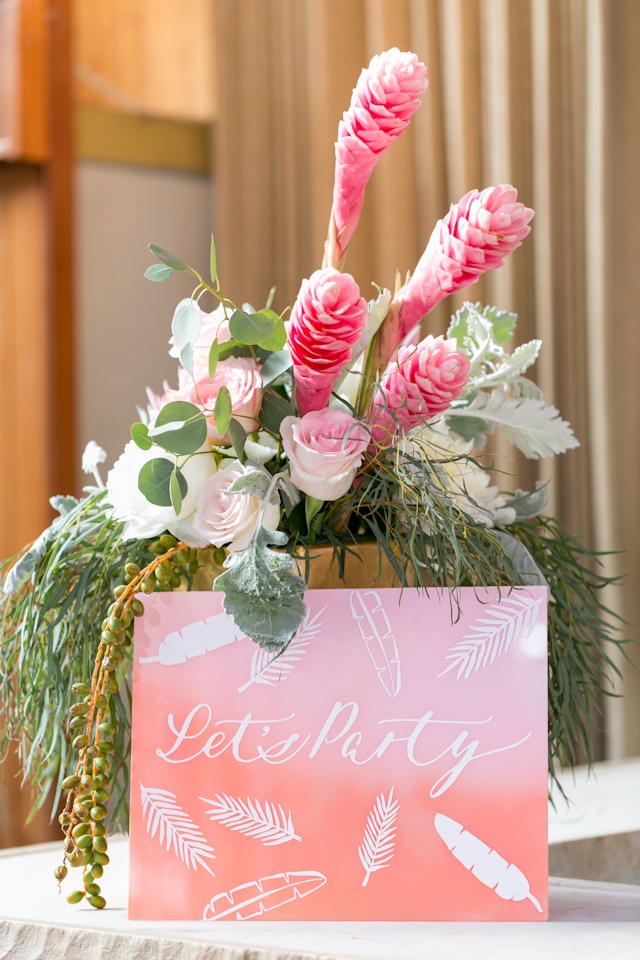
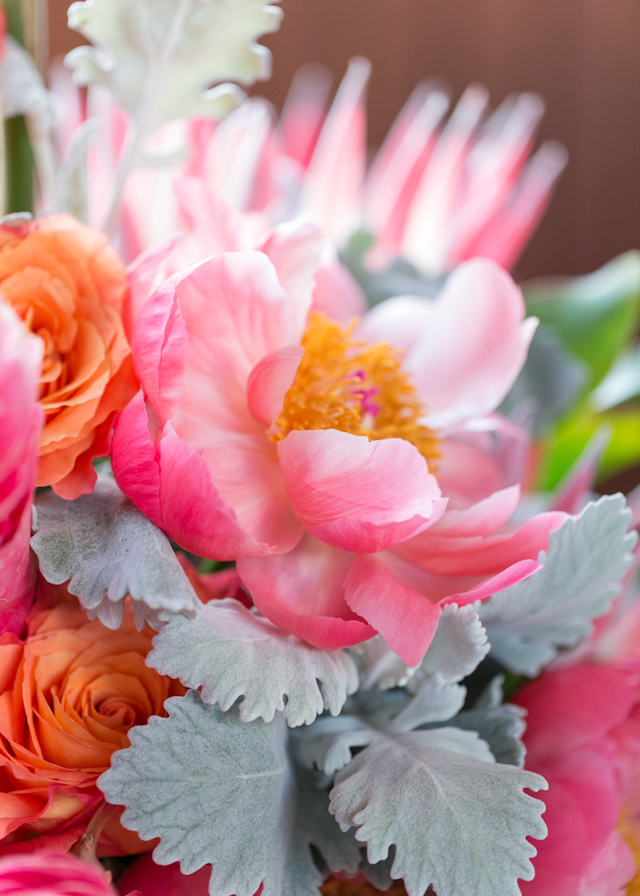
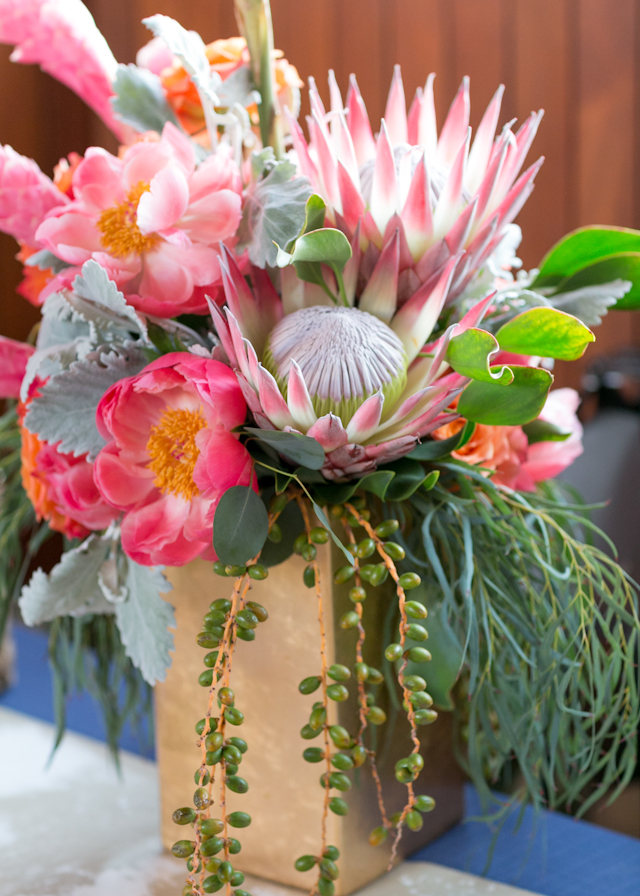
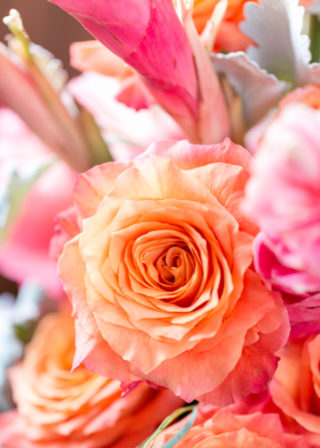
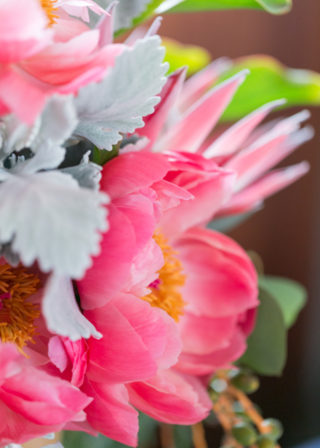
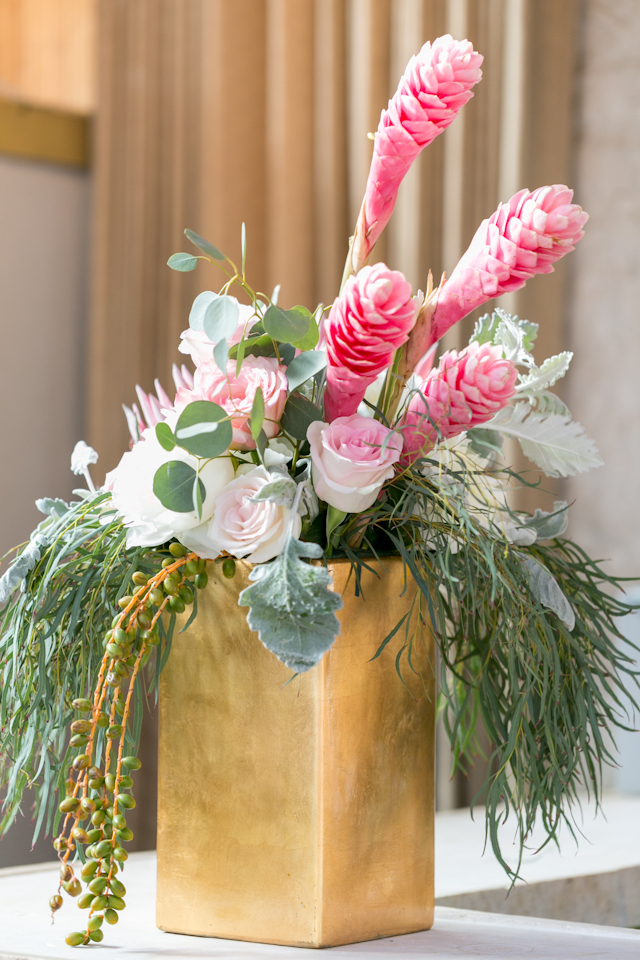
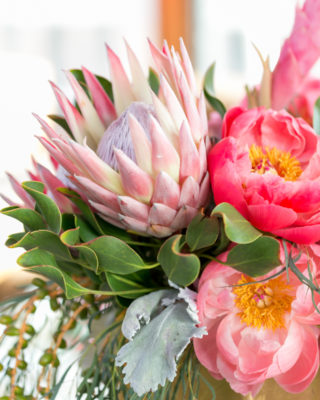
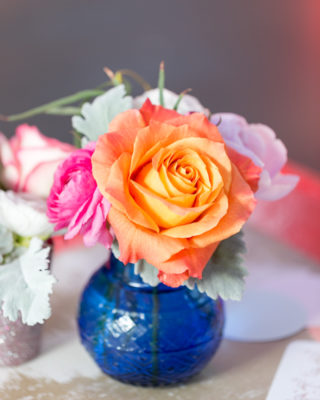
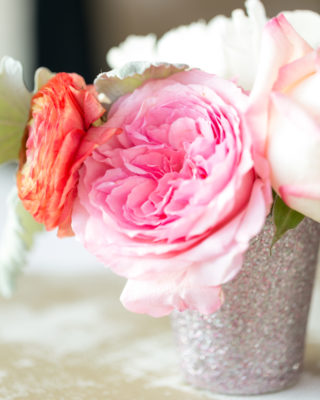
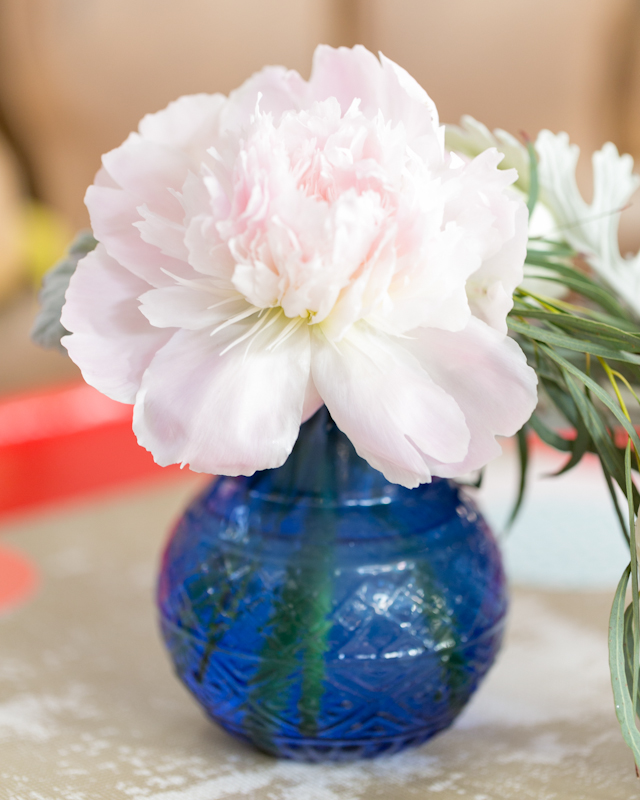
Can we talk about the AMAZING floral arrangements for a few minutes? Dawn from Soirée Floral absolutely killed it! We combined gorgeous peonies, garden roses, ranunculus, and greens from Flower Muse with a few tropical flowers like king protea and pink ginger flowers. We mixed a few large arrangements with smaller cocktail-size arrangements that guests could take home at the end of the evening. I’m still dreaming about these amazing blooms!

OSBP-Paper-Party-2015-Charlie-Juliet-Photography-163

OSBP-Paper-Party-2015-Charlie-Juliet-Photography-157

OSBP-Paper-Party-2015-Charlie-Juliet-Photography-165OSBP-Paper-Party-2015-Charlie-Juliet-Photography-164

OSBP-Paper-Party-2015-Charlie-Juliet-Photography-52

OSBP-Paper-Party-2015-Charlie-Juliet-Photography-60OSBP-Paper-Party-2015-Charlie-Juliet-Photography-94

OSBP-Paper-Party-2015-Charlie-Juliet-Photography-100OSBP-Paper-Party-2015-Charlie-Juliet-Photography-24

OSBP-Paper-Party-2015-Charlie-Juliet-Photography-19

OSBP-Paper-Party-2015-Charlie-Juliet-Photography-151

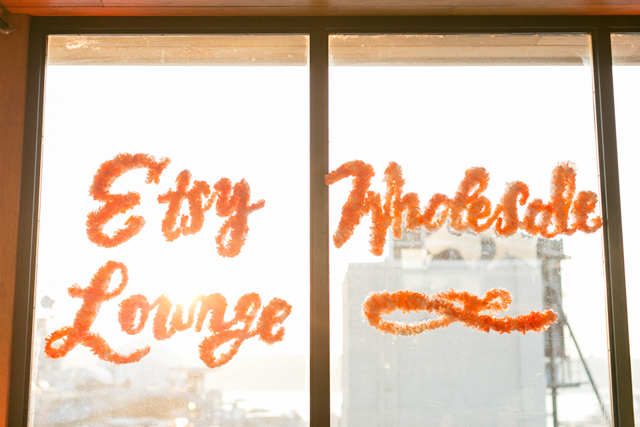
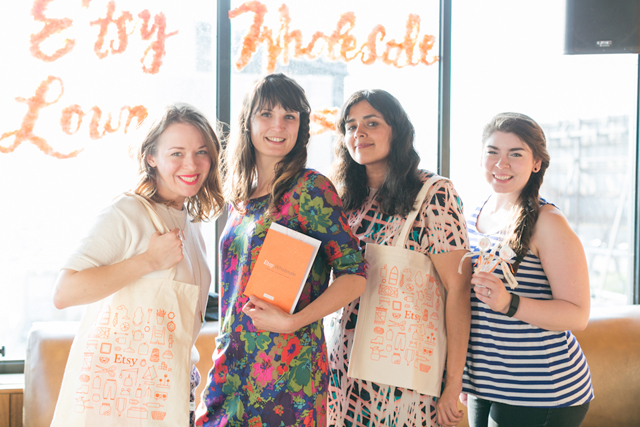
Yay for Etsy Wholesale! This was the second year that we’ve had an Etsy Wholesale lounge and I love that it’s becoming a little tradition at the party!

OSBP-Paper-Party-2015-Charlie-Juliet-Photography-103

OSBP-Paper-Party-2015-Charlie-Juliet-Photography-130

OSBP-Paper-Party-2015-Charlie-Juliet-Photography-127

OSBP-Paper-Party-2015-Charlie-Juliet-Photography-108

OSBP-Paper-Party-2015-Charlie-Juliet-Photography-111

OSBP-Paper-Party-2015-Charlie-Juliet-Photography-113

OSBP-Paper-Party-2015-Charlie-Juliet-Photography-145

OSBP-Paper-Party-2015-Charlie-Juliet-Photography-153

OSBP-Paper-Party-2015-Charlie-Juliet-Photography-175

OSBP-Paper-Party-2015-Charlie-Juliet-Photography-176

OSBP-Paper-Party-2015-Charlie-Juliet-Photography-186

OSBP-Paper-Party-2015-Charlie-Juliet-Photography-198

OSBP-Paper-Party-2015-Charlie-Juliet-Photography-57

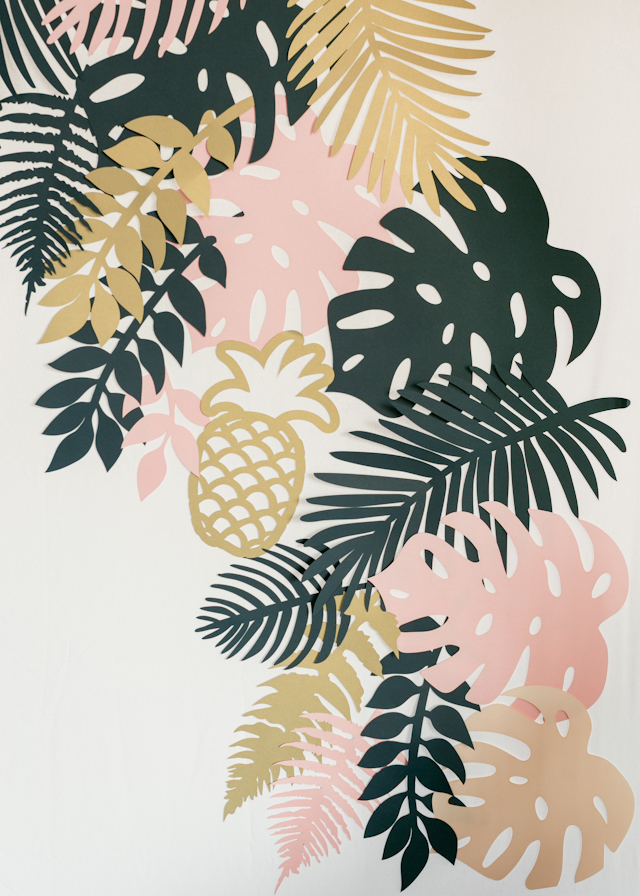
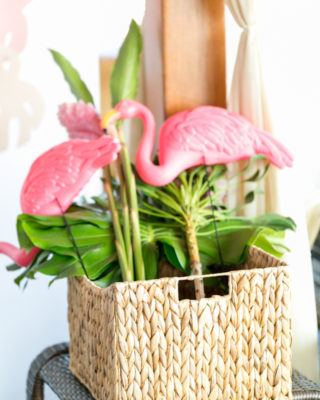
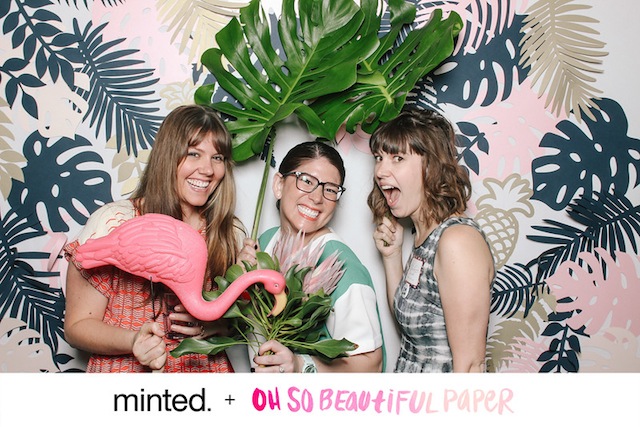
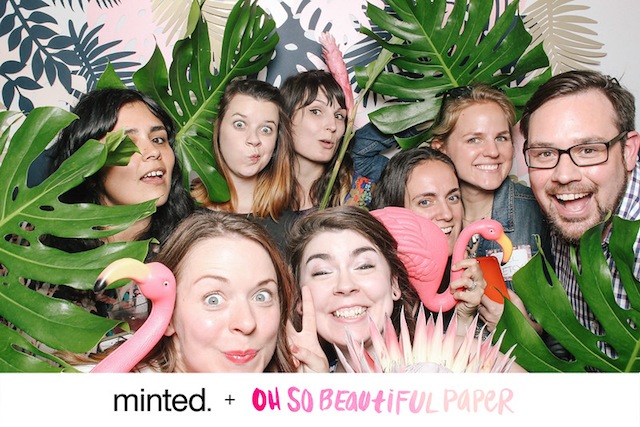
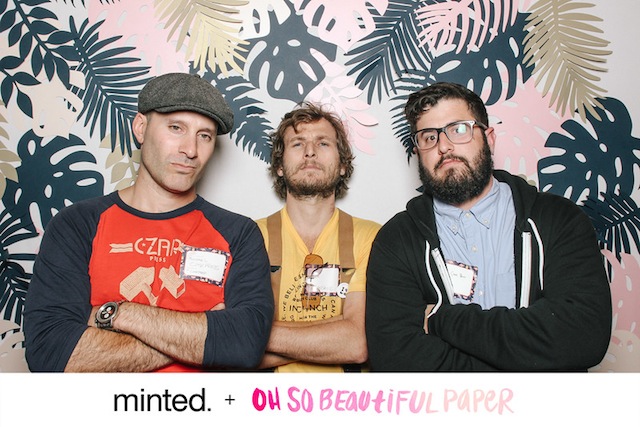
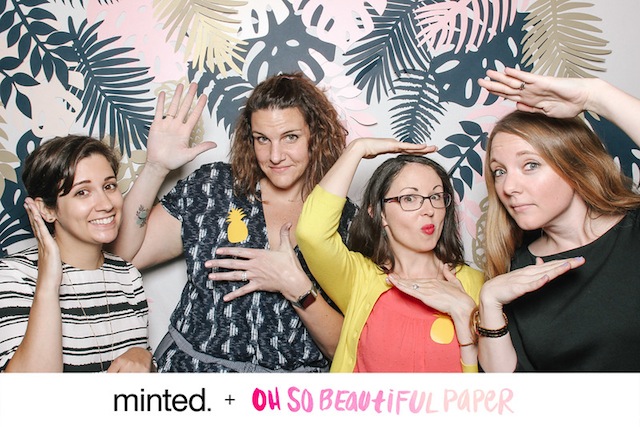
Our Smilebooth backdrop featured more lasercut tropical paper foliage from Alexis Mattox Design: palm fronds, philodendron leaves, and even a few pineapples! We also had some plastic flamingos for props, along with real philodendron leaves, protea, and ginger flowers. So. Much. Fun!

OSBP-Paper-Party-2015-Charlie-Juliet-Photography-55OSBP-Paper-Party-2015-Charlie-Juliet-Photography-56

Paper-Party-2015-Smilebooth-Hello!Lucky

Paper-Party-2015-Smilebooth-MaeMae-Antiquaria

Paper-Party-2015-Smilebooth-Etsy-Wholesale

Paper-Party-2015-Smilebooth-Printermen

Paper-Party-2015-Smilebooth-OSBP

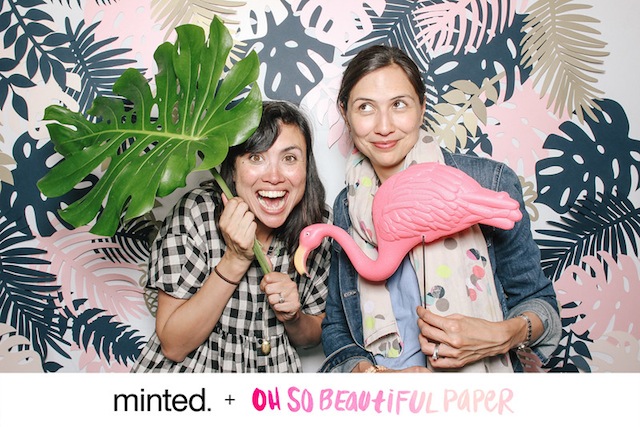
You can find the full photo gallery from Paper Party 2015 right here – and the Smilebooth photos right here!

Finally, a HUGE thank you to the wonderful sponsors and people who made the evening possible:

  • Infinite thanks to Janice and Mandy for all of their invaluable help over the past few months and throughout the evening – and Carrie, Kristina (and husband!) and our small army of friends who helped stuff gift bags or with set up before the party. We couldn’t have done it without you!

And of course a big thanks to Charlie Juliet Photography for the gorgeous photos and Hudson Terrace for having us! See you all next year!

Party Sources

Event Coordination: Bellwether Events

Floral Arrangements: Soirée Floral

Flowers: Flower Muse

Gallery Wall: Simply Framed

Day-of Calligraphy: Meant to Be Calligraphy

Day-of Stationery: Swiss Cottage Designs

Coasters, Stir Sticks, and Matchboxes: For Your Party

Table Confetti, Stripey Straws + Drink Flags: Minted

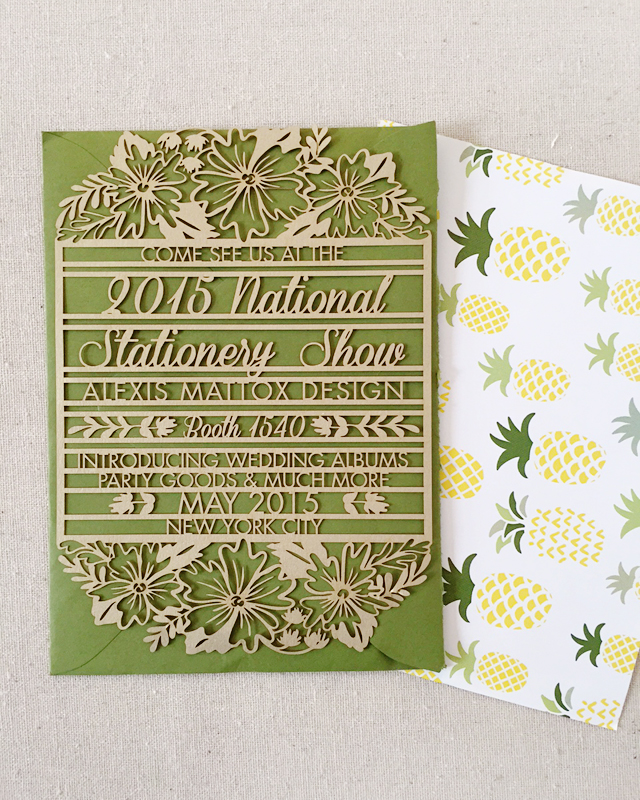
Tropical paper foliage for Smilebooth backdrop: Alexis Mattox Design

Table Runner, Placemats, and Place Cards: Hester & Cook Design Group

Venue: Hudson Terrace

Photo Credits: Charlie Juliet Photography