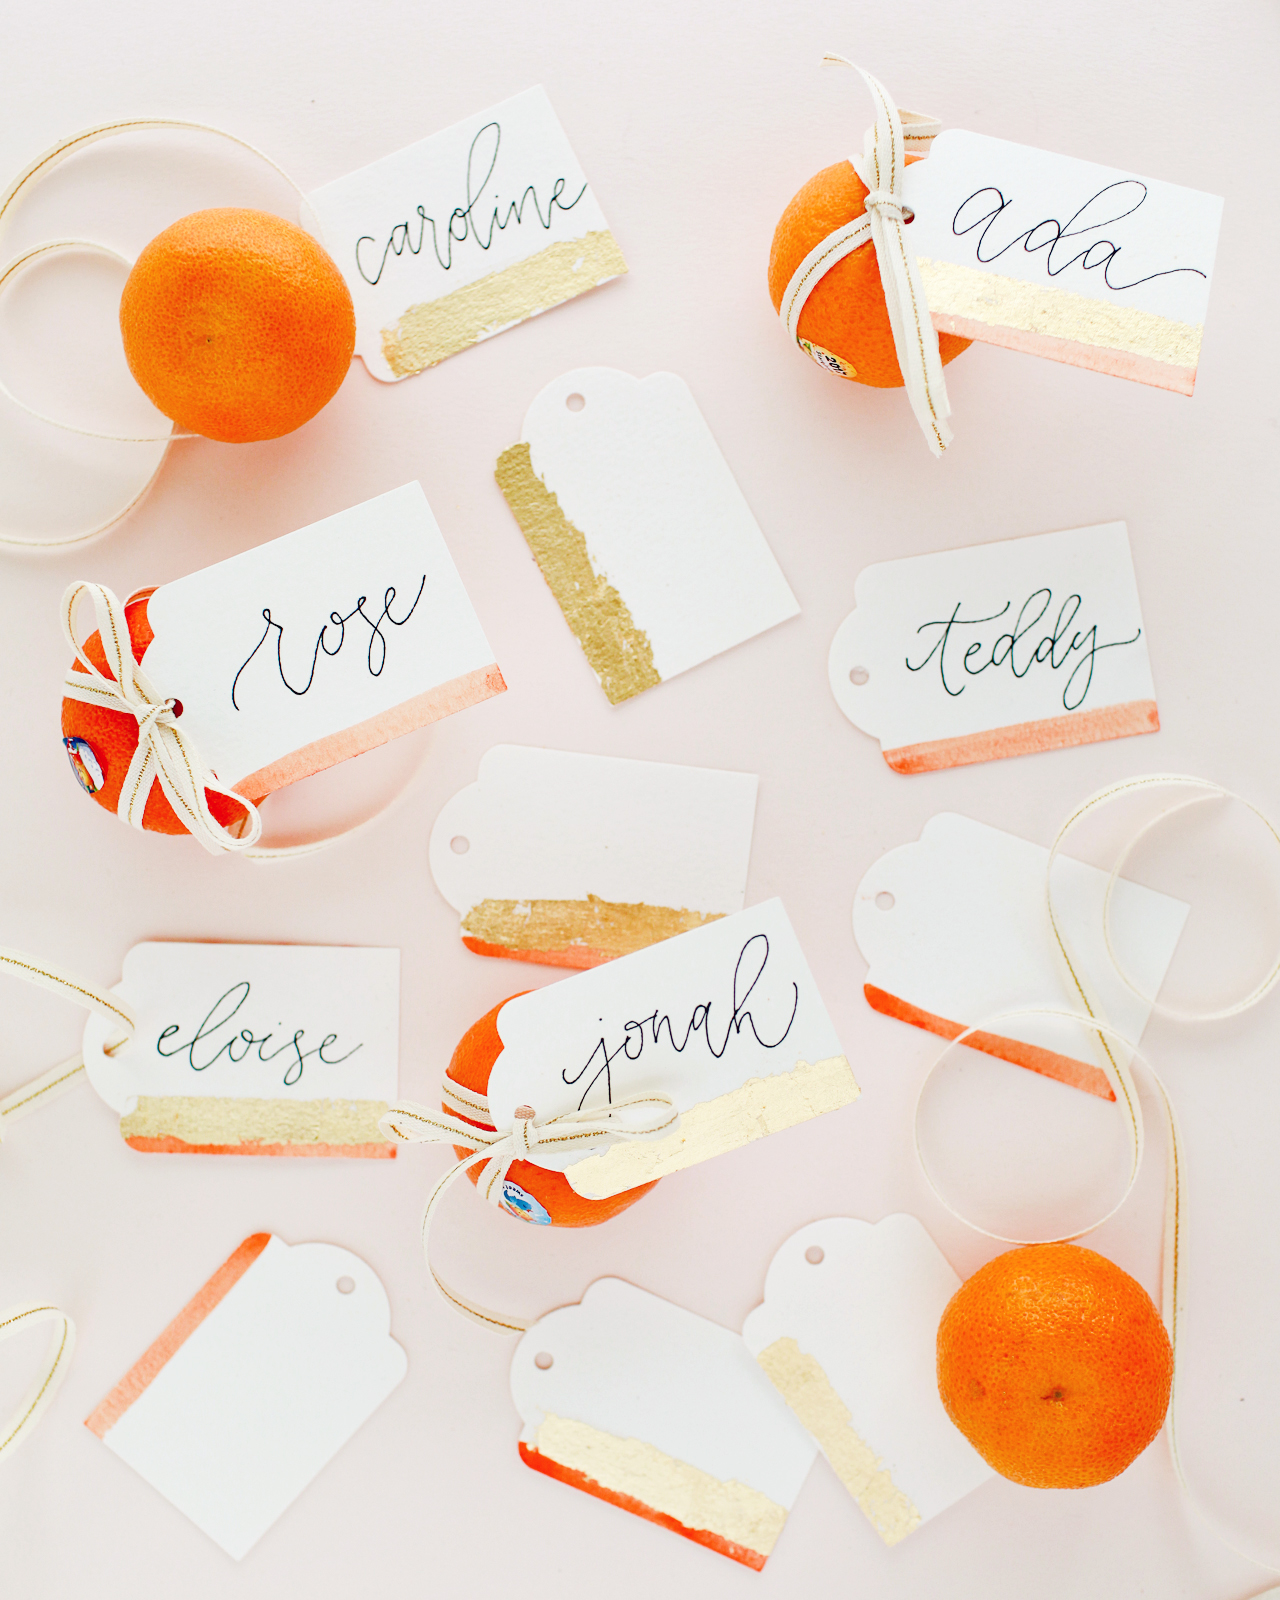
Yay! Today I’m finally kicking off my recaps from the 2017 National Stationery Show (aka NSS 2017) – but starting this year I’m doing things a wee bit different! Instead of doing long recaps with every photo in a series of posts stretched out over a couple of months, you can find ALL the photos from this year’s National Stationery Show in our brand new trade show gallery! Here on the main page, I’ll be doing a few highlight recaps based around a particular theme. We’ll be highlighting some of the new exhibitors, a few design trends, and a few product round ups. It’ll be so fun!
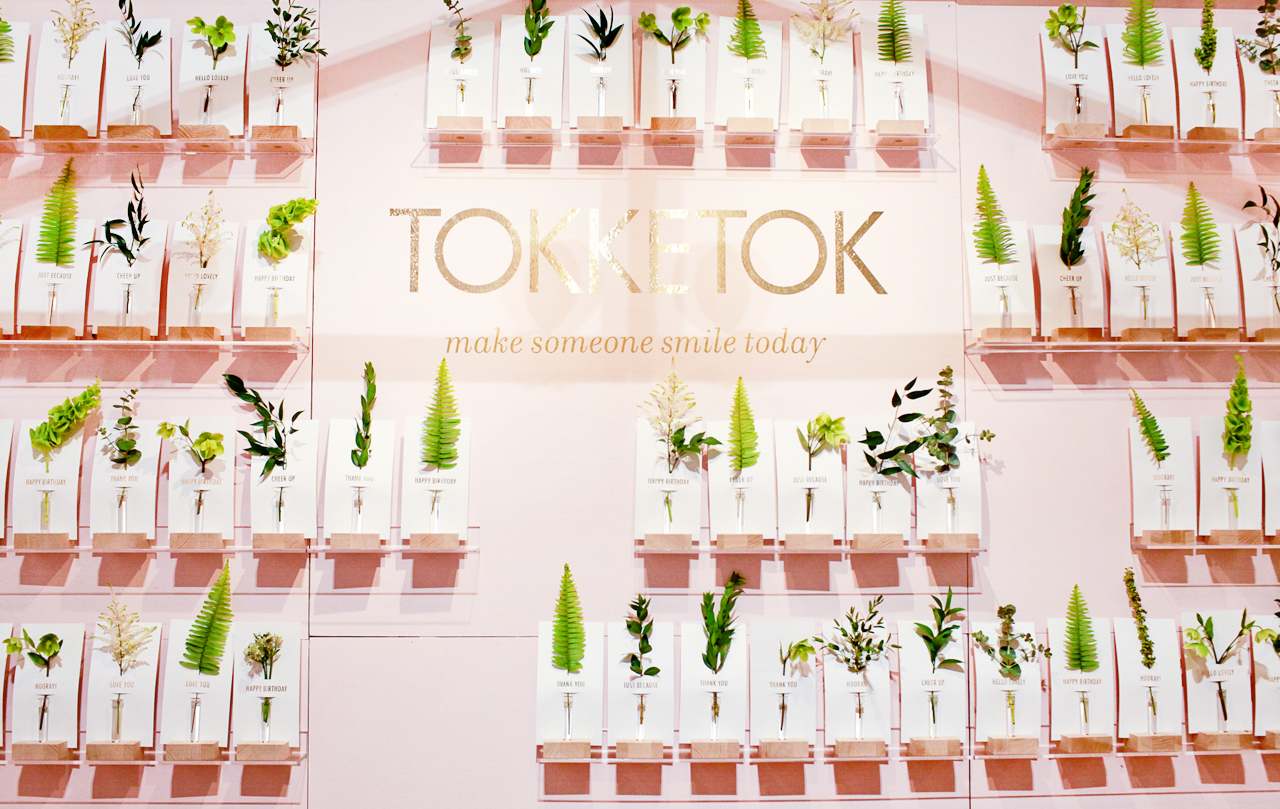
Tokketok – see more from the Tokketok booth here!
For those of you who have been reading for a while, you know that I normally do these super long recap posts right after the show with all the noteworthy exhibitors from that year’s show. The National Stationery Show isn’t open to the public, and I want to give you the experience of being there by sharing a ton of photos! But the last couple of years I’ve been wanting to change things up a bit. The big recaps can be kind of a slog to get through, and those of you who follow me on Instagram already get a real-time sneak peek of the show while it’s happening. So! I’ve been working with my developer to create a gallery with every single exhibitor that I visited at the show each year. You can visit the gallery, pick an exhibitor, and browse the images in slideshow format – or scroll below the slideshow to view all of the images from that booth in thumbnail form. I’ve been busy uploading all of my photos from this year’s show (all 99 booths!), so there’s plenty of eye candy to browse. You can also browse the 2016 exhibitors, and eventually we’ll get previous years up there, too!
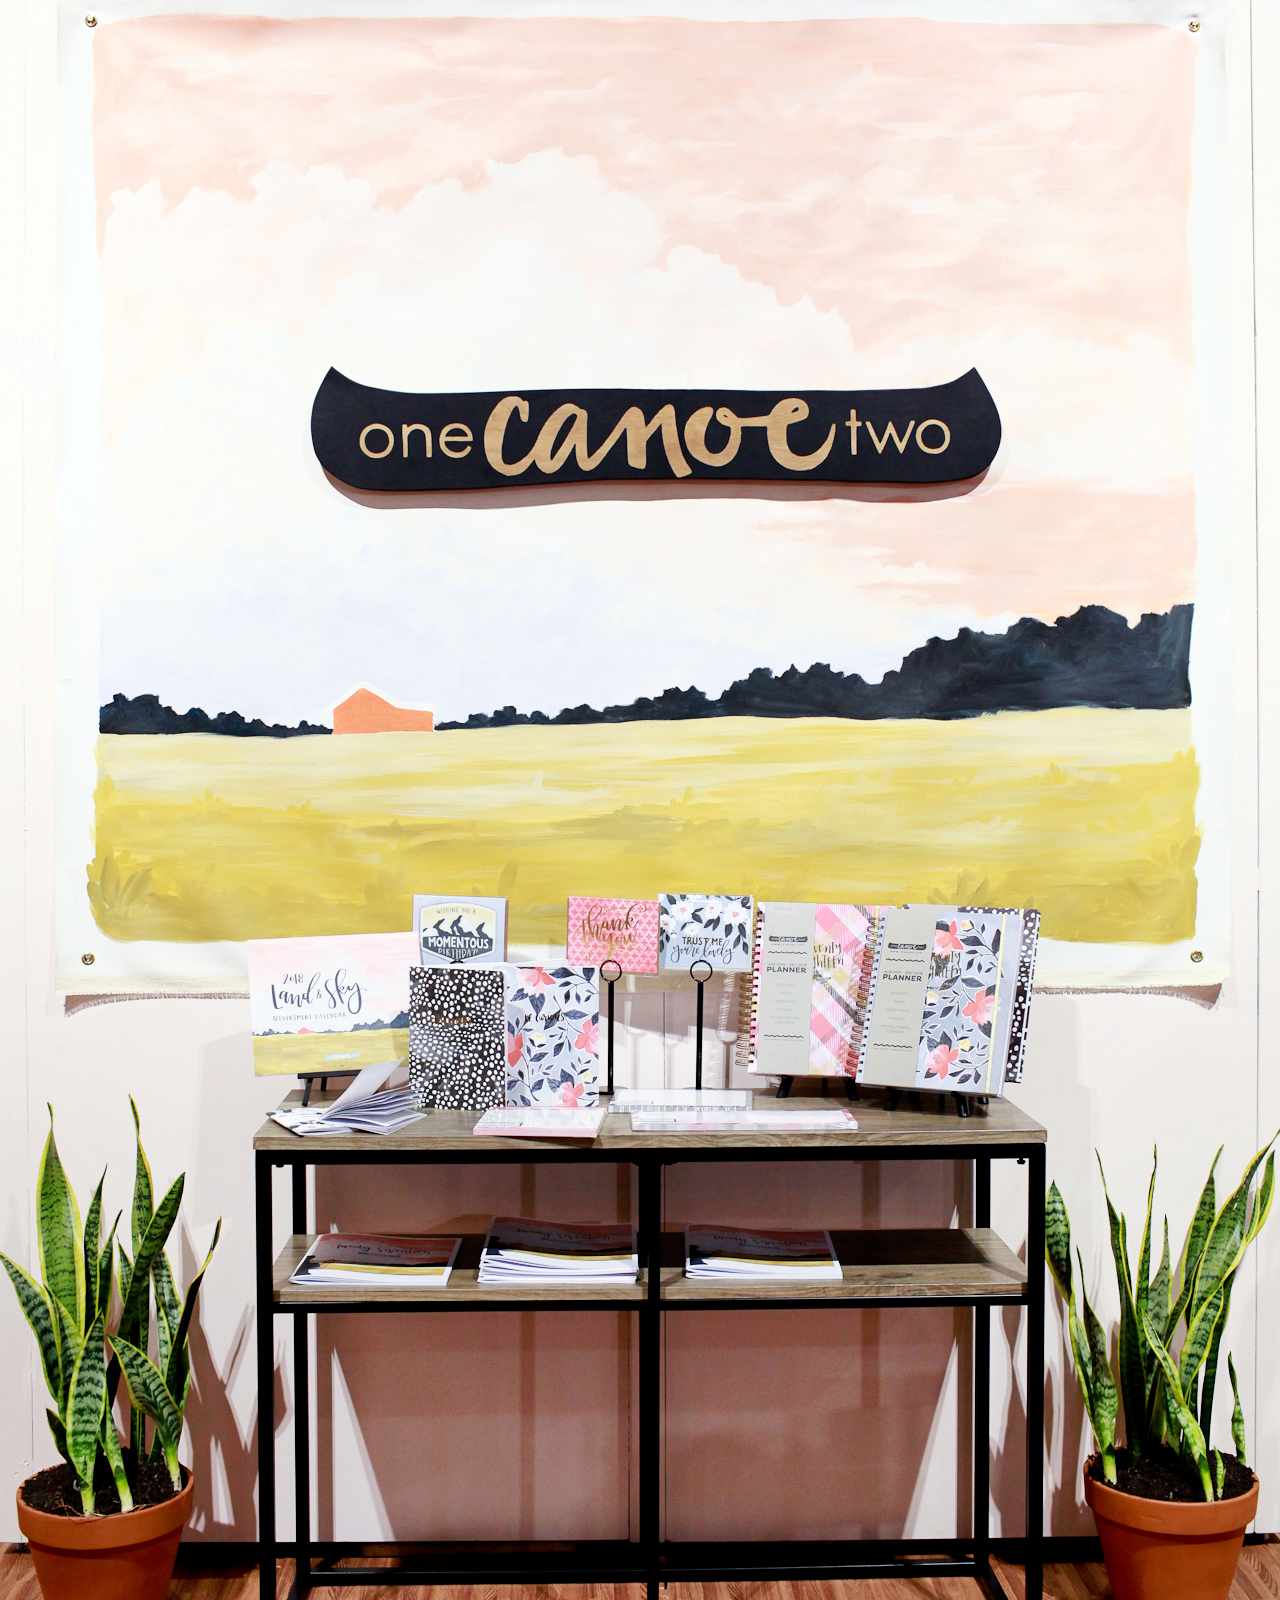
One Canoe Two – see more from the One Canoe Two booth here!
Today we’re kicking things off with one of my favorite things about any trade show: booth designs! Now, obviously the most important element of any trade show booth is the product inside the booth (and we’ll get to that soon), but good booth design is absolutely essential for catching the attention of busy retailers walking the show and getting them into your booth! Being the amazing artists that they are, National Stationery Show exhibitors do an amazing job creating the most beautiful booths, but there are always standouts each year. Let’s take a look at a few of them!
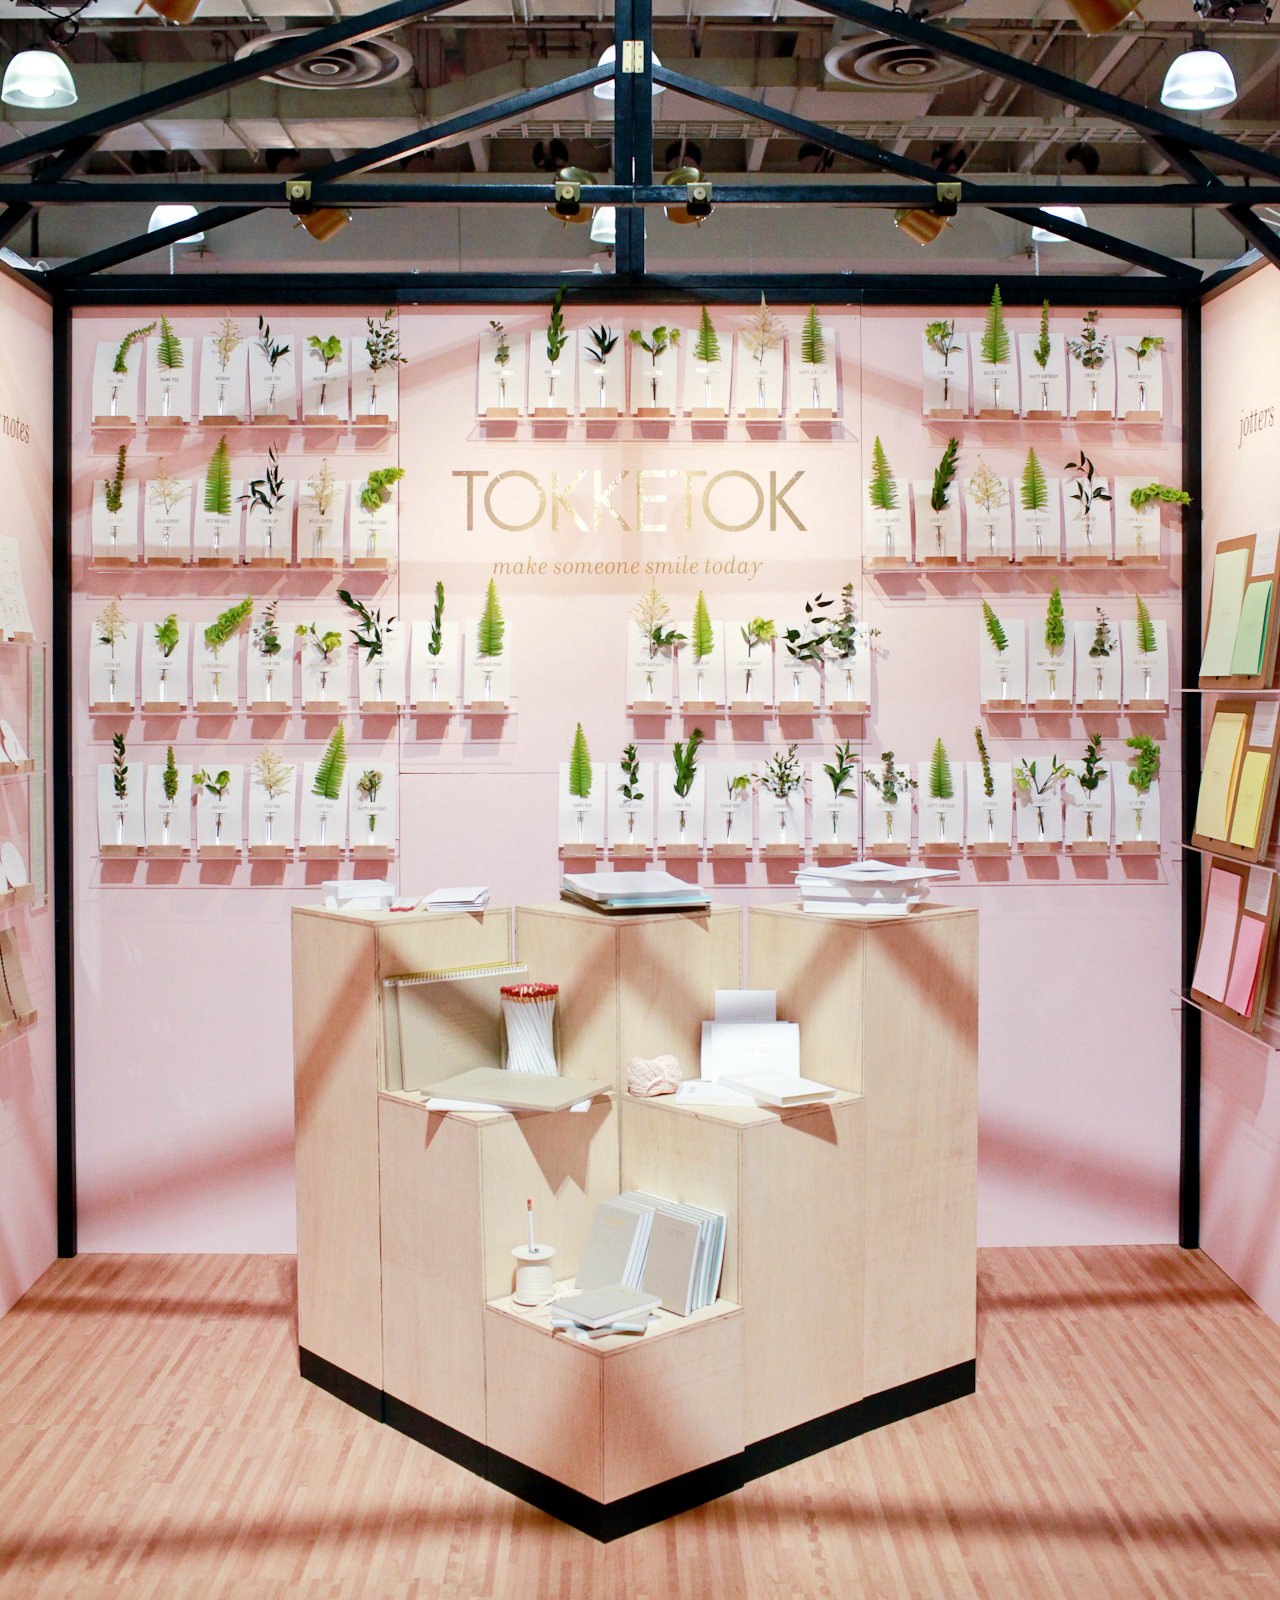
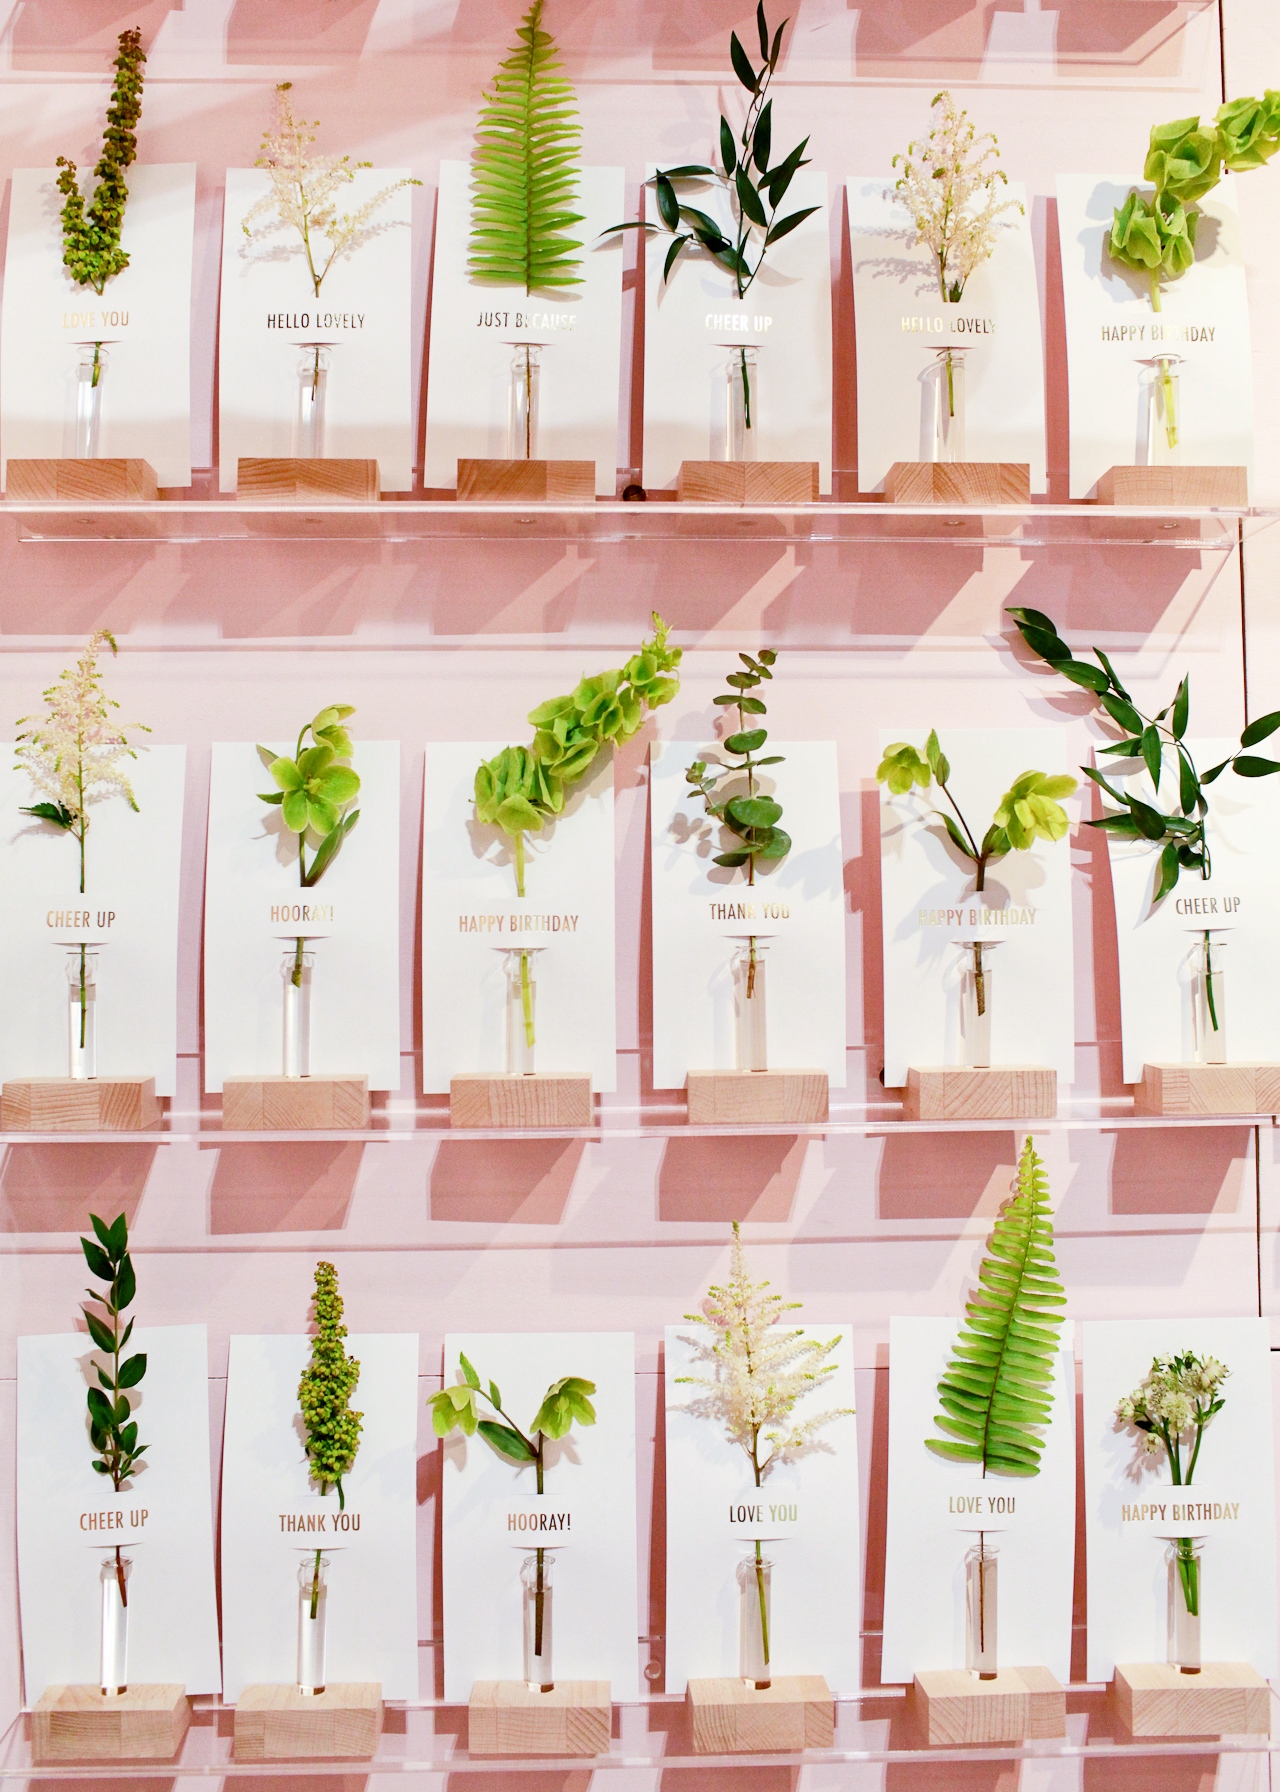
Tokketok – see more from the Tokketok booth here!
Tokketok made their trade show debut at this year’s National Stationery Show, and their booth was easily one of my favorites from the entire show! The booth was constructed to resemble a green house, which prominently featured this amazing wall of flower notes. Just gorgeous!

One Canoe Two – see more from the One Canoe Two booth here!
When painting is a big part of your line, make it a major feature of your booth design! One Canoe Two set up a feature wall with an original painting of their twilight landscape art print. Such a beautiful focal point!
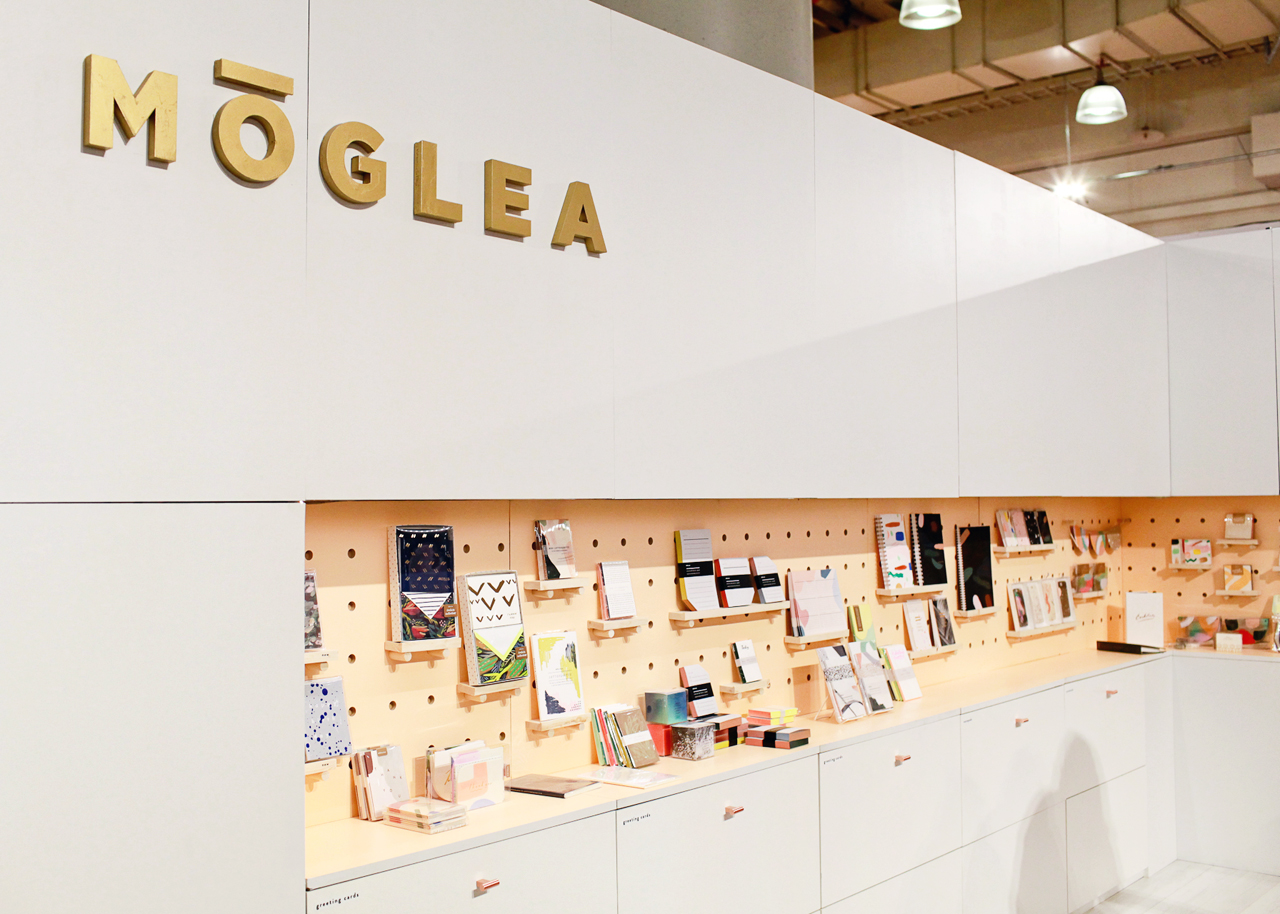
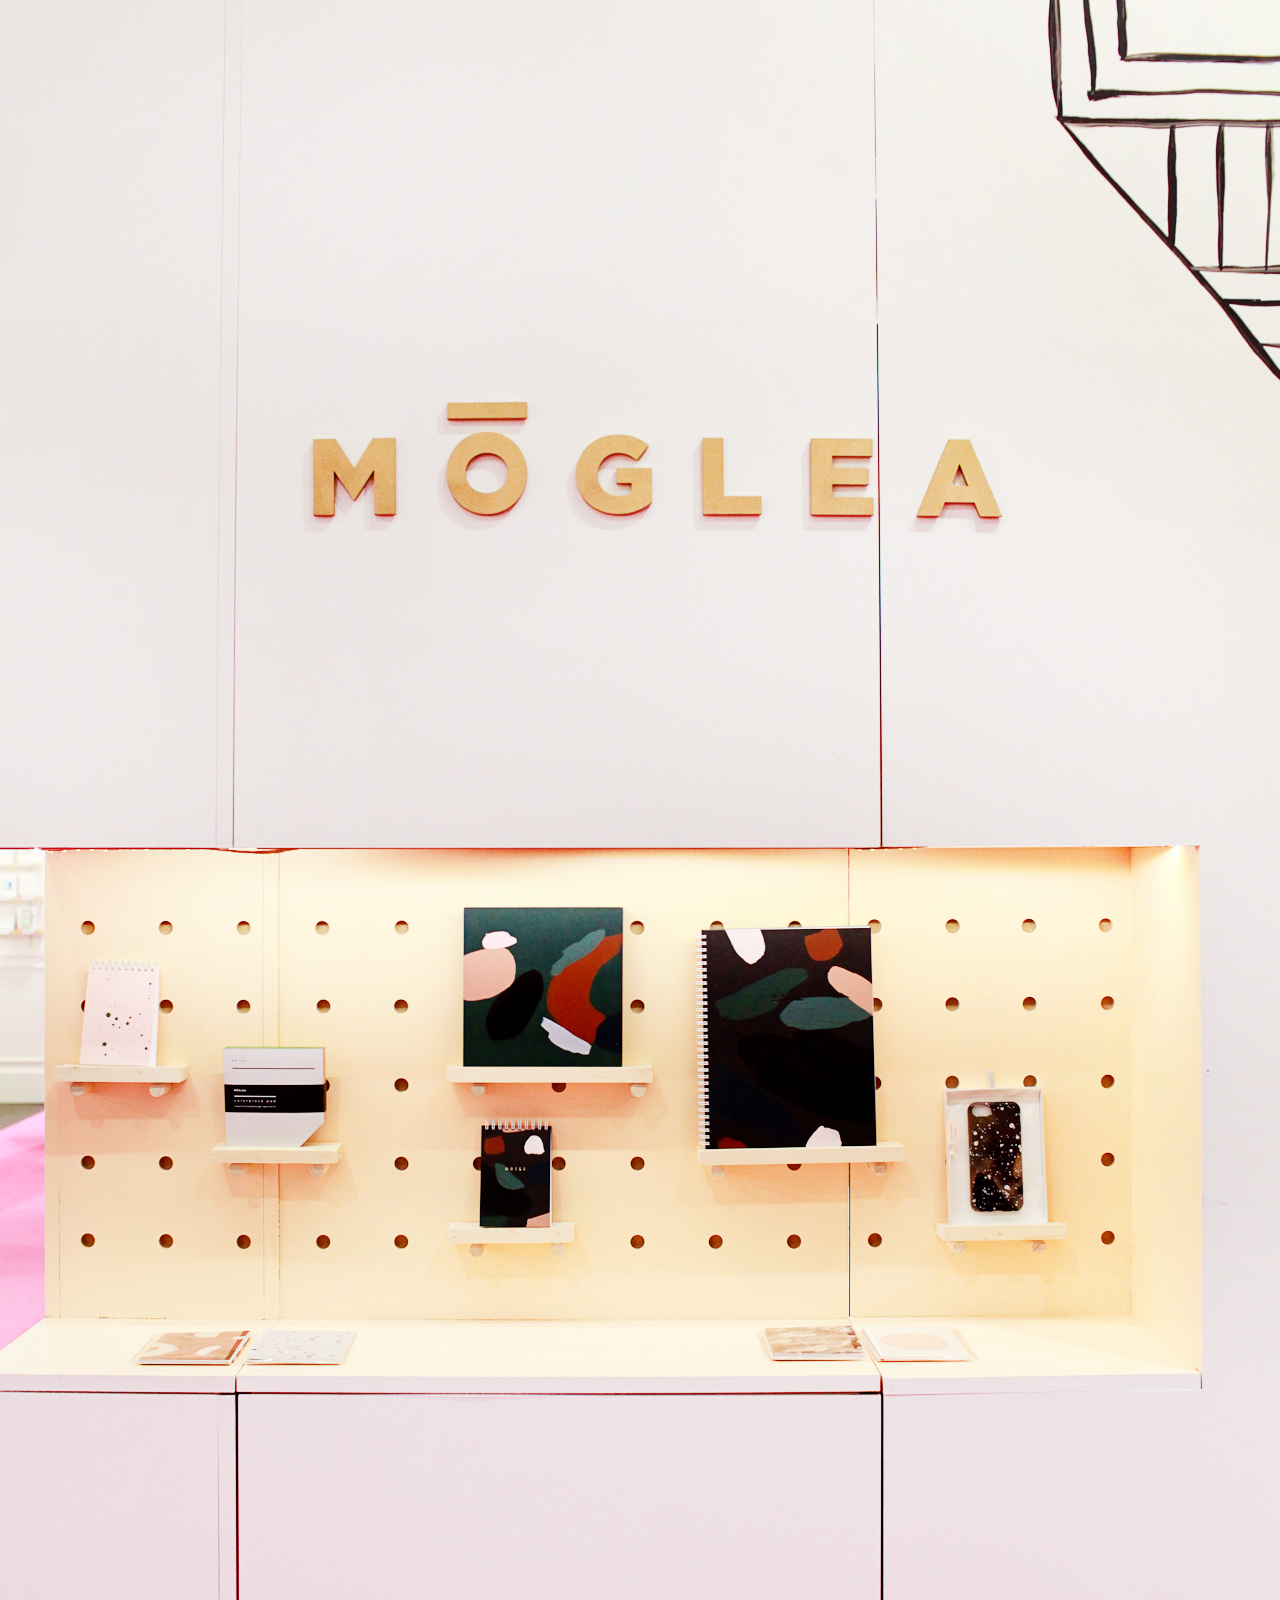
Moglea – see more from the Moglea booth here!
I’m still in awe of the Moglea booth, which displays a curated selection of new products on the pegboard-inspired wood dowel shelves and houses the full Moglea catalogue in the lower cabinets. Total genius.
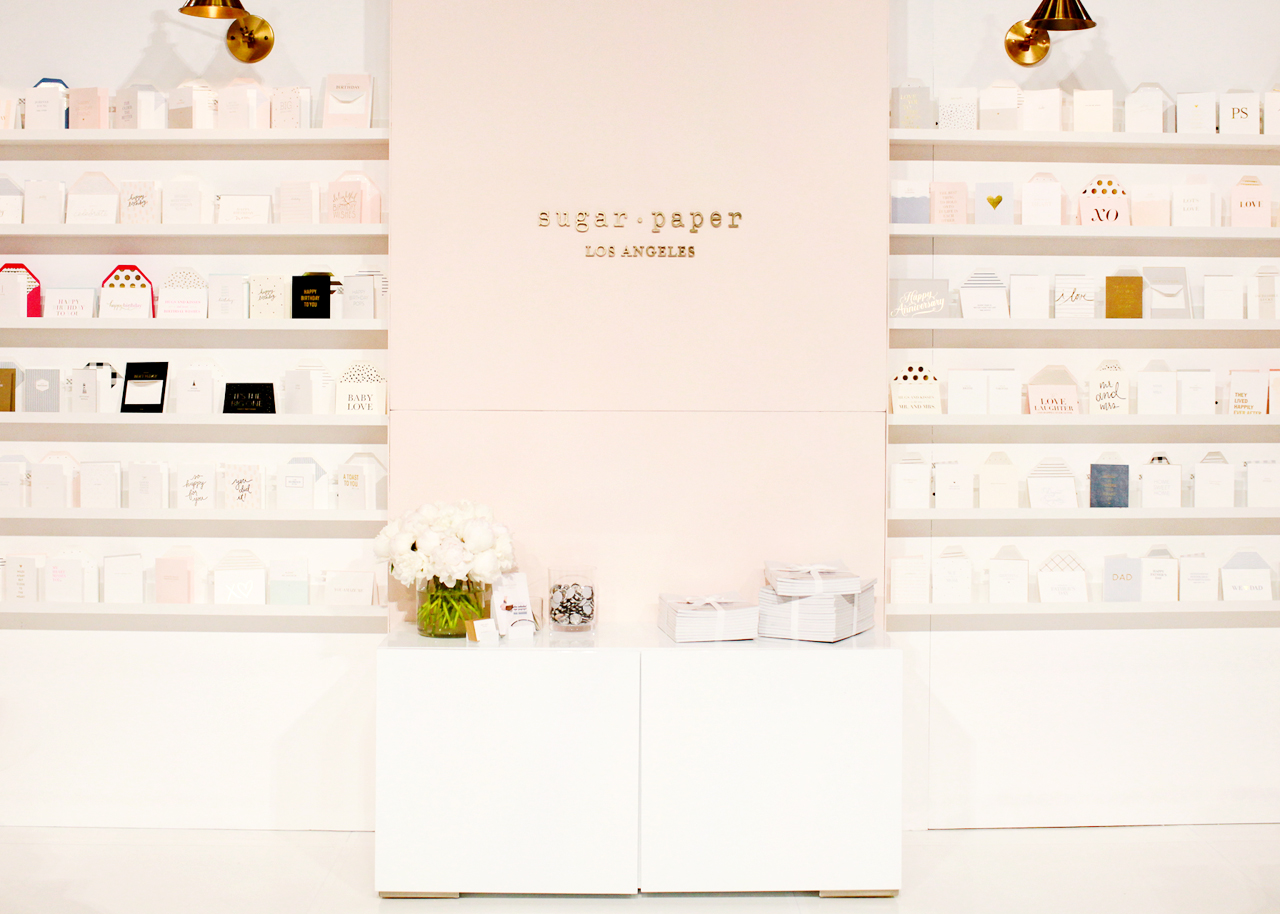
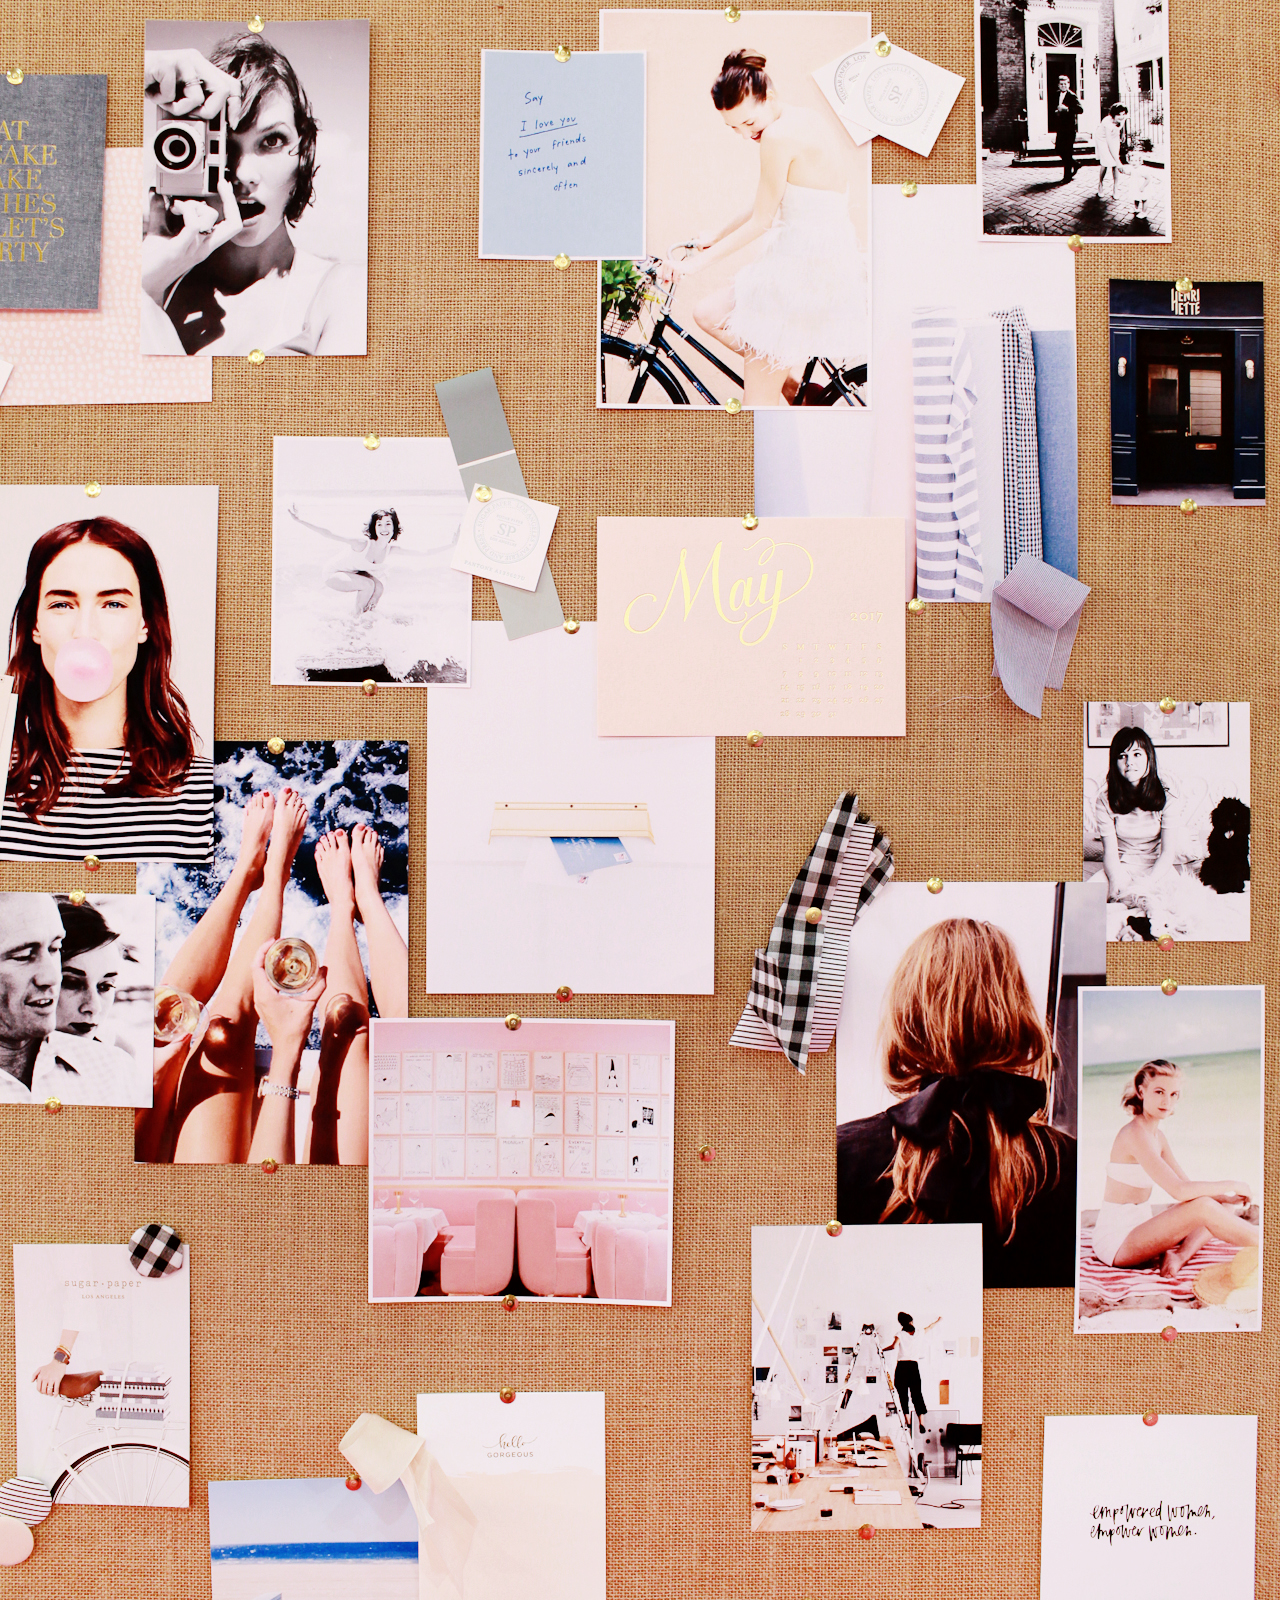
Sugar Paper – see more from the Sugar Paper booth here!
The Sugar Paper booth felt like walking into a beautifully curated stationery store. Also, all trade show booths should come with inspiration boards – don’t you think?

Our Heiday – see more from the Our Heiday booth here!
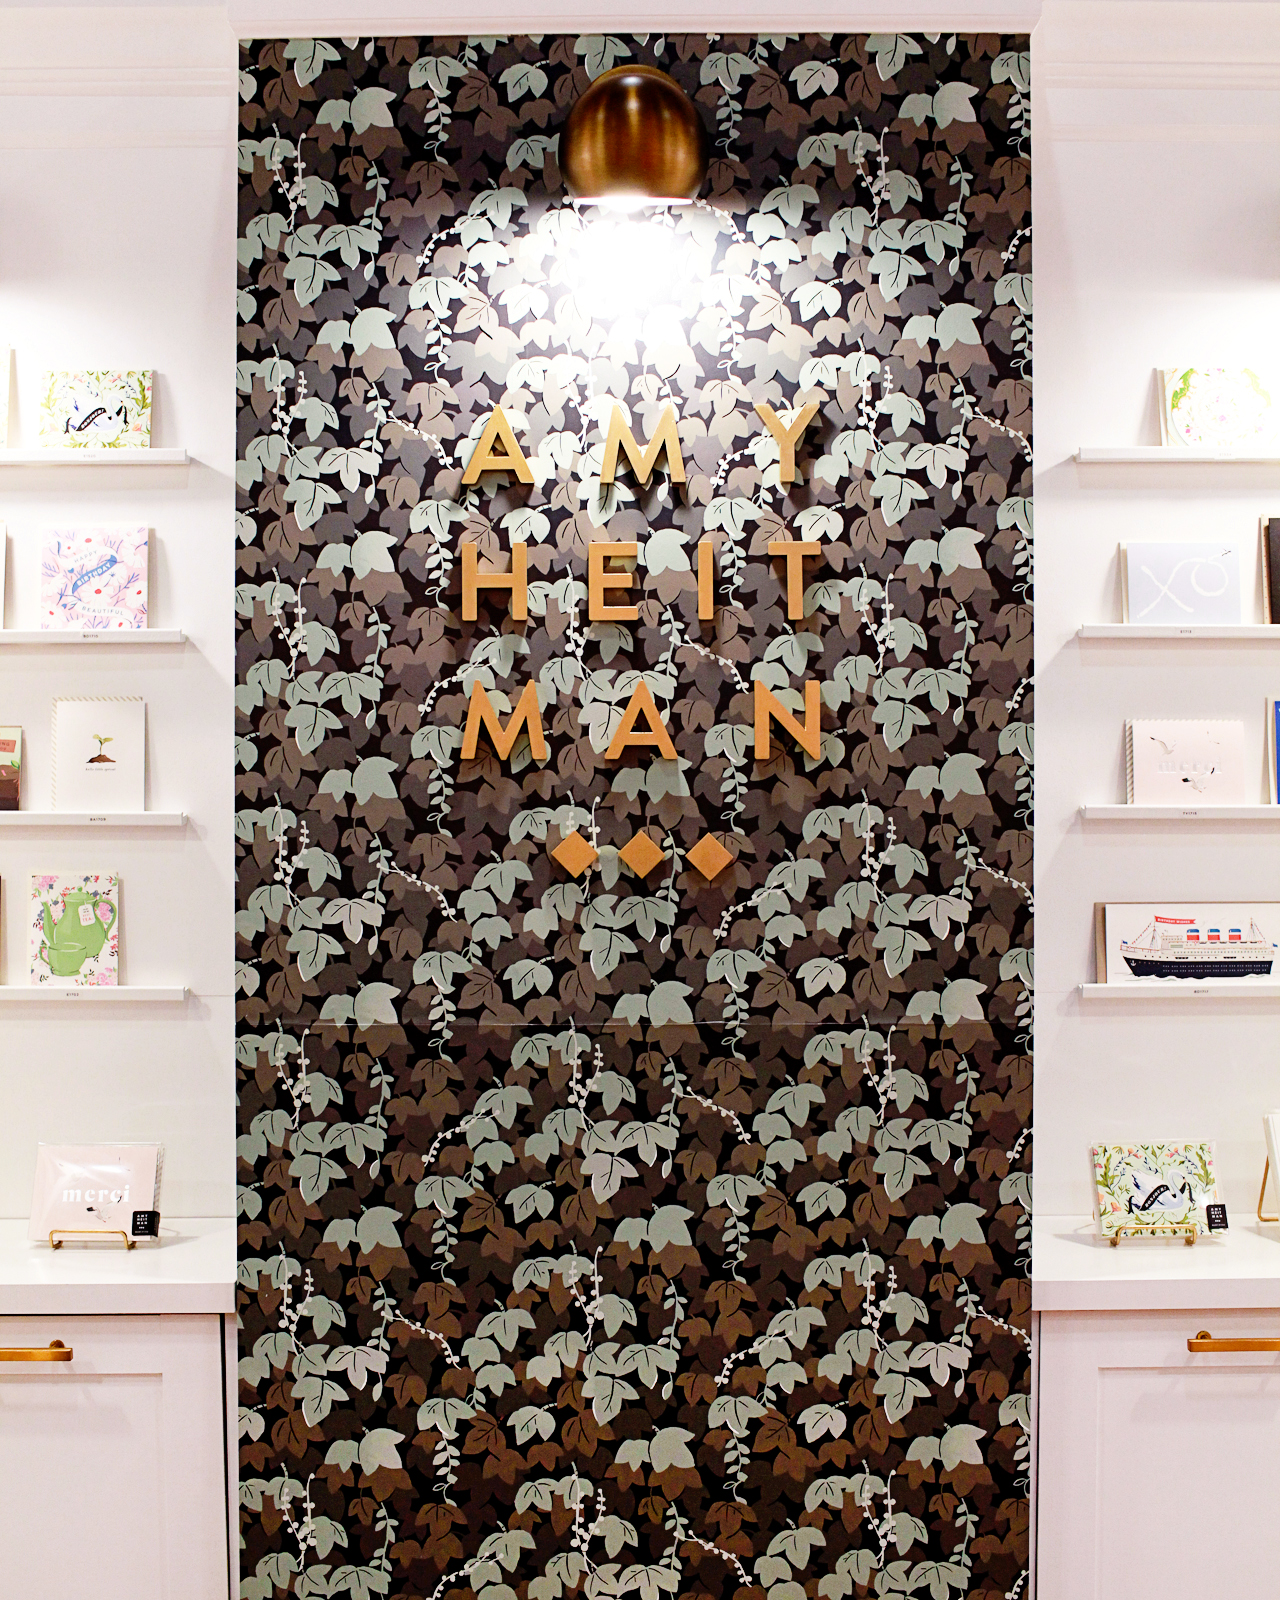
Amy Heitman – see more from Amy Heitman’s booth here!
Wallpaper for the win! Both Our Heiday and Amy Heitman turned their designs into wallpaper for a feature wall in their booths. I’ll just move right in, okay?
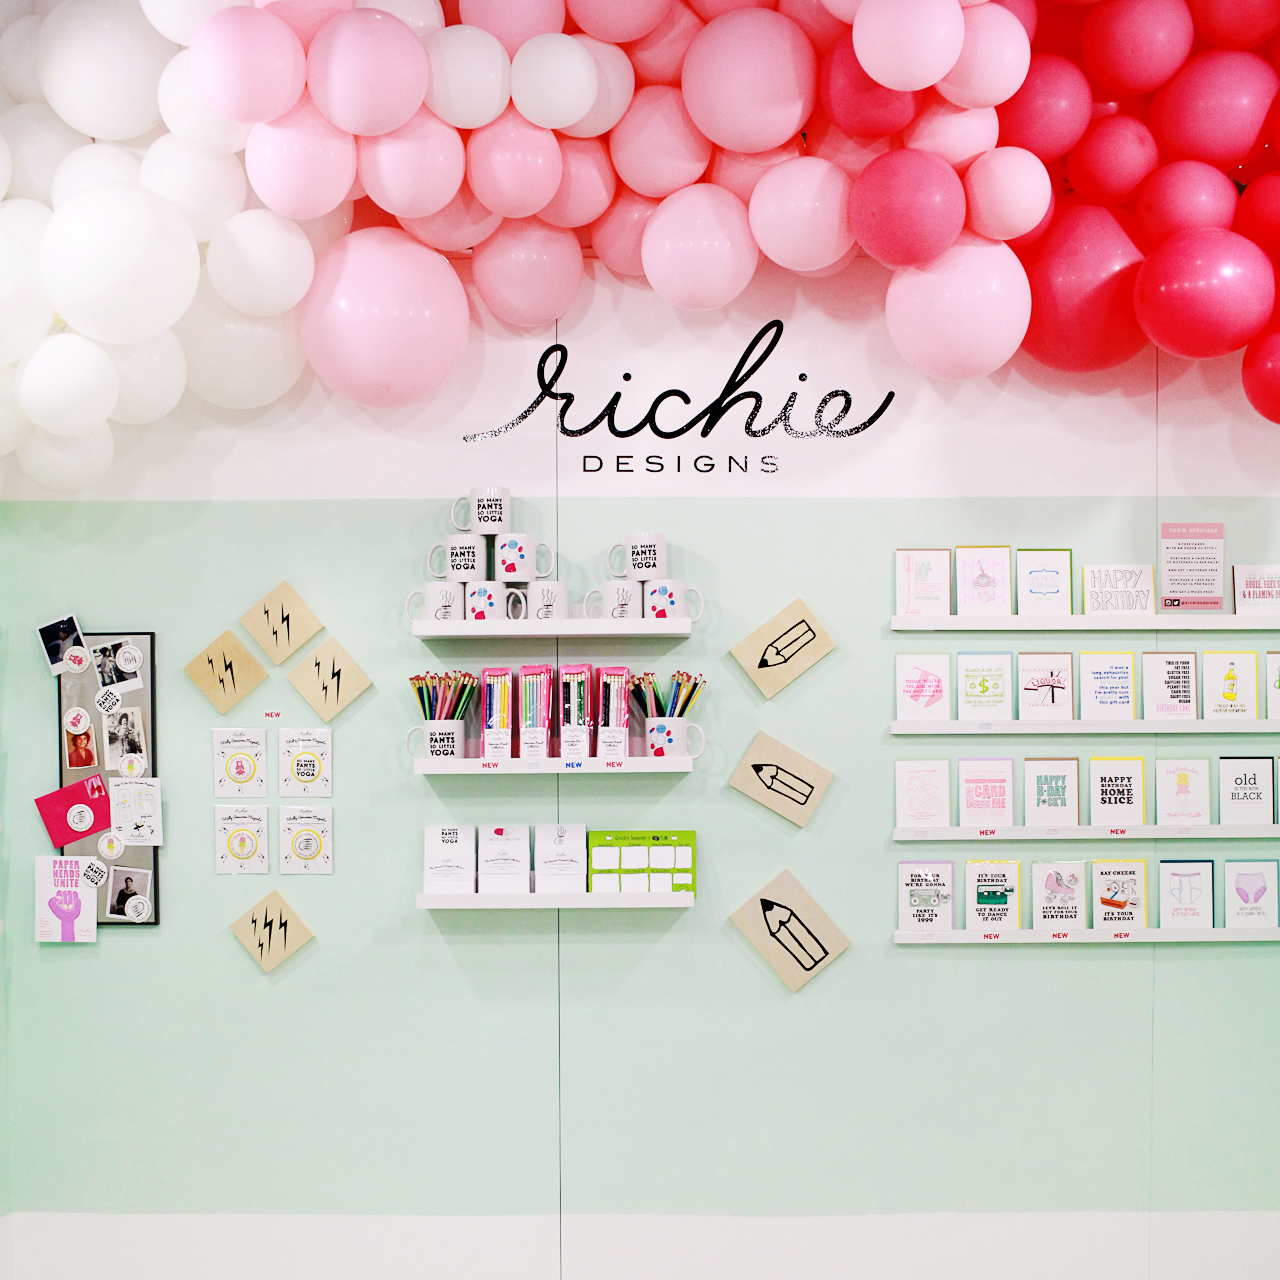
Richie Designs – see more from the Richie Designs booth here!

My Little Day – see more from the My Little Day booth here!
Balloons are such a fun way to decorate a trade show booth! Richie Designs commissioned Wild Child Party to create a balloon installation along the top of her booth for an extra dose of color, while My Little Day created an entire wall made with their printed balloons for big visual impact.
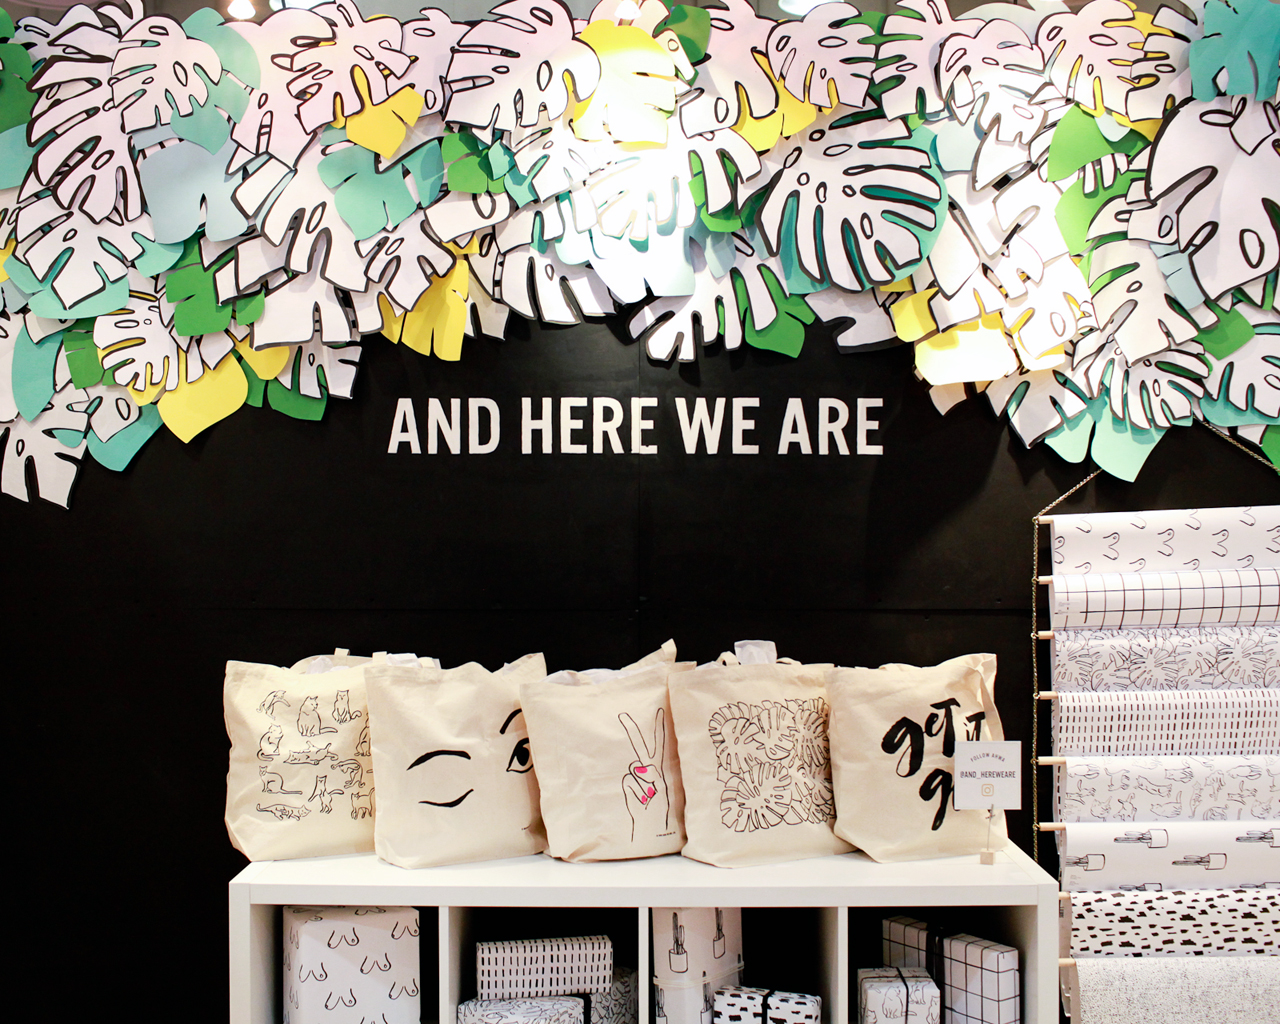
And Here We Are – see more from the And Here We Are booth here!
Vibrant paper monstera leaves lining the top of the And Here We Are booth! Such a great way to make a visual impact without sacrificing precious product display space.
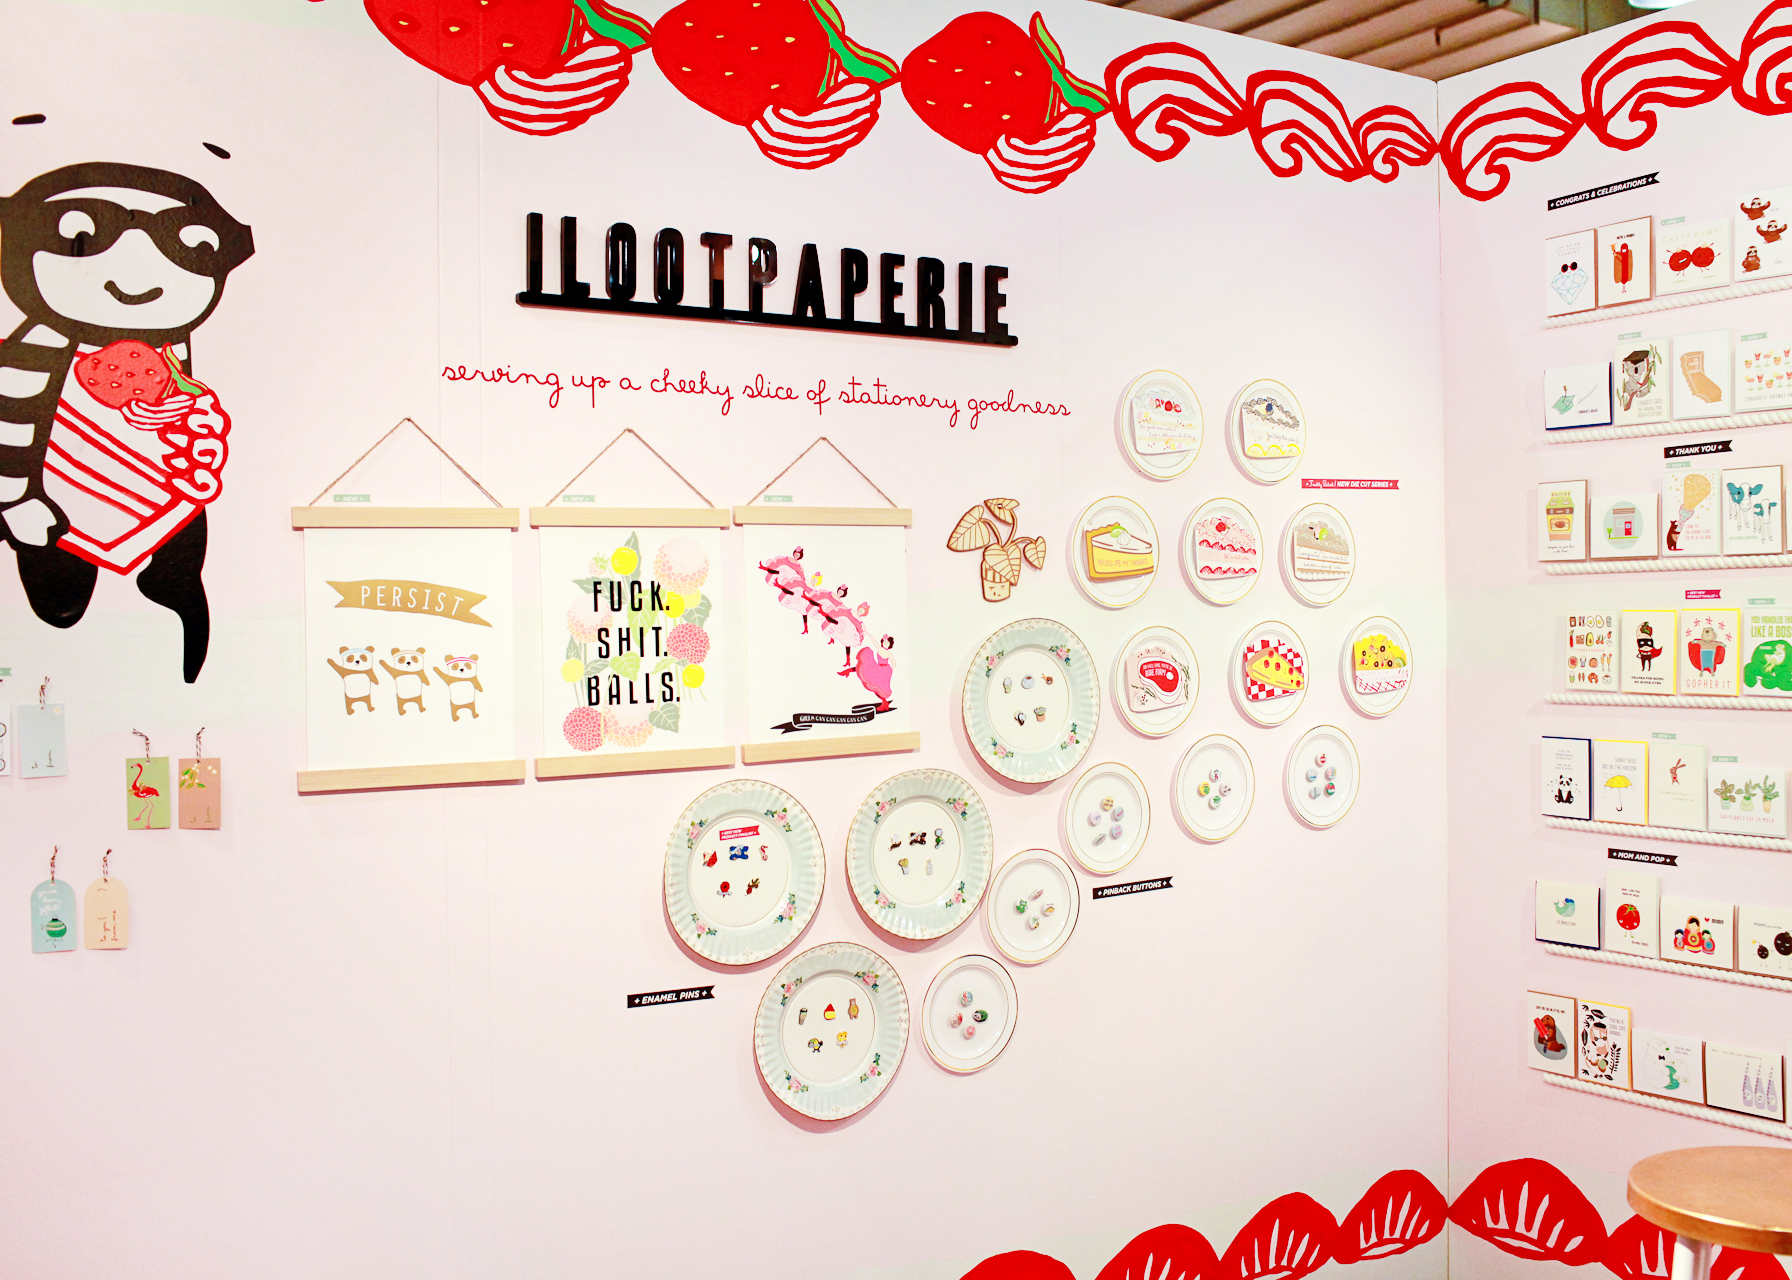
ilootpaperie – see more from the ilootpaperie booth here!
It’s hard to tell from this photo, but ilootpaperie decorated their entire booth to look like a piece of cake! See the frosting along the top and bottom edges, and the strawberries? So fun!
So what are you thinking about the new trade show gallery? Do you like having all the images in one place? Or did you prefer the long recaps on the main page? Should I even still be doing NSS recaps on the blog, or just stick to highlights on Instagram? I’ve been thinking about the way I cover these trade shows a LOT these past few weeks, so I really do want to hear your opinion!
I’ll be back tomorrow with another recap from the 2017 National Stationery Show!