Green and Neutral Holiday Gift Wrap Inspiration

Now that we’ve got our Christmas shopping mostly under control, it’s time to move onto gift wrap! I put just as much time into thinking about the wrapping paper and ribbon as I do the actual gift inside, and I tend to switch my color palette from year to year. I’ve definitely been feeling more of a subdued holiday color palette this year – mostly deep greens paired with neutrals (including blush, cream, white, and black) and pops of gold and red. So today I thought I’d share some green and neutral holiday gift wrap inspiration and resources!

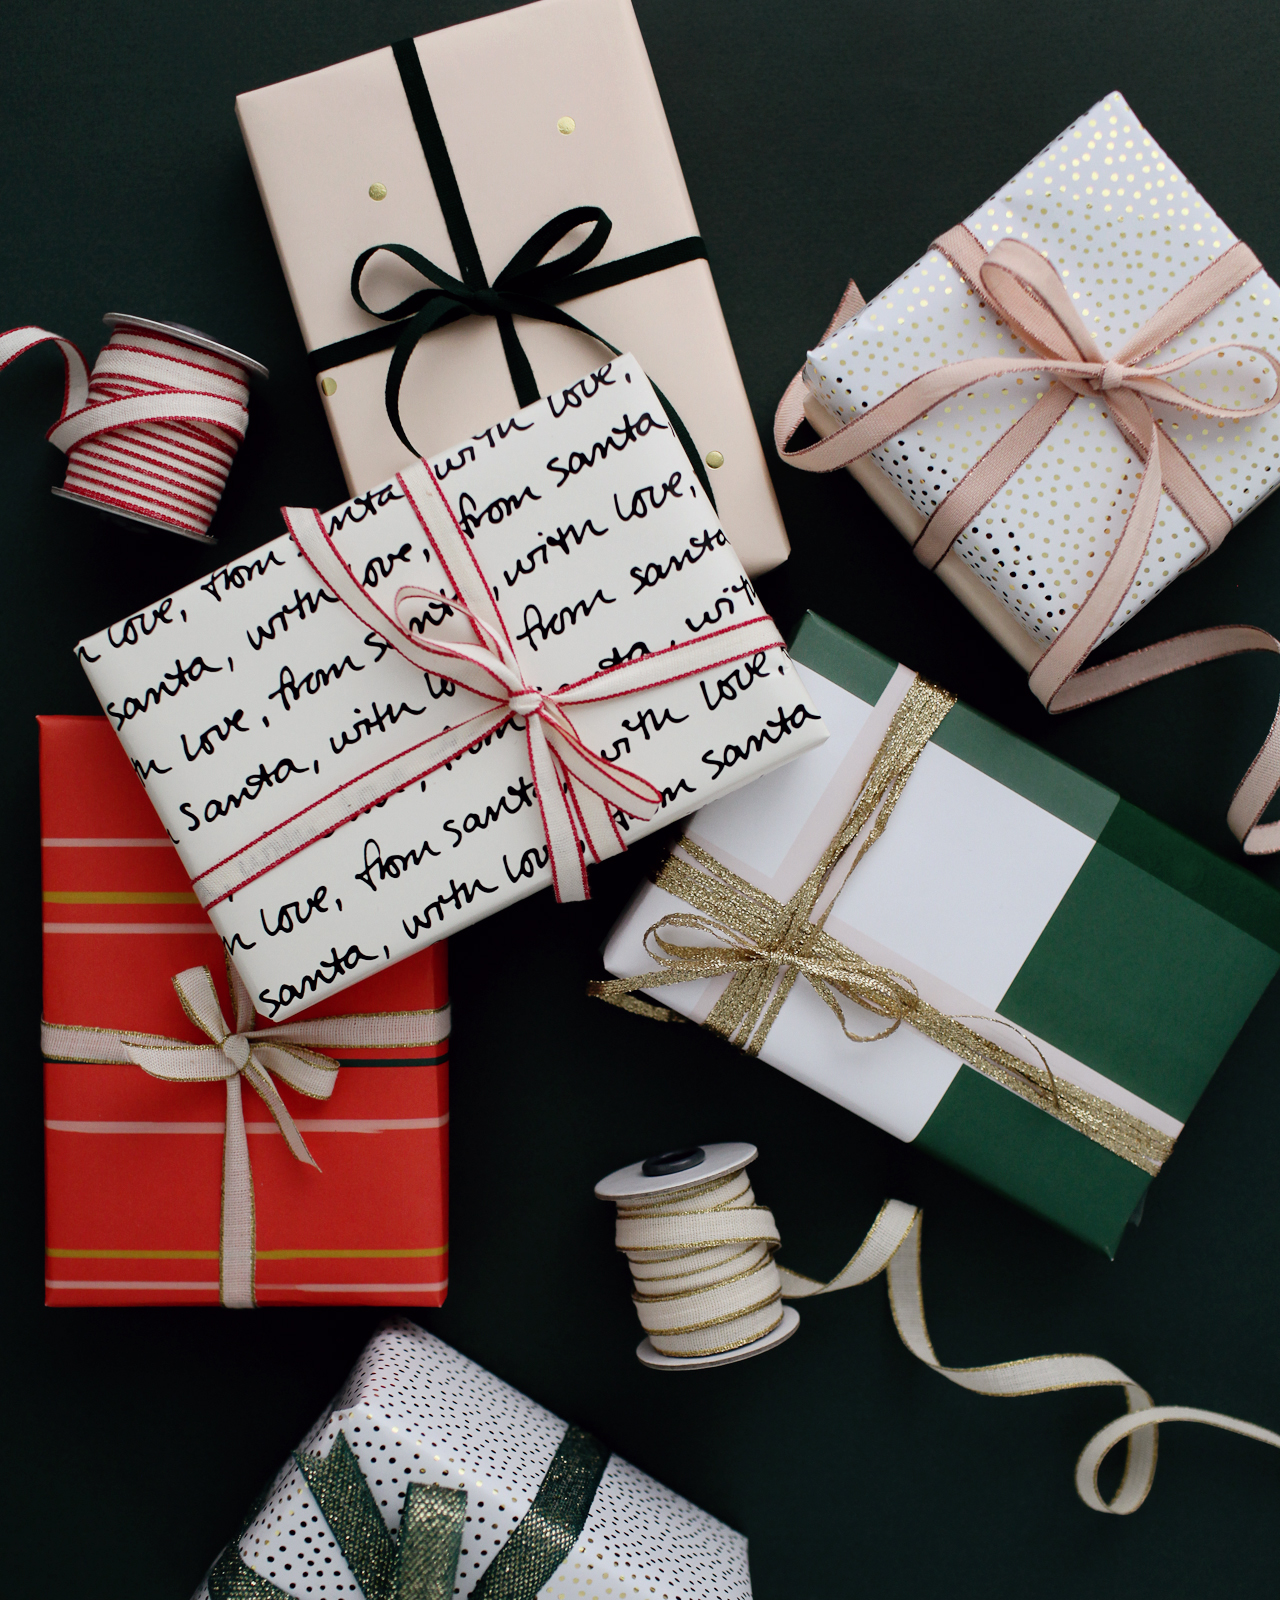
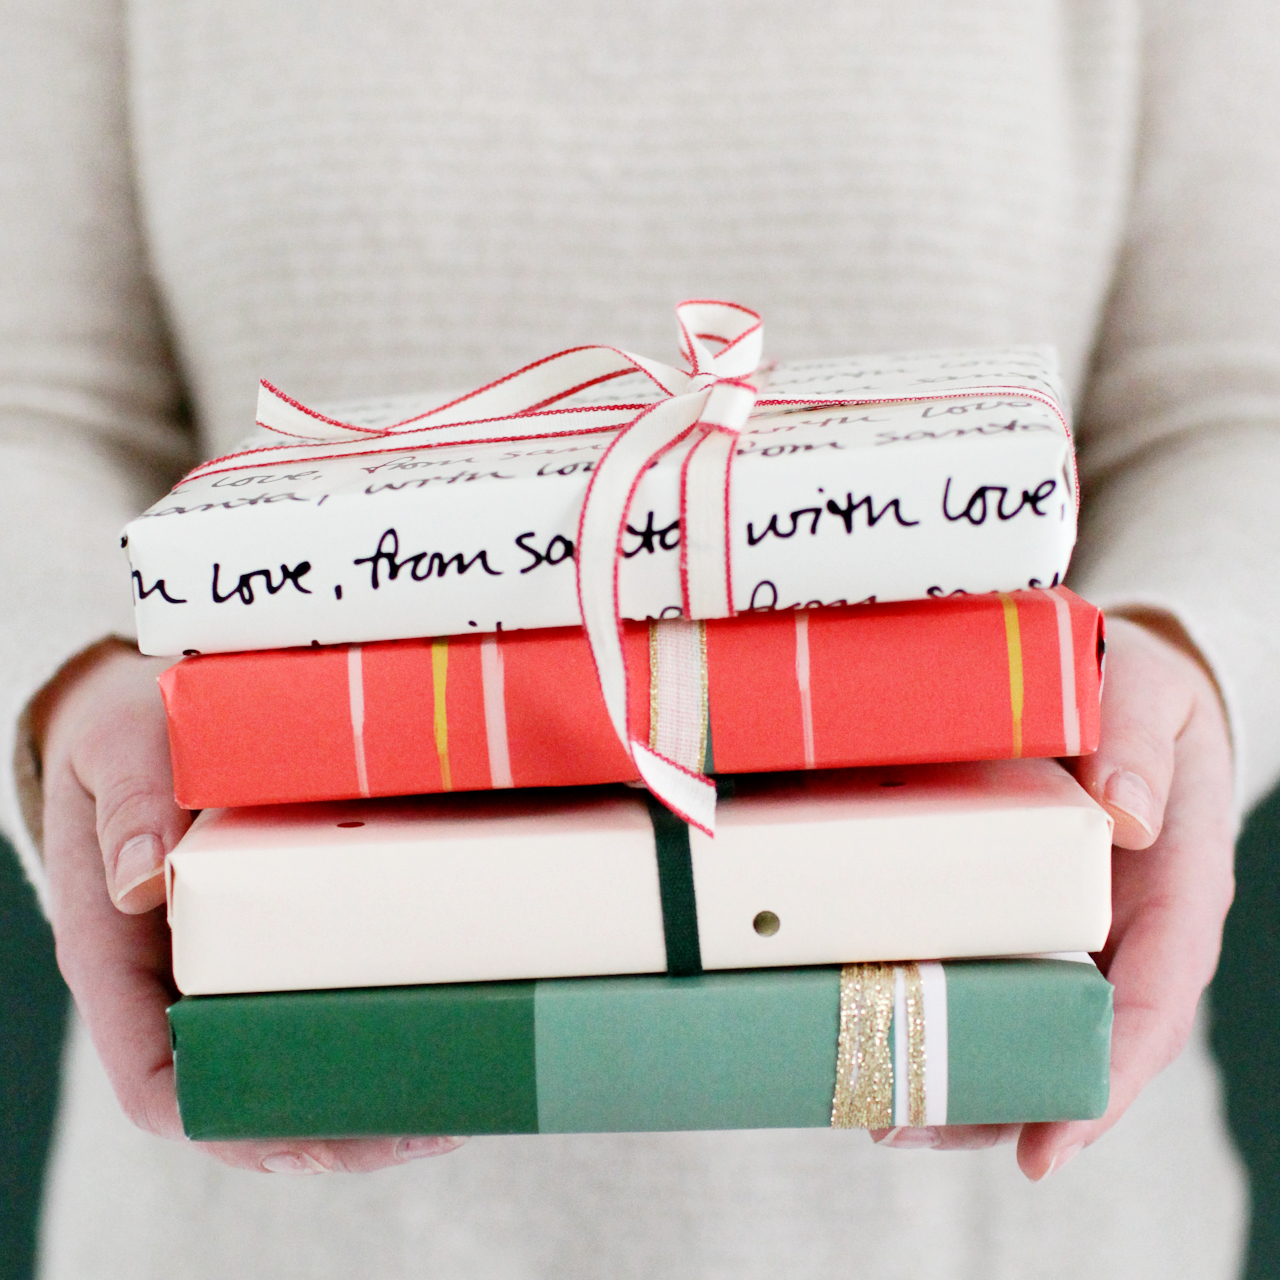
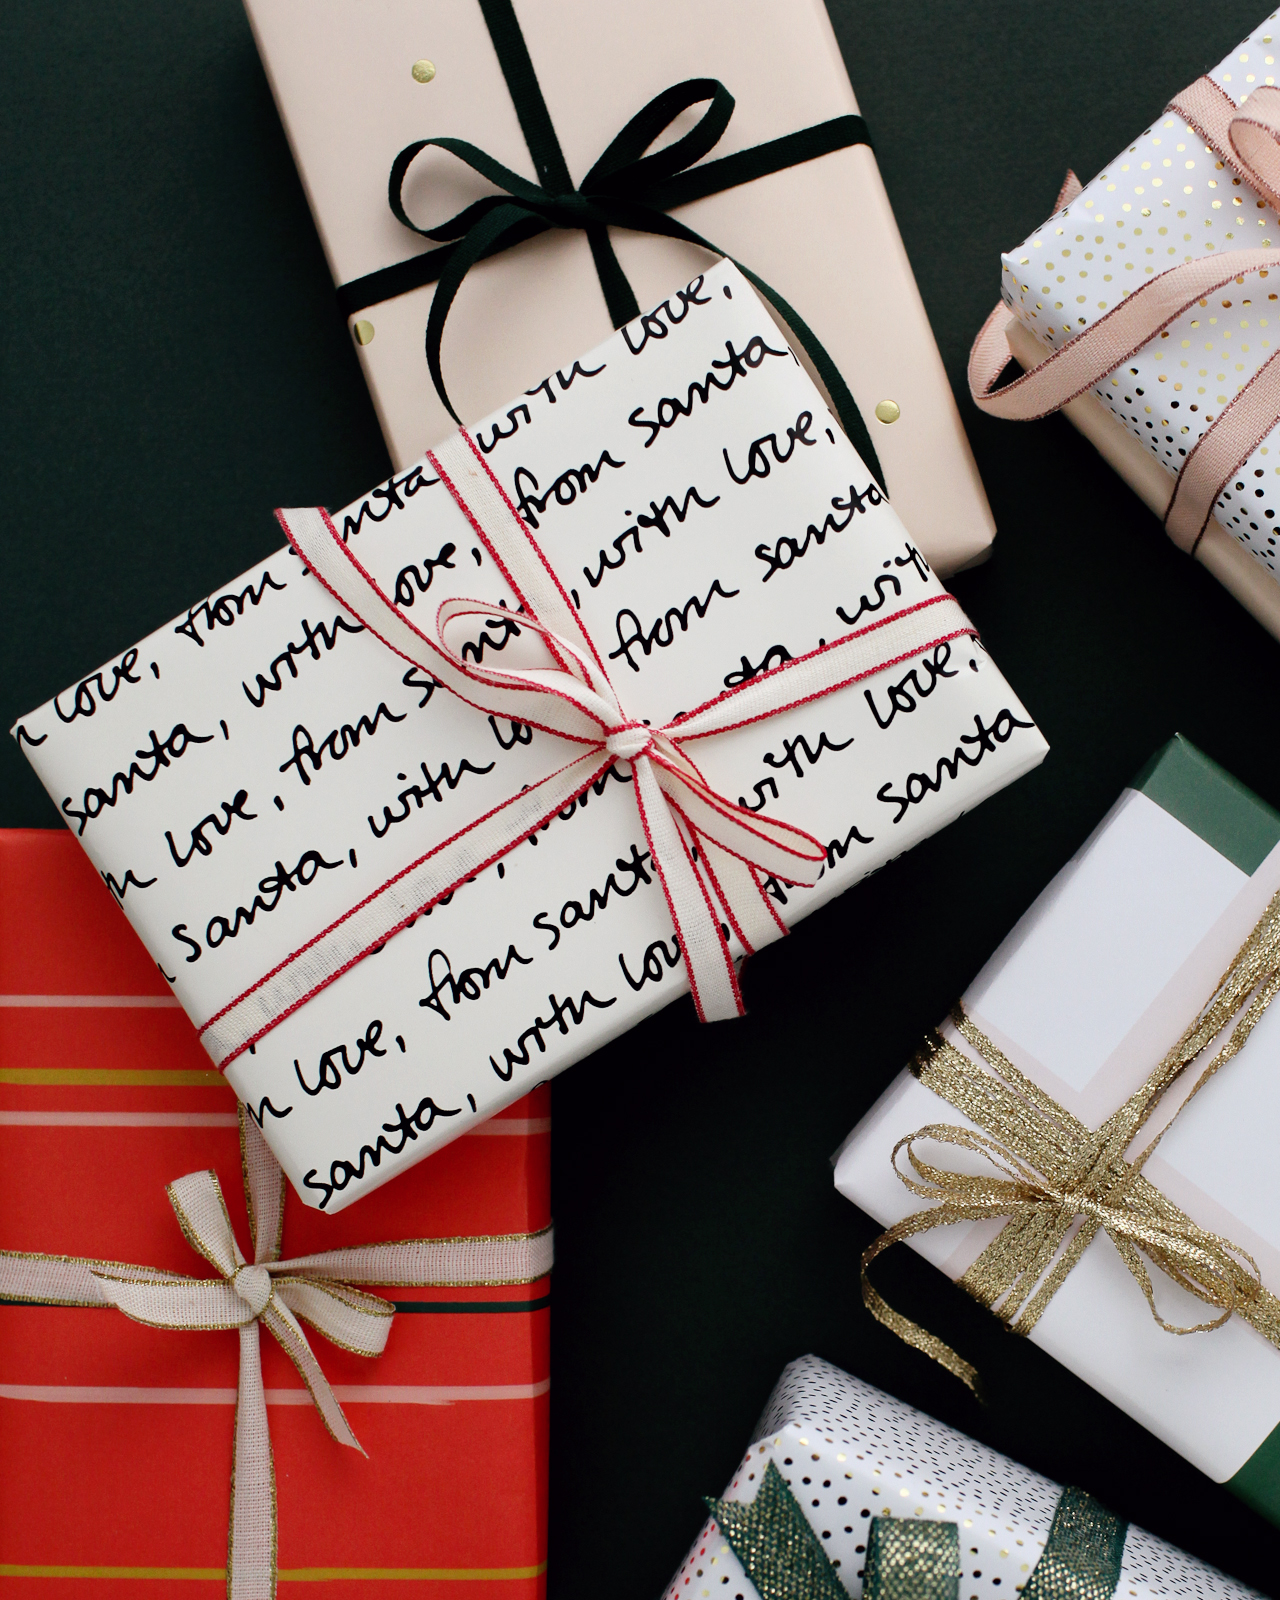
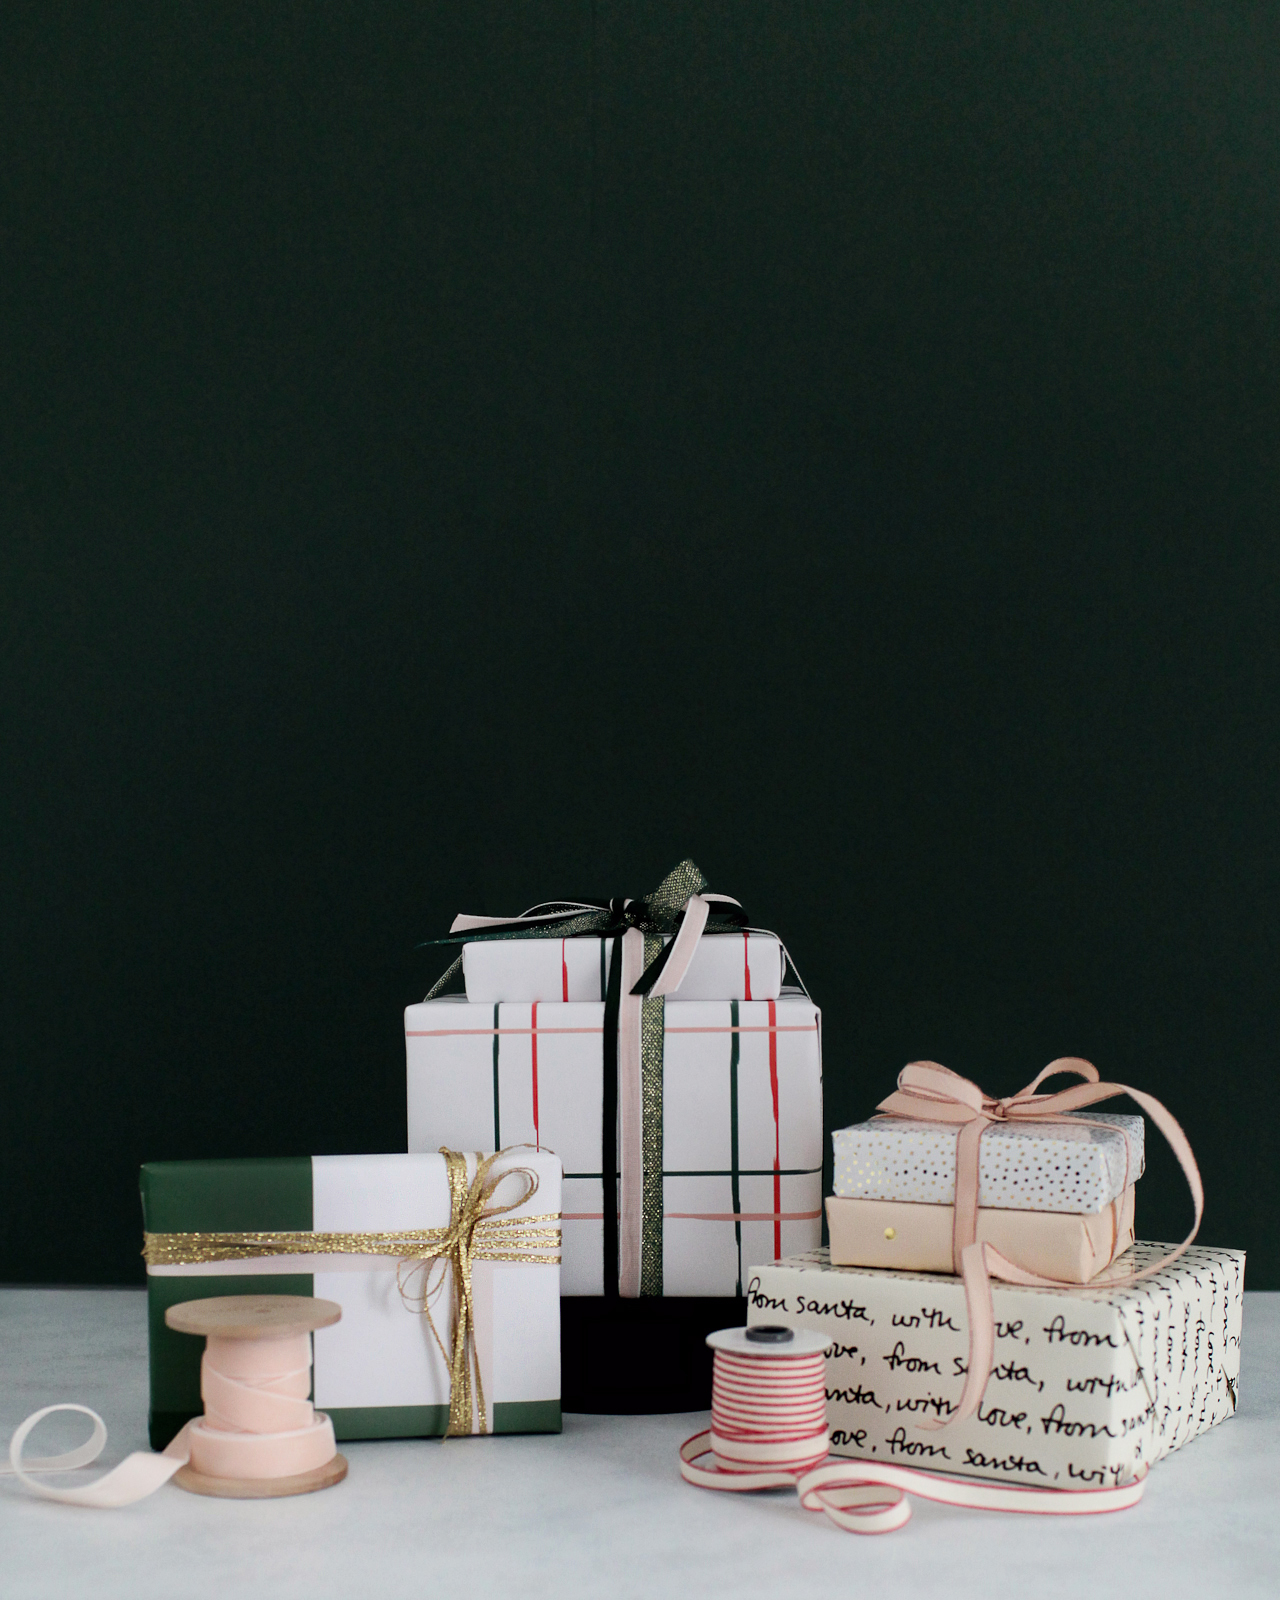
Okay, so let’s start with the wrapping paper. I always decide on a color palette before choosing patterns, and this year’s color palette was deep green, cream, white, black, gold, and blush with just a wee bit of red. I find that you can mix any pattern as long as you stick to a particular color palette, so there’s a mix of everything in here: plaid, dots, stripes, and even lettering this year!

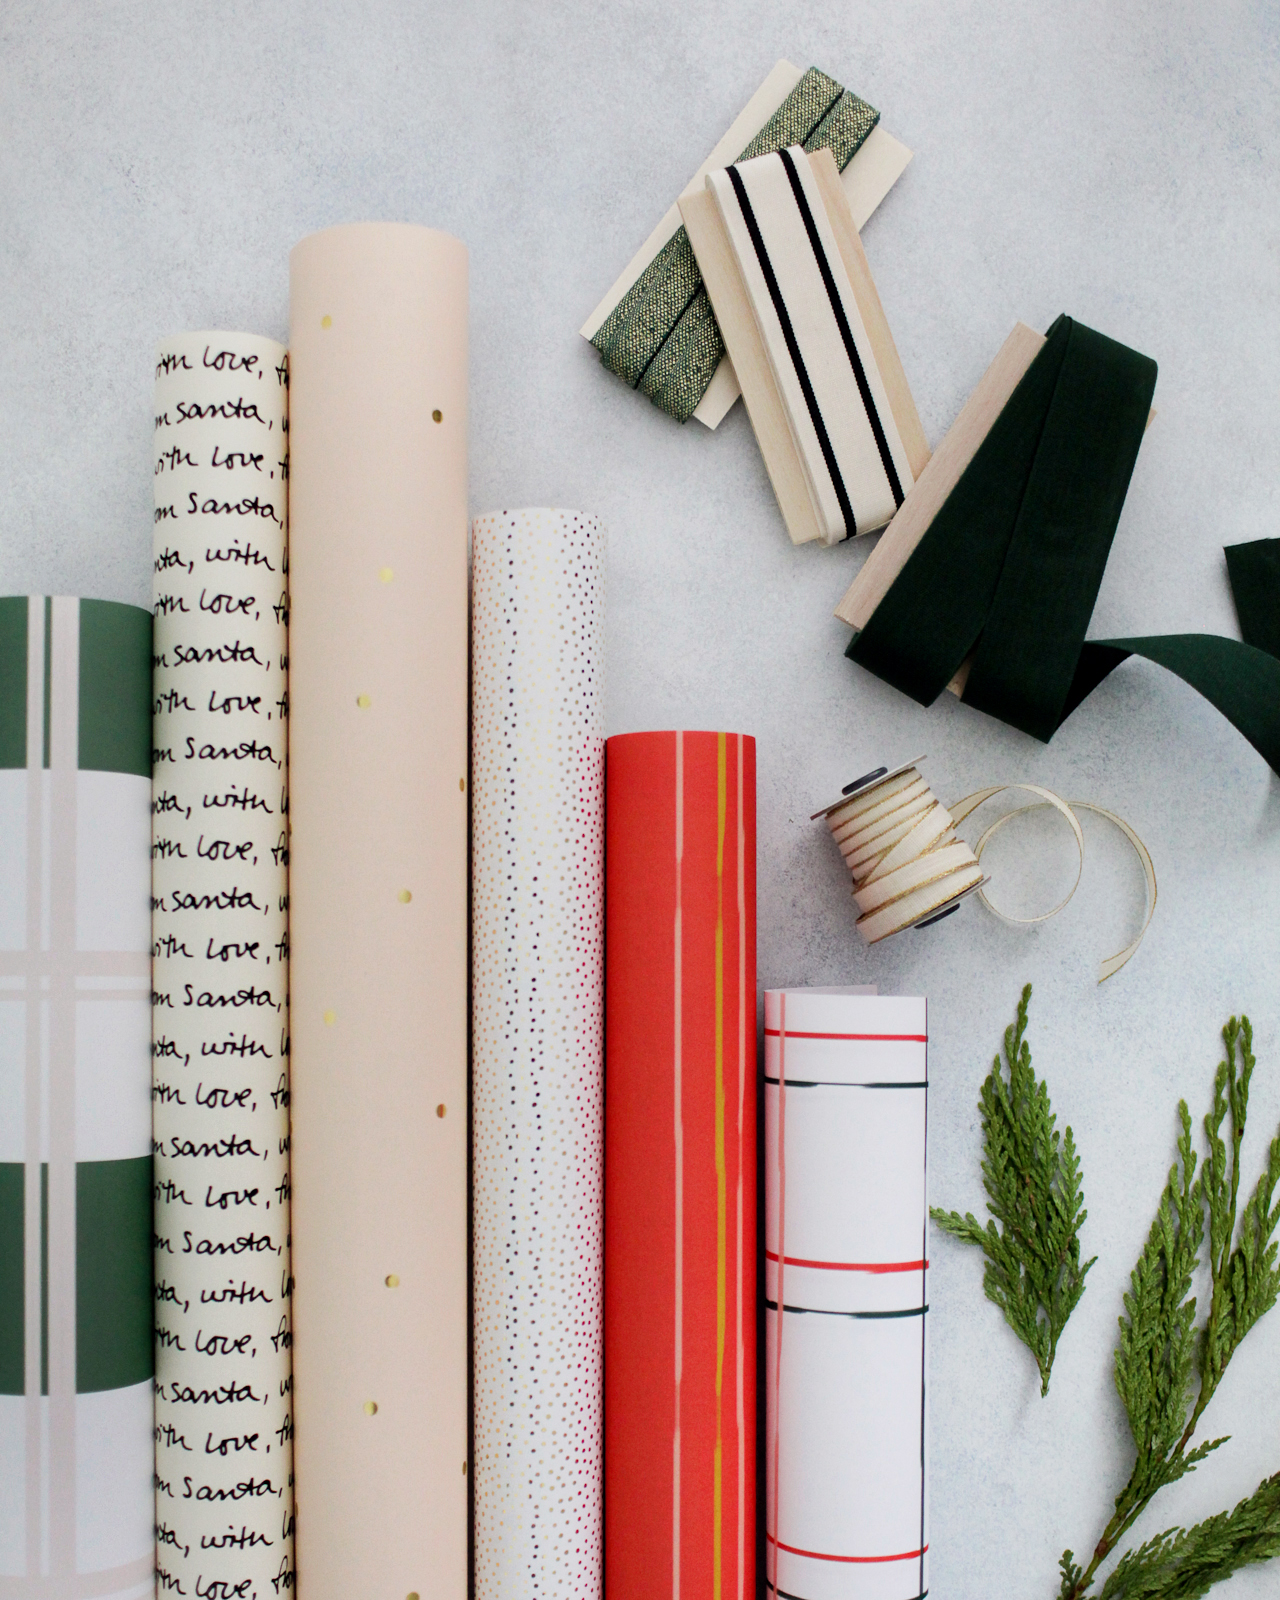
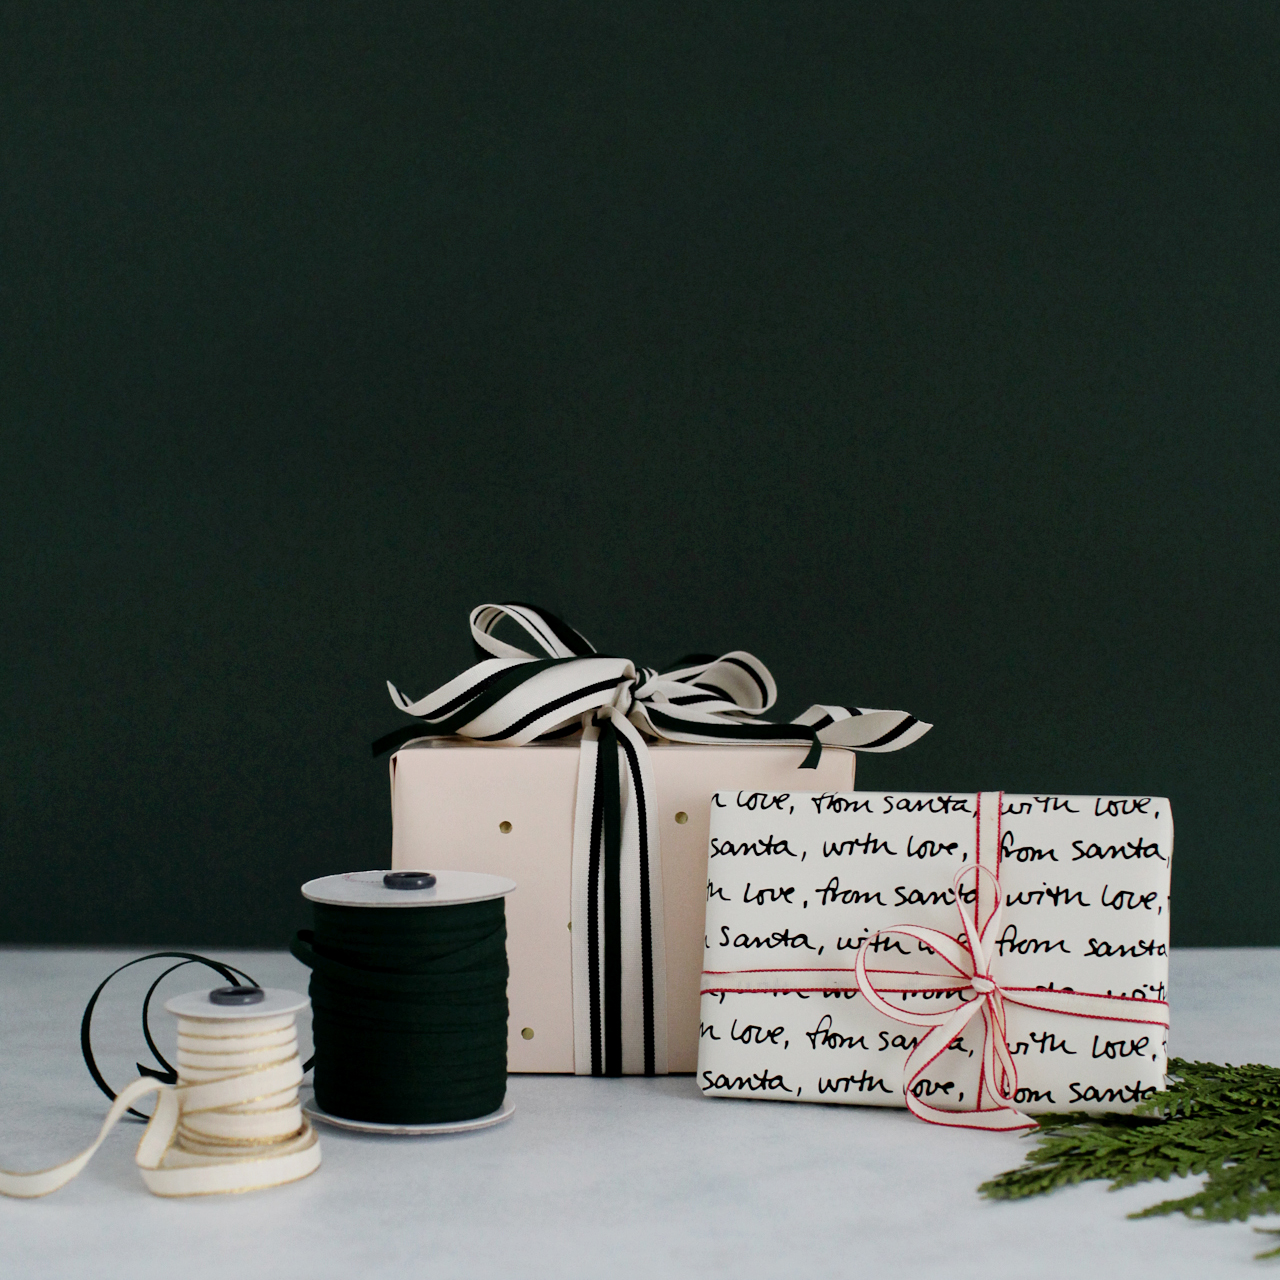
The Sugar Paper for Target holiday collection has become one of my go-to wrapping paper resources the last couple of years – the patterns are just so cute! I particularly loved the gold foil snow dots, pale pink with gold dots, and cream and black Santa lettering patterns. I also incorporated a few plaid and striped patterns from Copper Paper Co. and an abstract pattern from Our Heiday! I’ll put all the sources at the bottom of the post for you.

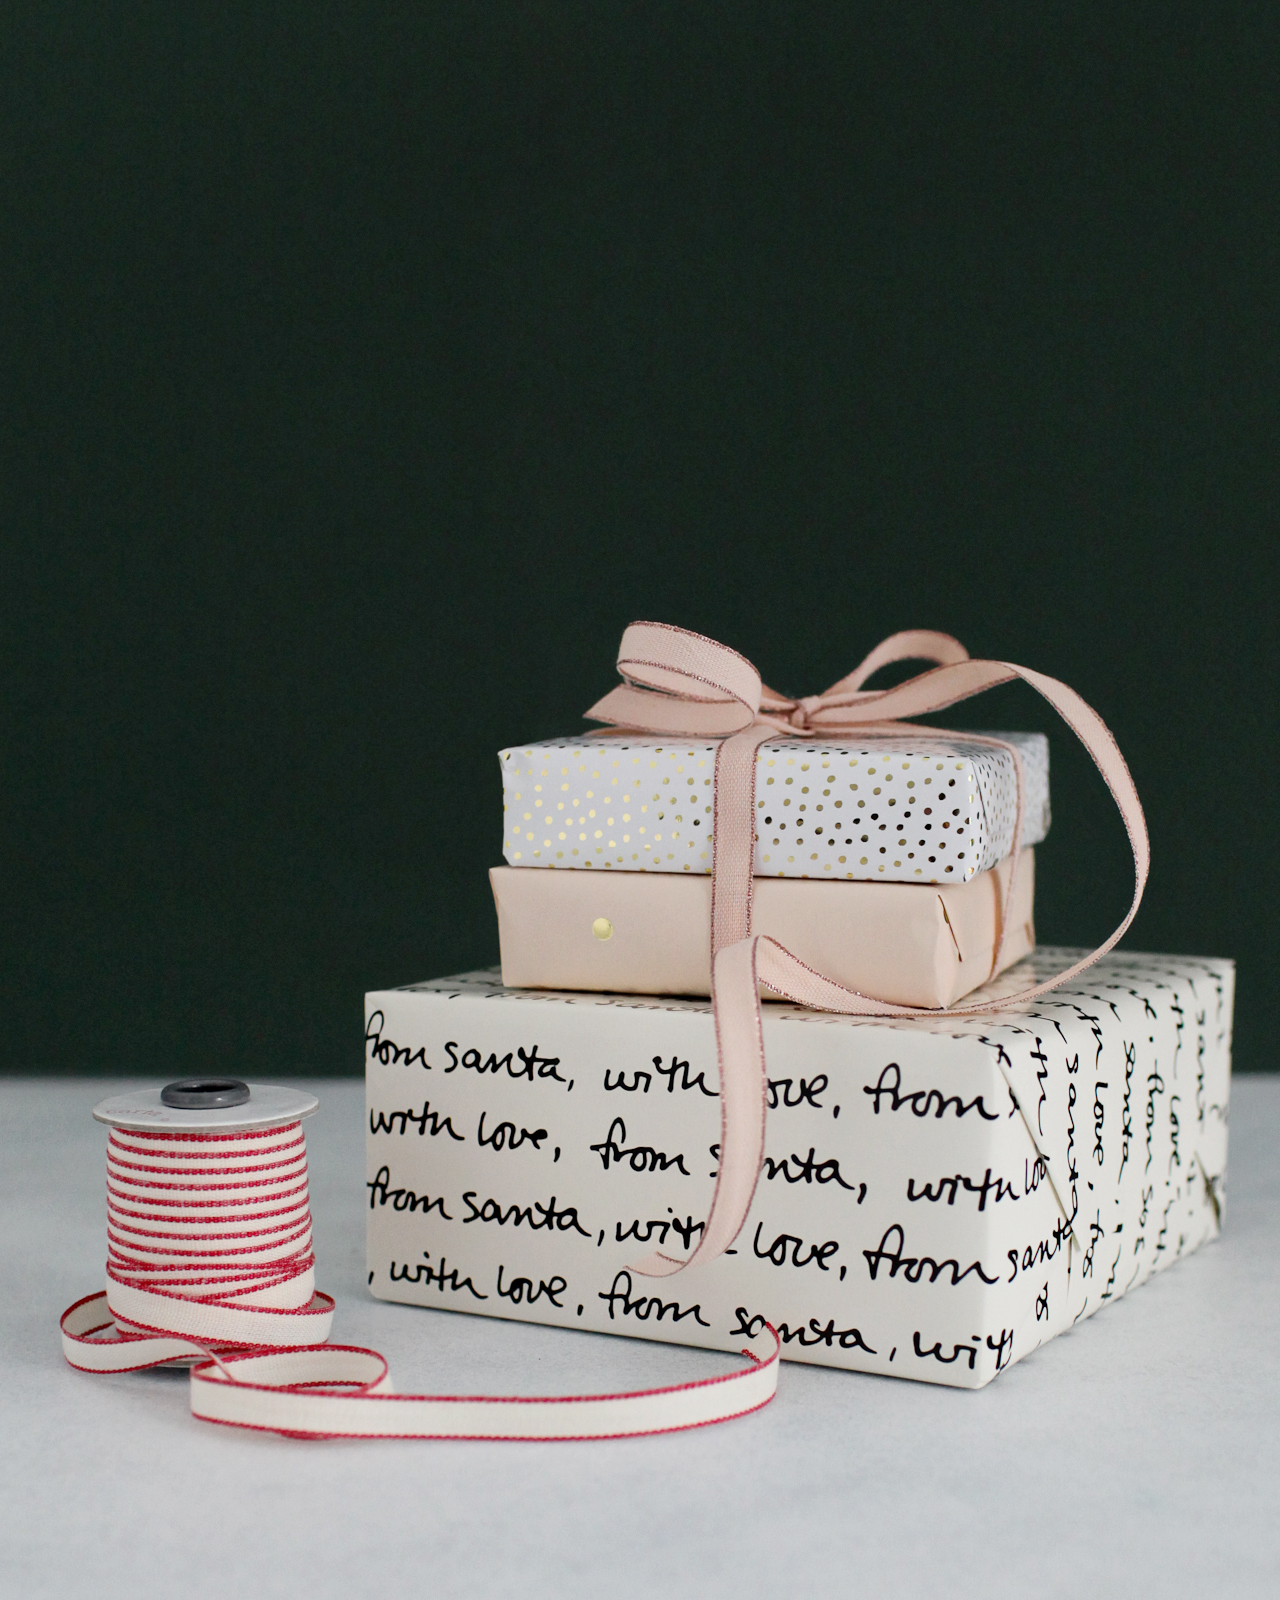
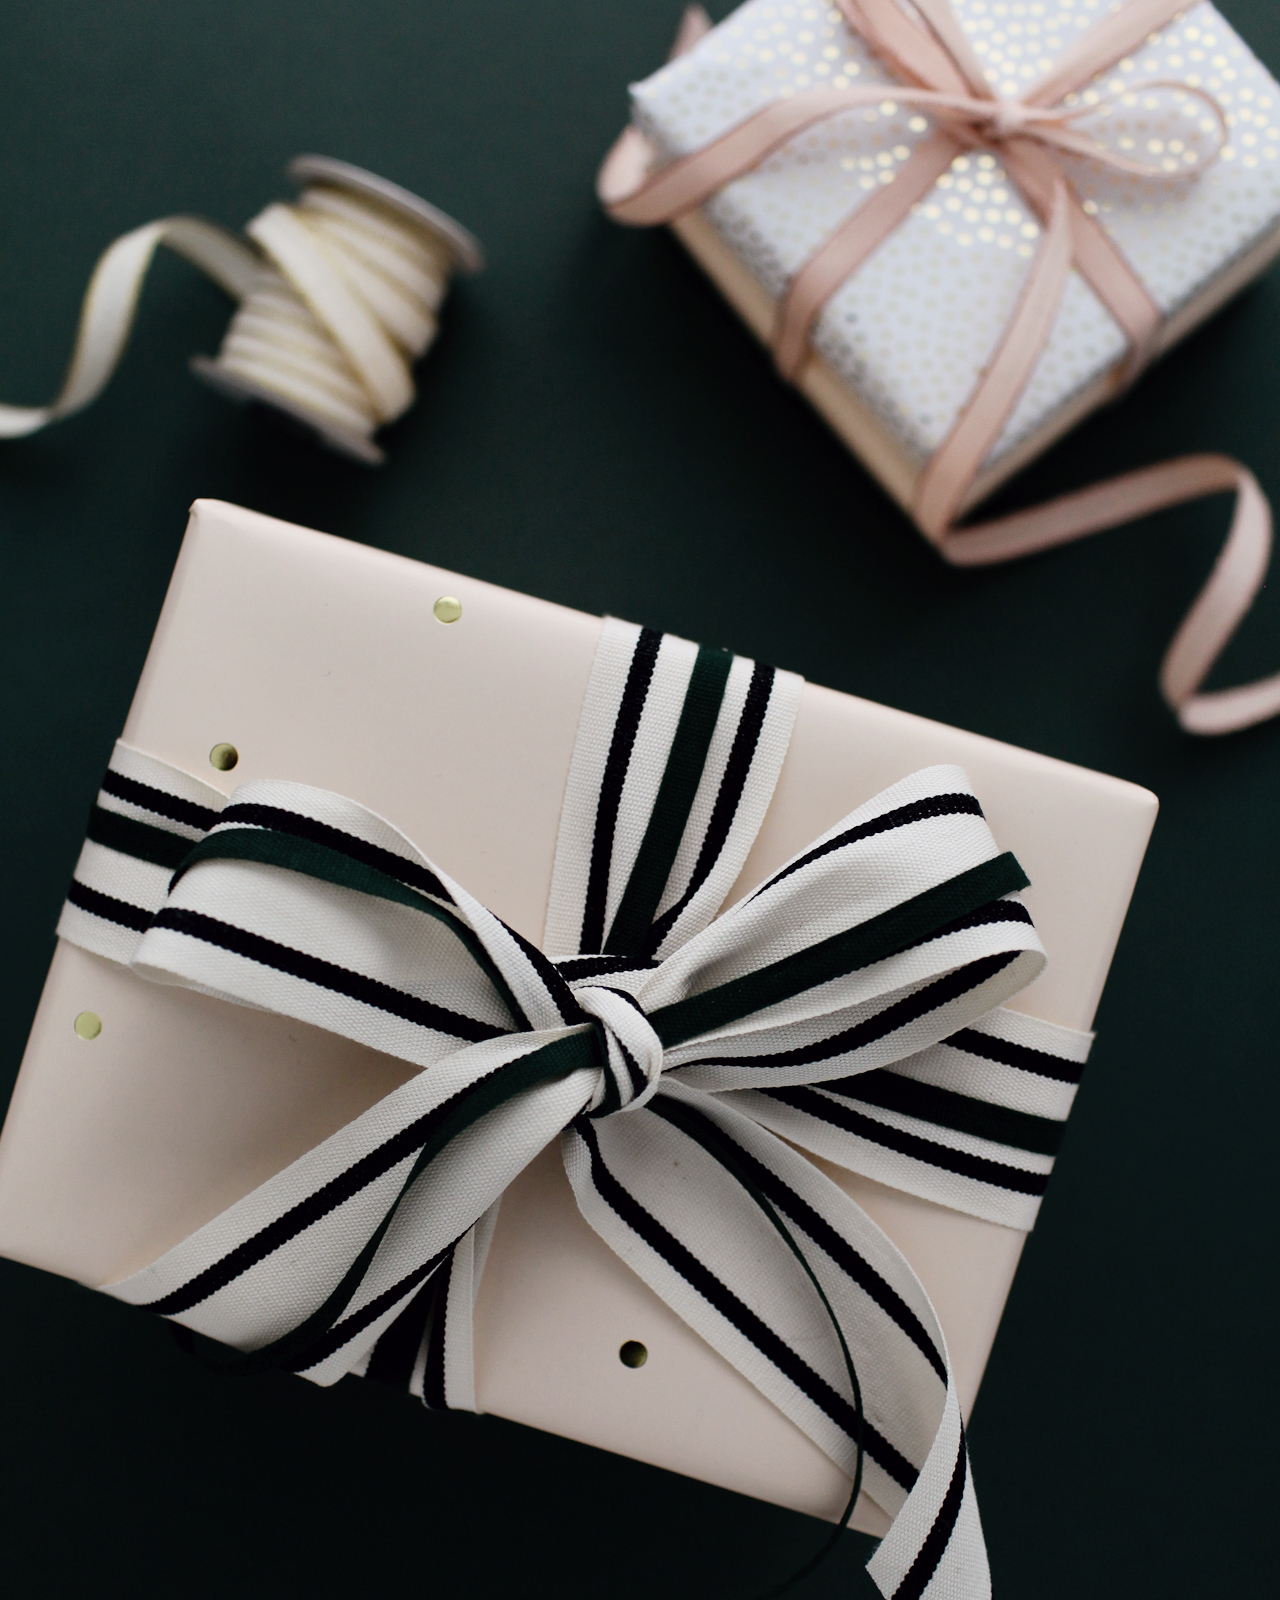
When it comes to ribbons, I always start with Angela Liguori‘s beautiful Italian ribbons – she really makes the most beautiful ribbon in the most beautiful colors. I’m especially loving her new deep green color (called Cypress), which is available in a variety of tight weave widths. I used several of Angela’s drittofilo ribbons this year (the ones with thin piping along each edge), along with a metallic loose weave ribbon and 1/8″ metallic braided ribbon.

It can be tricky to know which size ribbon to choose – but I generally go by the size of the box: a larger gift (and larger box) requires a wider ribbon, while a smaller box requires a smaller ribbon. You can also try combining a few thinner ribbons to create the illusion of a wider ribbon. I also love wrapping a thin ribbon (like the 1/8″ metallic braided ribbon) around a box several times to create added texture and interest. 

I also normally try to incorporate a wired ribbon into my collection for wrapping larger boxes, but I just couldn’t find anything I really loved this year! So I picked up this blush pink velvet ribbon from the Sugar Paper for Target collection, which I’m saving for a special shared present that my husband and I are planning to give to our daughters for Christmas. I also really love the velvet ribbon colors in this shop. Velvet is so dreamy this time of year!

RESOURCES

Gift Wrap

Sugar Paper for Target in gold foil snow dots, pale pink with gold dots, and cream and black Santa lettering

Copper Paper Co. in holiday plaid, poppy red stripe, and evergreen plaid

Our Heiday Winter Colorscape Gift Wrap

Additional independent gift wrap resources: Amy HeitmanIdlewild Co., Shannon Kirsten, Paula & WaffleSnow & Graham, Fox & Fallow, and Knot & Bow

Ribbons

Angela Liguori tight weave cotton ribbon in cypress – both 1 1/2″ width and 1/4″ width – and striped natural/black 1 1/2″ ribbon, metallic loose weave ribbon in jade/gold, and drittofilo ribbon in natural/red, blush/rose gold, natural/black, petal/white, and natural/gold (I just keep adding to my collection each year!)

Sugar Paper for Target velvet ribbon

Tulip Bloom 3/4″ velvet ribbon

So that’s my deep green and neutral gift wrap for this year! What colors did you choose this year? Do you pick specific colors or patterns for each recipient, or use the same pattern for the whole family? Tell me, tell me!

Creative Direction and Styling: Nole Garey of Oh So Beautiful Paper

Gift Wrap Styling: Kelsey Bethune of Tart Event Co. 

Photo Credits: Nole Garey for Oh So Beautiful Paper

Behind the Stationery: Banquet Workshop

For our next installment of Behind the Stationery, we’re headed to Vancouver to talk with Sarah and Tammy of Banquet Workshop! A mainstay in the stationery world for 8 years and counting, Banquet Workshop’s graphic illustrations are bright and bold (and never quiet) have been translated into everything from art prints and everyday stationery to clothing and jewelry. Sharing about their lives before Banquet Workshop, the strong influences in their work and the importance of staying flexible, here is Sarah and Tammy! —Megan Soh

Behind the Stationery: Banquet Workshop

Tammy: Before Sarah and I started working on Banquet Workshop together I was working in development for a television production company whose main focus was documentary and reality-type television. Think adventure cooking shows, family swaps, life a fighter pilot as well as documentaries that tackle issues around homelessness, political prisoners, civil rights cold cases and local food movements. It was definitely interesting and fun work, but once I had my first child I realized that a more flexible job would be in my family’s best interest. I also always loved being my friend’s hypewoman and had a love of stationery since I was young. It seemed like a natural jump to work with Sarah on Banquet where I can combine both these things!

Sarah: I had worked as an artist and in both commercial and not-for-profit galleries, but had always done design and hand-work on the side. Banquet started with our Sea Animals of the Pacific Northwest screen print, and from there it was a natural segue to partner with Tammy and move into stationery.

We met through a friend when Tammy moved back to Vancouver from living in Montreal and Sarah was working at an artist run centre. We had many (too many!) ideas that we wanted to work on including sun suits for kids, becoming hand bag designers, making kid’s craft kits (which we did do!), but Sarah had already been making prints and cards. We realized quickly that we could build something bigger with making paper products that could potentially support our families. That said, we still freelanced for the first four years or so of starting our business – Sarah doing design and Tammy working in TV.

Behind the Stationery: Banquet Workshop

We are located in beautiful Vancouver on the west coast of Canada where we are surrounded by oceans and mountains. Our location definitely informs our work. When you are 20 minutes to the beach and forest there is definitely no way to avoid the influence. We also have a strong community of creative women that are forever discussing business, art, fashion, colour theory as well as the politics of the day, and they really motivate us as mothers, creatives, and entrepreneurs.

We have a good sized studio with a view of a luxury car dealership and the mountains, where we pack and ship our orders. Tammy works here mainly with our awesome employees. A lot of the magic happens at Sarah’s house in her home-based studio where she can focus on the creative inspired by her garden, a vast collection of vintage books and textiles, and fueled by too much coffee.

Behind the Stationery: Banquet Workshop

We print a few different methods: screen printing for posters and yardage, offset printing for cards, and letterpress for our garlands/ gift tags. All of our printers are truly passionate about what they do and we love the collaborative production process.

If we had to say what makes us unique (such a hard question for two humble Canadians to answer!) it would be our flair for colour and a distinct graphic style. We are also able to charge ahead when inspiration hits and are not often tied to trends. We really do what we want to do and are always looking to make our business more sustainable and interesting. We have now been in business for over 8 years and haven’t run out of new ideas that we want to do! The list grows longer by the day.

Behind the Stationery: Banquet Workshop

Every day is different for each of us but the main things that need to happen always are new products and sales!!! All the other tasks lead back to this—whether it’s reaching out to new retailers or making sketches for new products. We are always trying to figure out if what we want to make fits into the brand. At the heart of everything we do is a desire to put quality goods into the world that are useful, bring happiness, and make people feel good.

We do not really have a daily/weekly schedule but we talk about it all the time! We do need to have Christmas cards ready in May and are tied to the yearly holiday and tradeshow schedule but I think having variety and fluidity is the key for us being able to be flexible.

Behind the Stationery: Banquet Workshop

Part of the creative process is always looking and being open to inspiration no matter where we are. Some of our best sellers have come from a hand-lettered sign spotted at the mechanics, a hilarious anecdote from one of our kids, or an amazing new-to-us houseplant at a friend’s house. Getting outdoors is everything, but then actual libraries are of course our happy place, and colour is always a favourite. It’s amazing what a hit of neon pink can do!

Behind the Stationery: Banquet Workshop

Then it’s a lot of drawing: because we work mostly with vector-graphics, we draw a lot by hand as the initial process and to try and keep things warm. Even with the computer we try to keep that loose feel, quirks and all. All of our type is hand drawn too, with fonts kept as libraries within Illustrator. Colour is where we really get to play, with a specific palette we go back to again and again, dropping in new favourites as we see fit.

Behind the Stationery: Banquet Workshop

Jumping around is an important part of the process too. Sometimes we need to focus on finding a new way to say happy birthday (not so easy!), where at other times we get to work on repeat patterns and styling an entire table setting with our linens, or doing special projects like a recent 4 x 22 metre banner for the Vancouver Board of Parks and Recreation featuring eight specific water-birds spotted in False Creek, a central Vancouver waterway. Variety is what keeps the design process interesting.

Photos courtesy of Banquet Workshop.

Want to be featured in the Behind the Stationery column? Reach out to Megan at megan [at] ohsobeautifulpaper [dot] com for more details.

Best of 2017: DIY

For our next look back at favorite posts in 2017, I’m recapping some favorite DIY projects from the year! 2017 was a bit of a transition year for me; up until now I’ve always focused on smaller scale DIY projects since I photographed everything in my home office – which presented quite a few space and logistical challenges! Now that I have Common Room Studio, I’m excited to move towards larger party inspiration posts in addition to smaller DIY projects. Here are a few favorite projects from the year!

DIY Hologram Foil Ornaments

Photo Credit: Meghan Marie Photography

2017 was the year that I discovered the magic of nail transfer foils! I used them to make hologram Easter eggs back in March and hologram  Christmas ornaments just a few weeks ago. I have a few more ideas for ways to use these versatile little foils, so you’ll definitely see them pop up in a project or two in 2018!

DIY Hologram Foil Easter Eggs

DIY Hologram Foil Easter Eggs

DIY Hologram Foil Ornaments

DIY Hologram Foil Ornaments

These DIY galaxy Easter eggs are so sparkly! My girls absolutely LOVED them. Nail polish marbling FTW.

DIY Hologram Galaxy Easter Eggs

DIY Hologram Galaxy Easter Eggs

Matisse’s paper cuts inspired a few DIY projects throughout the year, and they ended up being some of my favorite projects to date! Our first Matisse-inspired project of the year involved a colorful paper garland to help celebrate the 50th anniversary of Fiskars Original Orange-handled Scissors in September!

DIY Matisse-Inspired Paper Garland

DIY Matisse-Inspired Paper Garland

DIY Matisse-inspired Garland

And then I made Matisse-inspired pumpkins in October! They were so cute! I originally thought black and white pumpkins would work best, but that pink painted pumpkin was easily my favorite of the bunch.

DIY Matisse-Inspired Pumpkins

DIY Matisse-inspired Pumpkins

This next project is a personal fave – DIY iridescent paper prize ribbons that I made for my daughter’s preschool graduation! These ribbons are such a fun and easy way to celebrate a milestone event, or even to help cheer up a friend or co-worker. 

DIY Iridescent and Pastel Paper Prize Ribbons

DIY Iridescent Paper Prize Ribbons

Some of my favorite projects are also the most simple. These DIY watercolor and gold leaf gift tags involve just a quick stripe of watercolor paint and some gold leaf, but I love the understated beauty of the final result!

DIY Watercolor and Gold Leaf Gift Tags

DIY Watercolor and Gold Leaf Gift Tags

If you’re looking for more DIY ideas, you can check out our DIY archive right here!

DIY Matisse-Inspired Ornaments

Remember the Matisse-inspired pumpkins that I made back in October? Well, I’m back at it with DIY Matisse-inspired ornaments! I had some solid white ornaments from Target that needed a bit of dressing up and I happened to have a few leftover Matisse-inspired shapes from when I made the pumpkins back in October, so I decided to stick a few shapes onto the white ornaments – and ta da! I’m loving the pops of color against the matte white ornaments, but you could definitely make these with any color ornaments. These DIY Matisse-inspired ornaments are super easy to make, are a really fun way to add some color to your Christmas tree, and they’re also a fun project for little helpers. I’m sharing my template below so you can make your own!

DIY Matisse-Inspired Ornaments

DIY Matisse-Inspired Ornaments

DIY Matisse-Inspired Ornaments

When I did the pumpkins back in October, I used a mix of large and small Matisse-inspired shapes. Since ornaments are even smaller than the tiny pumpkins, we’ll just use the small shapes for this project. I also experimented with a couple ornaments that were all just one shape, like stars, but I really prefer the ornaments that combine all the shapes in a random pattern. These Matisse-inspired shapes are just so lovely when all mixed together!

DIY Matisse-Inspired Ornaments

DIY Matisse-Inspired Ornaments

Supplies

Solid color ornaments, either plastic or glass

Matte craft vinyl in a variety of colors – I used pink, orange, yellow, green, teal, purple

Opalescent vinyl (optional – but I love the way it looks!)

Silhouette Cameo or Cricut Explore cutting machine

Note: If you don’t have one of those machines, you can still use our template to trace the shapes onto the vinyl and cut the shapes out by hand – but it will go a LOT faster with a cutting machine. You can download our templates at the bottom of the post!

DIY Matisse-Inspired Ornaments

DIY Matisse-Inspired Ornaments

To make the DIY Matisse-inspired ornaments:

Step 1. Download our templates at the bottom of the post and use your Silhouette Cameo or Cricut to cut the shapes from each color of vinyl. You can do a colorful rainbow like I did – or keep things simple with just one or two colors!

Step 2. Carefully peel individual shapes from the adhesive backing and apply to the ornaments like a sticker. I found it easiest to start with two of the larger shapes on either side of the ornament, then fill in with the smaller shapes in between. If you place a shape and then change your mind, you should be able to move it by very carefully peeling the vinyl from the ornament and moving it to a new spot (I did this a few times!).

Step 3. Continue placing vinyl shapes until you’ve covered all of your ornaments, and enjoy!

DIY Matisse-Inspired Ornaments

DIY Matisse-Inspired Ornaments

DIY Matisse-Inspired Ornaments


So easy, right? And such a great way to add some color to your Christmas tree!

Download the templates below!

MATISSE-INSPIRED ORNAMENT TEMPLATE (Silhouette Studio file)

MATISSE-INSPIRED ORNAMENT TEMPLATE (SVG file)

p.s. DIY hologram foil ornaments and DIY Matisse-inspired pumpkins

Photo Credits: Meghan Marie Photography and Nole Garey for Oh So Beautiful Paper

DIY Hologram Foil Ornaments

So apparently my brain works best on a really tight deadline. Here’s my brain: a week to go until Christmas? Great! Here are five DIY christmas ornament ideas! So for those of you looking for some fun non-traditional DIY ornament ideas, I’ve got a couple of ideas to share with you this week! First up, DIY hologram foil ornaments! You might remember these DIY hologram Easter eggs that I made last Spring, and I couldn’t resist making a set of Christmas ornaments from these amazing iridescent and hologram nail foils!

DIY Hologram Foil Ornaments

I know pastels are on the non-traditional side for Christmas, but I just couldn’t resist! I used clear glass ornaments and filled them in with a few colors of craft paint that I had on hand, but you could definitely pick more traditional colors. Or use existing solid color ornaments – either glass or plastic. The hologram nail foils stick to pretty much anything!

DIY Hologram Foil Ornaments

DIY Hologram Foil Ornaments

The silver hologram foil really stands out, while the clear iridescent foil makes for a more subtle shimmer – but both are just totally gorgeous in person. That lavender and iridescent opal swirl is such a dreamy combination!

DIY Hologram Foil Ornaments

DIY Hologram Foil Ornaments

DIY Hologram Foil Ornaments

Supplies

Plastic or glass ornaments

Nail foil in your choice of color – I used Silver Spectrum, Silver Dots, Opal Glitter, and Opal Swirl. I bought all my nail foils here, but you can also find some fun colors and patterns on Amazon.

Nail foil transfer adhesive

Thin ribbon

Craft paint in assorted colors (optional)

DIY Hologram Foil Ornaments

To make the DIY hologram foil ornaments:

Step 1. Start by cutting several lengths of nail foil in your chosen colors. I usually needed one 5-inch piece to wrap around the middle of the ornament, then a few 3-inch pieces to fill in the rest of the ornament. The foiling process moves pretty quickly, so it’s helpful to have a bunch of pre-cut pieces ready to apply ahead of time. 

Step 2. Apply the nail foil transfer adhesive to the bottom half of your ornament. Allow the adhesive to dry until it becomes clear and tacky (usually 2-3 minutes).

Step 3. Once the adhesive is clear, apply the hologram foil to the ornament, pressing the foil down over the adhesive and smoothing it down with your fingers. Smooth the foil down for 10-20 seconds, then remove the foil. Continue applying the nail foils over all parts of the ornament where you applied the adhesive until you’re satisfied with the amount of coverage.

Step 4. If using clear glass ornaments, remove the top of each ornament, then fill the ornaments with craft paint in your chosen colors. With your finger (and maybe a paper towel) over the open end, shake the ornament until the paint covers the entire inside of the ornament. Allow the paint to dry completely (ideally overnight), then replace the ornament top. If using solid color ornaments, you can skip this step entirely!

Step 5. Cut a length of thin ribbon and string it through the ornament – and it’s ready to hang!

DIY Hologram Foil Ornaments

DIY Hologram Foil Ornaments

DIY Hologram Foil Ornaments

DIY Hologram Foil Ornaments

DIY Hologram Foil Ornaments

DIY Hologram Foil Ornaments

DIY Hologram Foil Ornaments


DIY Hologram Foil Ornaments

So much hologram and iridescent sparkle! Gah, I just love these ornaments SO much – and my girls are absolutely crazy about them! I think it also helped that I used their favorite colors to fill the inside of the glass ornaments. I’m loving all the pastel prettiness of these ornaments, but I also want to give this a try on some darker tones like navy blue and green!

DIY Hologram Foil Ornaments

DIY Hologram Foil Ornaments

DIY Hologram Foil Ornaments

DIY Hologram Foil Ornaments

What do YOU think?? Will you be making DIY hologram foil ornaments this year? If you do, I hope you’ll share a photo on Instagram with the hashtag #madewithosbp â€“ I want to see your craftiness in action!

p.s. DIY hologram foil Easter eggs and my favorite holiday gift wrap pairings

Photo Credits: Meghan Marie Photography and Nole Garey for Oh So Beautiful Paper