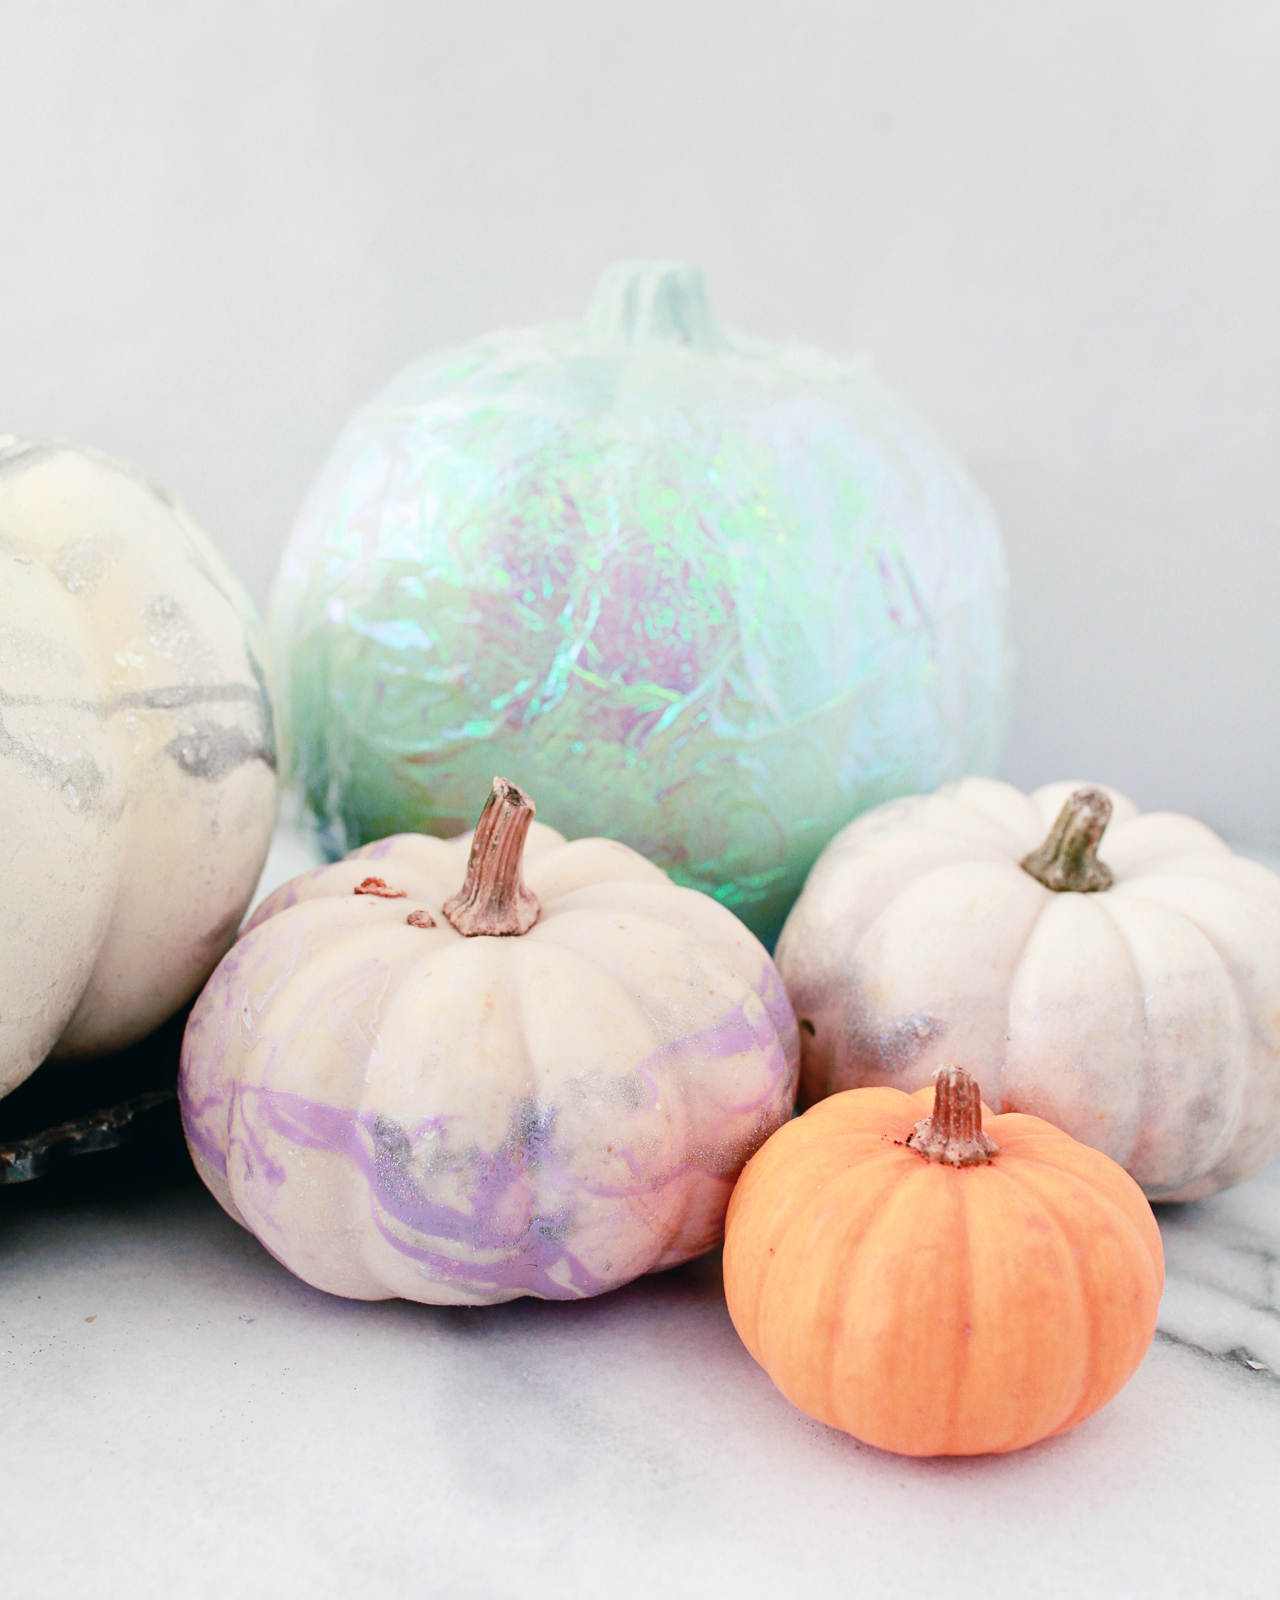
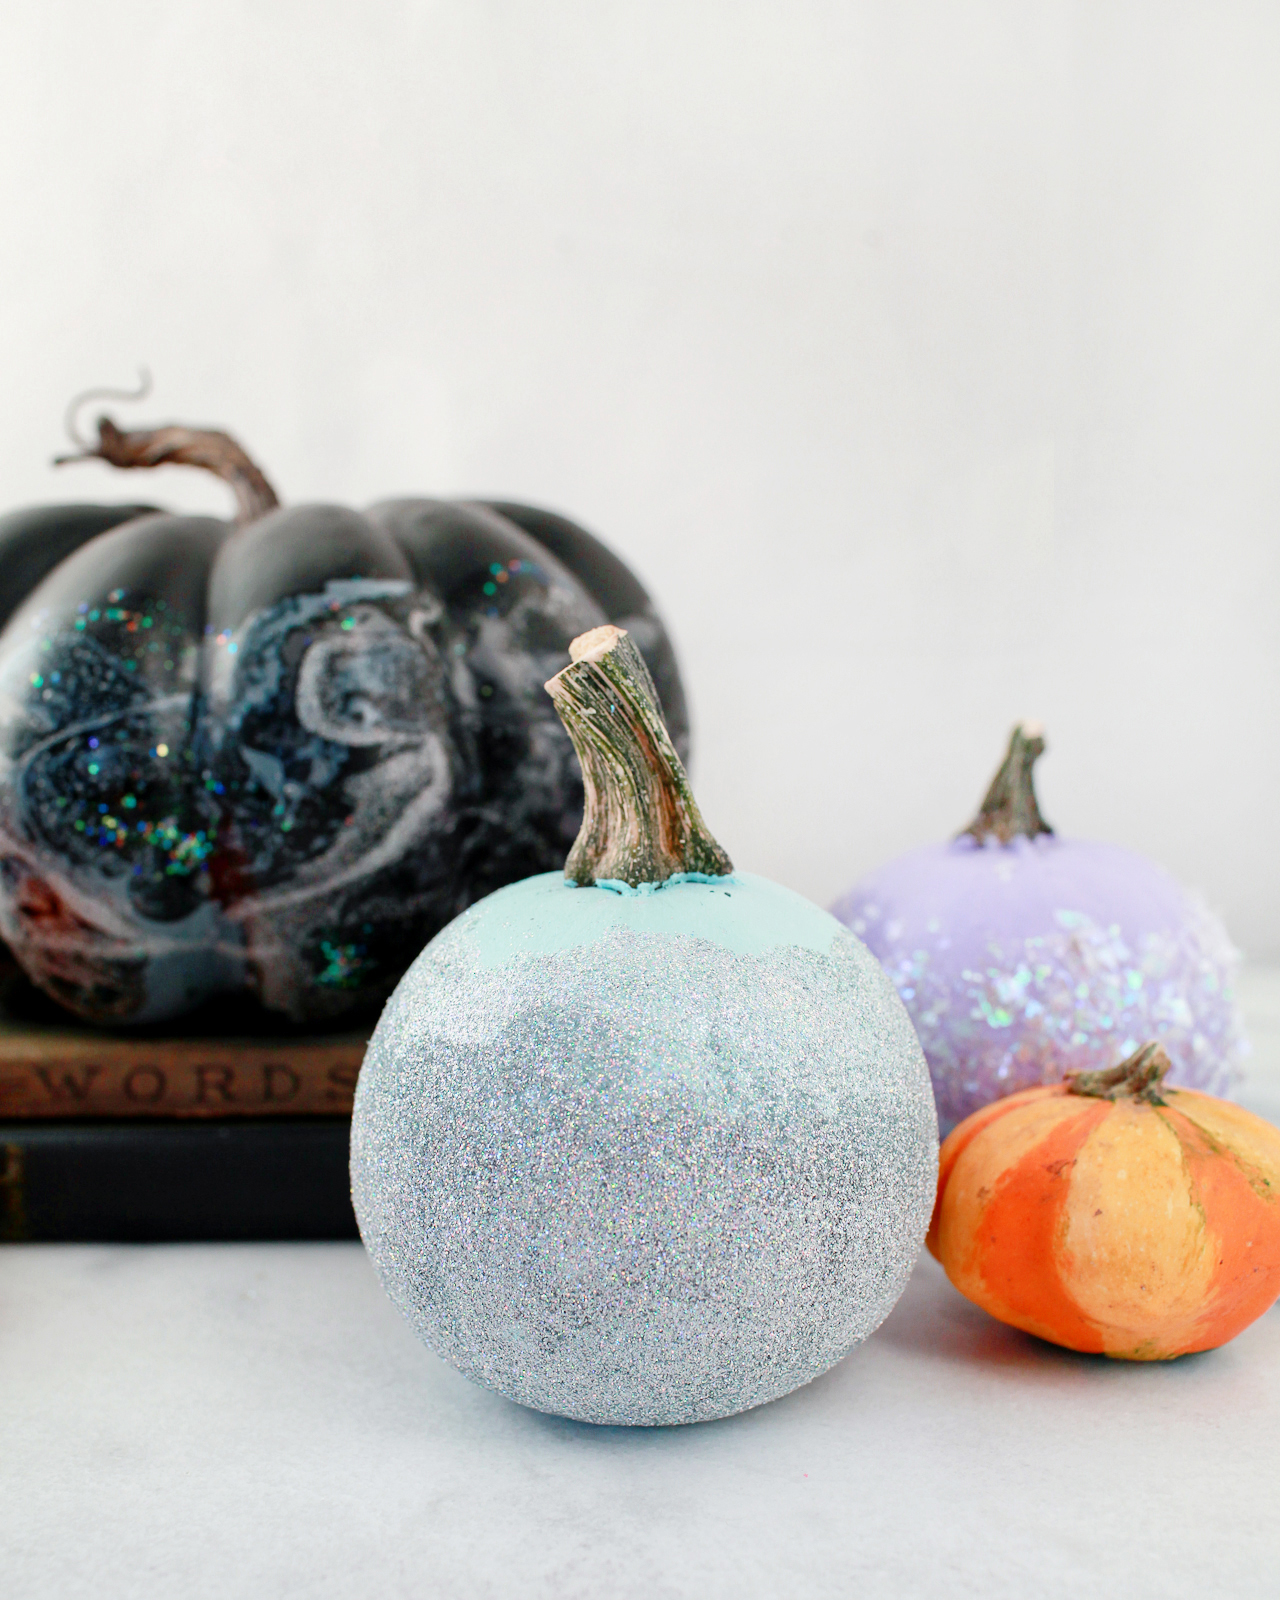
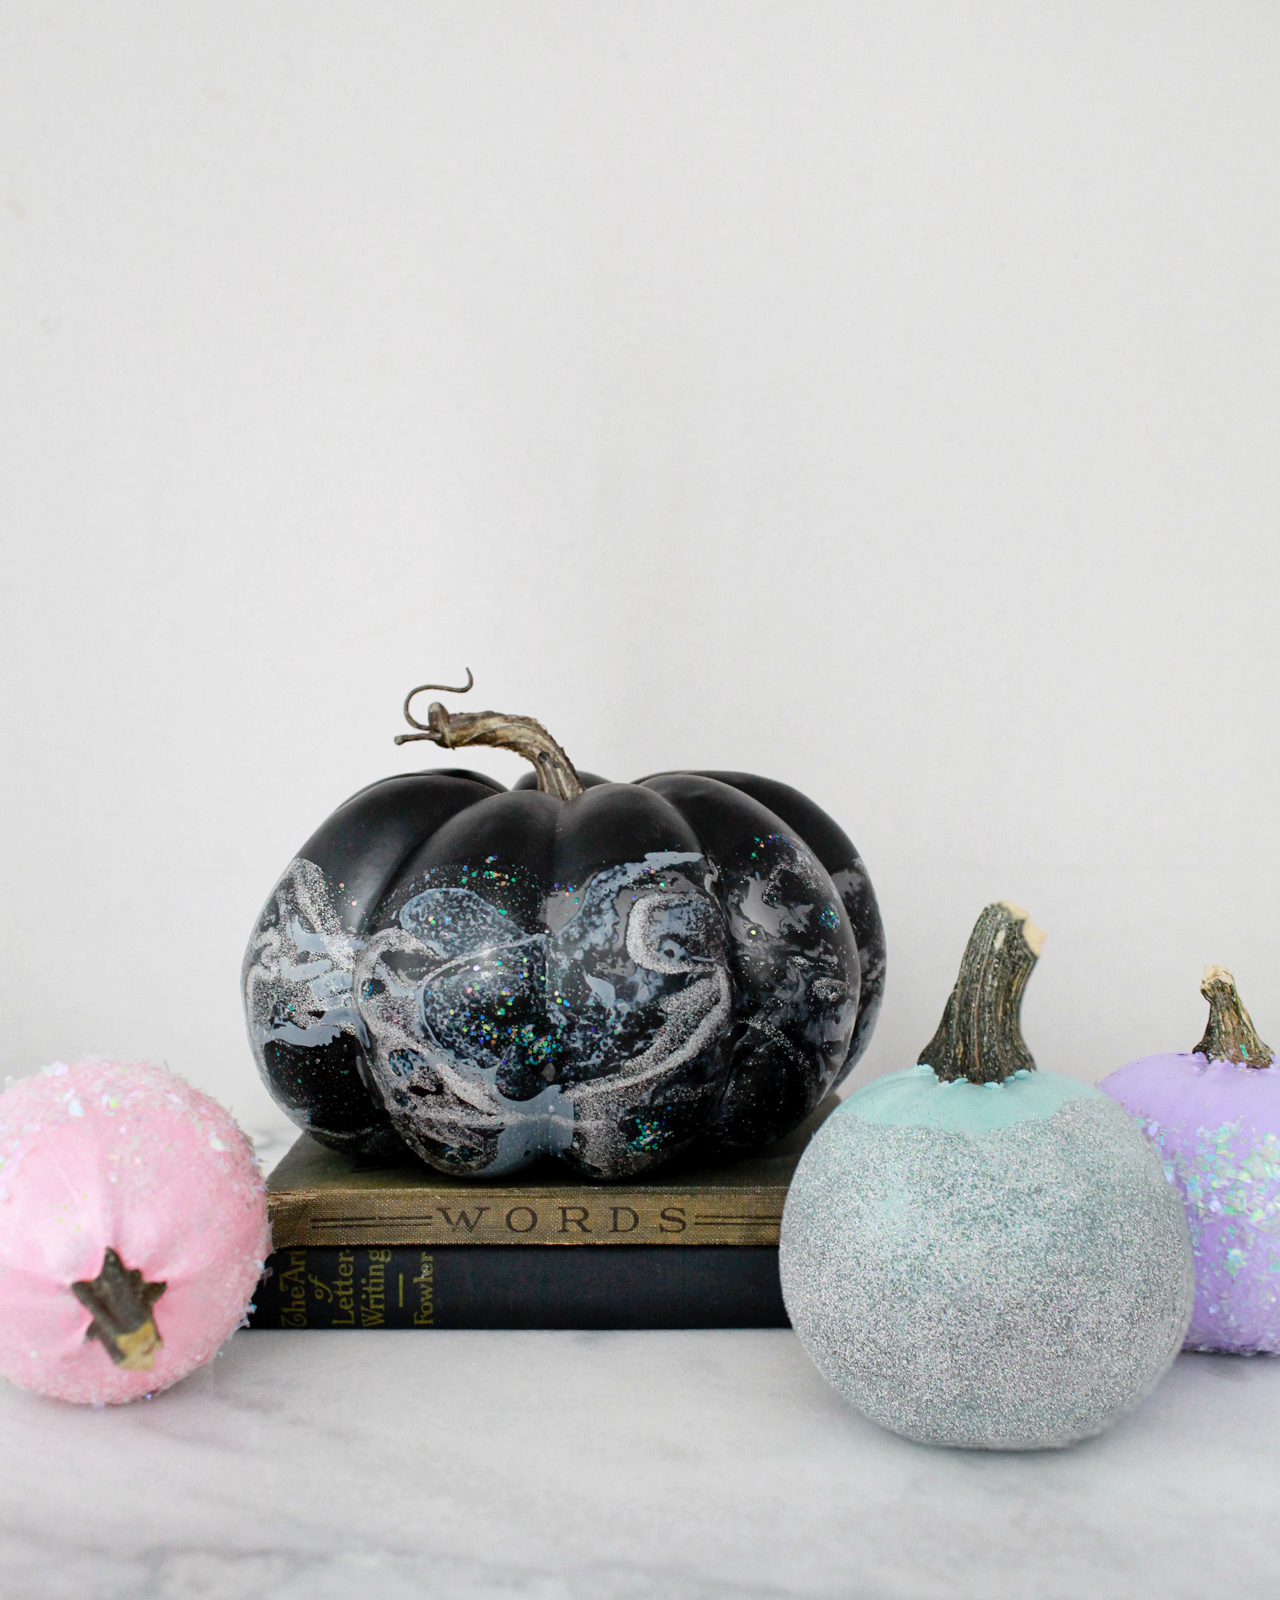
Anyone else doing the last minute pumpkin thing? Okay, good! As you may have noticed, I’m a wee bit obsessed with the whole iridescent and hologram thing happening these days, so I wanted to see if it would be possible to apply my favorite trend to our Halloween pumpkins! I tried a few different methods – including marbling and dipping the pumpkins in glitter – on both craft pumpkins and real mini pumpkins to create these fun DIY iridescent pumpkins, and I thought I’d share the results with all of you!
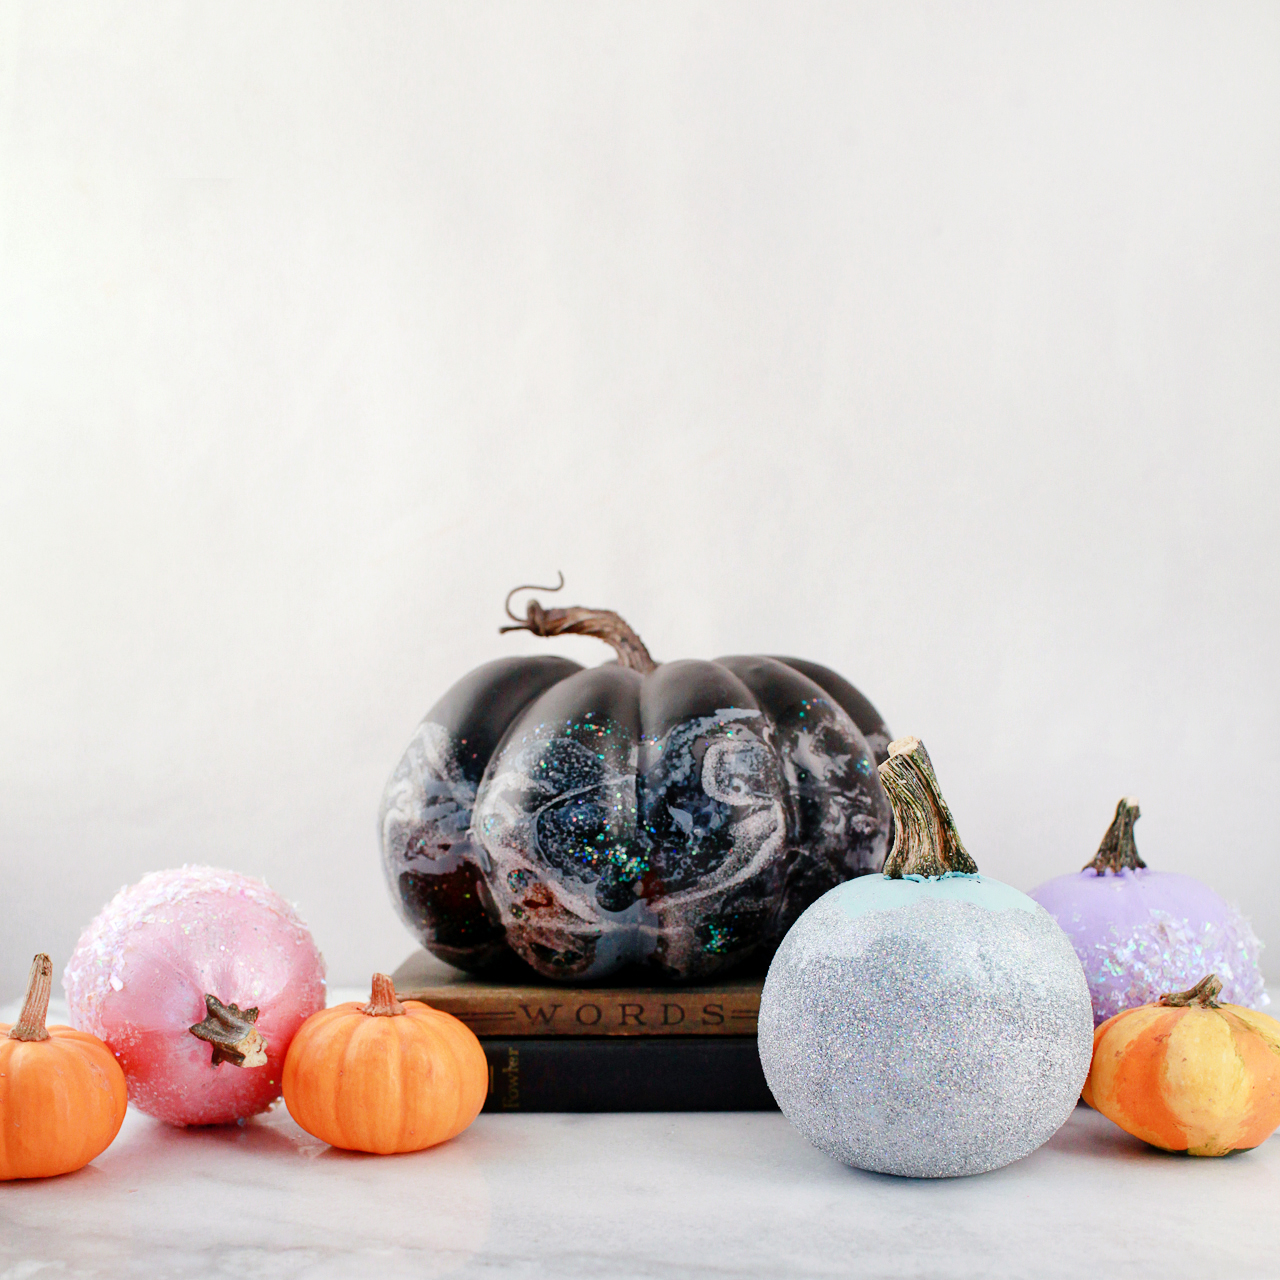
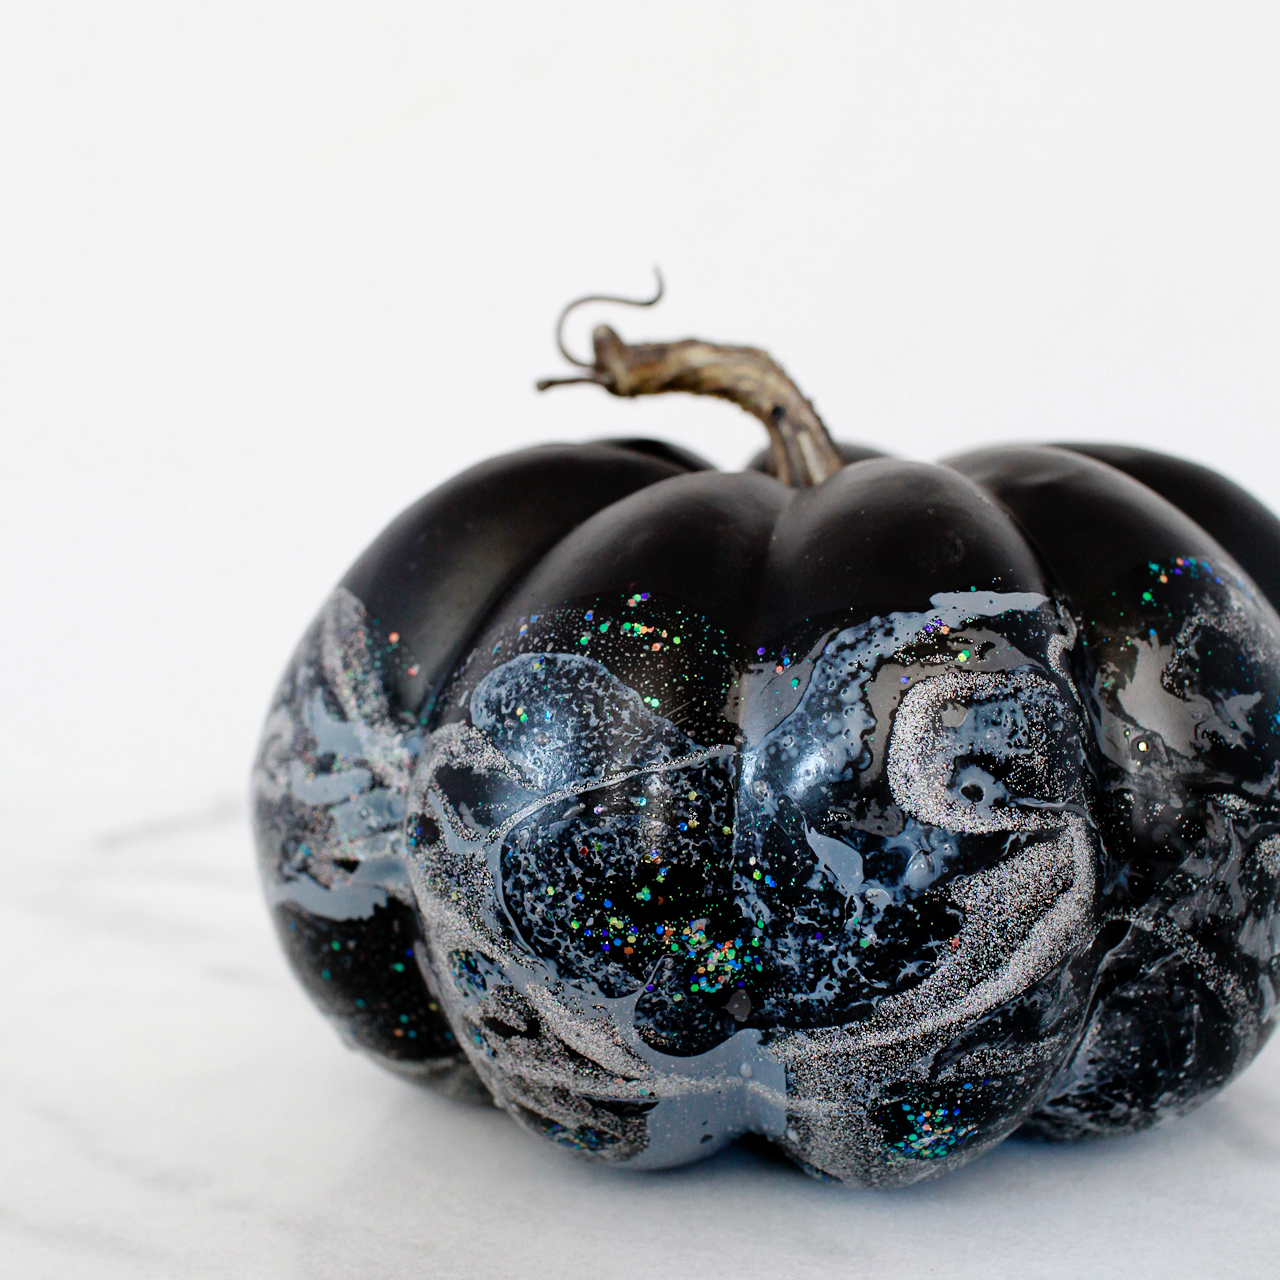
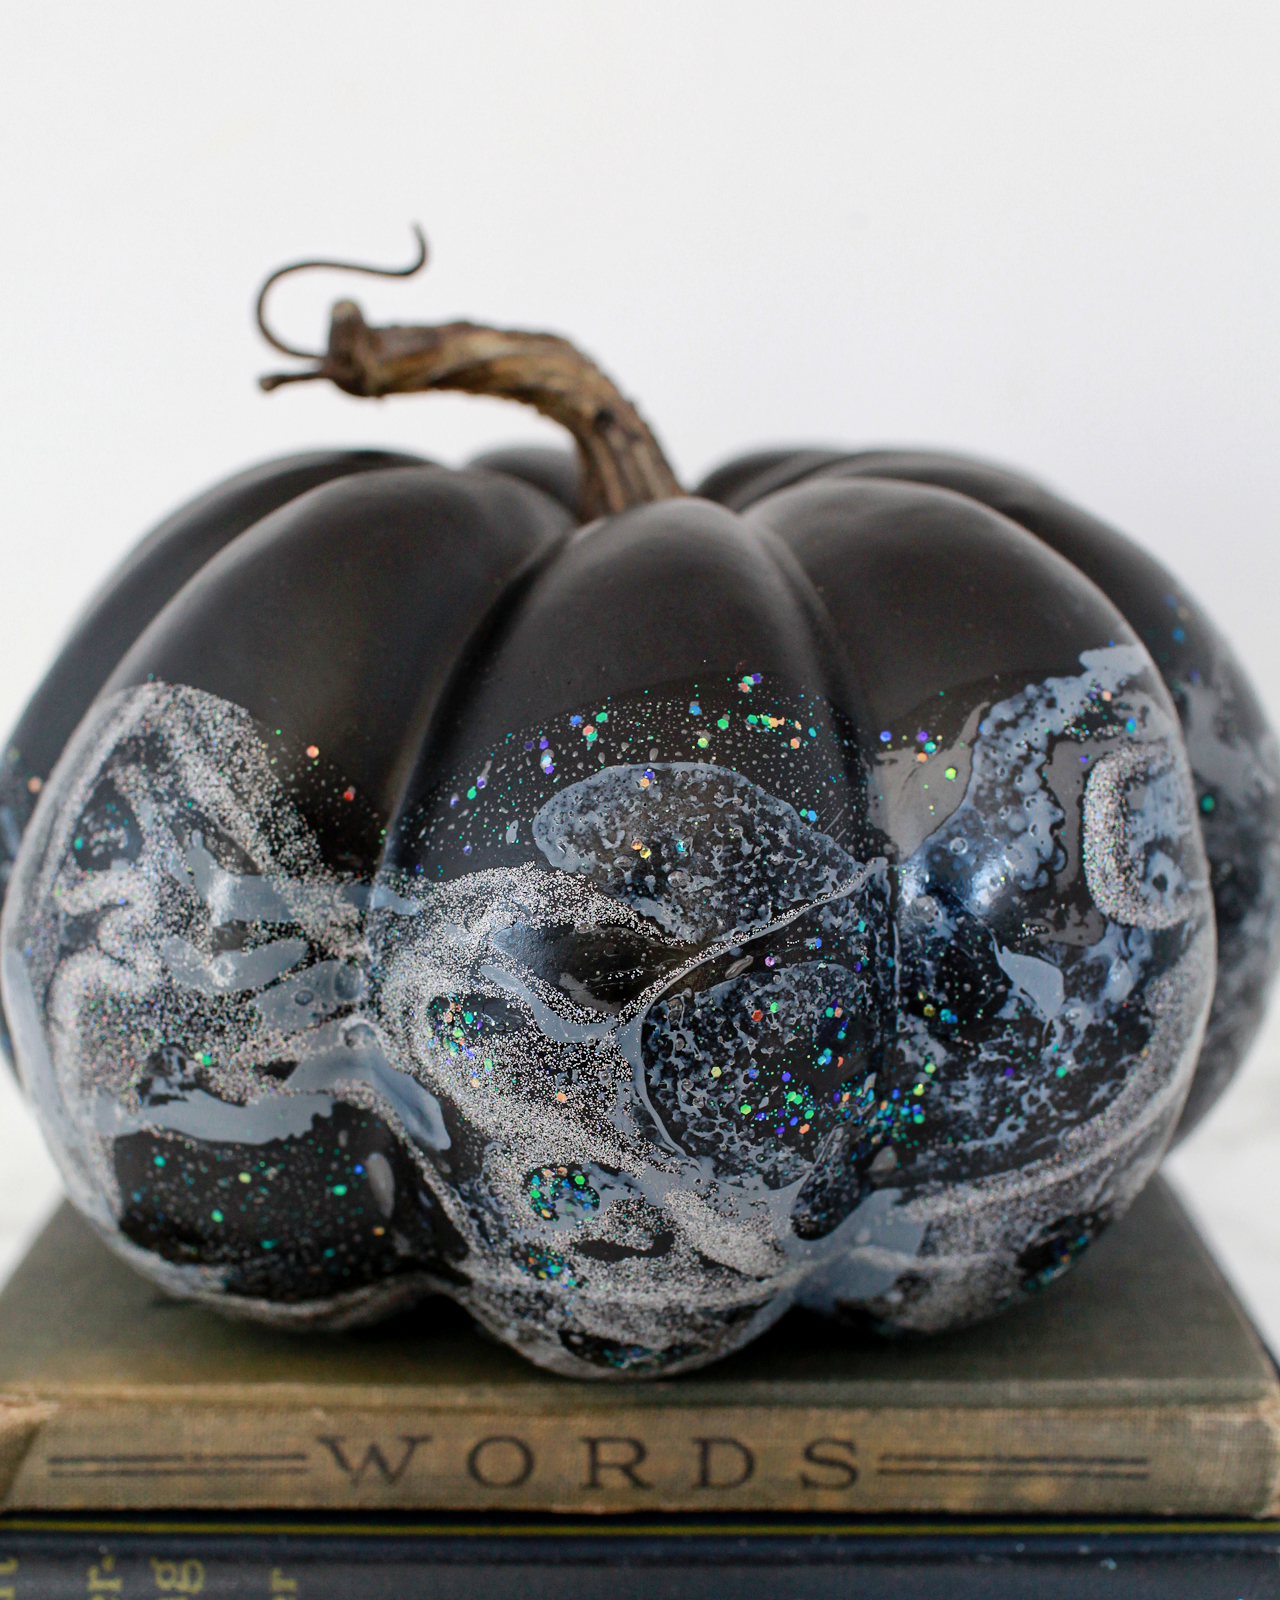
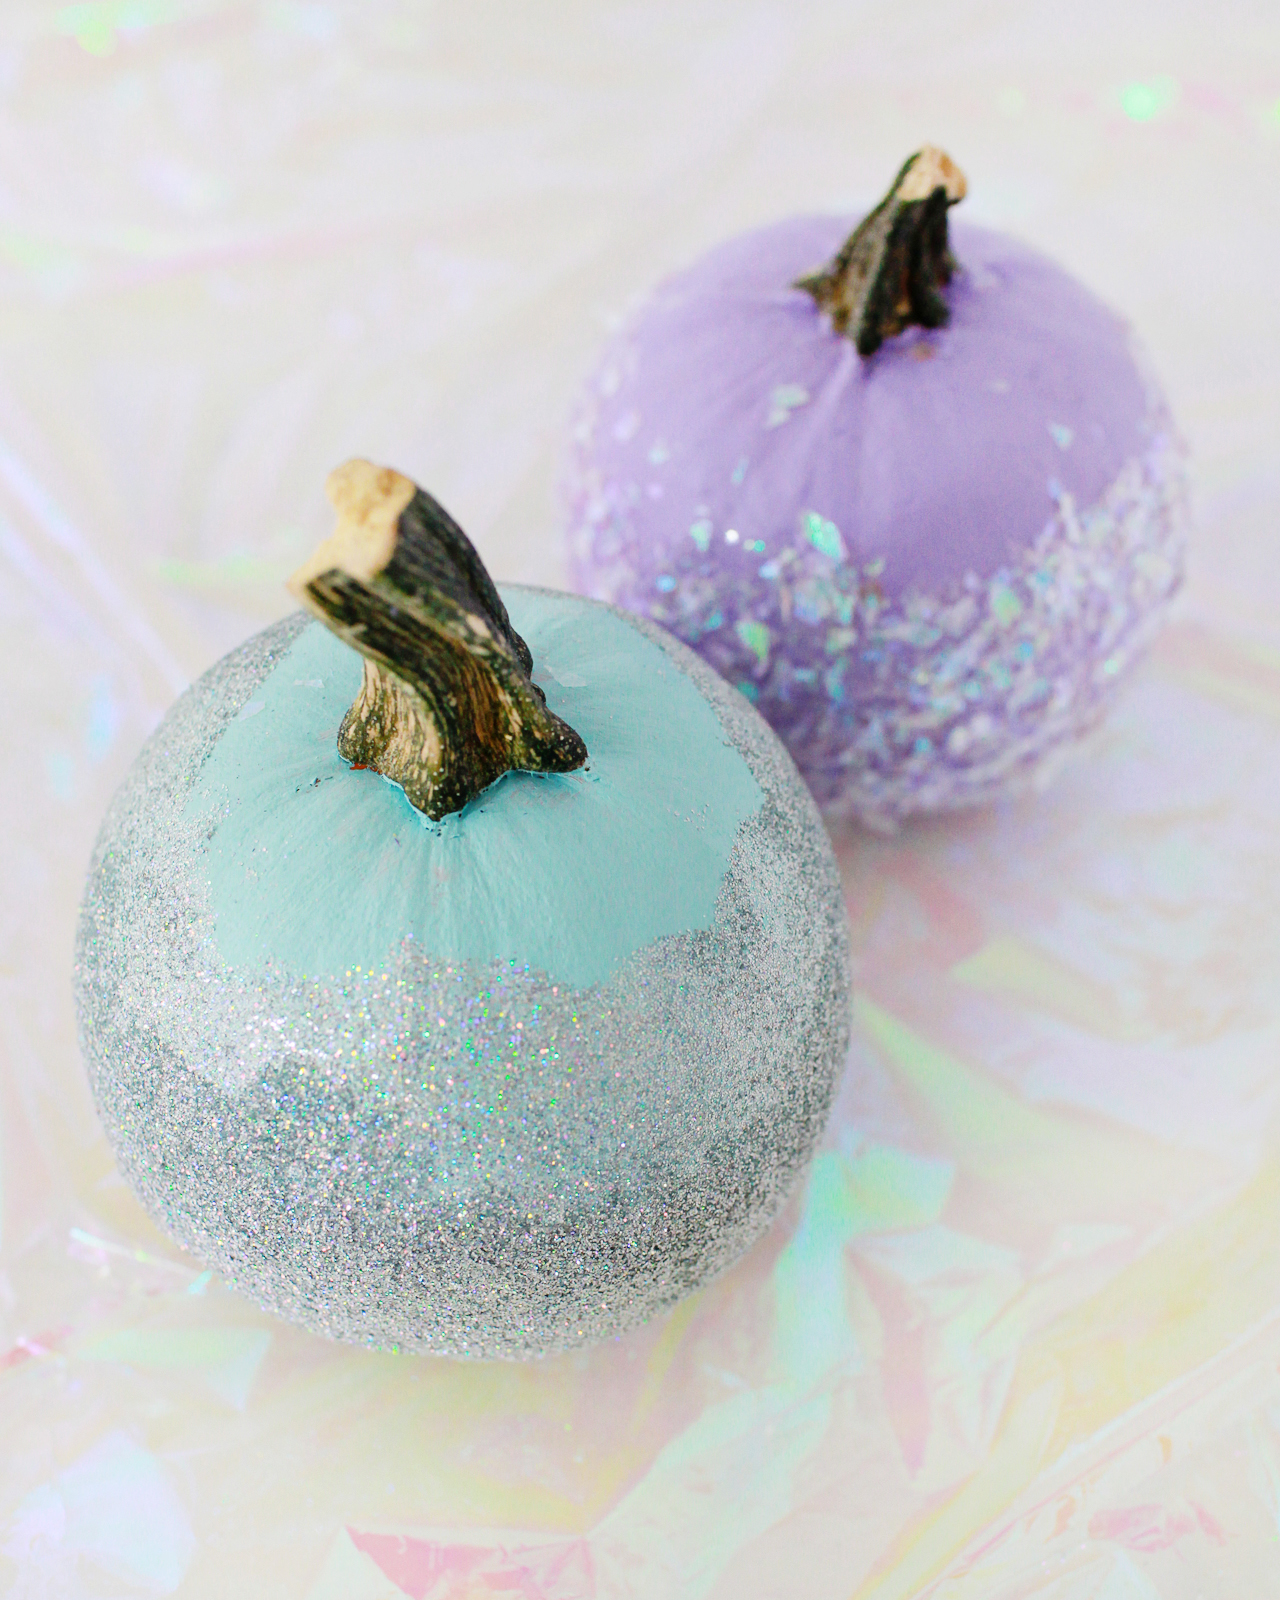
The two main methods that I used to make the pumpkins are nail polish marbling and dipping the pumpkins in iridescent confetti and hologram glitter. I’m including a supply list below with links, but you should be able to find all the materials for these pumpkins locally! For the nail polish marbled pumpkins, you can find all the materials at your local drugstore (I went to CVS) and supermarket. For the confetti and glitter dipped pumpkins, you can find the materials at pretty much any local craft store or party store (mine all came from my local Michael’s). I also made a pastel iridescent pumpkin covered a pumpkin in a layer of iridescent cellophane, but it was a pretty time intensive process so I only ended up making one of them. My favorite is the black marbled pumpkin – the iridescent and hologram nail polish looks like a galaxy!
Supplies
- Pumpkins in various sizes
- Craft paint
- Extra fine hologram glitter
- Iridescent confetti
- Iridescent cellophane
- Tacky glue
- Mod podge or school glue
- Paintbrushes
- Silver (or solid gray), hologram glitter, and iridescent glitter nail polish (I found all of mine at my local drugstore!)
- Disposable aluminum roaster pans (for marbling)
- Wax paper
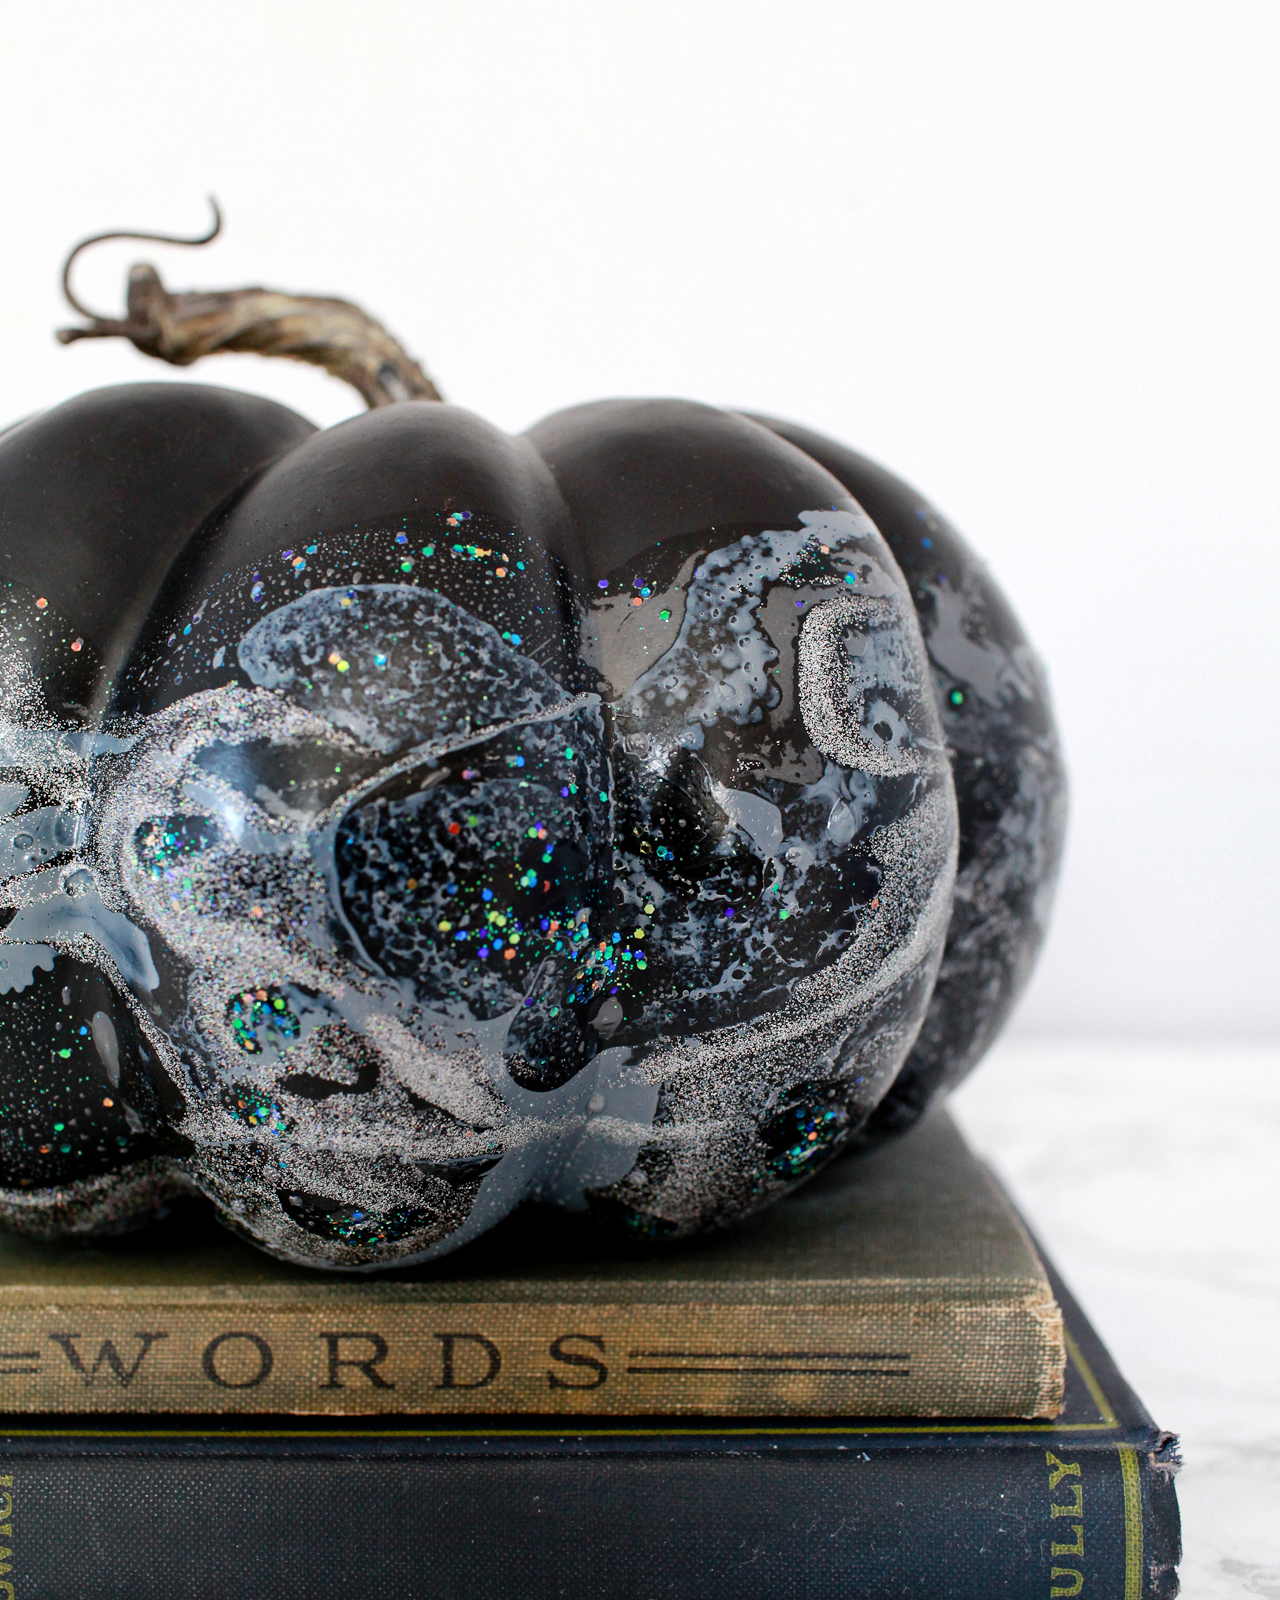
If you haven’t tried nail polish marbling, it’s super easy – but very stinky! I recommend either marbling outside or opening up a bunch of windows to air out the nail polish fumes. To make the iridescent marbled pumpkins, fill a disposable roasting pan with lukewarm water. The water needs to be deep enough to cover the entire pumpkin (or at least the portion that you want to marble). Drizzle nail polish over the water in curvy circular patterns, starting with any solid colors and working towards the clear glitter polish. For the larger pumpkins I used about half a bottle of nail polish each, but for the smaller pumpkins just a few drops of polish is enough. As you add more nail polish, the new drops will make the previous nail polish disperse across the surface of the water, creating beautiful marbled patterns. Holding the pumpkin by the stem, dip the pumpkin in the water and spin it around a bit. Remove the pumpkin from the water and set on wax paper to dry.
I was only able to marble one pumpkin per marble bath, so I tried out a bunch of nail polish combinations on both black and white pumpkins. My absolute favorite combined solid gray, silver glitter, hologram glitter, and iridescent glitter nail polish (all found at my local CVS) on a black craft pumpkin. The hologram and iridescent glitter is pretty subtle on the white pumpkins, so I tried adding a pastel lavender nail polish to the mix, but I think darker colors would have worked better on the white pumpkins – maybe even black or oxblood mixed with the iridescent and hologram glitter polish??
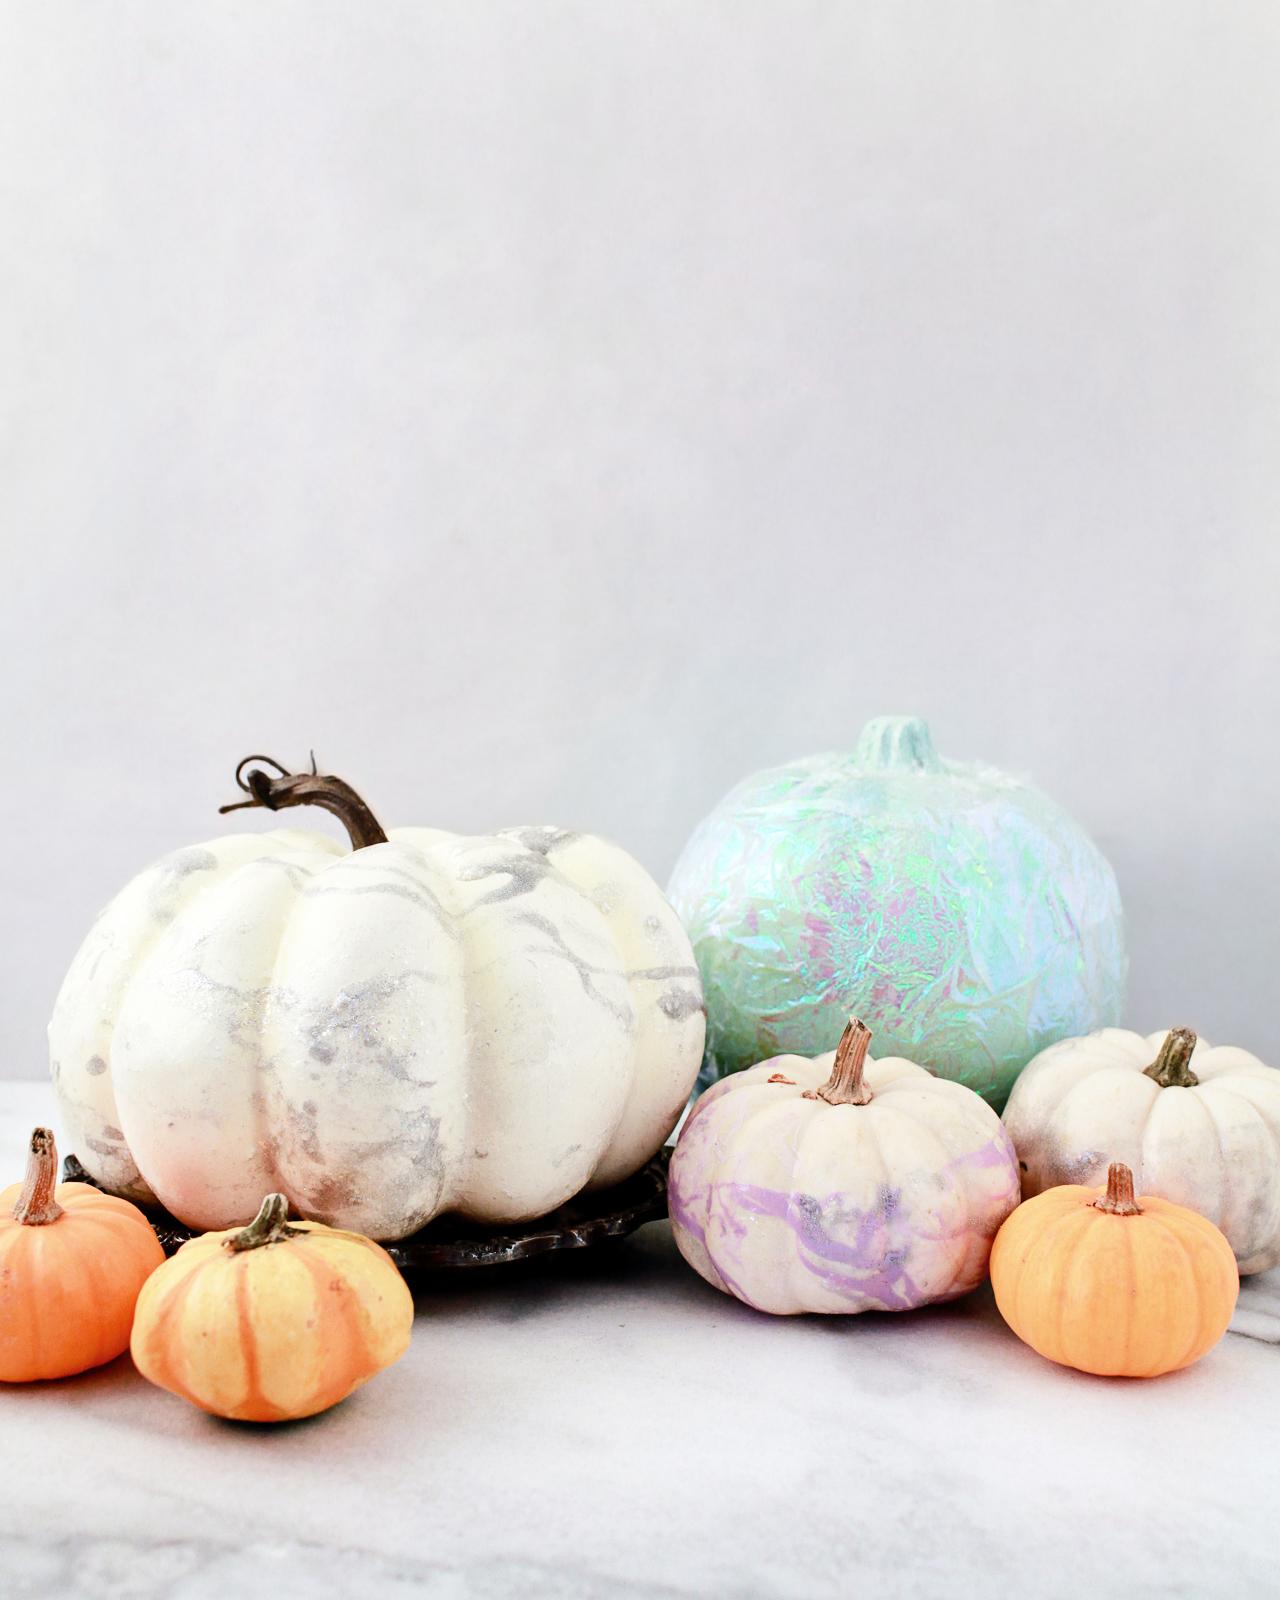
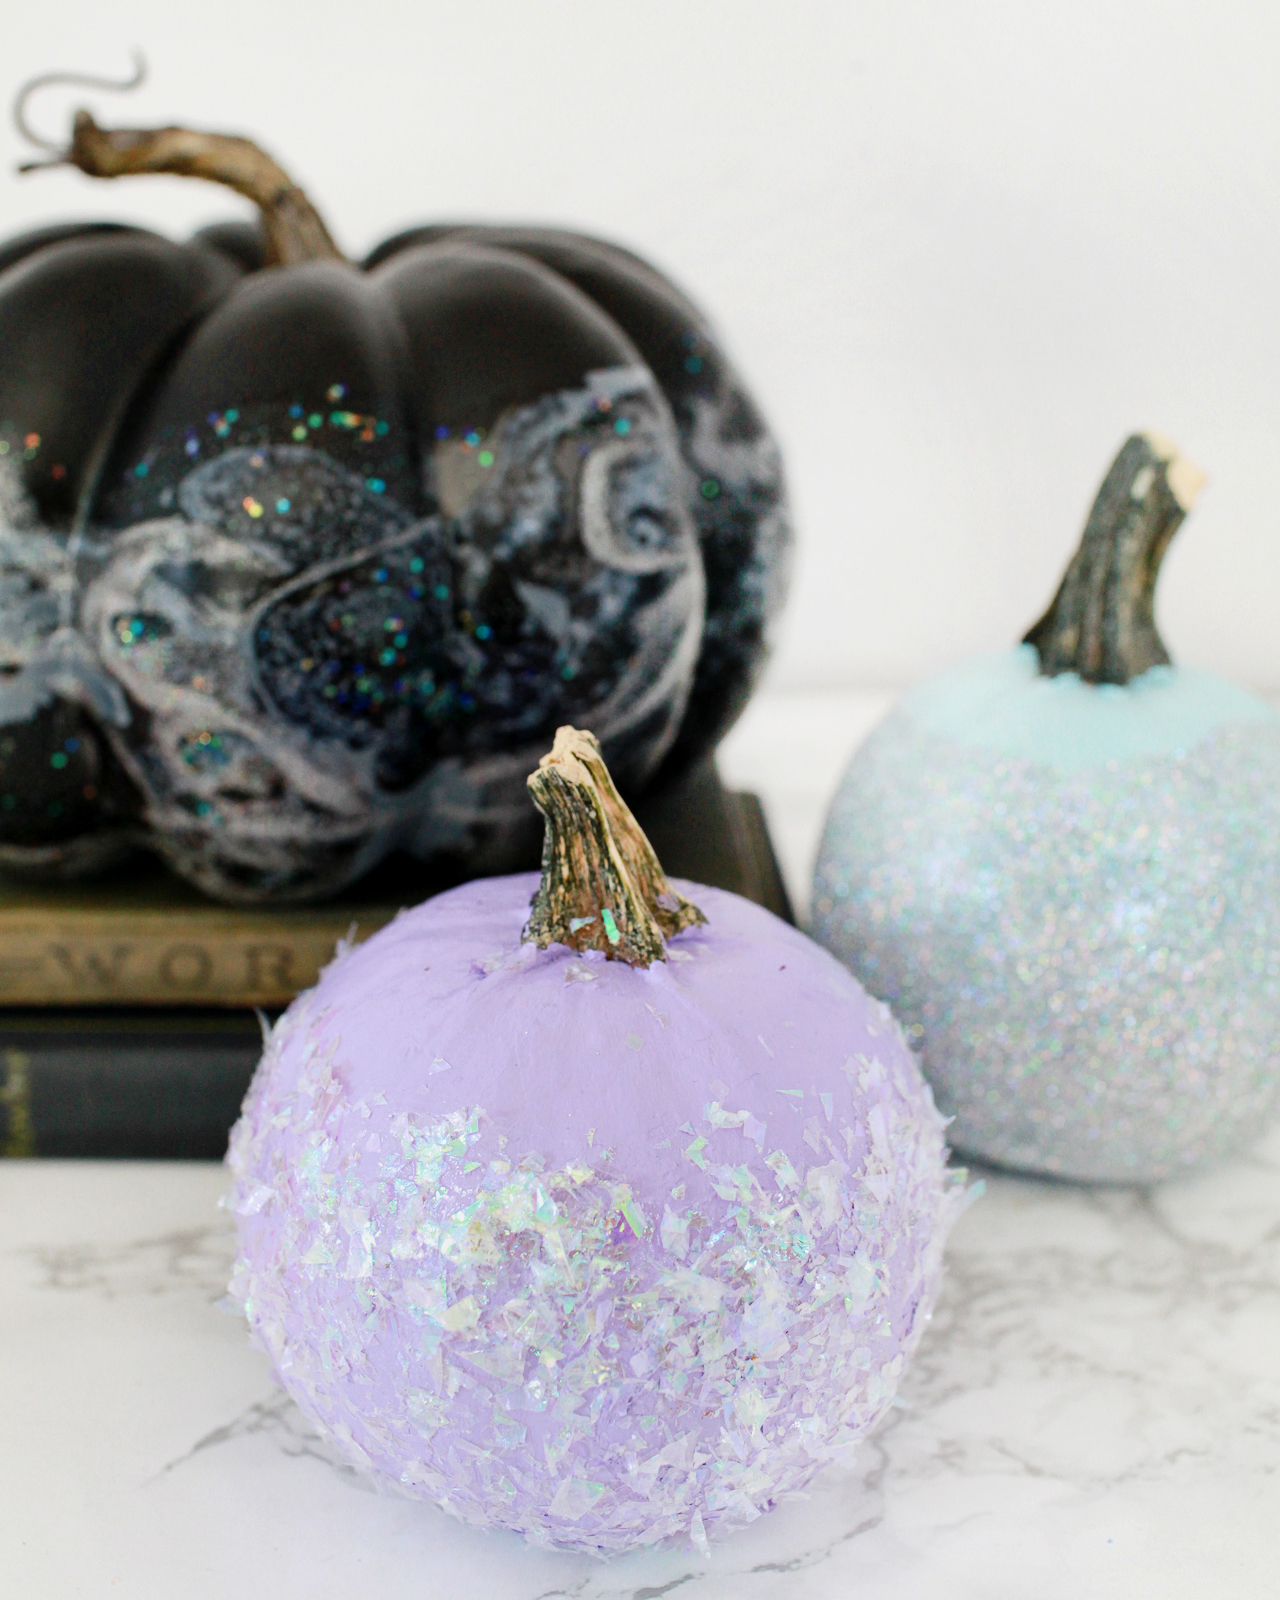
To make the pastel iridescent pumpkin, paint a pumpkin with pastel craft paint or spray paint and let it dry completely. Cut squares of iridescent cellophane that are approximately the same height as your pumpkin – mine were about 6″ square. Apply a layer of quick drying tacky glue to the pumpkin and spread it out with a paintbrush, then quickly press a square of iridescent cellophane to the pumpkin. Continue working around the entire pumpkin until all sides are covered.
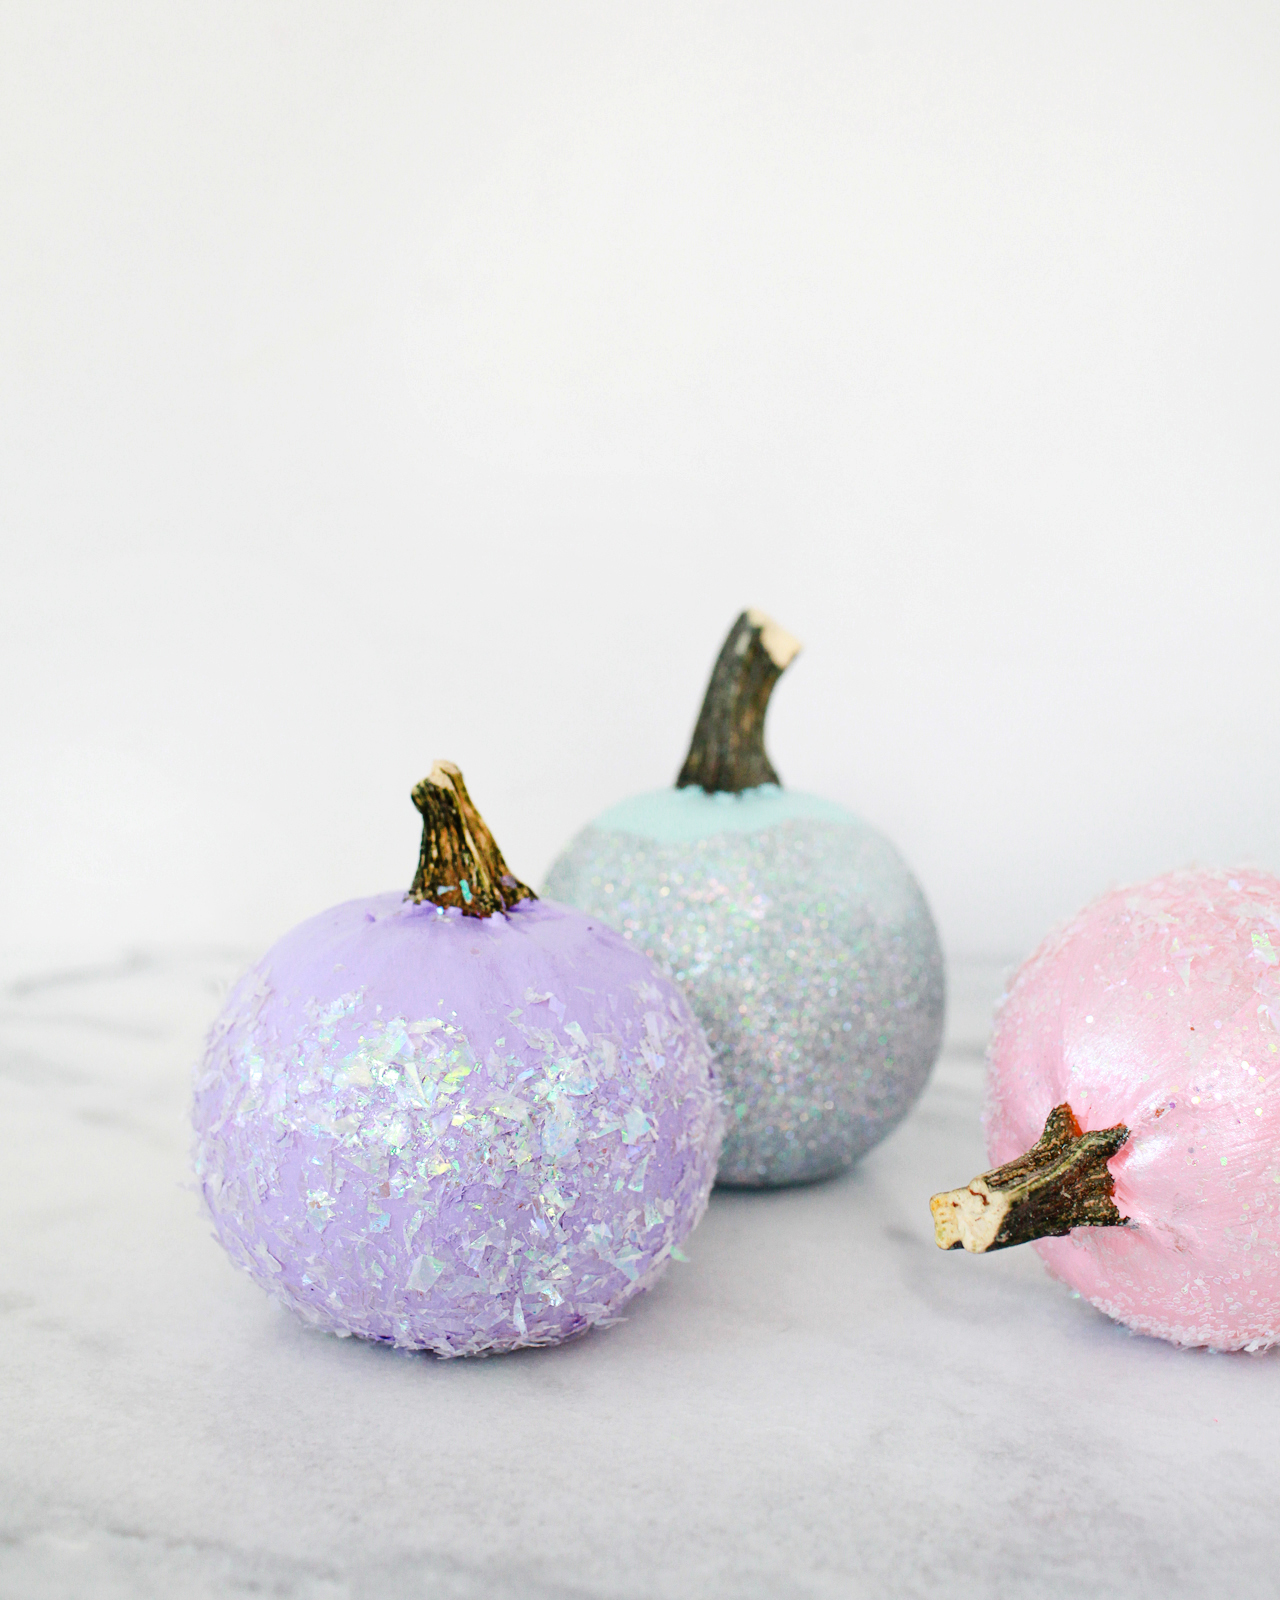
To make the glitter and confetti dipped pumpkins, you can start by painting your pumpkins with craft paint in your chosen color palette – or use white mini pumpkins or black craft pumpkins! I painted a few orange mini pumpkins in a pastel color palette of pink, mint green, and lavender. Use a paintbrush to apply a layer of mod podge or school glue on the lower 2/3 of your pumpkin. For the iridescent confetti pumpkins, hold a pumpkin by the stem over a bowl filled with confetti. Grab small handfuls of confetti and press it on the pumpkin until all sides are covered with confetti. For the hologram glitter pumpkins, I found it was easiest to fill a bowl with the glitter, then hold the pumpkin by the stem and dip the pumpkin into the glitter. Slowly turn the pumpkin until all sides are covered with glitter, then set aside to dry. Once the pumpkins are dry, you can tap them to shake off any excess glitter. If you like, you can take the pumpkins outside and spray them with a clear varnish to seal the rest of the glitter.
p.s. These DIY iridescent favor bags could be easily repurposed as Halloween party treat bags!
Photos by Nole Garey for Oh So Beautiful Paper
Love how unique these are! The hologram glitter is a nice touch. 🙂
These are so unique! Pinned for next year!