Hi guys, Ashley from Fine Day Press here. We’ve finally come to the last post in our Invitation 101 series. Thank you for reading and learning along with me! Today’s post covers the last steps in getting your invitations out the door: invitation addressing and mailing.
Be sure to check out our previous posts:
• Where to Start
• When to Send
• Printing Methods
• Wording & Etiquette
Addressing and Mailing
You’ve spent countless hours picking out just the right invitation suite, and possibly months agonizing over every little detail from the wording to the printing. Take a few moments to plan using our invitation addressing and mailing tips below; I promise it will be well worth the effort!
Plan Ahead
First, leave some time to gather and organize your address list. You’ll want to provide your stationer (or calligrapher, or printer) with a clear, detailed list of names and addresses that includes appropriate titles like “Mr. & Mrs.†or “Dr.â€Â It’s commonplace to spell out in full the address line and state, for example, “123 Smith Street; New York, New York 10010â€. Additionally, if children under 18 are invited to the wedding, list their names individually on the line following the parents’ names — unless you are using inner envelopes (increasingly rare these days), in which case the names of any children should be listed here and not on the outside. Adult children should receive their own invitation.
Secondly, make sure you have extra envelopes in case of any addressing errors. About 10% over is a good rule of thumb, and many stationers (including Fine Day Press) will automatically include some extras with your order. If using a calligrapher, be sure to ask if more than that are needed. You’ll also want a few extra invitations on hand for last-minute guests, and just in case one gets lost in the mail (it happens).
Methods of Addressing
Traditionally, invitations are hand-addressed, usually by a professional calligrapher. There’s nothing quite like receiving a calligraphed envelope in your mailbox, and it’s most definitely high up on my happy list. And if it‘s in your budget, go for it! Check with your calligrapher to confirm how much time they’ll need to address your envelopes, but at minimum you’ll want to factor around 2-3 weeks for envelope calligraphy into your invitation mailing timeline.
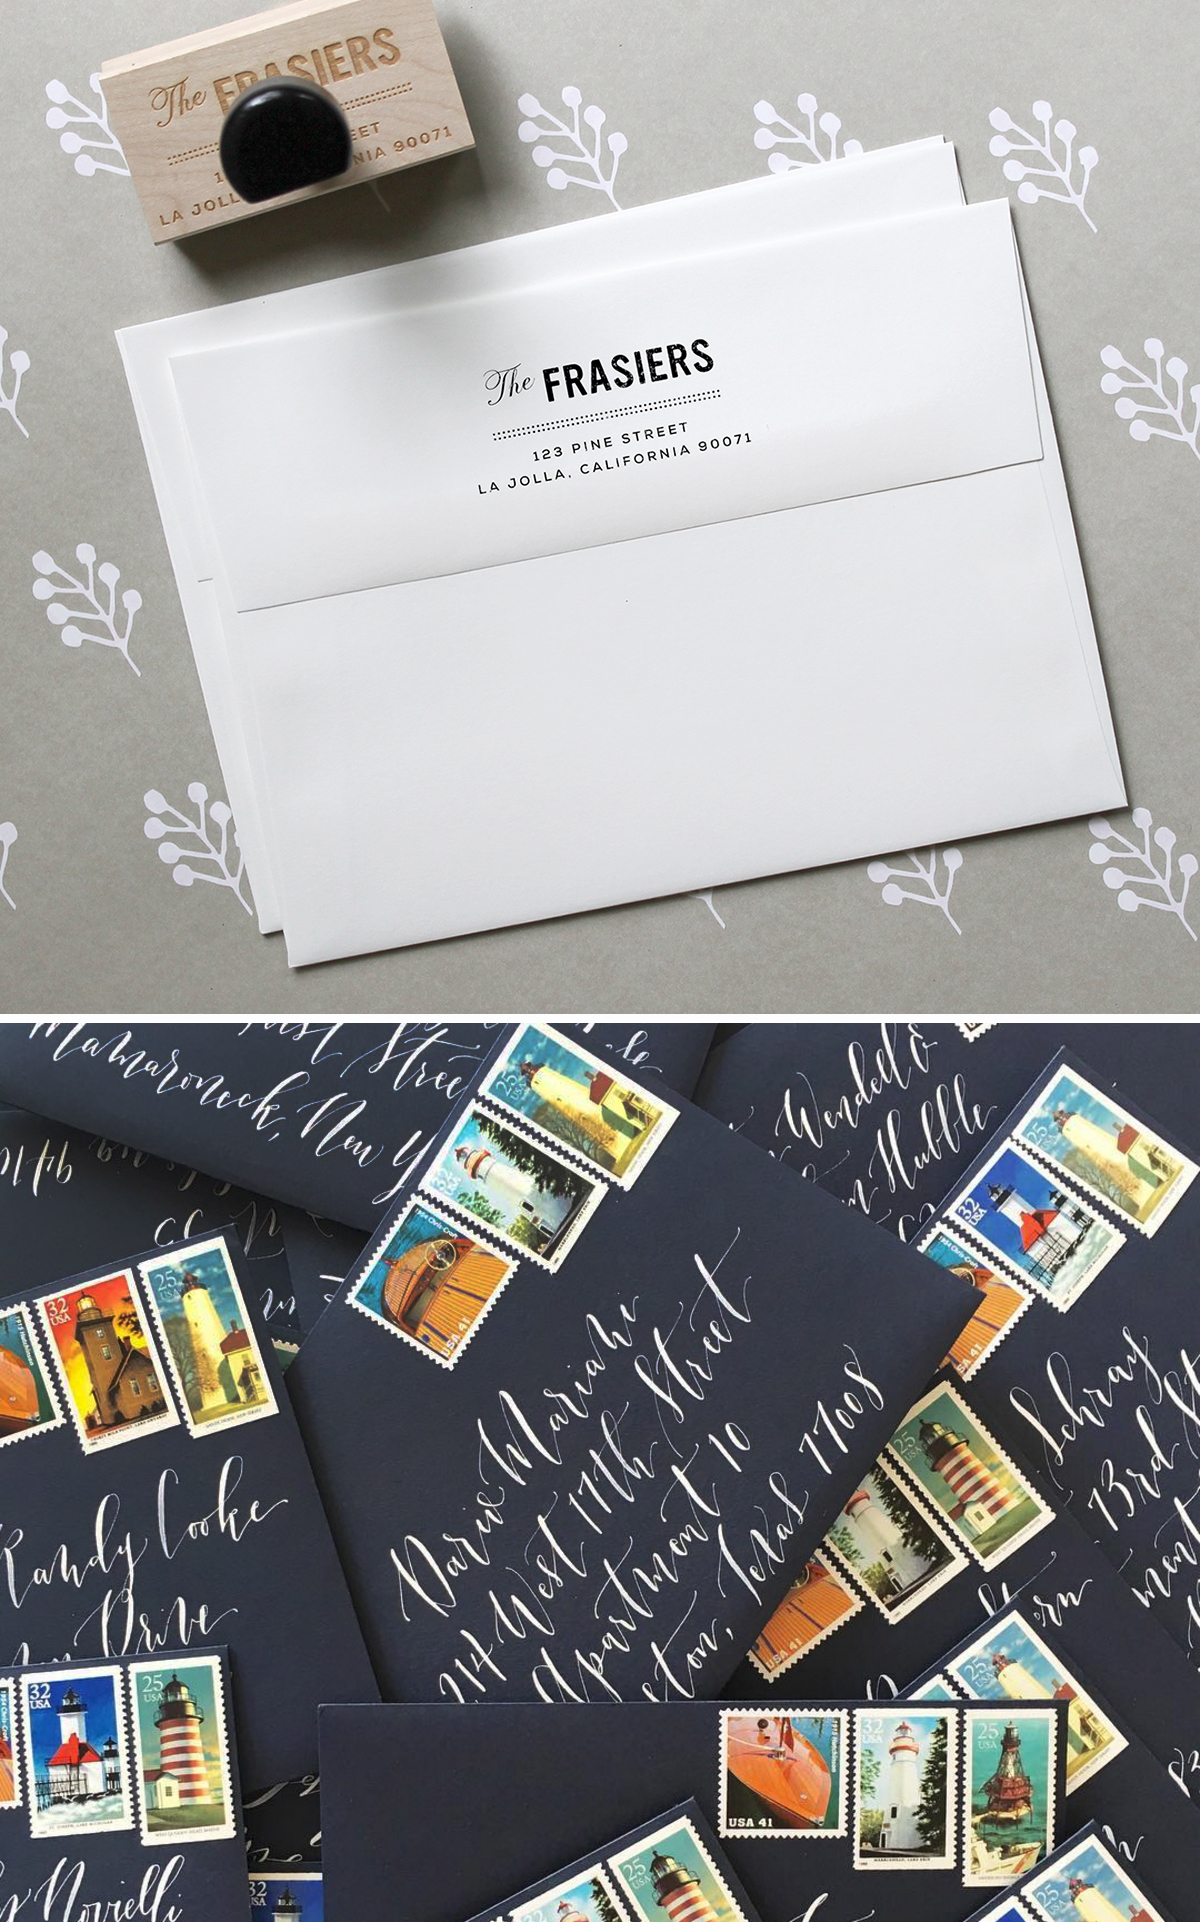
If you are hand-addressing the envelopes yourself, a great option for the return address is to have a custom stamp created. We‘ve created many of these for our clients over the years. Provided you aren’t moving right after the wedding, the stamp can be used again on thank you notes, holiday cards, and other future mailings. Alternately, with the convenience and quality of digital printing, many stationers will print guest addresses directly onto the envelopes. You can even choose a calligraphy-style font.

Above: Custom return address stamp by Fine Day Press; calligraphed envelopes by Blue Eye Brown Eye
Adding Postage
Note the size of your invitation and compare it to the post office standard sizes. Square invitations require extra postage; the same goes for double-thick stock. If you’ve got extras like a reception card, list of wedding events, map and directions card, ribbons, bows, bells or whistles, that can push your overall weight up beyond the first class stamp zone. You’ll want to take a complete envelope suite to the post office for weighing. They can tell you the exact postage amount you’ll need, and help you find a stamp (or stamps) to match. Don’t forget to take into account any international guests. When addressing, put these in a separate pile and have the post office determine the correct postage for each.
Beautiful postage is the last thoughtful touch to complete your invitation. USPS has definitely stepped up their stamp design game in the last few years, so you can easily achieve a beautiful envelope just by browsing the available stamp selections online. The post office also usually has a few different love-themed options, like these Louise Fili stunners. Custom stamps can be created to match your invitation design (for example, via zazzle.com), from personalized stamps with a custom monogram to vintage-inspired designs. Vintage postage is a beautiful detail for wedding invitation envelopes, but can be difficult to find and sometimes costs more than the face value of the stamp – you can read all about finding vintage postage here. And remember that your reply envelopes will also need a first class stamp – don’t leave your guests hunting for postage to send their reply.
Let ‘em fly
You’ve done your homework. Time to send those beautiful babies out into the world, and wait for the excitement that follows!
One last pro tip: Request hand-canceling. There can be an extra charge for this beyond 50 pieces, but it’s worth it to not have that bummer of a barcode printed along the bottom of all of your gorgeous envelopes.
Happy Mailing!
