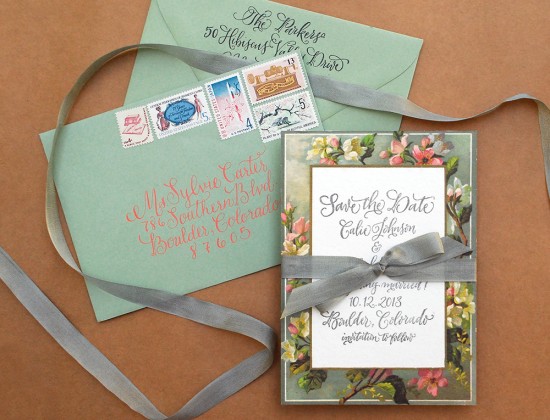
Spring has arrived and we couldn’t be happier! It’s always a refreshing and inspiring sight to see all of the little buds form on branches, knowing that soon they will burst into a gorgeous show of flowers. With this save the date design, we wanted to capture this brief moment in time and create something fresh and beautiful. – Bailey and Emma of Antiquaria
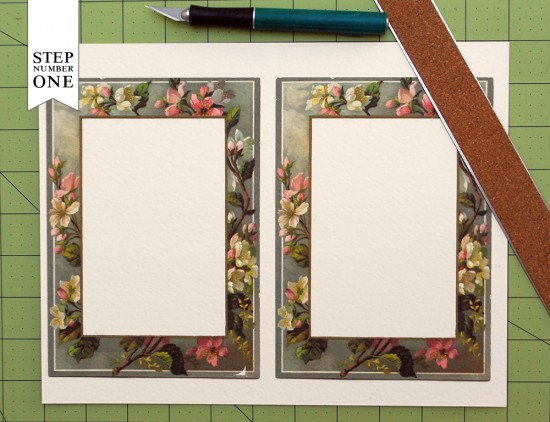
Step One: One of the key elements to this save the date is the border card on which you will print your stamp. To start, print out the border card file onto heavy card stock (as heavy as your printer will allow) and trim to size. If you would like to use this spring blossom border design, email us for the free printable download! Other borders can be found on Graphics Fairy.
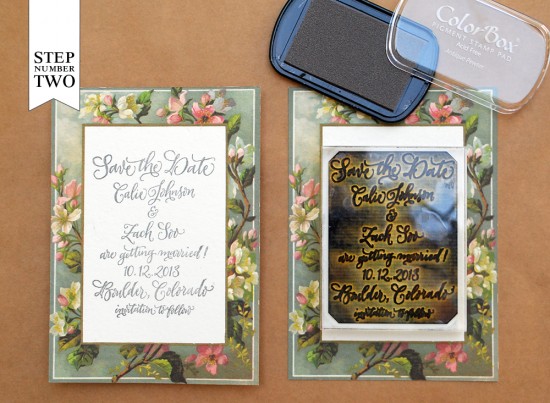
Step Two: Now that you have your cards printed and cut, you will want to print your stamp (we used our Calligraphy Save the Date Stamp, No.2). Set your card on a firm, hard surface. Ink your stamp well and center it over the card. Press down firmly, making certain that you apply even pressure to all areas of the stamp. Lift the stamp off and set the card aside to dry. For more information about this process, please watch this video.
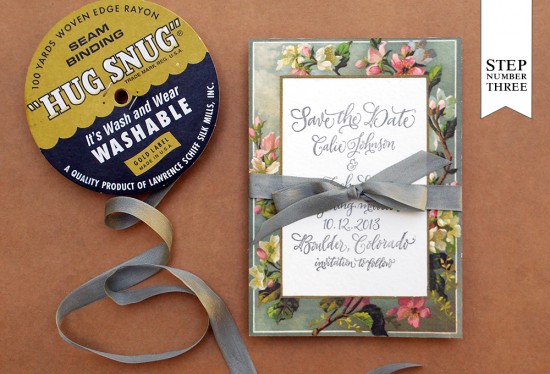
Step Three: We’ve dressed up the save the date card with a gorgeous sage gray ribbon. Simply cut a length of ribbon and tie it into a bow. Trim the ends with sharp scissors so that they are even and do not hang off of the edges.
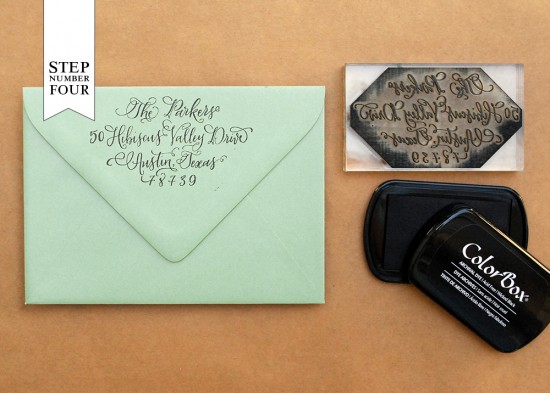
Step Four: Next, you will want to stamp your return address (we used our Calligraphy Return Address Stamp) on the back flap of your envelope. Follow the same printing instructions from step two.
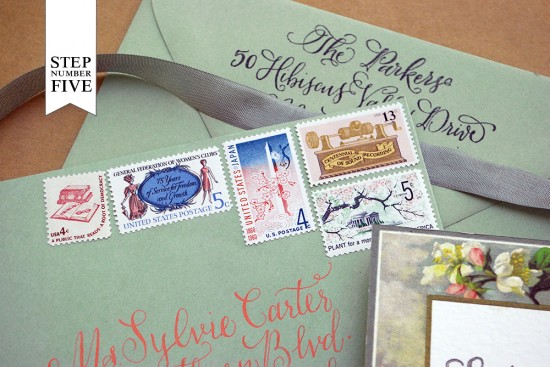
Step Five: Now all that’s left to do is to address the envelopes, add postage (we used vintage postage from Verde Studio) and send them on their way! This design is sure to bring a fresh dose of spring to every single guests mail box.
Materials:
Calligraphy Save the Date Stamp, No.2
Calligraphy Return Address Stamp
Stamp Pads (in Wicked Black & Seattle Grey)
8.5×11 Cover Stock (needs to be able to run through your home printer) in Eco White
Free Border Card Download (Please email us for the file)
Scissors (or an X-acto Knife & Self Sealing Mat)
A7 Envelopes-in Sage
Hug Snug Rayon Seam Binding in Khaki #503Â Â (it’s actually a sage-grey color)
AntiÂquaria is a memÂber of the Designer Rolodex – you can see more of their beauÂtiÂful work right here or visit the real wedding invitations gallery for more wedding invitation ideas!
Photo Credits: Antiquaria

