It’s the ladies of AntiÂquaria, back with another fabÂuÂlous and creÂative DIY project for you!  This week they’re here with instructions on how to create a rubber stamp save the date tag!
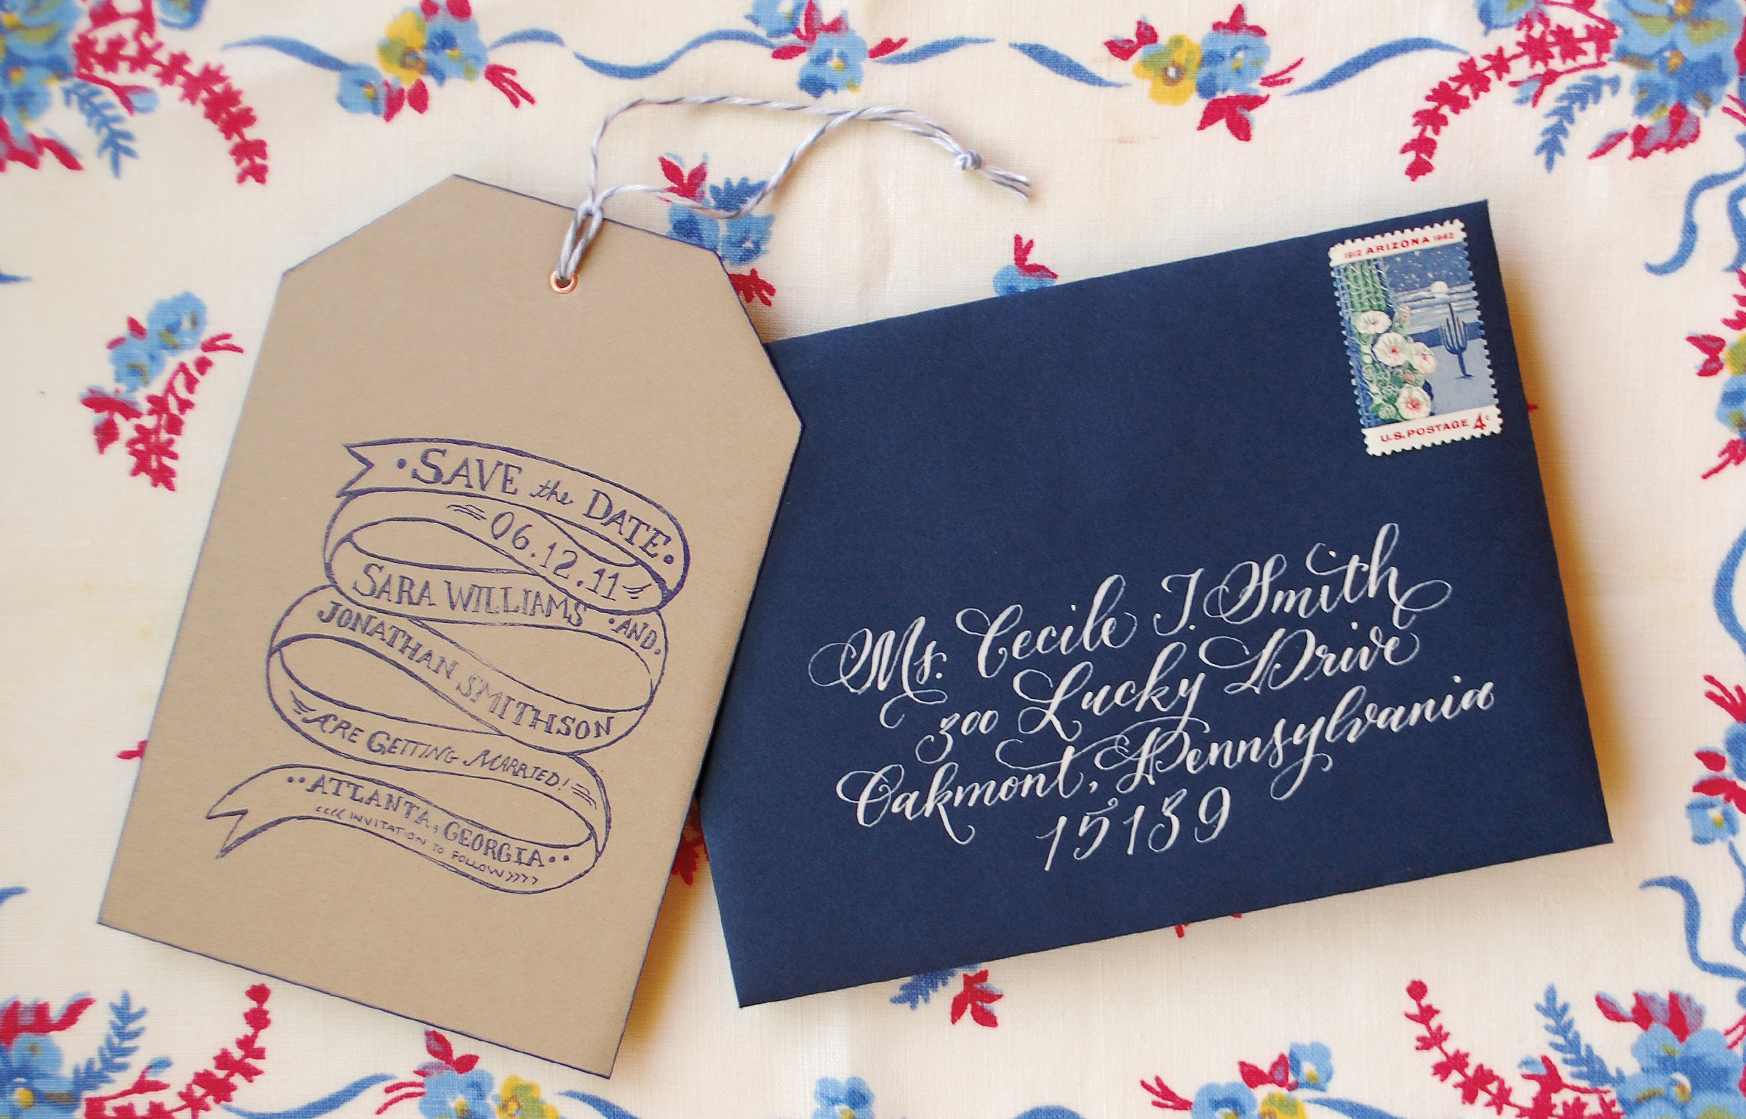
At Antiquaria, we love everything vintage!! Â In this save the date DIY, we were inspired by the look of old luggage and parcel tags. Â There is something very lovely and familiar about this tag shape but to have it professionally die cut can be quite costly. Â We emphasized the shape with “edge painting” using a very nifty and easy trick!!

Step One: Cut your kraft paper into a 4.5″x6″ rectangle. Â Ink your save the date stamp (we used our “Ribbons and Banners” stamp) with your desired ink and make a print on your paper. Â Be sure to press evenly on a hard work surface. Â Let the ink dry overnight.
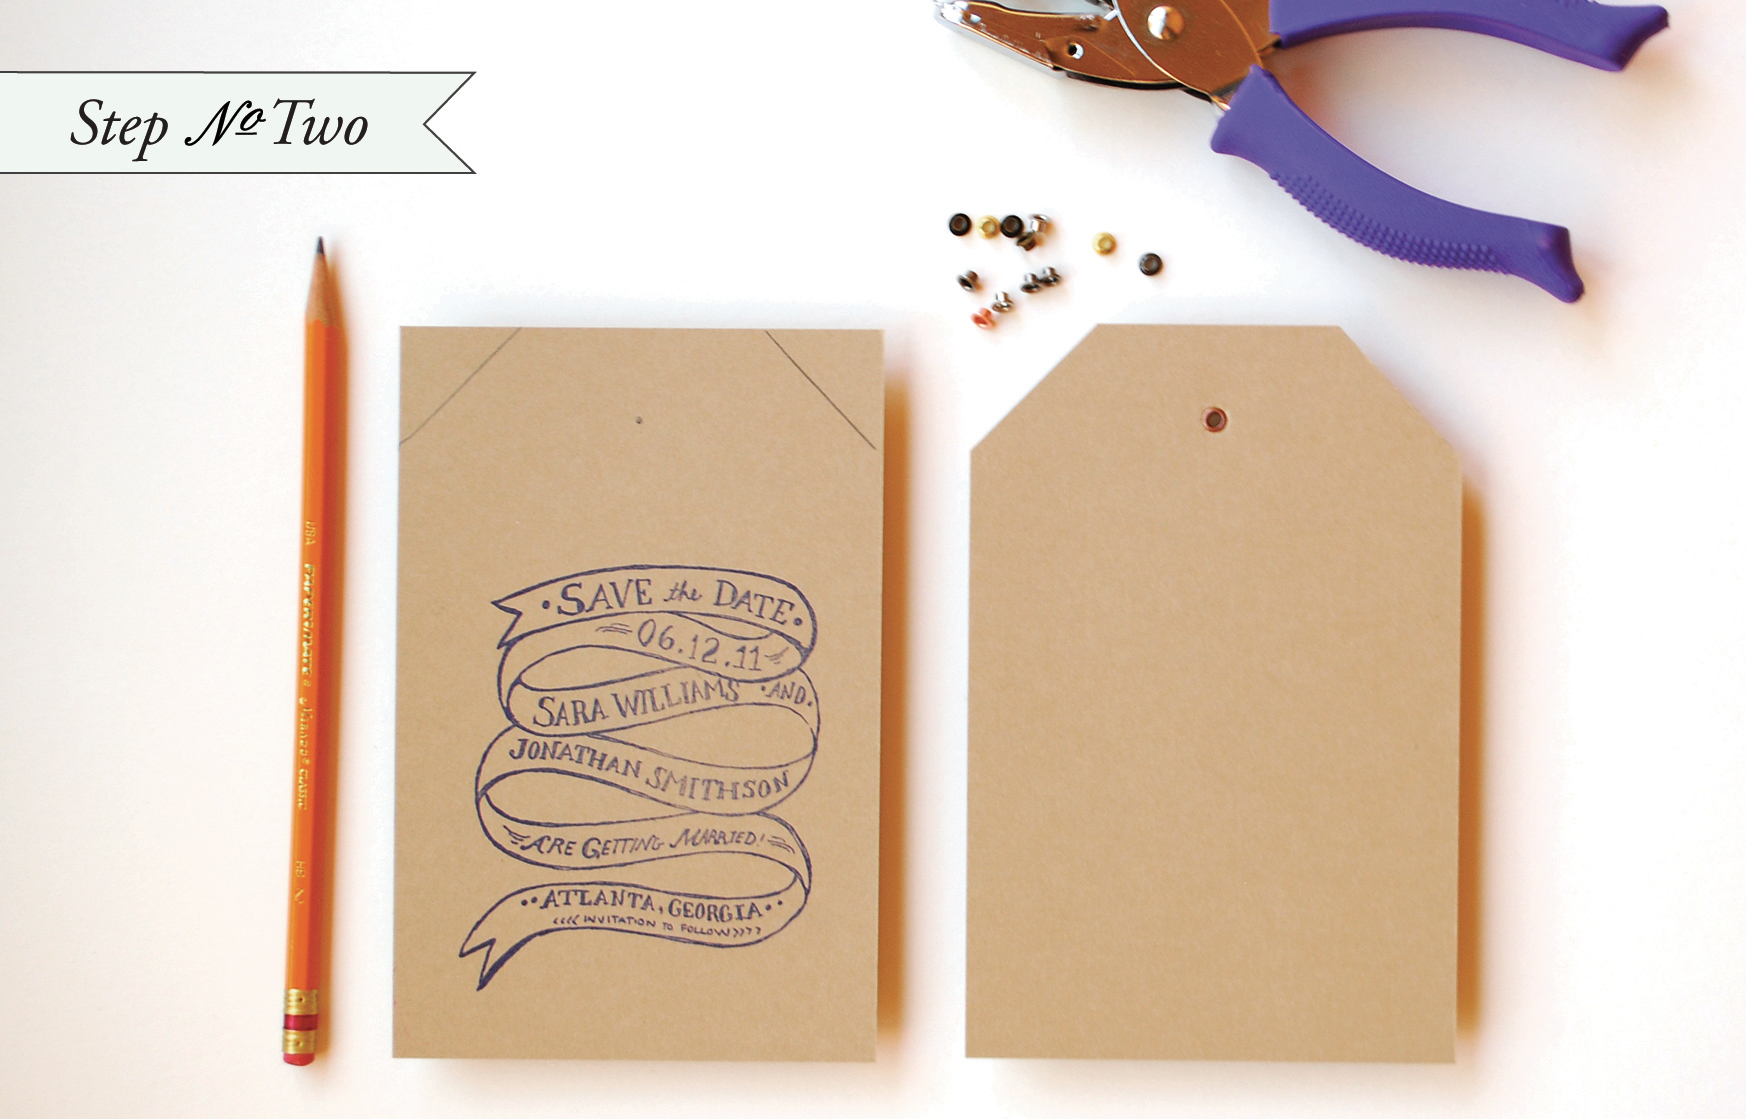
Step Two: Next, draw 1.5″ diagonal lines on the top corners of the save the date. Â Also draw a small dot in the center, about 3/4″ from the top. Â Once you have your markings in place, cut off the corners with a pair of scissors or an X-Acto knife & ruler. Â Punch a 1/8″ hole where you have placed the dot. Â Insert a small craft grommet and install using a grommet tool.

Step Three: Â Using the same or a coordinating ink color, drag edges smoothly through the pad to create the “edge painted” effect. Â Let dry overnight.
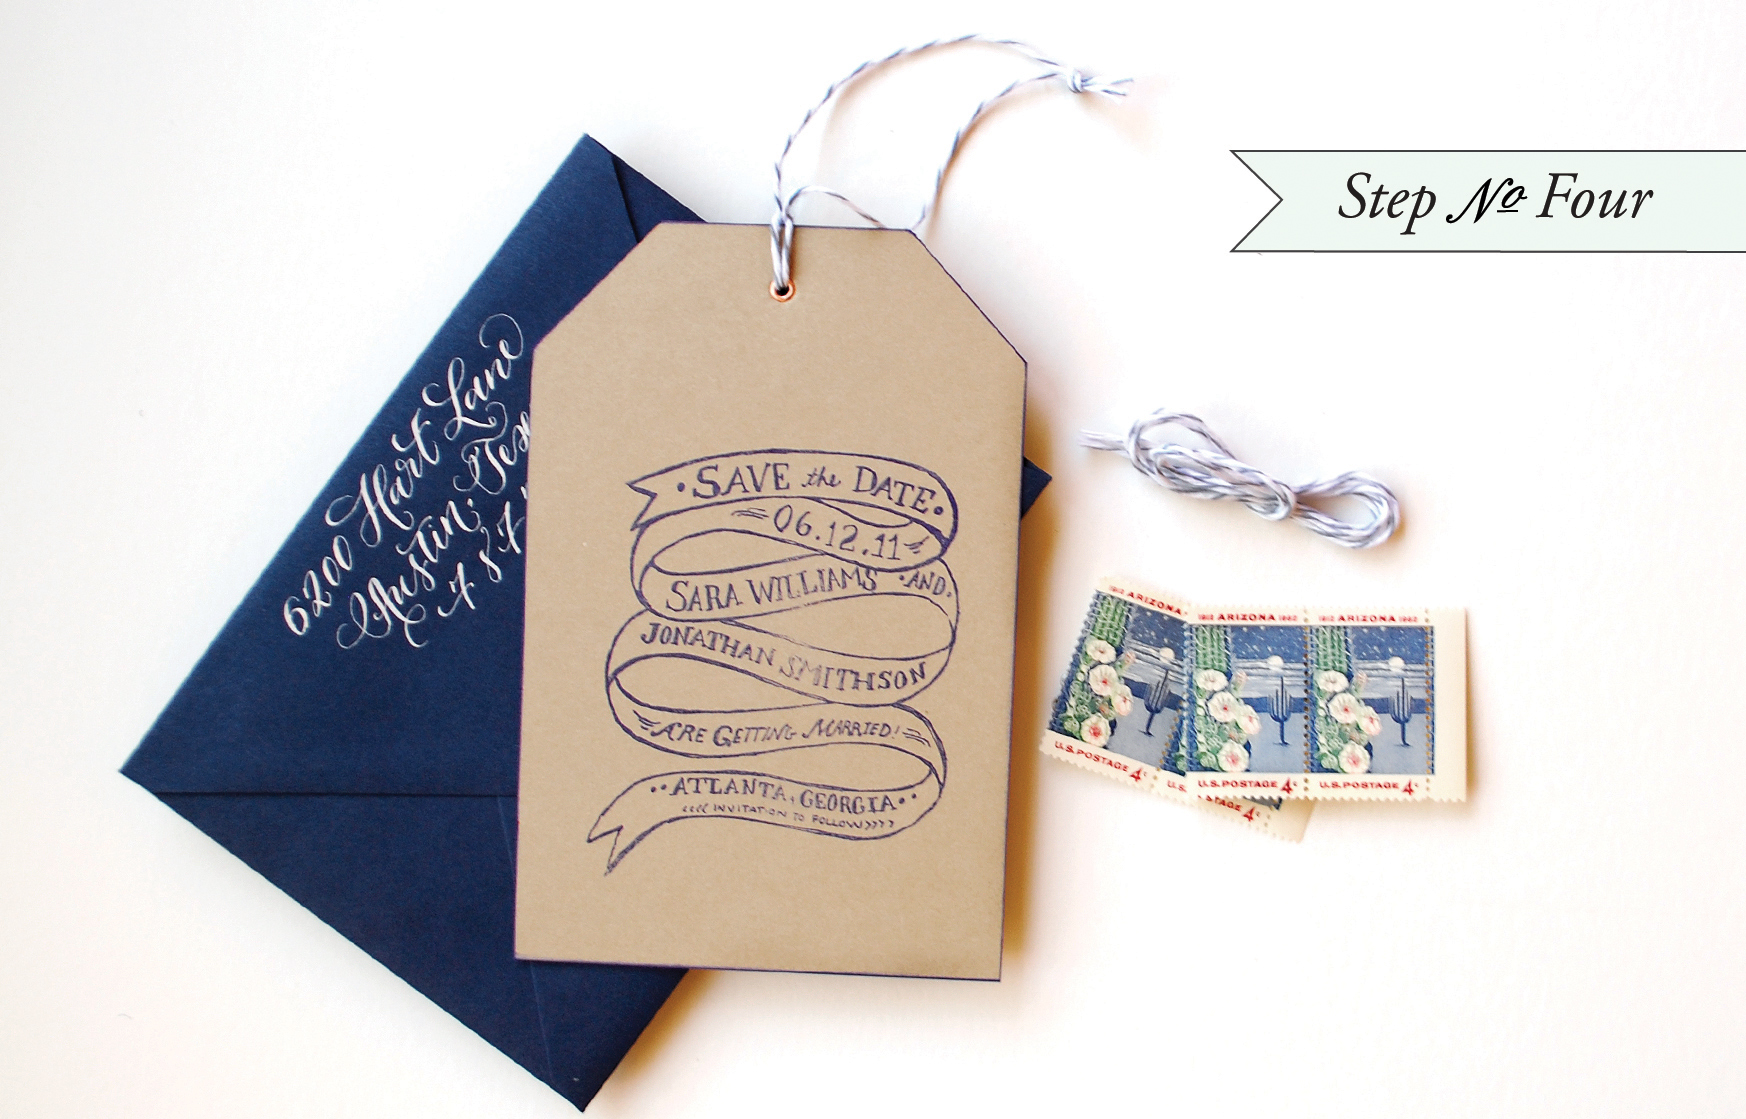
Step Four: Â Assemble the save the date. Tie twine or ribbon through the brad and add fun postage and calligraphy to bring it all together!!
Materials:
“Ribbons & Banners” Save the Date Stamp
Kraft Card Stock, cut into 4.5″x6″ rectangles
Stamp Pad (we used navy)
Pencil
Scissors or X-acto & Self Healing Craft Mat
Photo Credits: Antiquaria
I love this! What color envelope did you use from Paper Source? Also, where did you get the pen to address the envelopes? It is white in color?
Thank you!
Thanks Brittany! The color of the envelope is “night”. The lettering was done in calligraphy with a pointed pen (Brause EF66) and oblique holder. Pen and Ink Arts is where I obtain my calligraphy supplies. The ink used was Dr. Martins bleed proof white. Have fun DIY-ing!!
These are adorable! What a great way to send out save-the-dates. Plus, I always love the distressed edged look, one of my favs!